A long time ago, in my early 20s when some friends of mine and I were enjoying the early wave of pre-IBM-PC personal computers, one of them introduced us to the term "spacejunk." It means any high-tech object that is still around after its intended use no longer exists. Among techies the term is far from derogatory, in fact it's more a kind of reverent reference to the amazing and beautiful technical achievements of past engineers. The 'space' part of the term derives from the various national space programs, which tend to produce the most extreme examples of esoteric technology left-overs — unused spare satellites and manned vehicles, rocket engines, weird hand tools with mind boggling manufacturing costs, and so on. But the term applies to any tech-artefact, not only space-related.
Just because they are 'expired', or superceeded by the trajectory of technology, does not make such items any less impressive. Actually, they can develop a mysterious aura of lost technological mastery, like the Antikythera Mechanism. This complex, precision machined mechanical calculator of astronomical positions was manufactured sometime between 205BC and 100BC. How's that for forgotten history and lost skills? Fascinating isn't it? How did that happen? What was the story of how such knowledge could be so utterly lost, that no written record of its existance remains?
Hence the "Space Junk Mart" title of my For Sale and Wanted page on this site. If I list something there, it most definitely is not junk, even though it may be old and only of historical interest. Or, it may still be very useful indeed. Depends on what you want, such as some Helium-3.
In more recent times, some amazing no-expense-spared technology was produced for the military during wars, hot and cold. Like the AN/GRC-106 military radio set I sold in 2014. And another few of the same, that I've been meaning to fix up and sell ever since, but didn't have the time and workspace to do it.
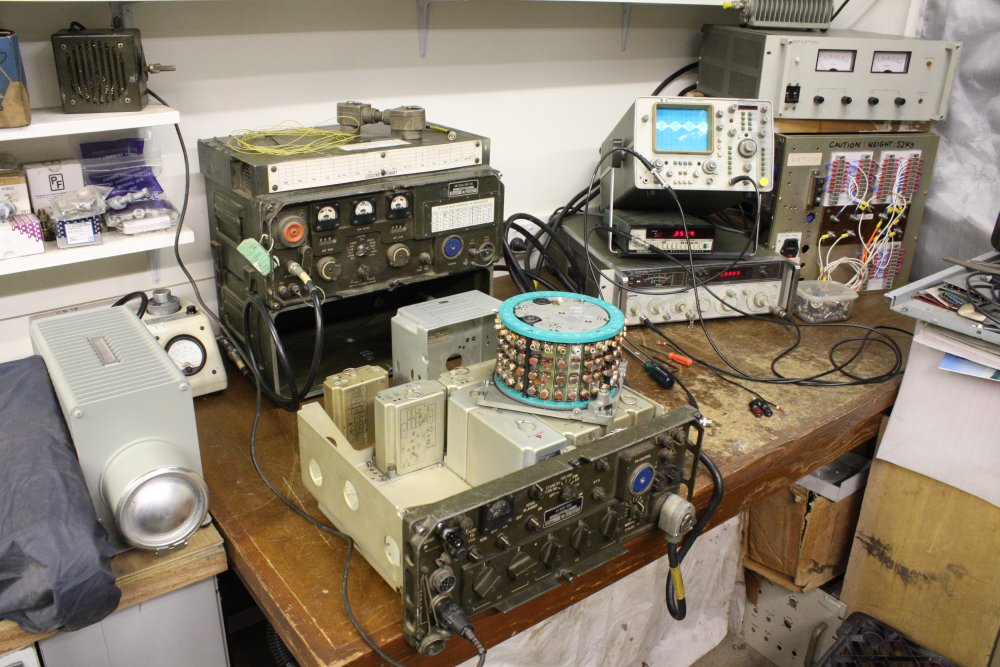
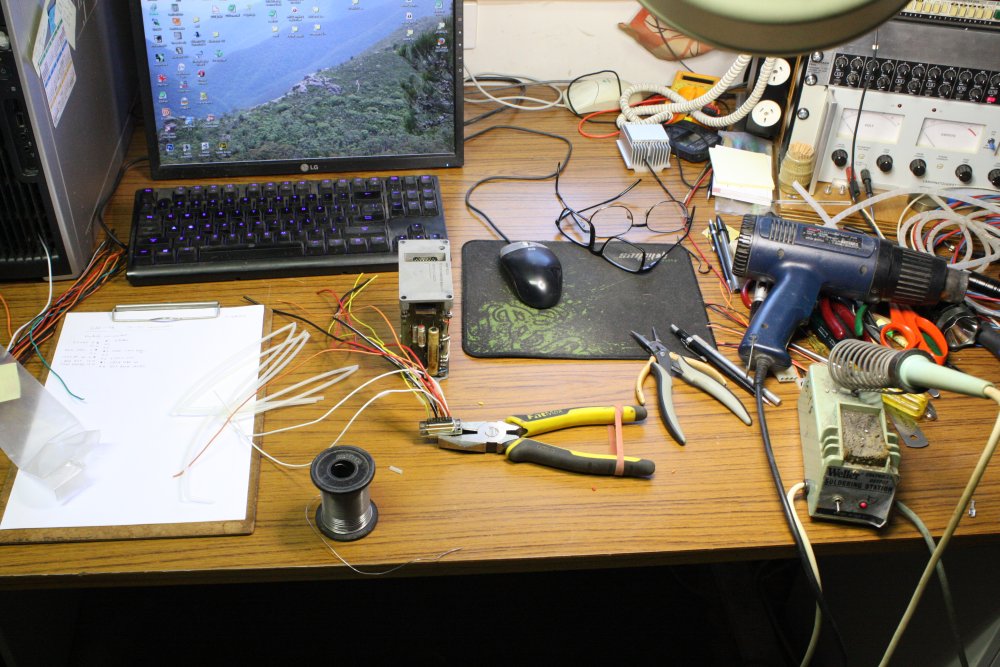
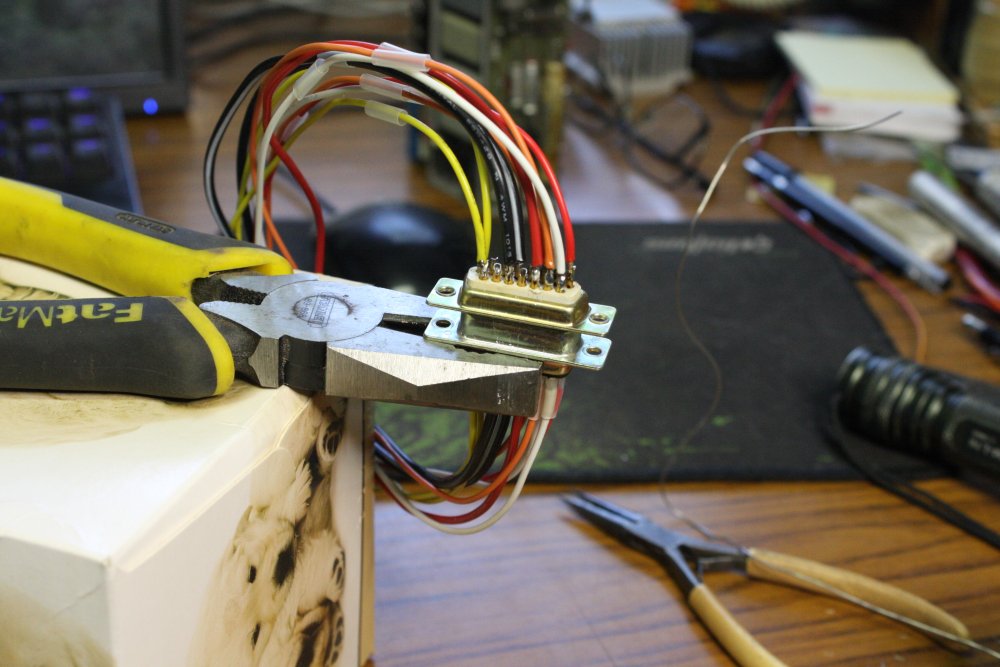
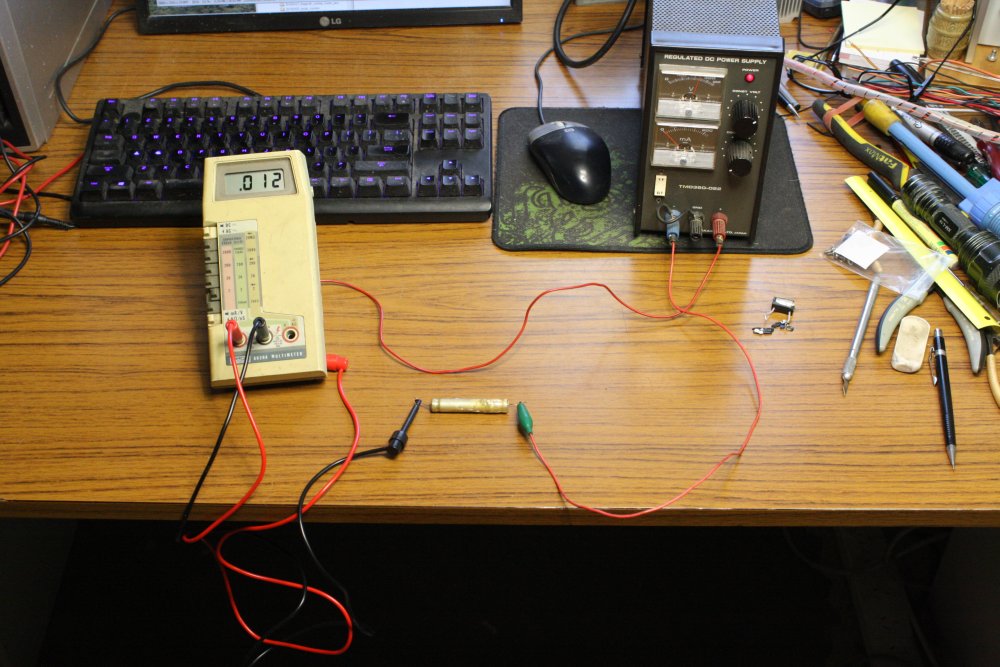
After a recent workshop upgrade I finally have a dedicated area for repairing old radios and other bulky items. See photo above.
Plus I need the money. And so, this is the story of testing and fixing up an old military radio, built in the 1960s. If you are interested in the history of this model radio, google & youtube grc-106 radio. Lots of information on the net.
See also my:
 |
 |
 |
Apart from space to work on them, servicing these radios requires some other non-trivial items:
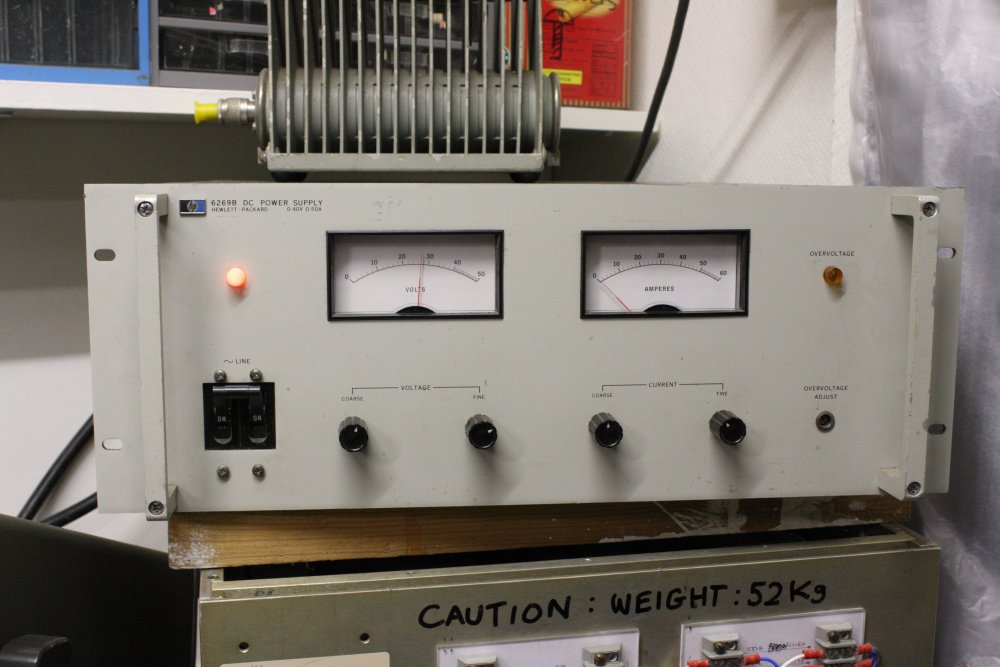
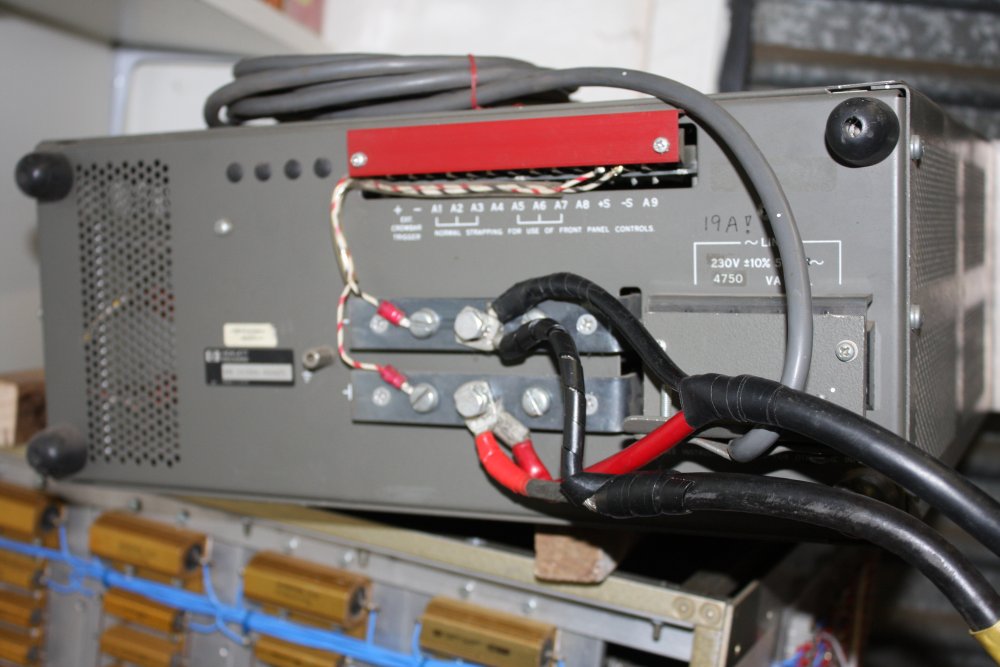
- A regulated power supply able to deliver 28 Volts at up to 50 Amps.
For this I'm using a HP 6269B (pics 1 & 2) and a recently installed 240V 15A power outlet just for it. - An RF dummy load able to dissipate 200 to 300 Watts. And an ability to measure the power output.
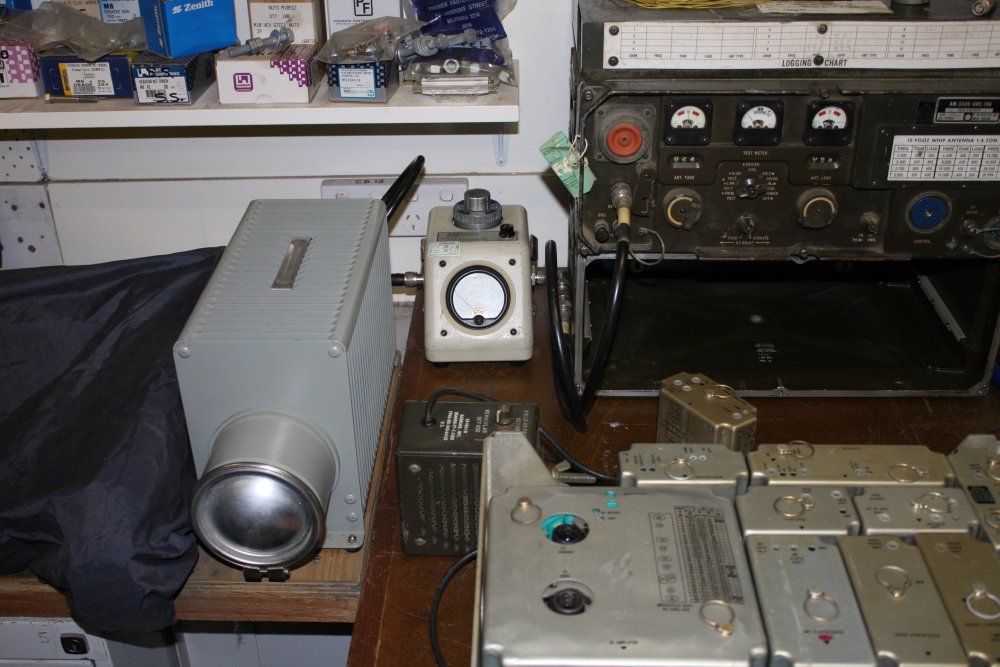
I have a Philco power monitor with 2-30MHz up to 1000W insert. Followed by a Bird model 8201 500W 50 Ohm coaxial load. - An RF signal generator covering the radio's frequency range (10 MHz to 30 MHz) and amplitude range down to the receiver's limit.
My HP 8640B will do this.
Anyway, the end result is that I have no experience with radio practice. Only general electronics, mostly digital, with a reasonable amount of analog practice as well. I'll be relying on the service manual preceedures for anything where I feel out of my depth. And under no circumstances will I be connecting the power output of the transmitter to anything other than a dummy load. Apart from being not legal, I don't trust my ability to do avoid doing something radio-signals-impolite.
Once set up, I started with the RT-662/GRC, which is the transceiver part. Simple, just connect a length of wire to the antenna input and the speaker unit to either of the audio sockets. Power it up, select AM mode.
Nothing. Dead silence. Hmmm...
Well I knew the case was going to have to be opened, and trying it before opening it up was pure wishful thinking. This set has been sitting unpowered for at least 15 years, and electronics doesn't last well like that. All kinds of things fail.
At least it's easy to open. Undo six big allen key screws, and the unit slides intact out of the waterproof enclosure. There's plenty of pics on the Spacejunk page of what these look like with the shell removed, so I won't repeat that here.
With it open I powered it up again. Still silent. I checked the squelch was off, RF gain was up, audio gain was up. Tried changing the MHz range frequency controls, and the carosel rotated and stopped correctly. Checked the two valves in the carosel tuner module both have filament glow.
Then suddenly, just as I was thinking "Oh great, so it's going to be like this" the audio burst into loud hiss. Quite startled me, but also relieved. It was too loud, so I turned the audio gain down — and in doing that found out why there had been no audio. Old potentiometers, if not turned for a long time, seem to develop an insulating film on the carbon track. The wiper hadn't been making contact, then finally the film broke down and let the audio through. Turning the knob now, the action is extremely crackly from the speaker, with more dead spots than good.
Sigh. I know this one. The solution is simple but tedious. You have to stand there twirling the knob back and forth over the whole range, and keep doing that till the insulating film or whatever it is all wears away and there are no more intermittent contact points along the wiper's range of travel. This 'old pot' syndrome is probably one of the few things that can actually be properly fixed by randomly twiddling something.
Hiss is fine, but can it hear anything? Disconnecting the wire from the antenna input quieted it, so it's hearing something. Now for a known signal. Rather than connect the signal generator directly to the antenna input, which would be the sensible and measurable thing to do, I got playful. Connected the signal generator output coax (after the scope T connection) to a 12 inch length of wire, with signal of 1mV with AM modulation at 4KHz. Set the frequency in the radio's range, tried tuning the radio to it. Signal going from the small antenna driven by the sig-gen, via a few feet of airspace to the separate antenna wire of the receiver. So much more satisfying to make the first test of a radio involve actual radio waves rather than just signal along a coax.
And it works. Nicely selective, at several different frequencies I tried, though I have no idea what the signal strength is on the receiver antenna input.
It was sitting there, playing that lovely 4KHz tone, while I was wondering what to do next. Probably switch to direct coax signal connection, and see if the receiver sensitivity was up to spec?
But no, that wasn't what was going to happen next. What did happen involved a very bad smell. The tone was still playing, but I hit the power switch fast as a reflex action.
Ah. But I didn't see any smoke. So I have no idea what failed. I guess that's one problem with having all the electronics inside those neat enclosed plug-in modules. The smoke is contained, and doesn't give any visual clues. Also the smell was curious. I know the smells of bad caps well, but this was a bit odd. There are different types of cap failure smells, and this one was kind of in between polyester caps giving up the struggle against electrons, tantalum caps deciding they would rather be resistors, and electrolytics having an emotional breakup with their electrolyte.
Perhaps I hit the off switch too fast; I want to see where the smoke is coming from. So I turned it back on.
And the radio works. The stink was lingering in the room, but didn't seem to be getting any worse over the next minute. Great. I turned it back off. Having fixed one fault by twiddling a knob for several minutes (which I can assure you does not feel very dignified), now I'm going to have to do something I know would look even more bloody stupid, if anyone saw me doing it.
I didn't have a suitable piece of tubing handy, so go dig out a shopping bag of assorted flexible PVC tubing from storage, and cut off a foot length of a clear one about 8mm diameter. Back at the radio, I stick one end of the tube in a nostril and pinch that nostril closed around it and the other one closed. Then proceed to sniff inhale via the tube, while holding the other end at various holes in the radio modules' casings, progressively working across the radio. Yes, the different modules have slightly different 'scent essences', no doubt due to the variety of components. The radio is still off, but I know the smell will linger close to the source. And one module... stinks like burned caps. Very definitely that one. Urrgh, it's horrible! This may be a dumb-looking method, but it sure works.
The stinky module is 1A11, the DC to DC converter.
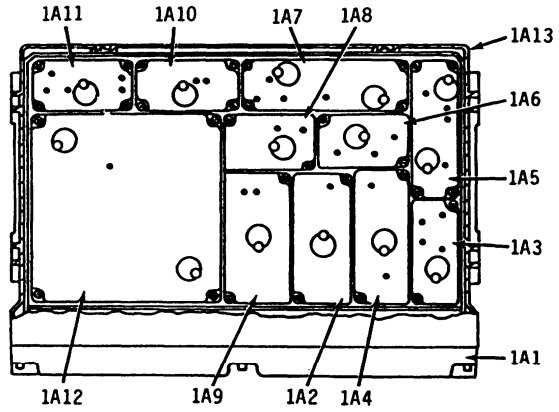 RT Module Numbers
1A1 Front Panel
1A2 100kHz Synthesizer
1A3 Frequency Standard
1A4 10 & 1 kHz Synthesizer *
1A5 Transmitter IF & Audio
1A6 Frequency Dividers
1A7 Receive IF
1A8 Translator
1A9 MHz Synthesizer
1A10 Receive Audio
1A11 DC-DC Converter
1A12 RF Amplifier Turret
1A13 General chassis components
* Same module number but a completely different module in the RT-662 vs. the RT-834
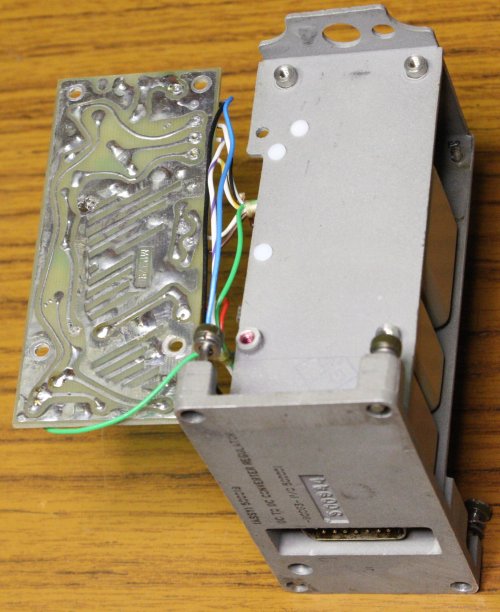
On the small modules like this the cover comes off with a half twist of the ring-pull, while to remove the module from the chassis takes 4 screws. Also, since I wanted to spot what was smoking, I'd need to power it in the machine. After removing the cover, I turned it on again.
Naturally the radio worked fine for a while. Then finally, a visible puff of smoke and more stink. This time the audio even dropped out for a moment then came back. Power down, then remove the module.

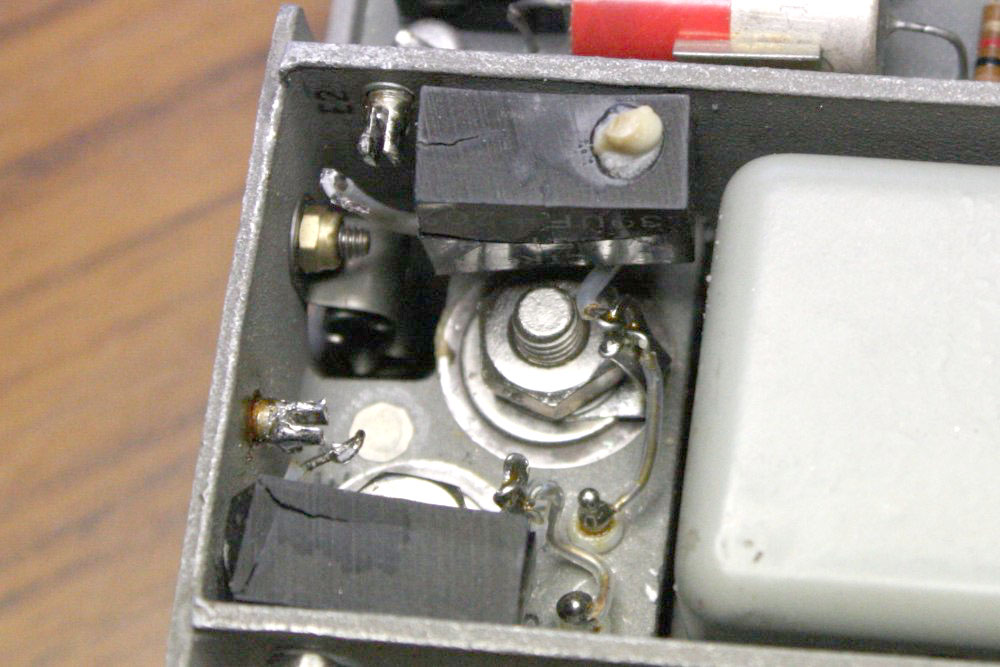
Oh yeah, that's one dead looking cap.
Severely corroded aluminium tubular case, and is that brown spot a smoke stain under the plastic?
 Only problem, that's not where the visible smoke came from.
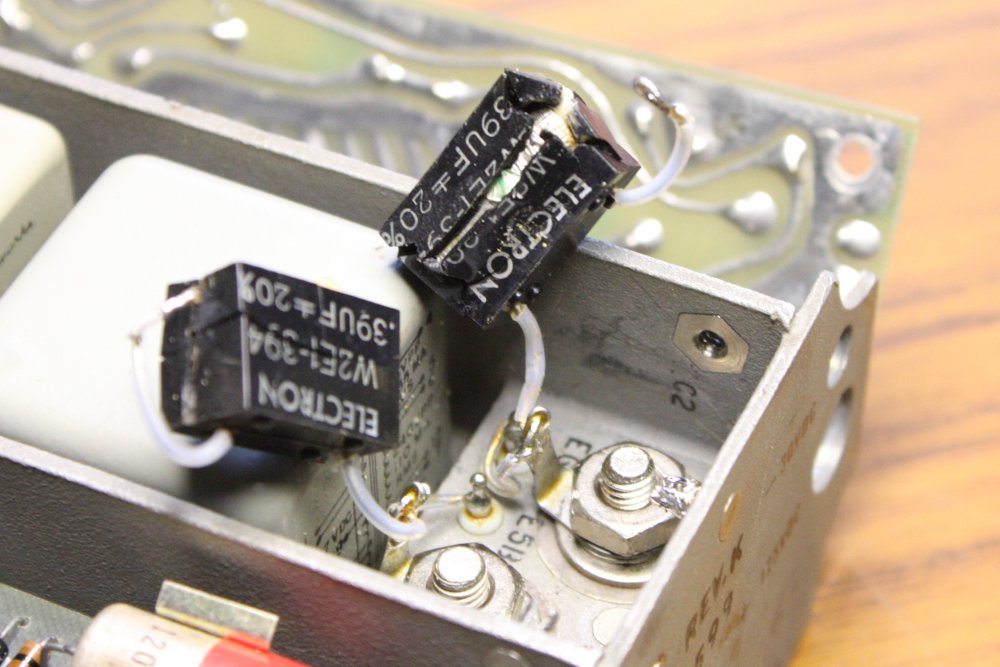
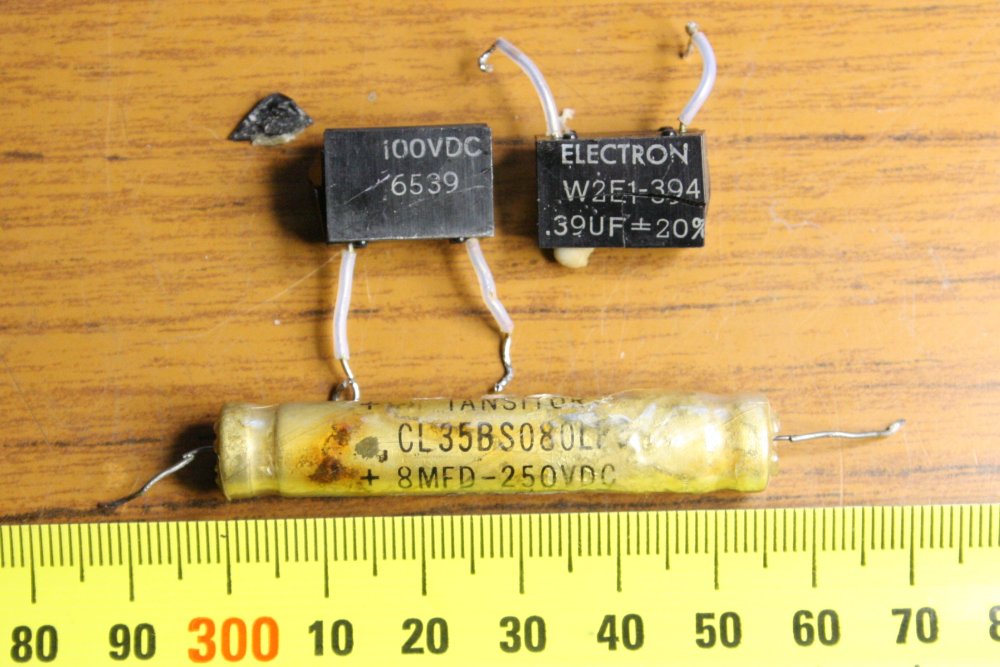
It was these guys. The two rectangular black plastic ones, with cracked and swollen cases. One of them has even extruded some white waxy substance. And they stink.
The bizarre thing is, the radio was actually still working. Despite three key components looking like rotting carcasses.
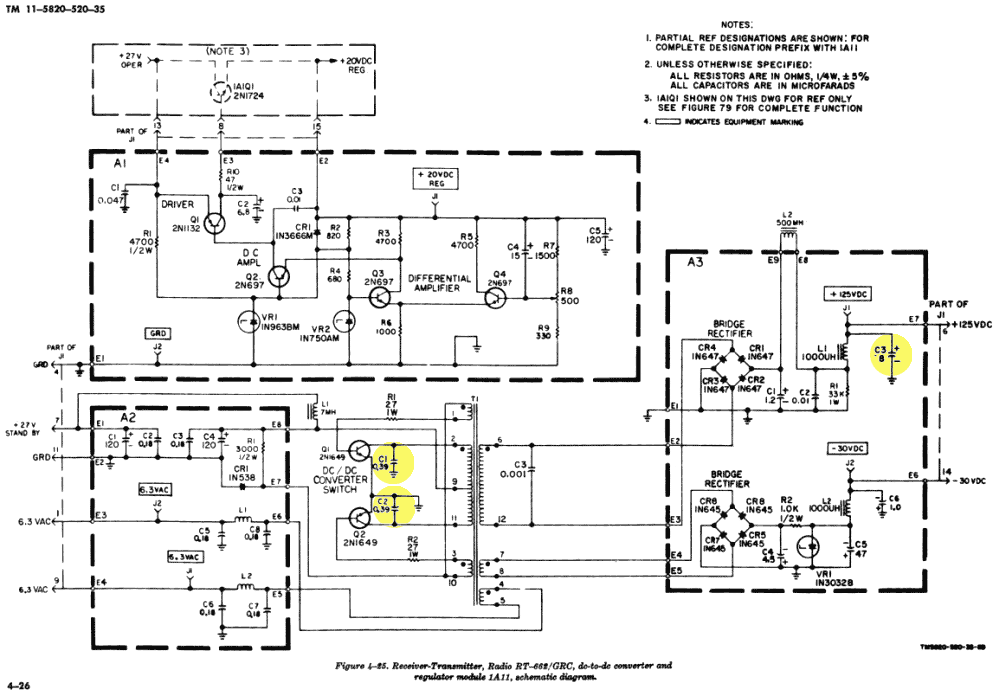
Also, what is that 8uF 250V thing? Apart from the rare 'long thin' form that is going to be a pain to source, the lead structure says it's definitely a tantallum. Purplish coloured wires coming out of the cap, then spot welded to normal tinned wire to allow soldering. The purple wires are tantalum, and that means the capacitor elements are too.
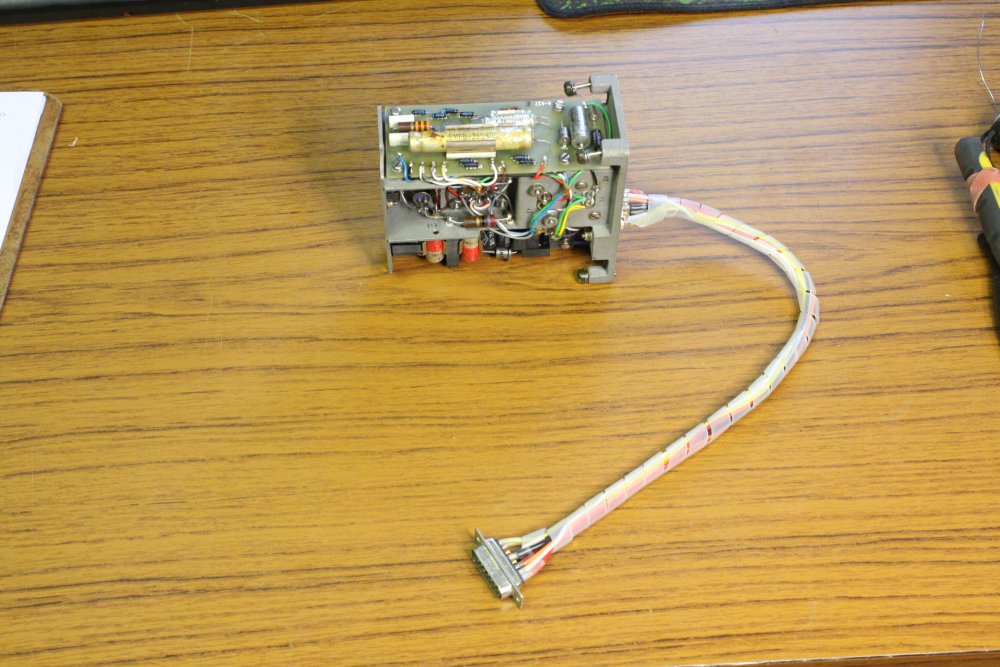
Well, the caps have to come out of the module, and the module has to be run out of the chassis.
I made an extender lead first. Easy. |
 |
 |
 |
 |
Then the caps are extracted.
The black ones are ordinary metalized polyester film, and it's an interesting question why they failed like that.
But seriously, WHAT is that 8uF thing?
It can't be shorted, because then there'd be no +125V supply, and the radio would be dead. But it can't be healthy, because it looks like it has a burned hole in the case.
 |
 |
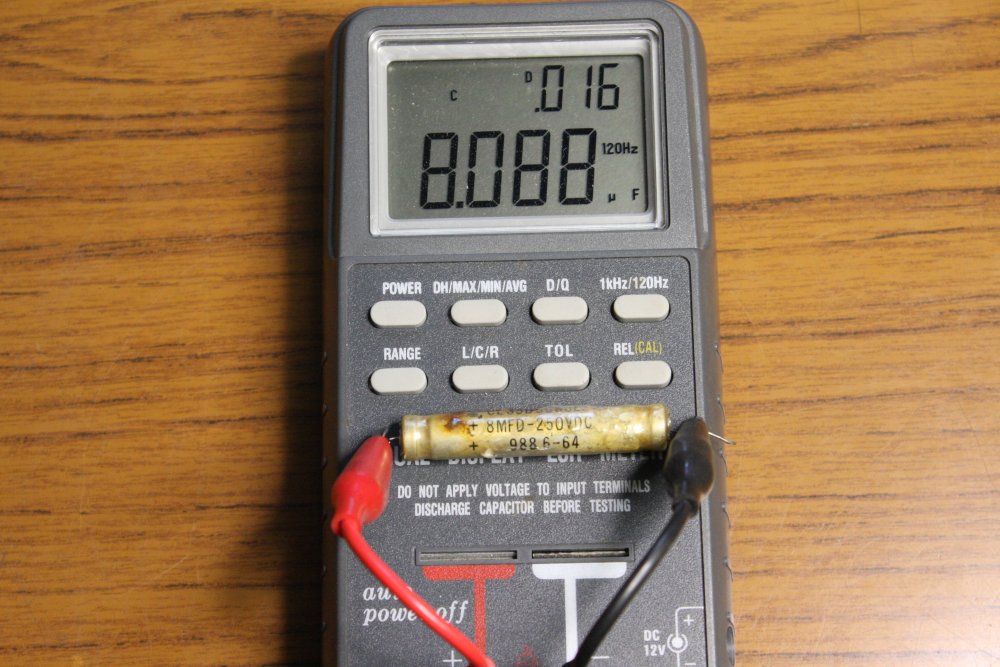
Let's try it.
Curious. It's almost good. It measures as 8uF. But there's 12uA of leakage current at 230VDC, and this varies quite a bit over time. So no, it's dead. Maybe intermittent high leakage, just not showing itself at the moment?
 |
 |
 |
 |
 |
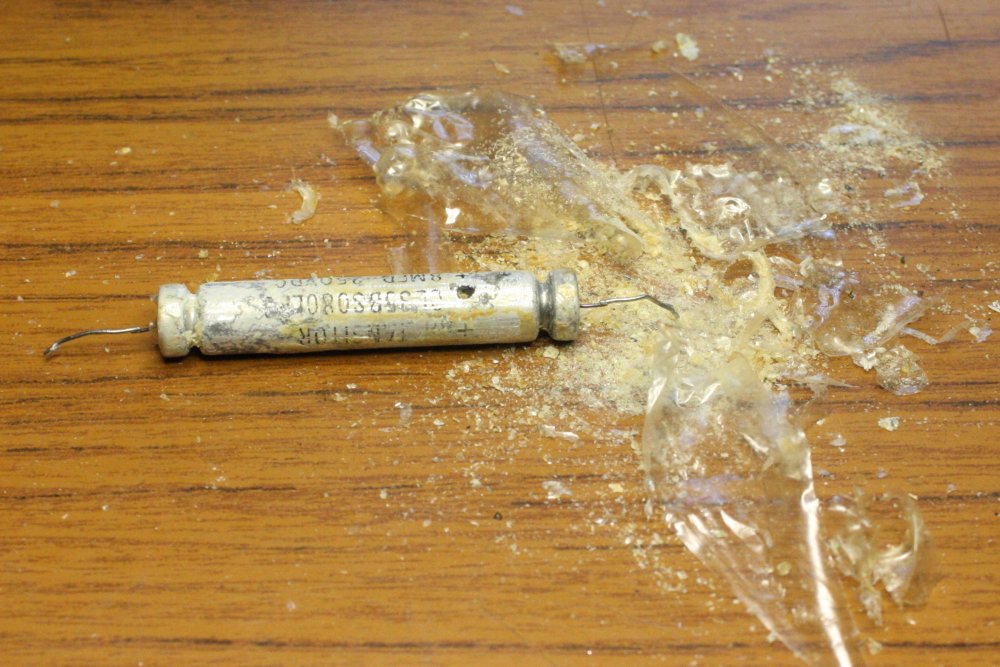
1. Peeling the plastic sheath off, and sure enough that thing that looked like a hole in the case, really is.
2. Opening the case, the insides are completely dry. I doubt it's supposed to be like that. But wait, isn't this a tantalum? It's looking like it has a wound foil structure.
3 - 5. It does. But the foil is tantalum not aluminium. Cool. I didn't know such things ever existed. Despite the corrosion of the outer case the the tantalum foil is still perfectly clean. One is a metalic gray colour, the other has a shimmery effect that changes colour between green and purple depending on the angle of view.
The polyester 390nF 100V caps shouldn't be hard to replace. But this long thin 8uF 250V one... It has to be that size, as there's no room for anything fatter. Hmmm...
It's going to be interesting to see how many components like this through the radio have expired due to age and have to be replaced. They'll be in the same condition in the other units too. So, when I replace anything in this unit I should order the parts in quantity so I have stock next time.
20160502
Those 390nF 100V matalized foil caps turned out to be awkward to find, since it's a rarely seen value. I ended up ordering 50 x 400V 390nF 15MM from China (aliexpress), and so they'll take a while to arrive.Similarly with the axial 8uF 250V caps. Those I couldn't immediately find a cheap source in quantity, so bought 2 of these from RS as a stopgap. $7 each, ouch. RS stands for Really 'Spensive.
Lower voltage, but the rail is supposed to be +125V, and once the radio is operating I'll check what it actually reaches. Unregulated I see, and derives from the +27V_standby rail, so how much does that vary? Still need to do a bulk buy of something suitable for this, and will leave that till I find out if a 200V rating is adequate, or it really needs to be 250V.
A solder fracture, on a leg of C5. How long has this fault been making the radio a little bit flakey? Who knows? Anyway, resoldered.

While I had this A3 board free I lifted one leg of the three other potentially suspect caps. (Every tantallum cap is suspect, though the glass-sealed wet-slug ones like C5 are pretty reliable.)
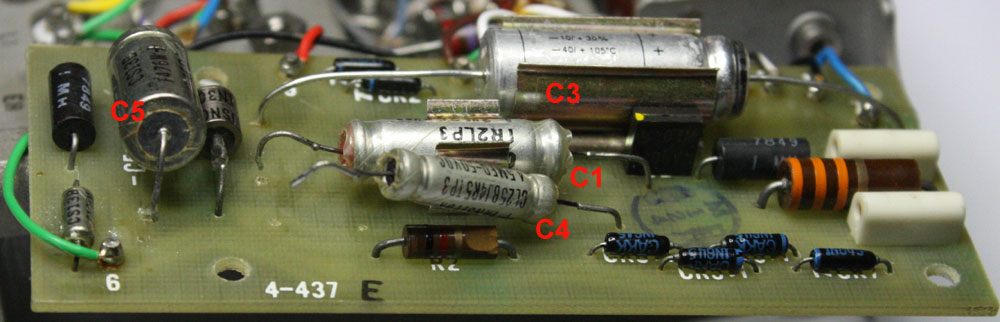
Measured values:
        Spec   actual
    C1  1.2    1.22    OK
    C4  4.5    0.27    bad.  Marked 4.5uf 50V. It's a tantalum foil axial.
    C5  47     46.38   OK    (Expected this one to be fine, it's a glass-seal type.)
Hmm. I have a lifelong hatred of Tantalum slug caps, from seeing countless smoking failures of them over many years. I hadn't previously had much exposure to other forms of tantalums other than the glass seal type, which seem to be fine. But there was that corrosively leaked 'tantalum slug in aluminium can' thing in my HP 4815A Vector Impedance Meter, and now these tantalum foil caps in the GRC. Of which 2 out of 3 are bad. OK, I now don't like any kind of tantalum caps in aluminium cases.
This worries me. How many of these are there throughout the rest of this radio?
Fortunately, after removing, opening and inspecting every module in the RT unit, there turn out to be none that I can see. Still need to check the internals of the carosel unit via the manuals, since it's not possible to see the insides without serious disassembly. But I'm greatly relieved. There are plenty of glass-seal tantalums, but those are OK.
However I'm now biased enough against these tantalum foil things, that I'm going to replace all of them in all the DC to DC converter modules I do. Back to the parts ordering...
To be continued....