OK, the title's probably a bit over-dramatic. Or perhaps not. Similarly to Because What The Heck this was a smallish project, and also a case of dealing with product failure due to poor design (or deliberate planned obsolescence, maybe.)
Unlike that one, this thing absolutely had to be repaired. Also it definitely had plastic cancer, and the repair was a battle.
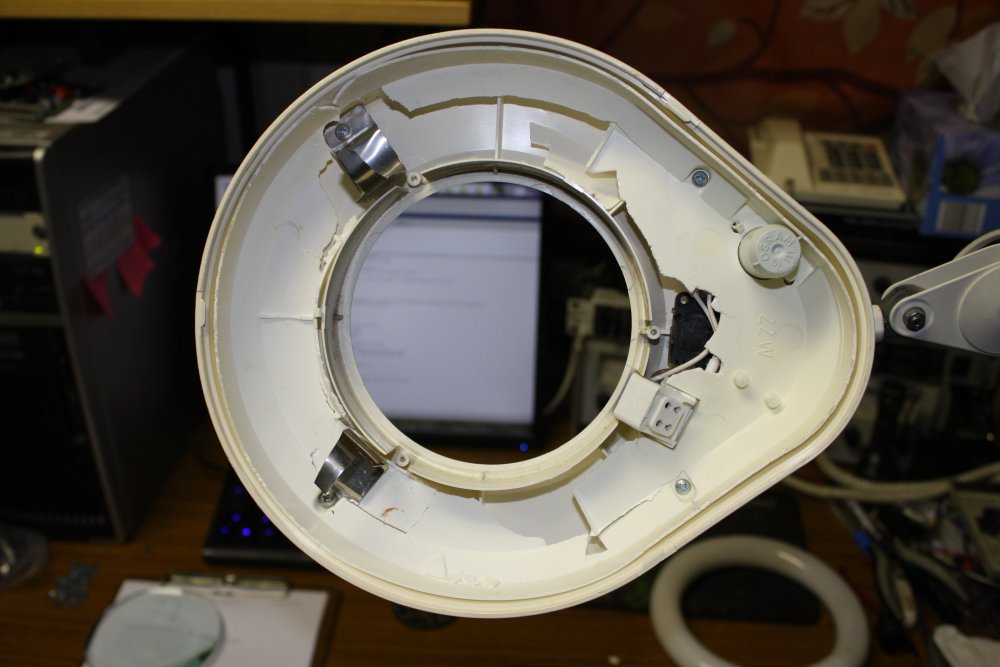
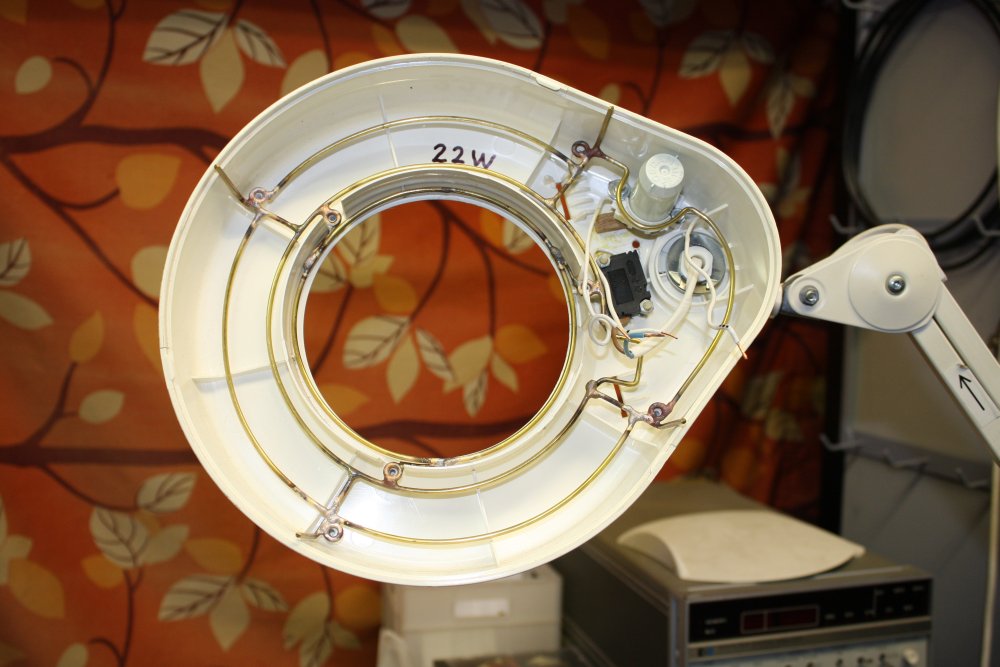
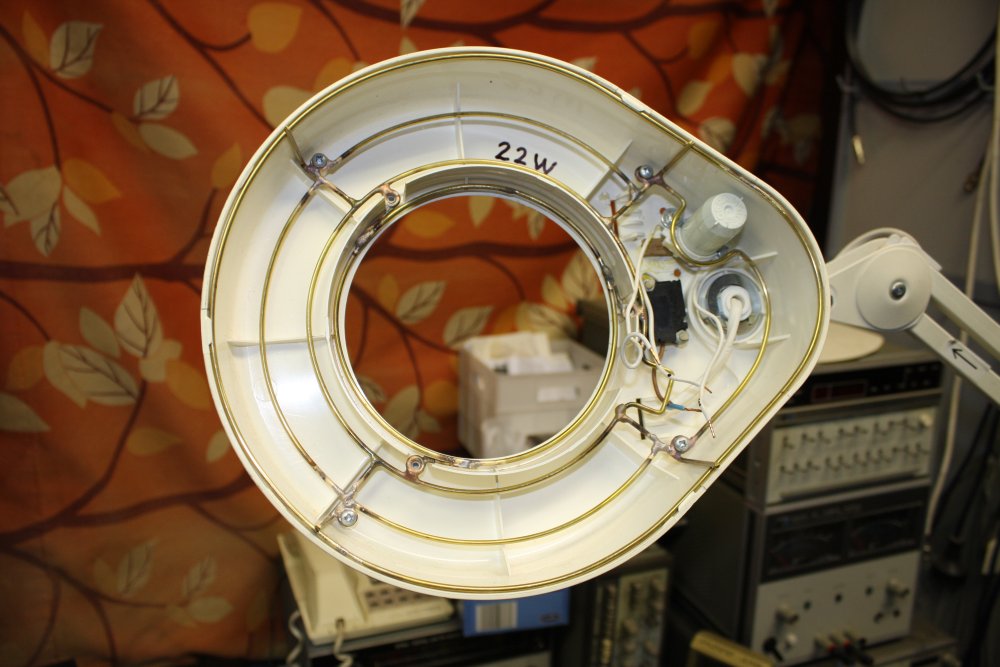
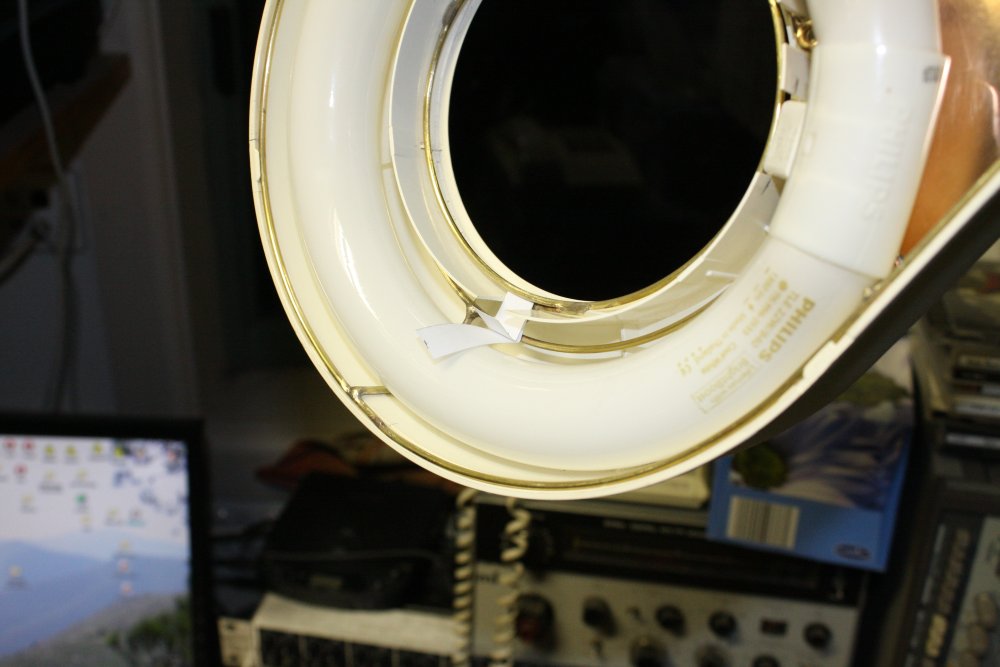
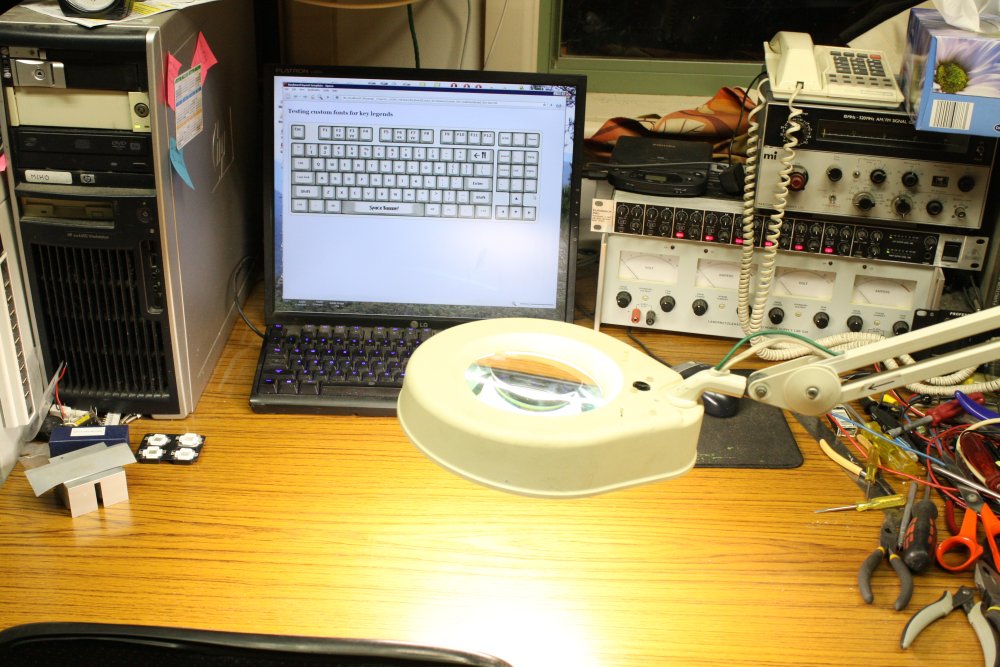
I'm fairly old, eyesight isn't as great as it used to be, and for any fine visual work at my bench I rely heavily on a planet lamp-magnifier. So this kind of development is not welcome:

The outer plastic shell of the lamp is fine, but there's an inner molding of a different type of plastic that has been showing signs of decay for some time. A couple of tabs that held the fluro tube in place broke off ages ago, and I'd roughly improvised metal clips to replace them. Now the lens support part suddenly failed, fortunately not quite dropping the lens completely out.
Whatever this plasic was, it now has the strength and flexibilty of chalk. It's not degrading due to UV from the tube or sunlight, since the decay is equal everywhere, not only in the exposed surfaces. It's just really crappy plastic.
'Biodegradable' perhaps, ha ha. Thanks Luxo (the manufacturer.)
Anyway, I need this thing working, and have other things I'd rather buy than a replacement for it. Nor do I like the idea of submitting to this kind of forced product replacement. The rest of the lamp is fine, and it's a familiar tool — which adds to the value. It's getting repaired no matter what it takes.
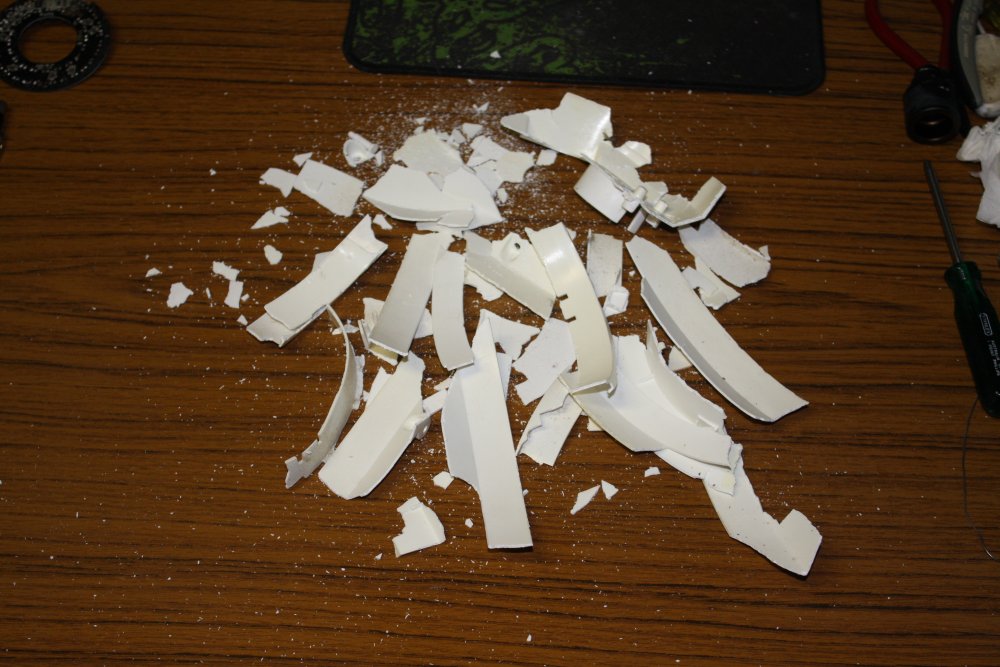
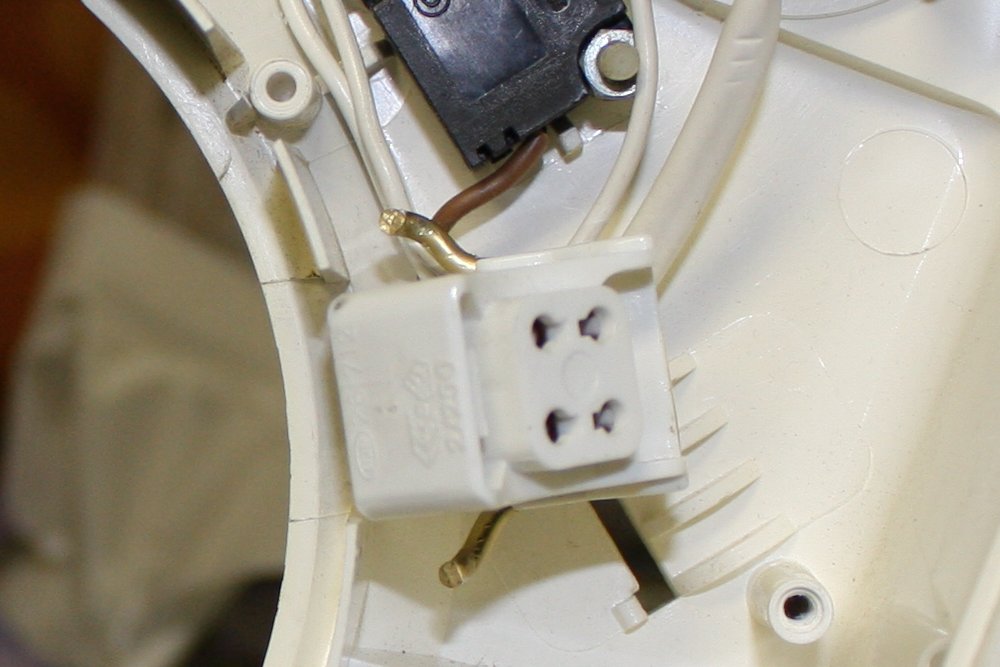
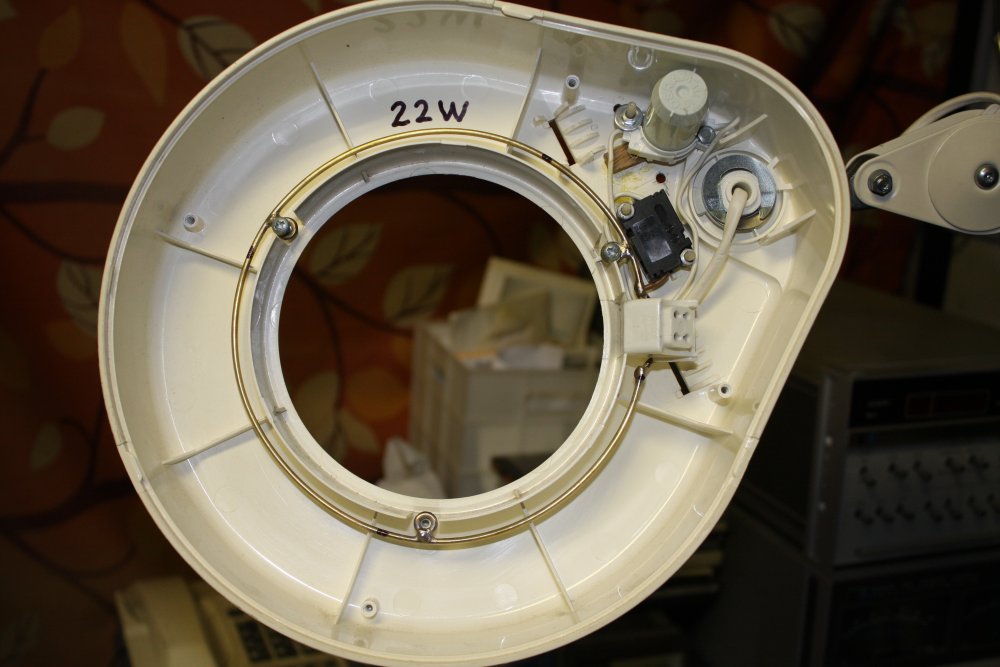
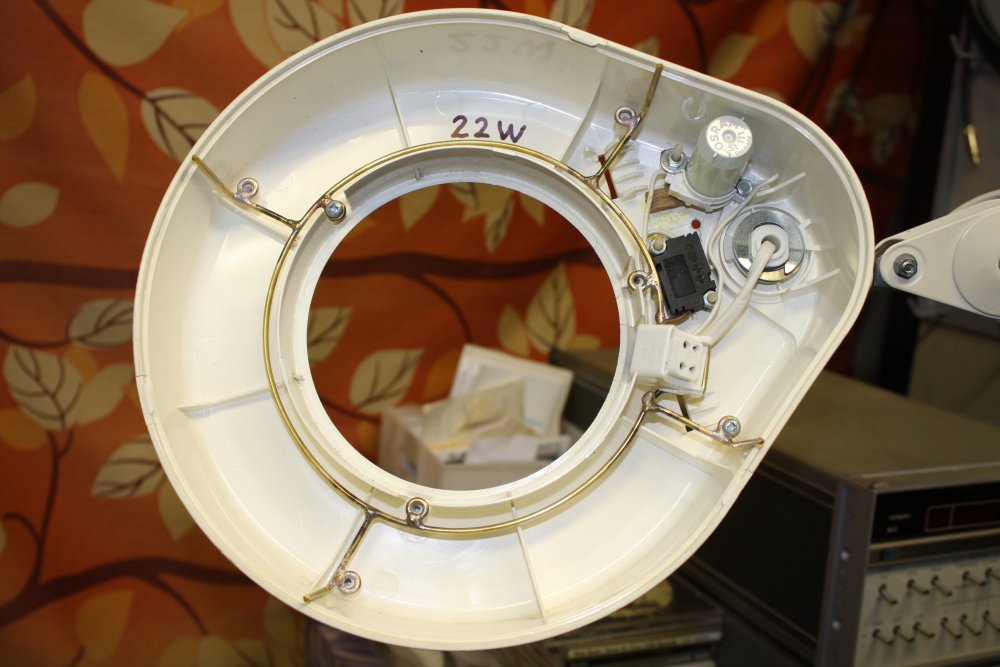
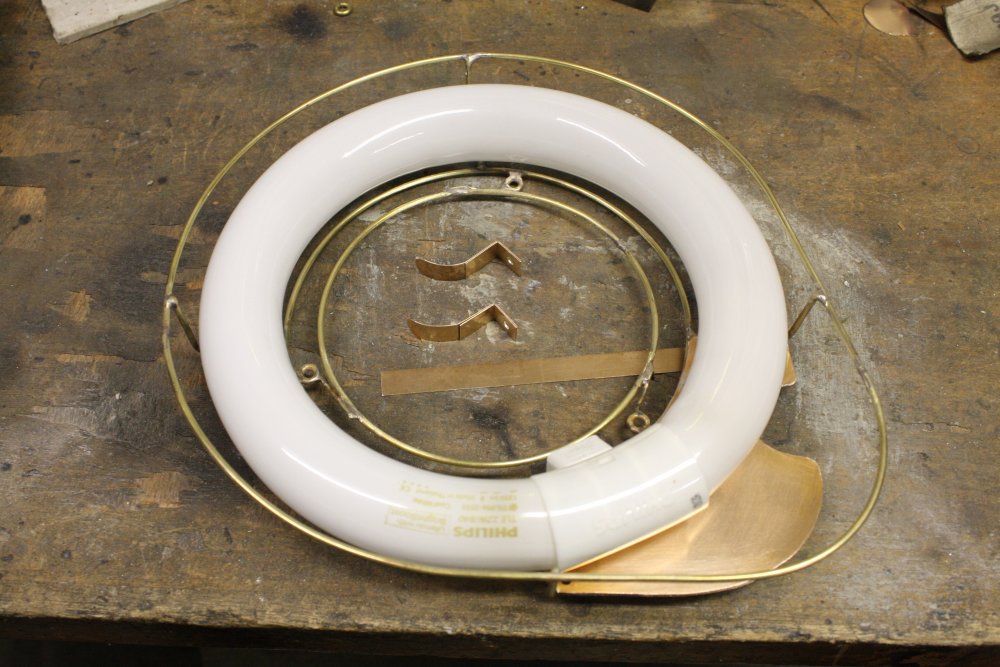
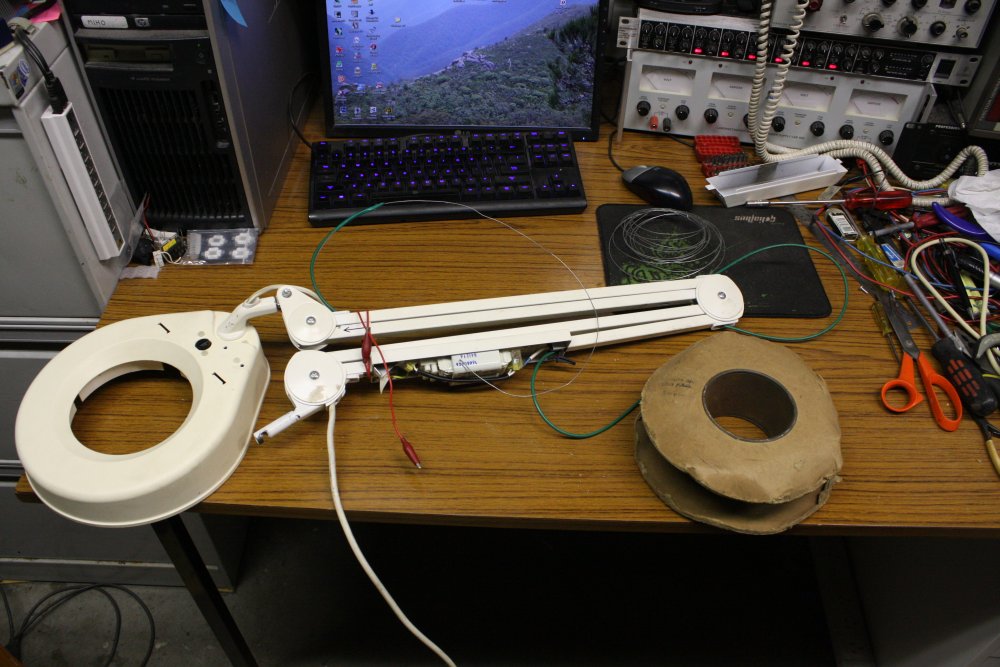
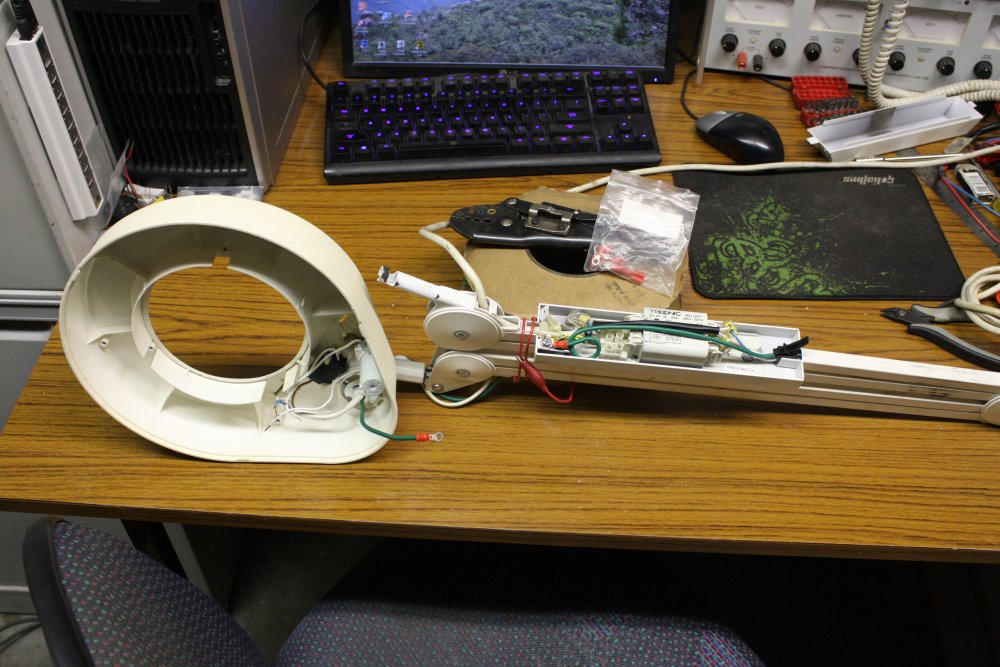
Which uh... may be quite a bit of work. That inner molding holds all the inner parts in place. The power switch, the fluro starter, the lamp connecter, the lens, the lamp... It was a complex plastic molding. What's left of it:
On removal it ended up like this:
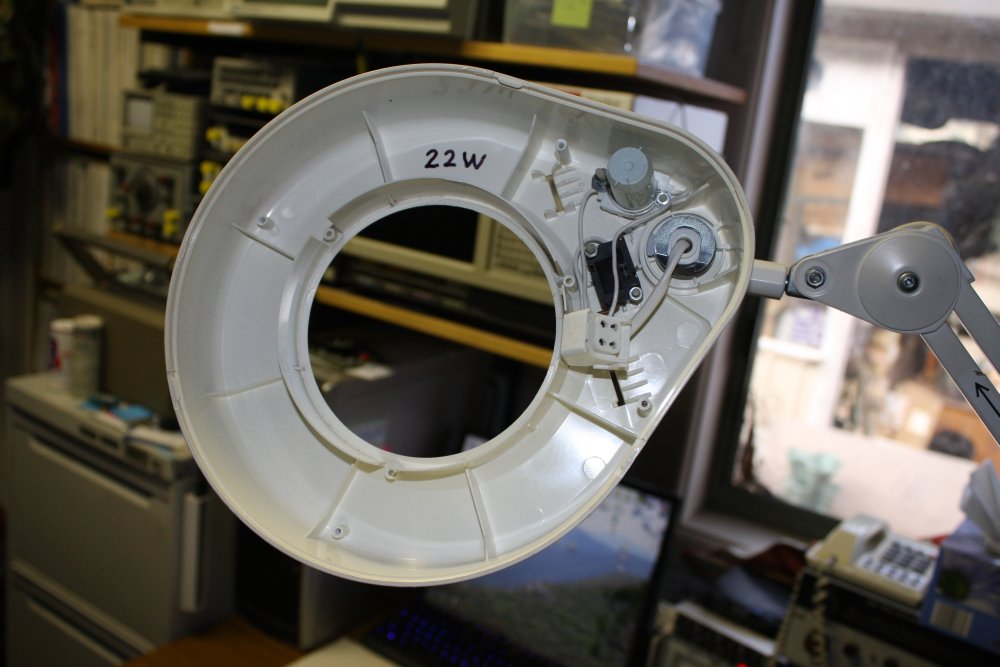
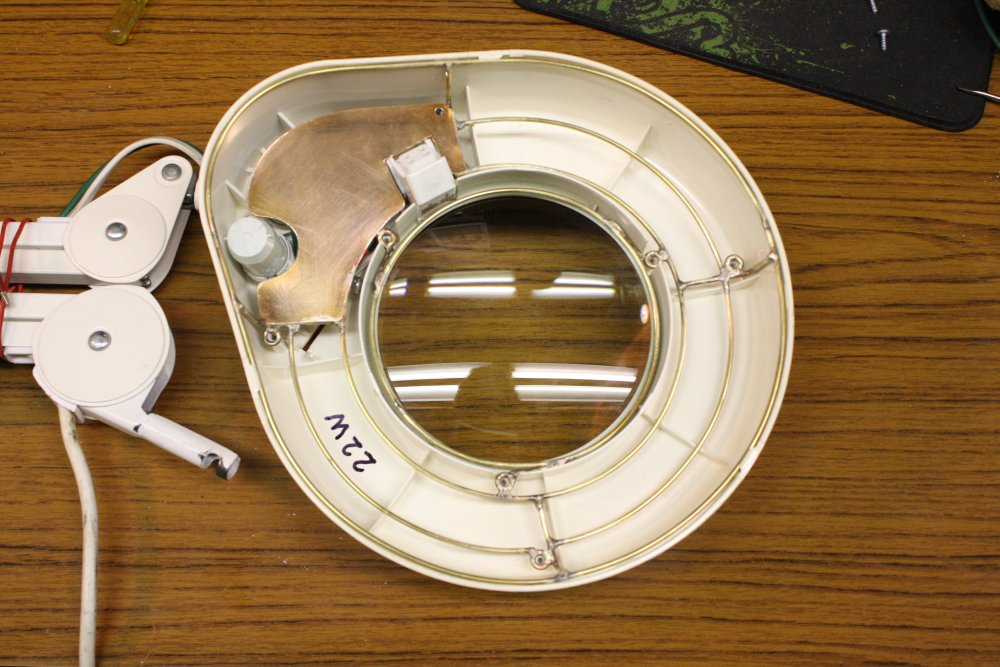
First stage of repair involved fastening the switch and fluro starter in place. Some nylon screws through the outer case solved that problem. The fluro connecter is still just floating on its wires in this picture.
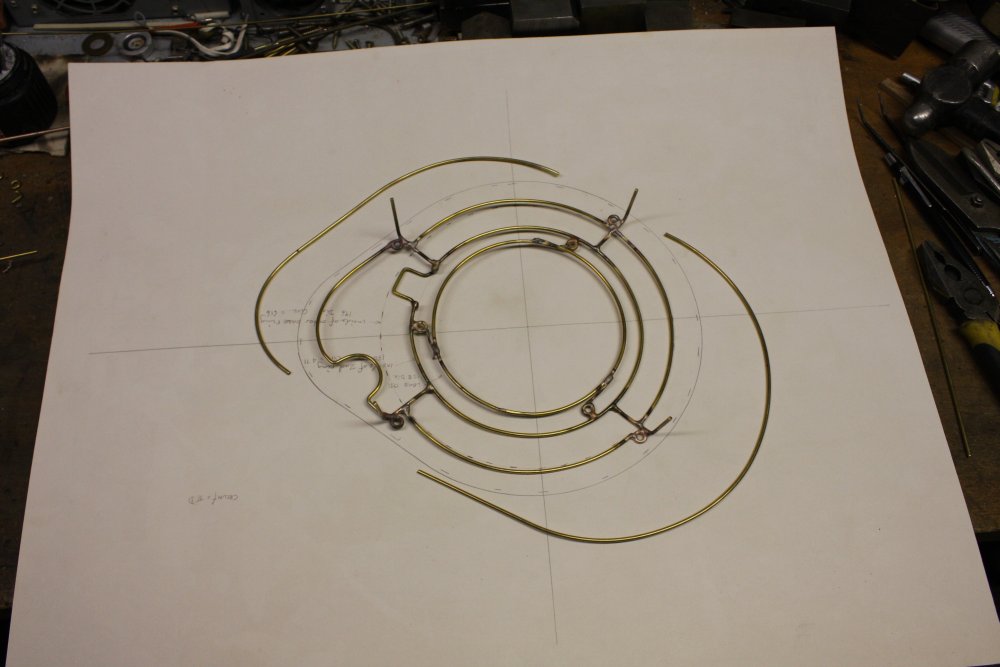
Now here's an interesting construction challenge. What's needed is a thing that spans a 3D space, kind of donut shaped, with various mounting points and surfaces required through the space. It has to be rigid enough to hold the heavy lens, but light (since it's at the end of a planet lamp arm.) The area of mains wiring has to be shrouded for safety. There have to be springy clips holding the fluro tube in place. Also it would be good if it provided a high reflectivity surface behind the fluro tube.
No problem, I'll use my injection molding machine, or 3D printer. No wait, I don't have those. So I guess it will have to be my old fallback, wire-frame construction. Remember this?
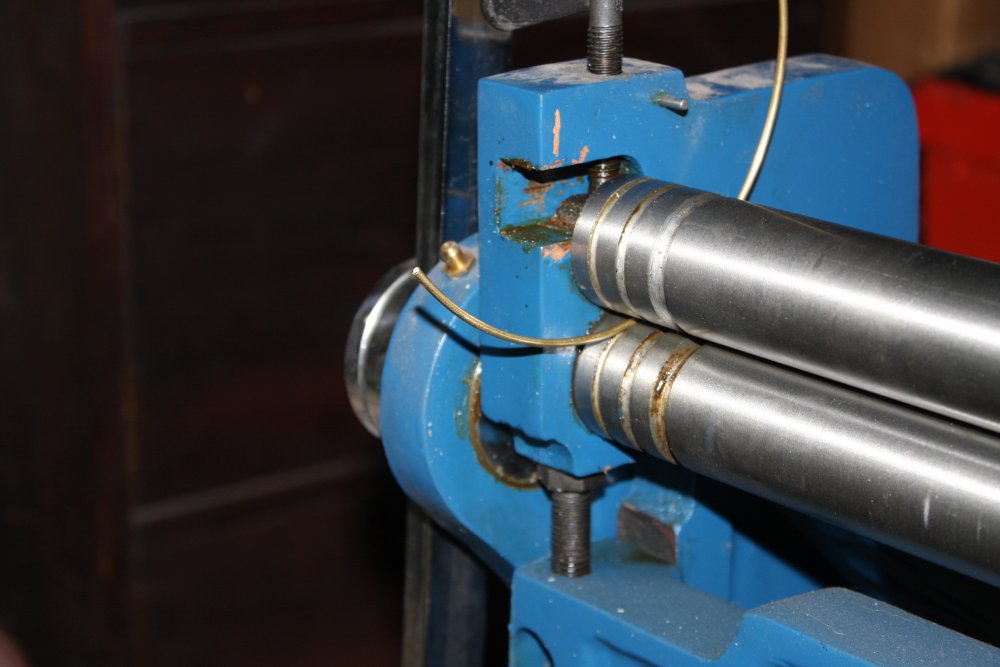
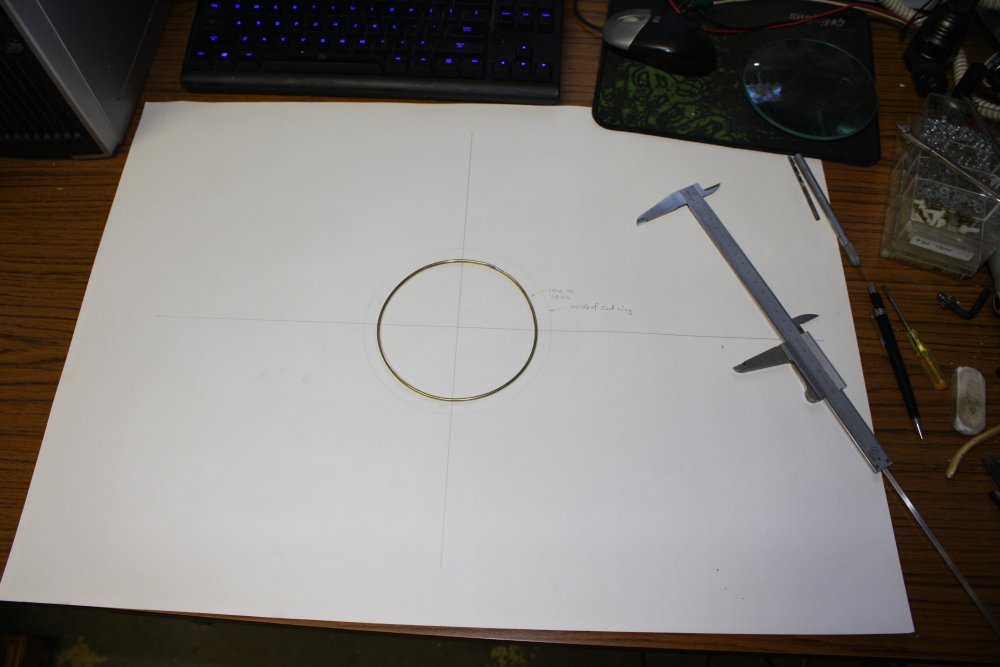
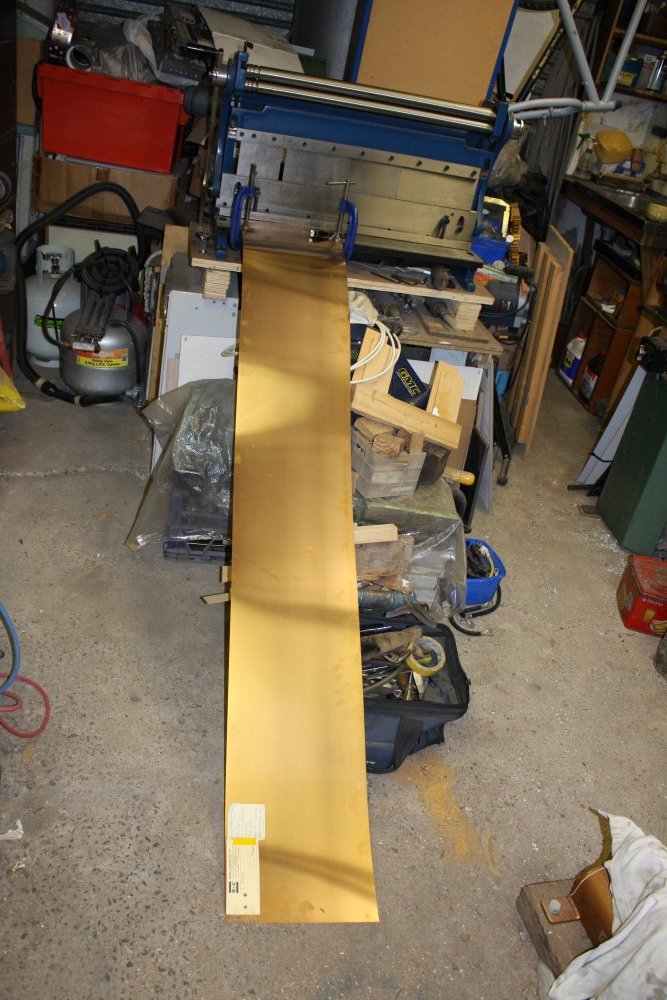
Here I'll use some stiff bronze straight wire, bought as brazing rods. Also my sheet metal working machine has a wire curve roller, that I've never used before. Time to try it out.
 |
 |
 |
 |
 |
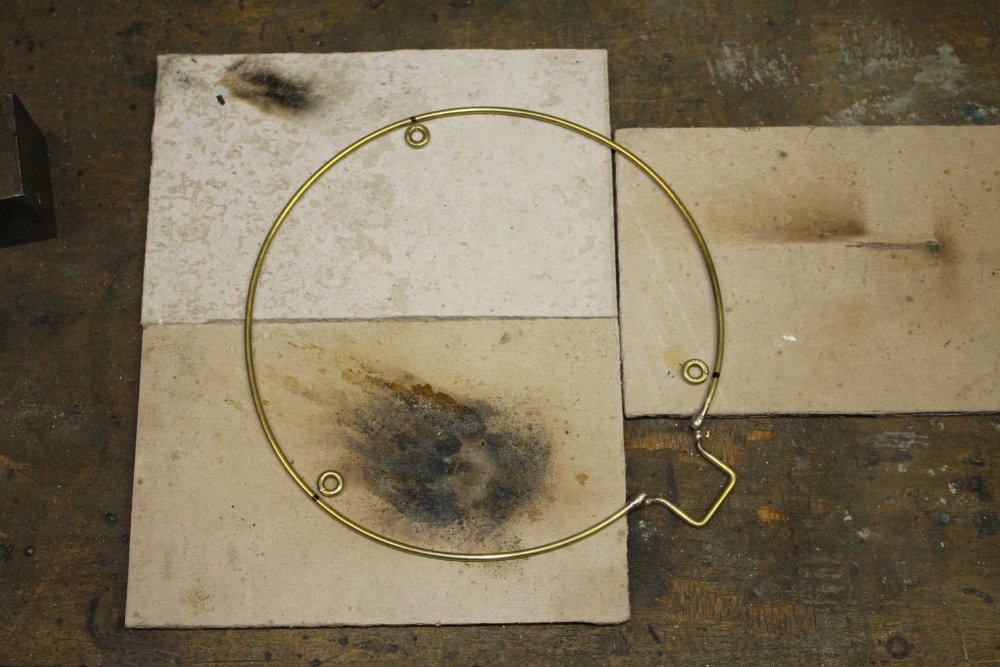
1. The wire bender. There's a third roller at the back.
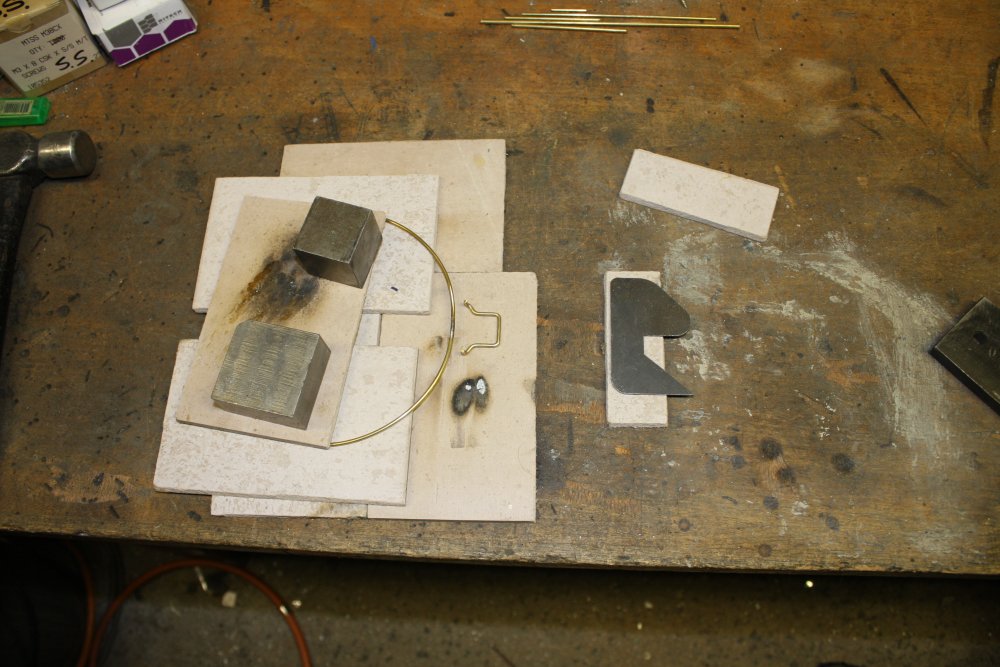
2. First ring worked. This one is the lens holder. I'd silver-soldered the wire butt-join. Silver solder is tougher than the bronze wire so the join is more than strong enough.
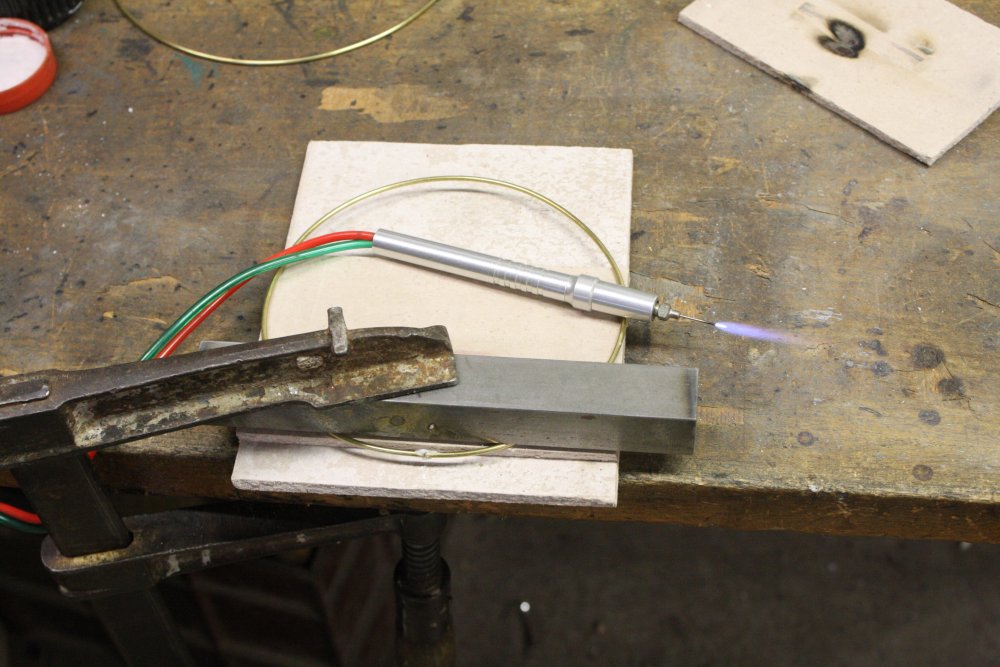
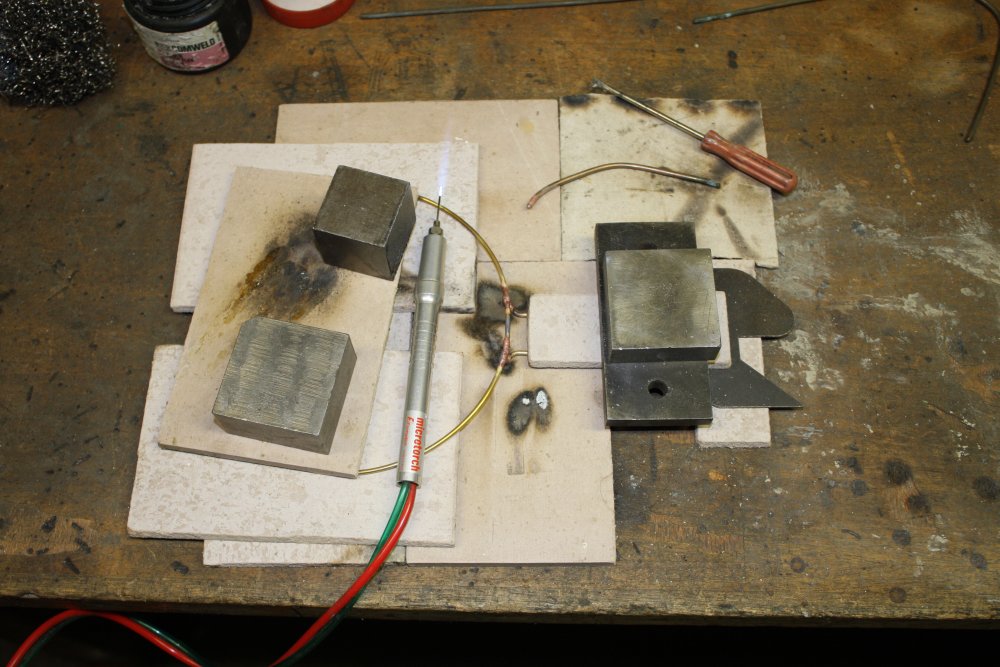
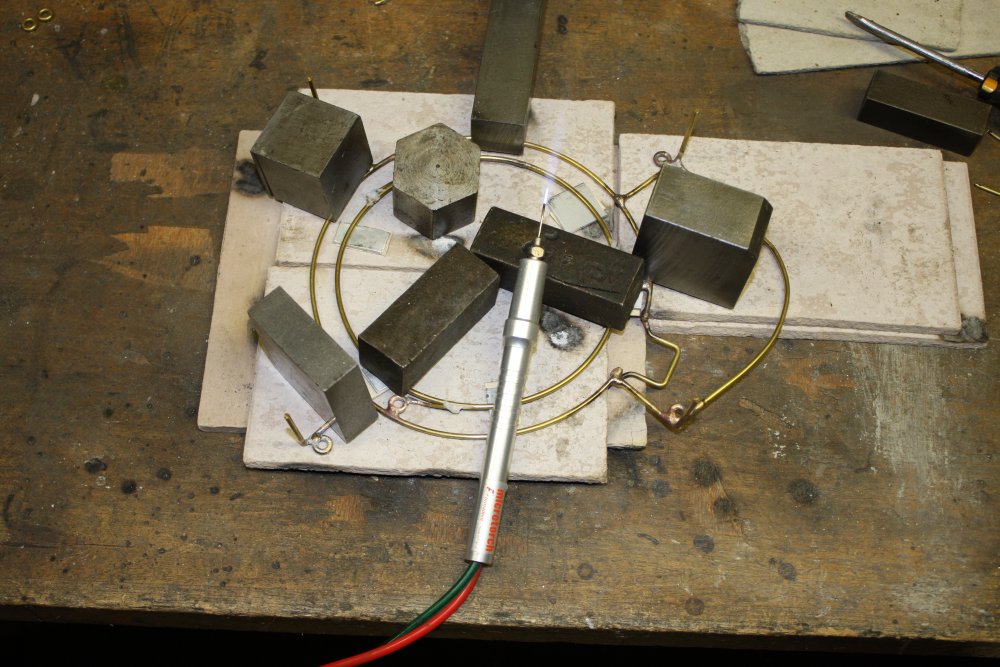
3. Setting up to solder the next larger ring. The little jeweler's torch there is a cool tool. Someone gave it to me many years ago, with no accessories, just the torch body and hoses. I made a control valve set for it from an old junked propane camp stove (that provided the gas valves and knobs), and some bought welding gas hoses and fittings.
The tip of this torch is a standard medical syringe tip, with the end filed flat. So I could have different apperture tips if I wanted, but this small one does me. If I need something bigger I just use the big oxy-acetylene welding kit.
There's a comical story about that tip. Thing is, considering that the gas coming out the end of a welding torch is an explosive oxygen and acetylene mix, do you know why the flame doesn't just burn back into the torch?
A: because the flame has a velocity of detonation through the gas mix, and at a welding torch tip the gas mix is travelling faster than that. It slows down as it expands after leaving the tip, and that point is where the flame sits.
Different gas mixes have different velocities of flame propagation. When I was given this mini-torch, I was told it used oxygen and acetylene. So after I got the valves set up, I connected it to my welding cylinders (via pressure regulators of course), turned on the acetylene, lit the flame, then started turning on the oxygen.
The bright yellow acetylene flame goes clear and blue as oxygen is added, and much more intense. The flame contracts towards the tip, since it's ... well exploding as fast as it can go, literally. All good, except suddely it was burning inside the stainless steel syringe tip core. Which makes the tip go white hot and begin burning away. Back towards the torch body, rapidly.
Fortunately my hand was still on the valve and it was easy to turn off fast. I got it before all of the syringe had burned away, so the torch handle wasn't damaged.
Ah. Well apparently this is not intended for use with acetylene and oxygen. The gas in the syringe is flowing slower than the VOD (velocity of detonation) of that mix.
A slower gas mix is oxygen and propane. I switched over to a propane tank, put a new syringe tip on the torch, and tried that. Works great.
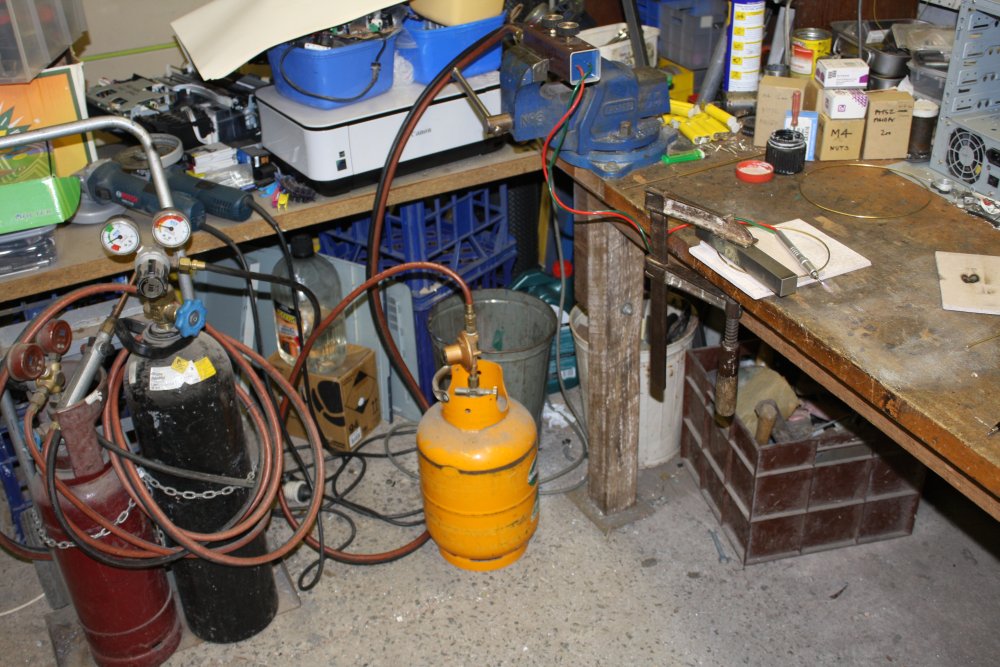
4. A view of the usual general mess.
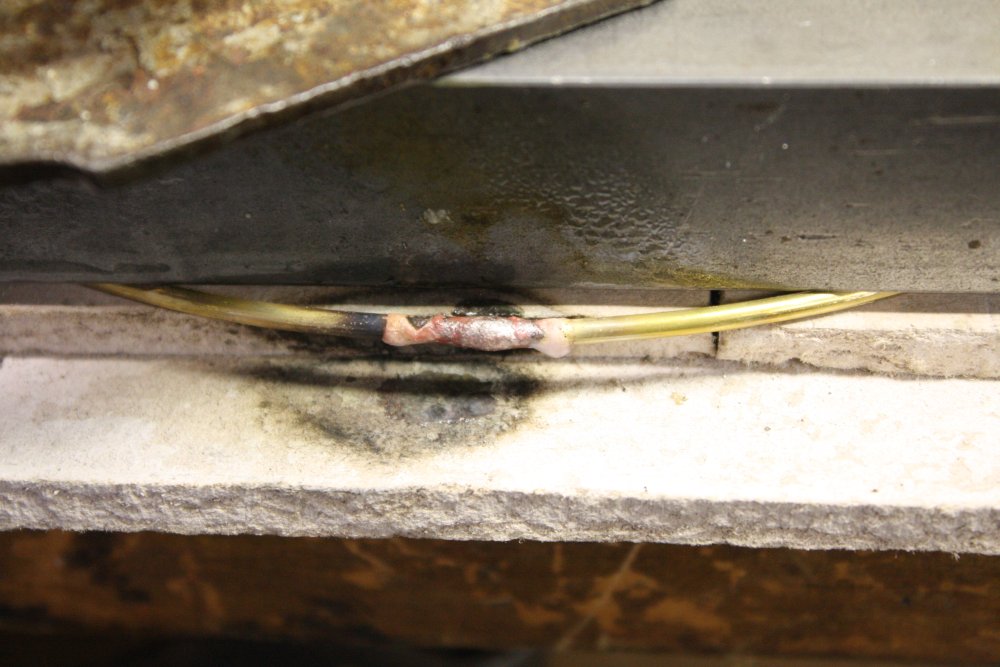
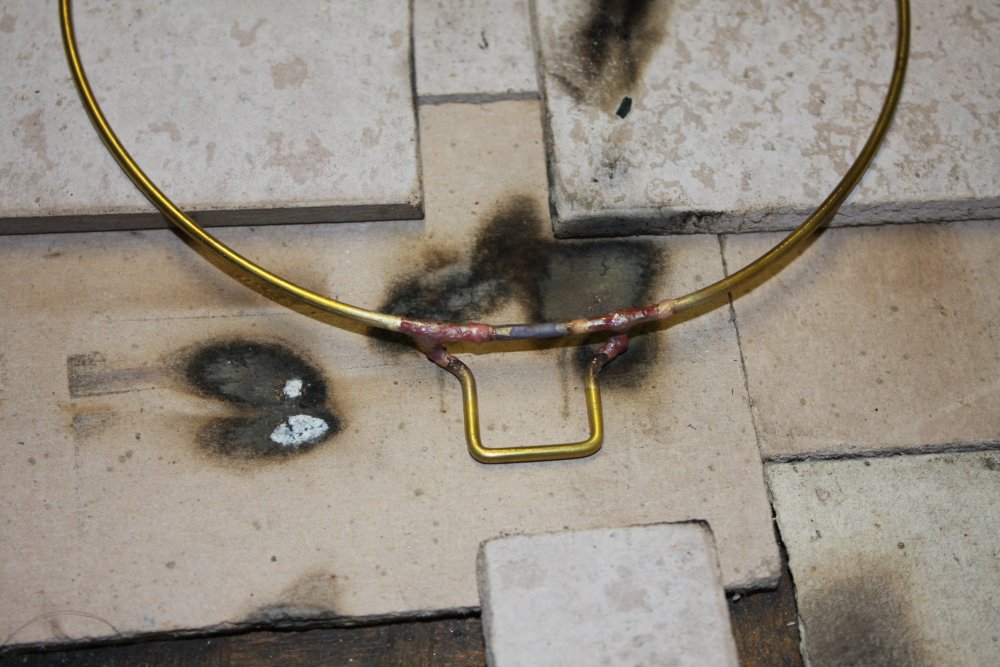
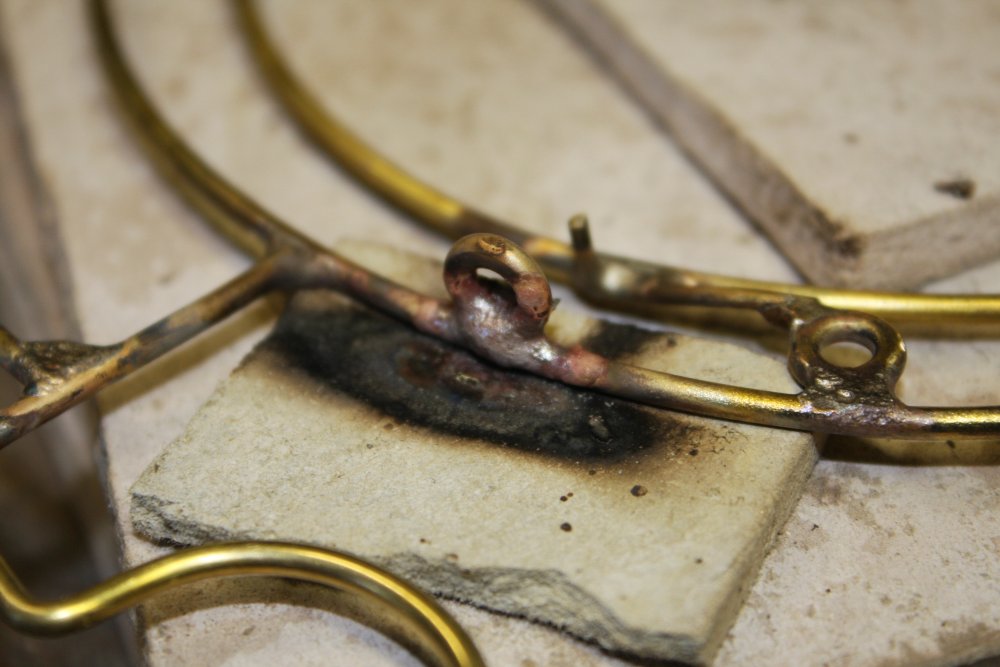
5. Butt silver soldered join of the 2nd ring. Like all my welding skills, my silver soldering isn't very good. Might have something to do with using big thick plumber's silver solder rods, with 5% silver content, so a fairly high heat is required and the molten solder doesn't flow very well. I keep meaning to find and buy some more jewelery-oriented silver solder, but it seems to be one of those things that never makes it to the top of the shopping list.
The white lumps are silver brazing flux, which like all brazing fluxes is nasty stuff. Applied as a wet paste, when heated it turns into a glassy substance that chemically rips the oxide film off metal. This one is a mix of boracic acid, potassium bifluoride and potassium hydroxide. Like most brazing fluxes it's nasty enough that despite being in a tough 'chemical-proof' container, the paper labels on the container disintegrate. Leaving just the POISON symbols molded in the container. And it is, very. After brazing a joint, the remaining flux has to be removed, which is best done by soaking in water, then scrubbing, while avoiding getting the water with disolved flux on your hands. Any flux dust on the bench should be carefully cleaned up, and then when everything else is clean, wash your hands. And face, as tiny specs of it can have settled around your mouth. And yes, you can taste it if you didn't wash well enough.
 |
 |
 |
 |
 |
Making a mount for the fluro socket.
 |
 |
 |
 |
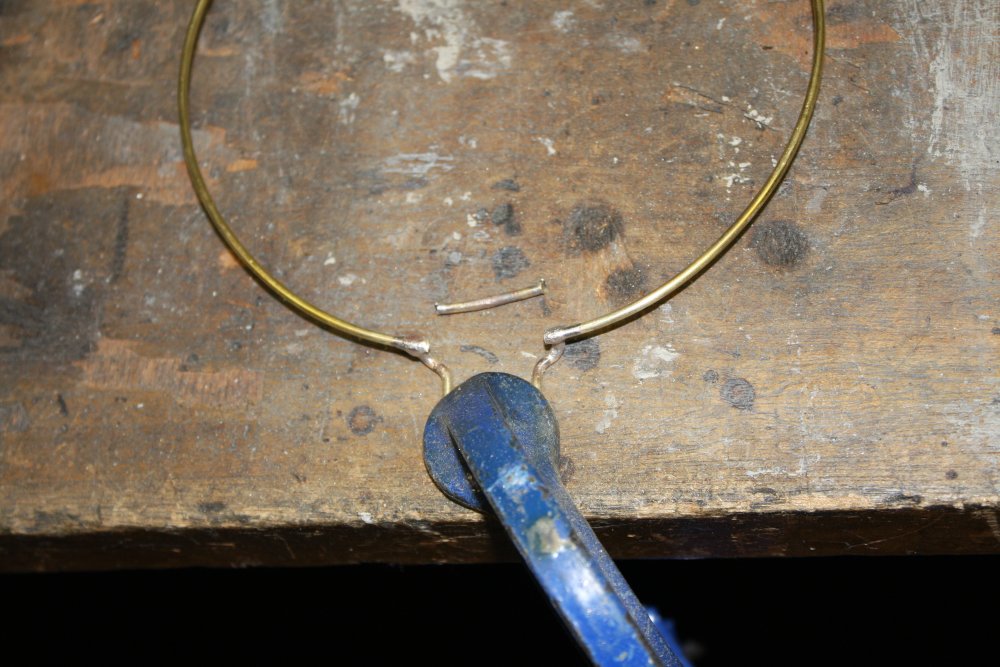
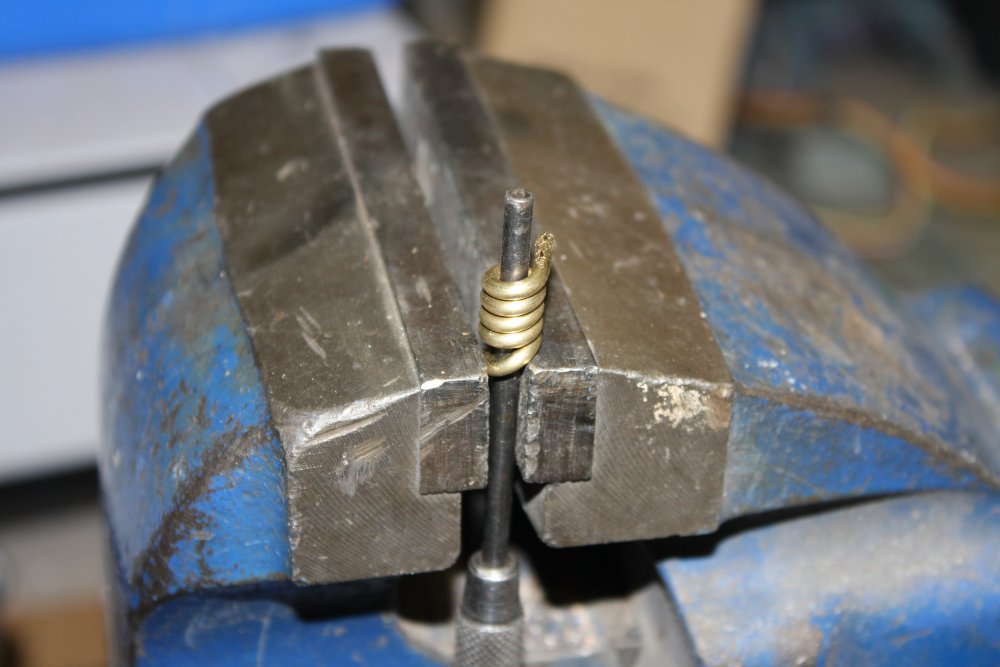
The several screw fastening points need small rings made. Like this:
1. Wrap the wire round a shaft of the right diameter for the screws.
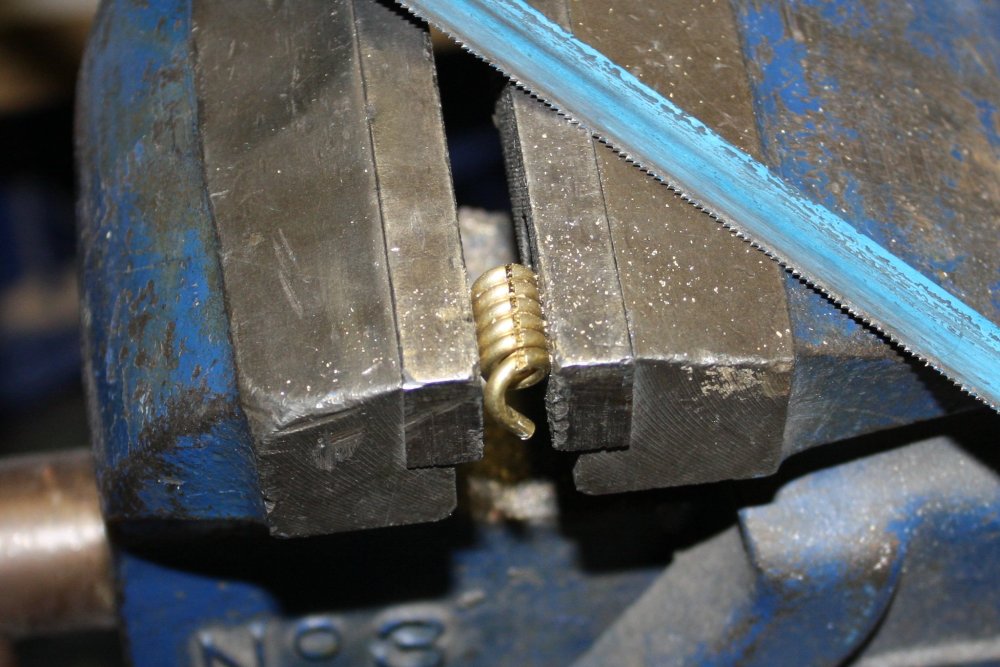
2. Cut the spiral down the side, to separate the rings.
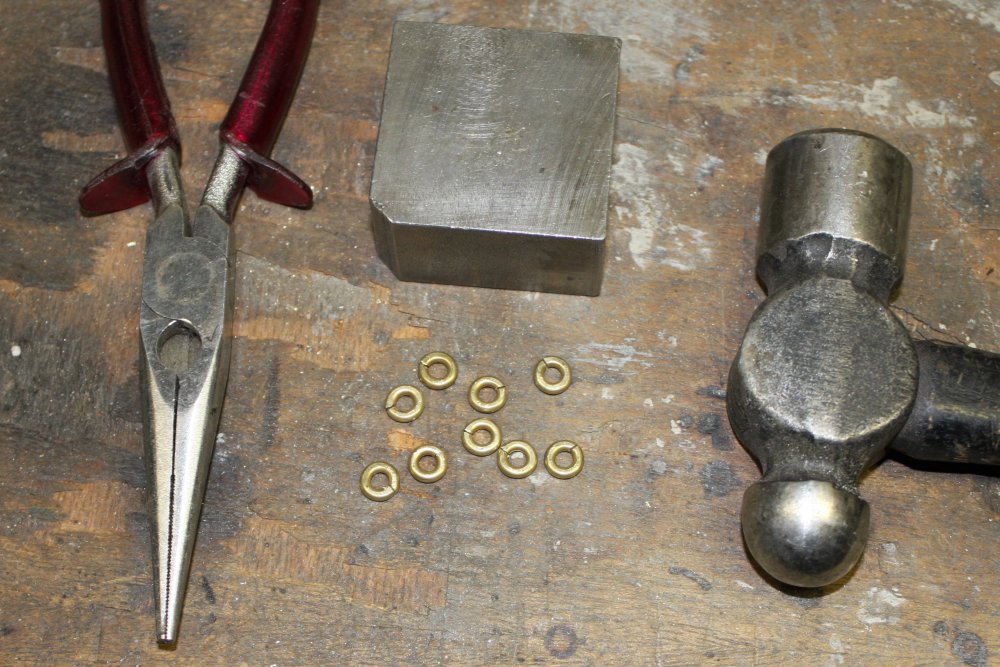
3. A bunch of loose 'pieces of spiral', still to be flattened.
4. After flattening and closing with a hammer.
 |
 |
 |
 |
1. The screw-mount rings ready to be added to the first structural ring.
2. Joined.
3. Testing the fit. All good so far. (Which is nice, since it shows the overall concept is workable.)
4. Added the outer mount points.
 |
 |
 |
 |
 |
1. Added an outline of the shielding area over the wiring, and starting on the lens mount. The inner ring to hold the lens has to be a little raised above the next outer one, and should have a bit of spring. Hence the offset wires here.
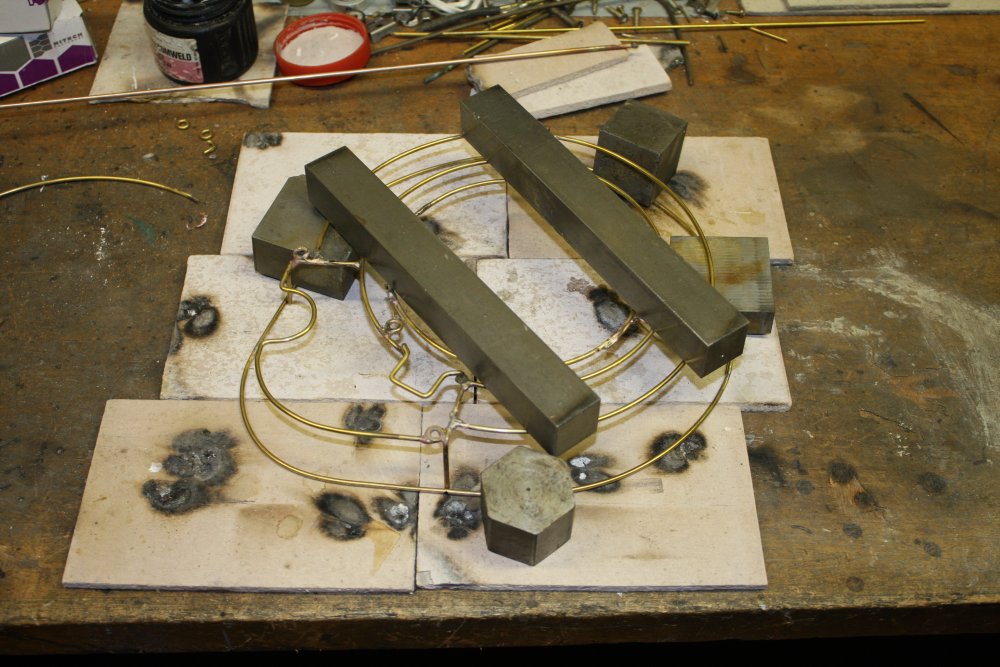
2. Joining the lens ring. It's spaced up on shims, to get about the right height. Kind of a guess, since it was a difficult thing to measure from the lamp shroud.
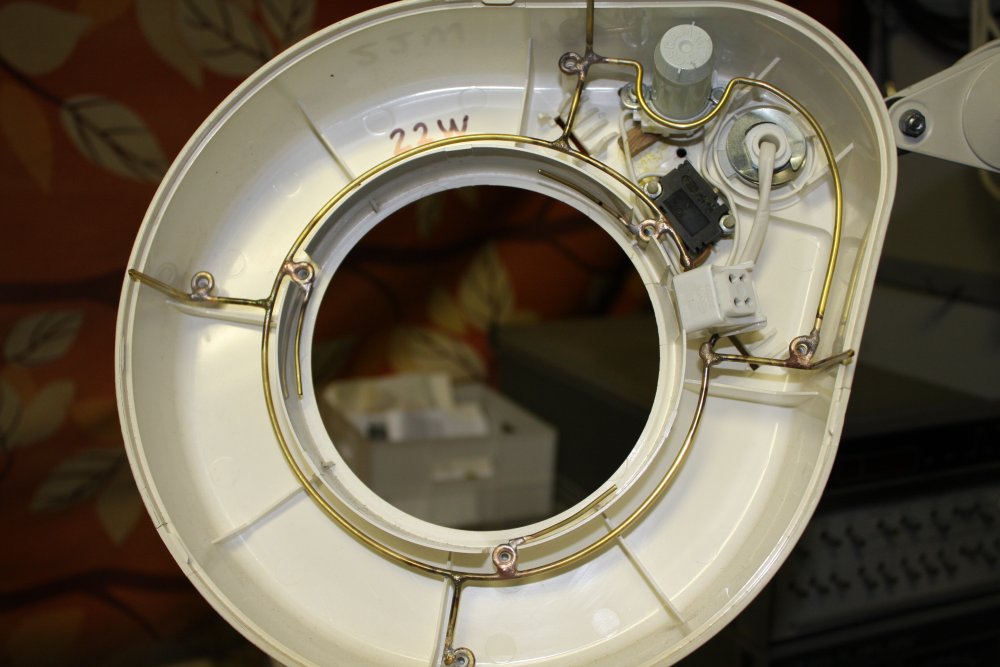
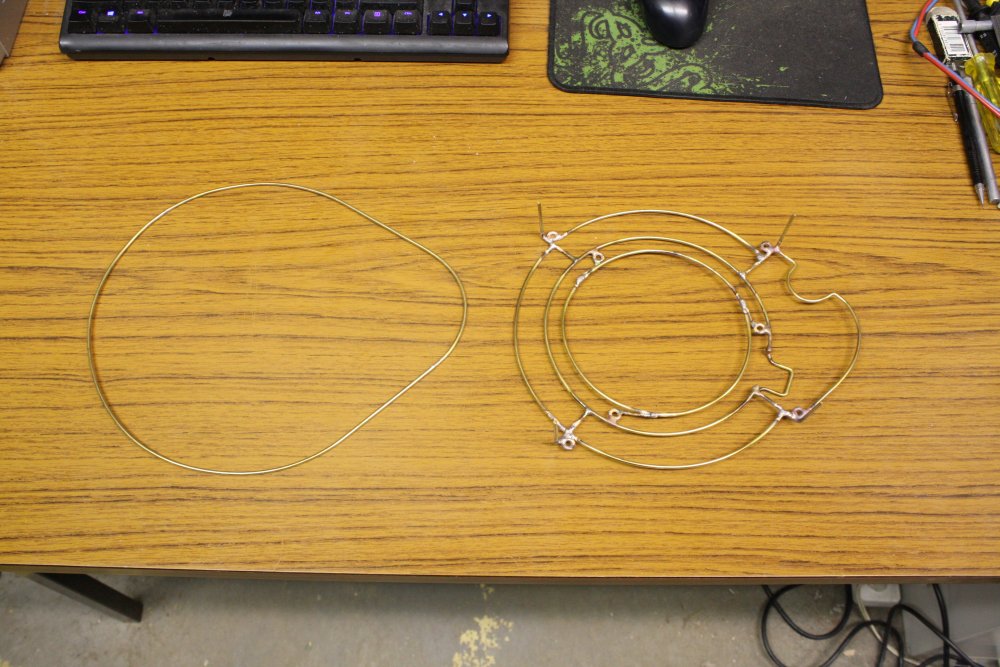
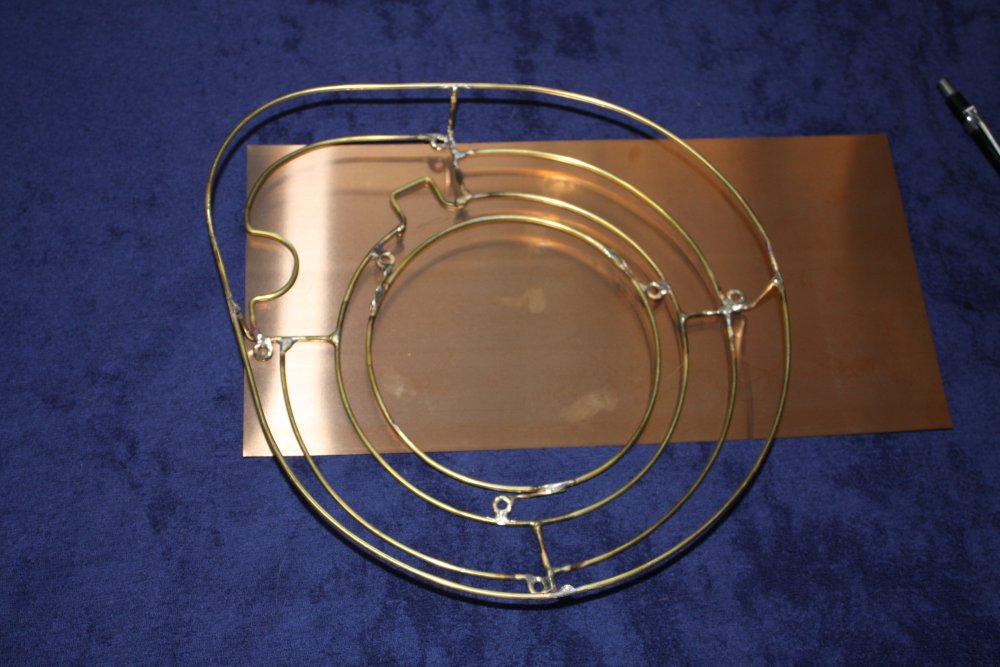
3. Main structure done.
4. One more to add. I wanted a liner just inside the lower lip of the lamp body — you'll see why later. The plastic even has retaining clips for it, though the original inner plastic molding didn't use them.
5. The teardrop shape complete. I had to get this as accurate as possible so it would be a tight clip-in to the plastic rim.
 |
 |
 |
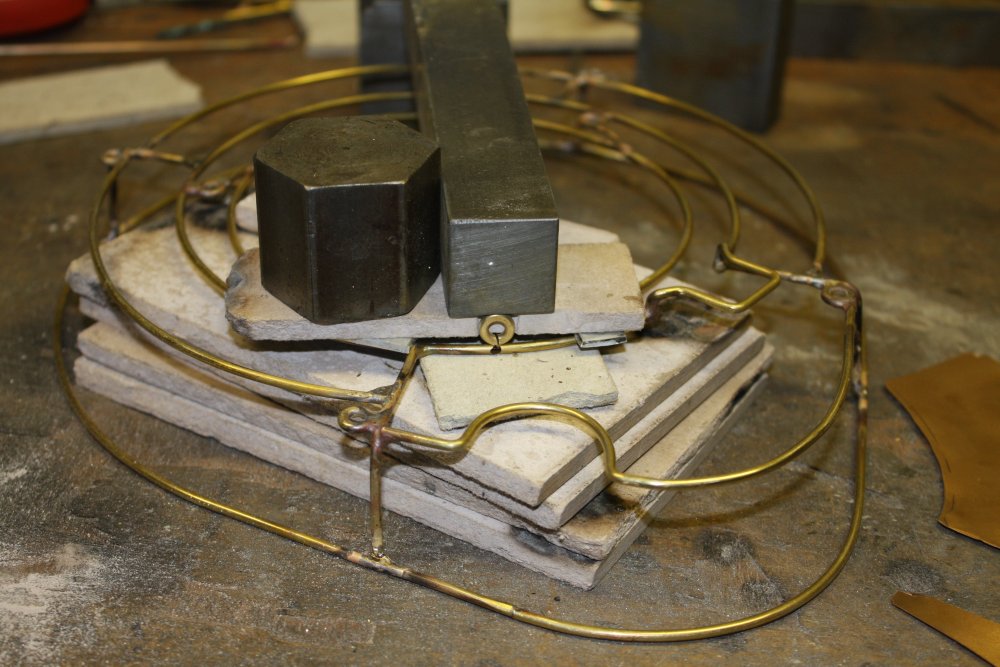
Joining the teardrop to the rest. Again, zero margin for error. Using a big pair of side cutters I nibbled the ends of the vertical wires to be correct to a fraction of a millimeter. So it could be jigged up like pic 2, for no movement while soldering.
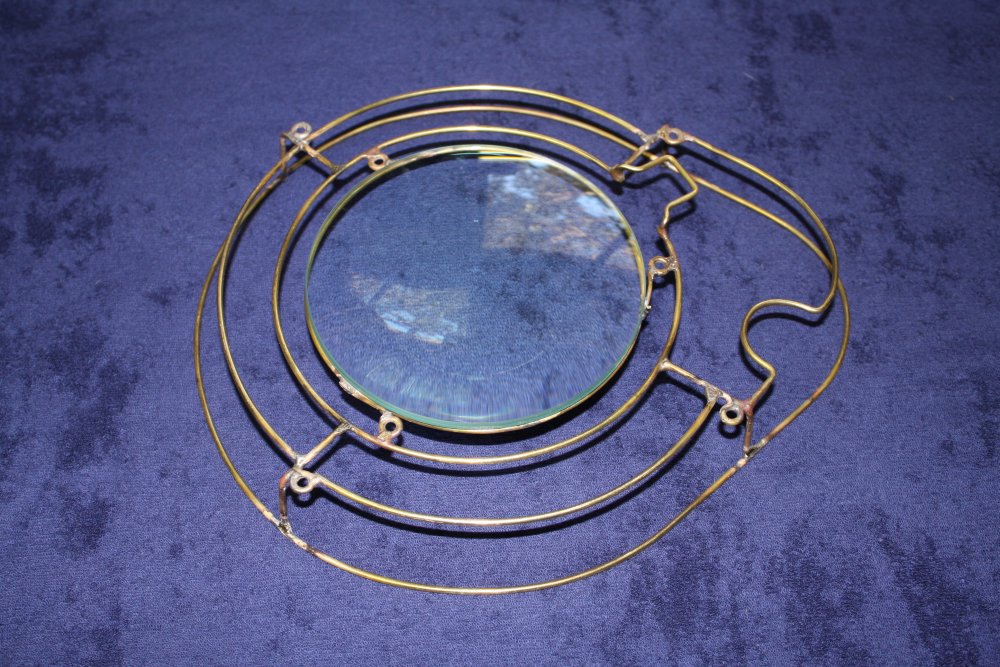
Pic 3 is the frame with lens resting on it.
 |
 |
The original lamp had no ground wire to the lamp head, since it was all plastic and double insulated.
This wire frame will be exposed to touch so there has to be a safety ground. The mains cord and metal case holding the fluro ballast coil has grounding, so an extra wire has to be brought to the light head and attached solidly. Here I'm adding a screw mount point dedicated to the earth wire.
 |
 |
 |
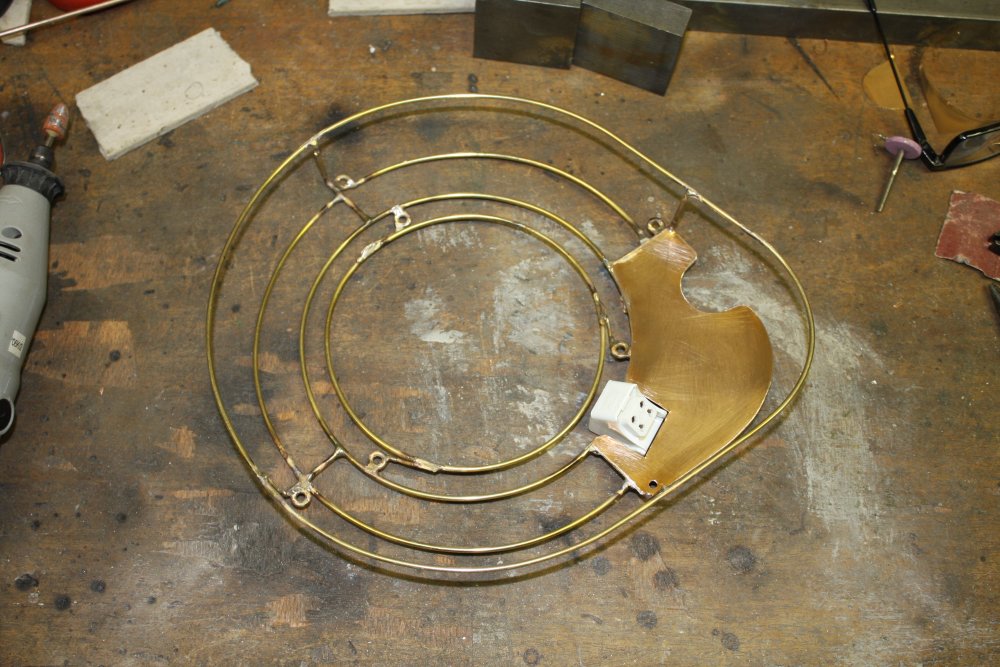 |
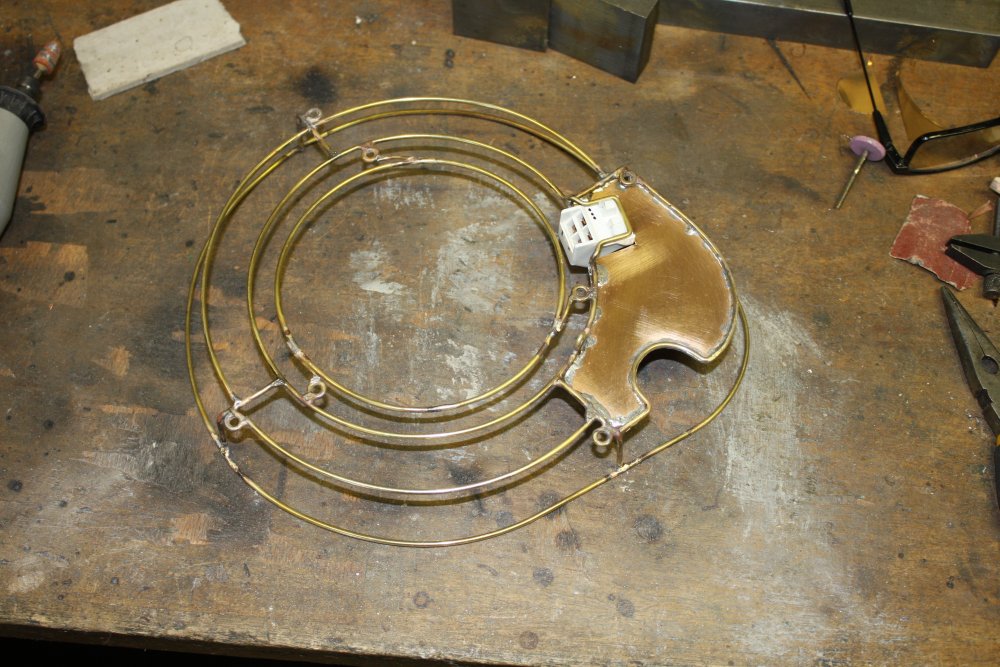
The area with the wiring has to be adequately encased to avoid risk of electric shock.
1. Marking out a sheet of rigid phosphor bronze. It's thin and light, but strong.
2. For this, ordinary soldering is best. It's to be attached all around the edges, and silver brazing would warp the sheet. I had also gone over all the silver solder joins and with a small grinding wheel in an engraver, removing the bumps of excess joint metal.
3 & 4. Done.
 |
 |
 |
There's still some spring clips to be made, to hold the fluro tube.
1. A large sheet of thicker springy phosphor bronze, about to have a small strip cut off the end. This sheet makes a really pleasant and interesting noise when held up by the end and shaken slightly. Hard to describe; a kind of cross between springs, wobble board, and a reverb unit.
2. Making a paper puppet for folding the spring clips.
3. The two clips done.
 |
 |
 |
 |
 |
1. Pulling the safety earth wire through the lamp arm cavities.
2. Crimped lugs at the ends.
3. Attachment to the wire frame.
4. Test placement with all the wiring restored. But there's one more thing...
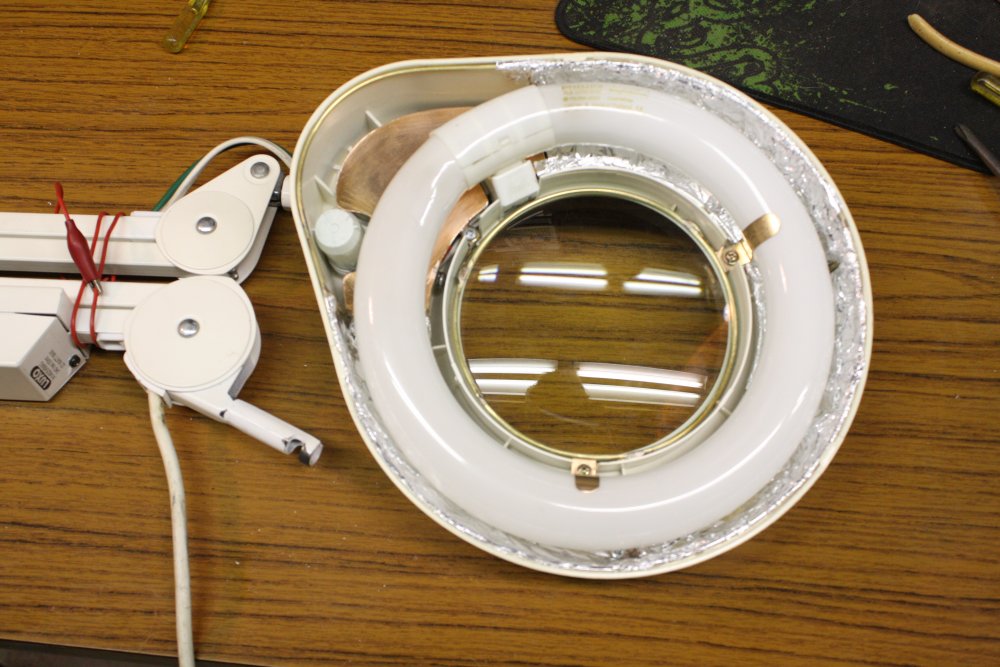
5. Here's why I wanted the wire around the rim. To hold this aluminium foil in place. Much more reflective than the white plastic. Despite being flimsy it should last OK since it will never be disturbed, and anyway it's easily replaced.
 |
 |
 |
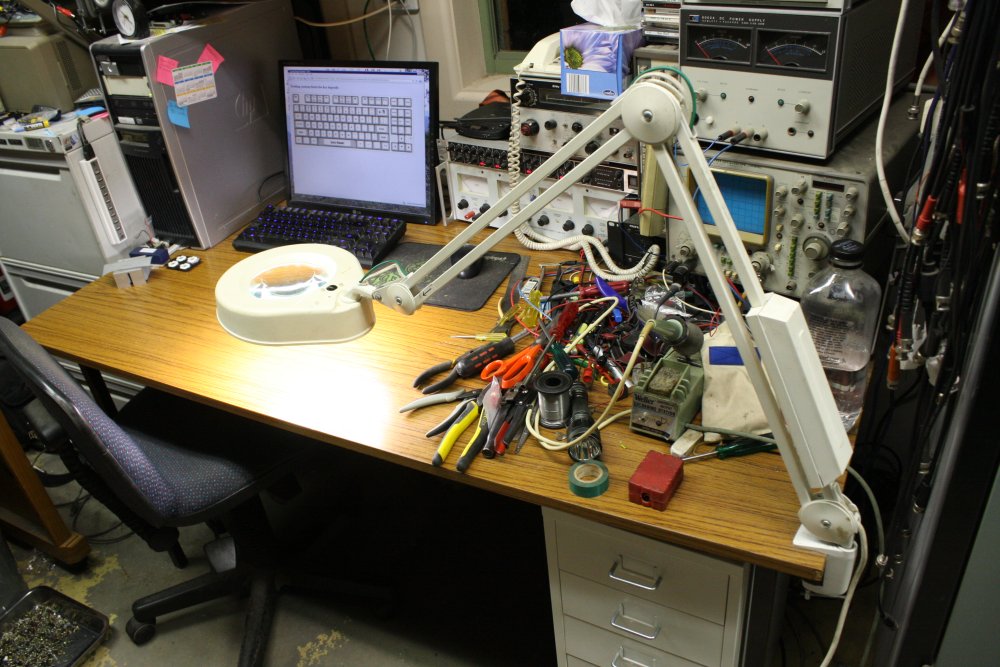
All done! It's nice to have my magnifier lamp working again. The al-foil works as intended — the lamp seems significantly brighter than it used to be.
A great relief to finish it, since while projects like this are unfinished it's annoying and impedes working on other stuff since I always feel 'I should be doing that'. That and other recent distractions.