Recently when I went round to my mum's to do the weekly chores, I retrieved some very old electrical cables I'd had stored under her house since my teens, when I lived there. This article is about those cables, but first some history.
My mum's house is in Oatley. The Illawarra train line through Oatley crosses the Georges River via a bridge to Como. The original Como rail station and single-track bridge were opened on 26 December 1885.
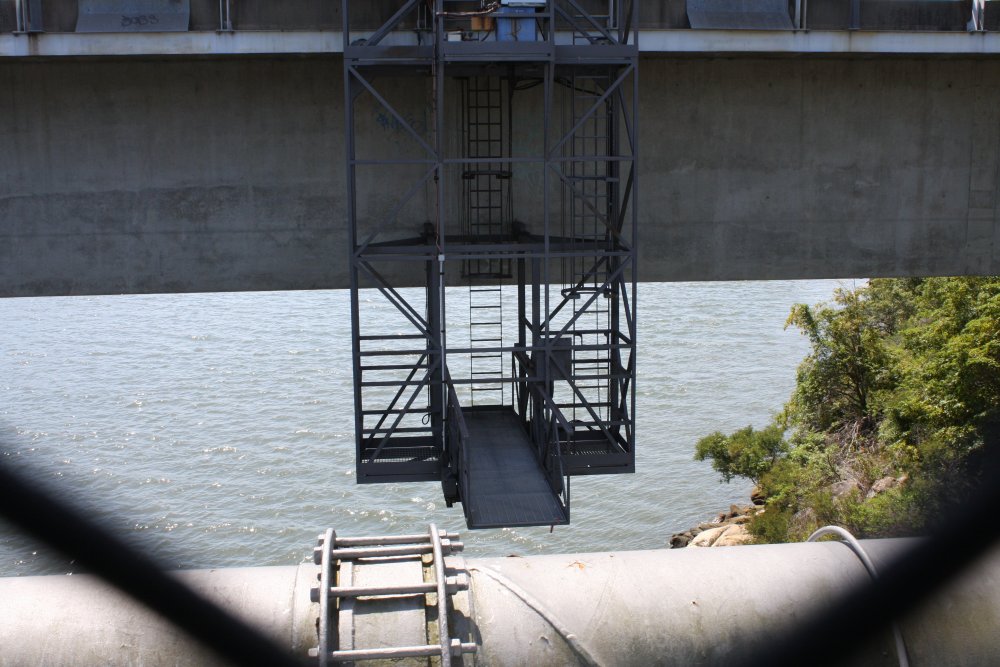
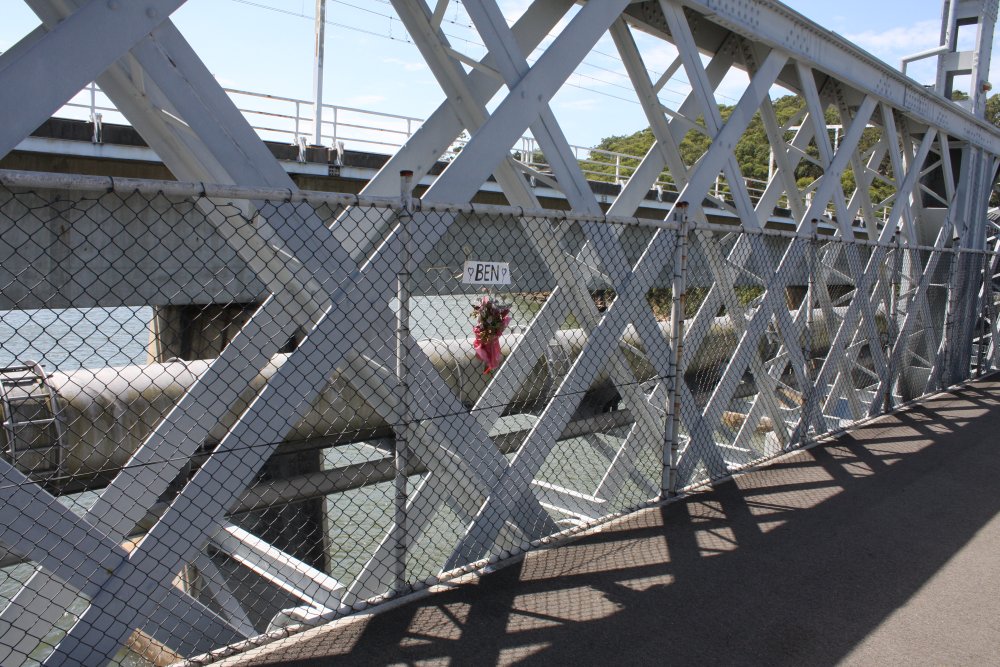
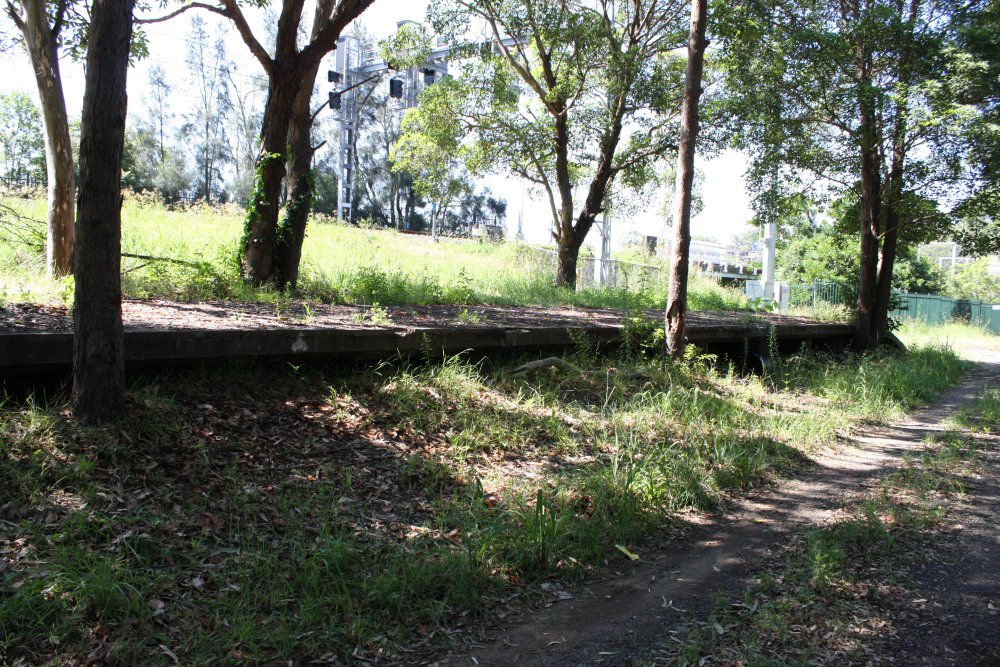
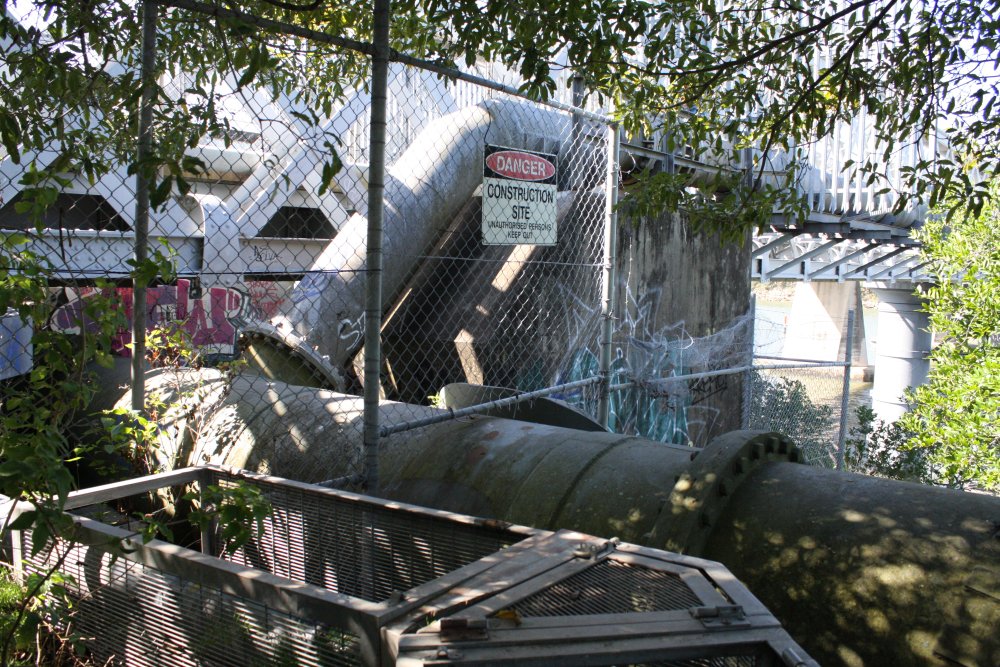
In 1972 a new concrete double-track bridge was built alongside the old steel bridge, and on 27th Nov 1972 a new Como station was opened about 500m further south. The old station buildings were demolished, but the platforms left. The old steel bridge was also kept, since it carries a water supply pipeline. Only the steel train tracks were removed.
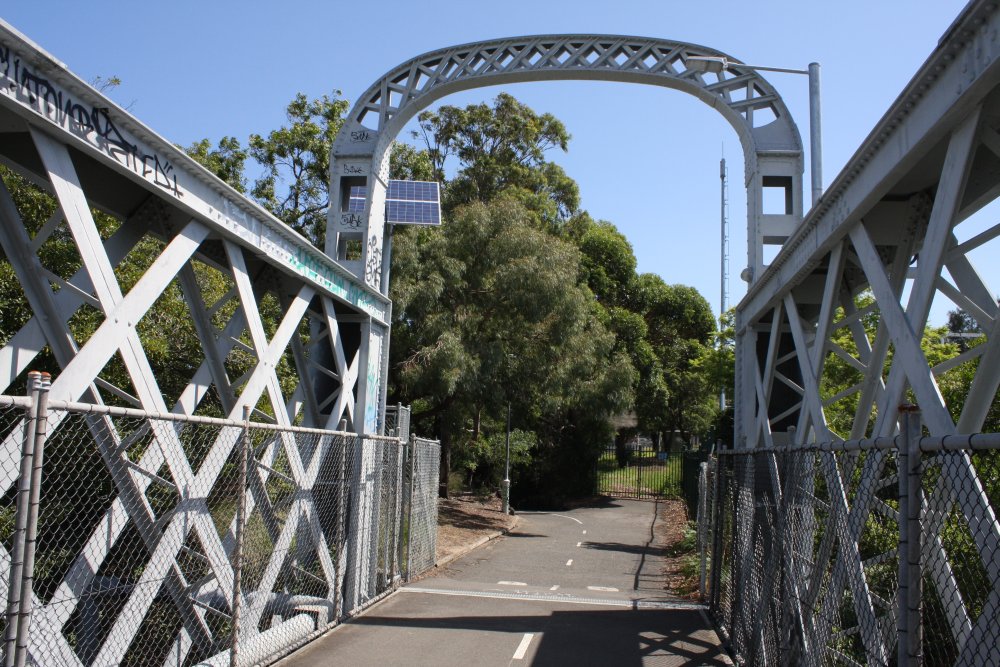
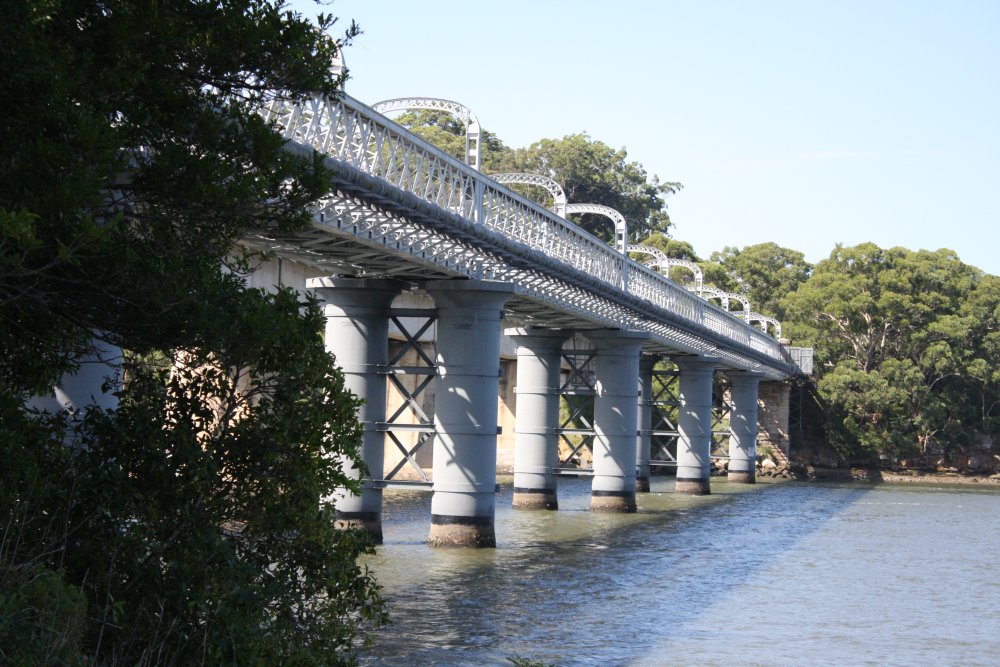 The Old Como Bridge |
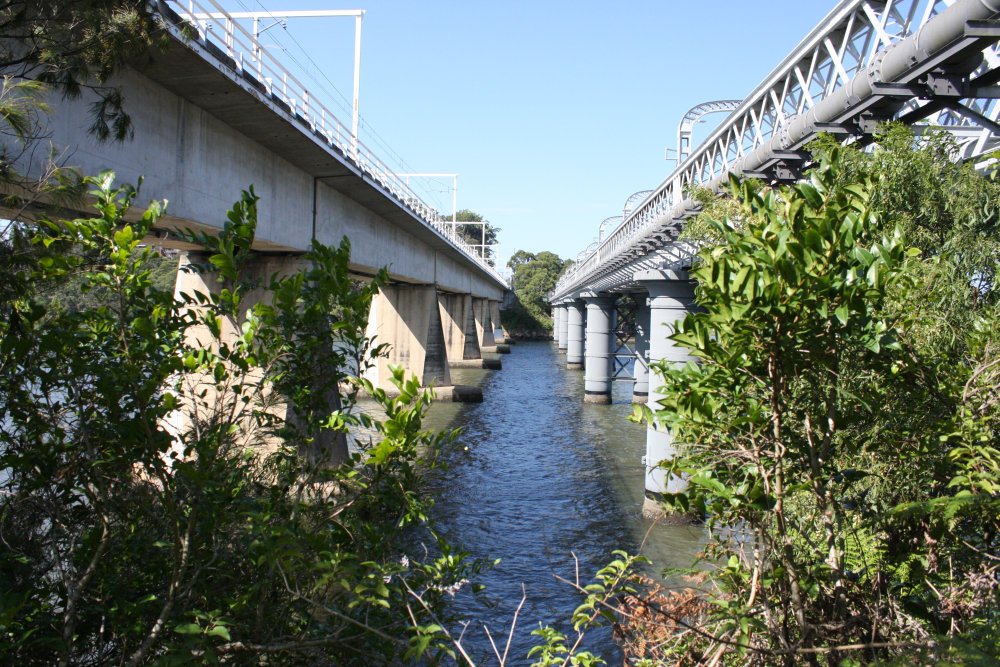 The New and Old Bridges |
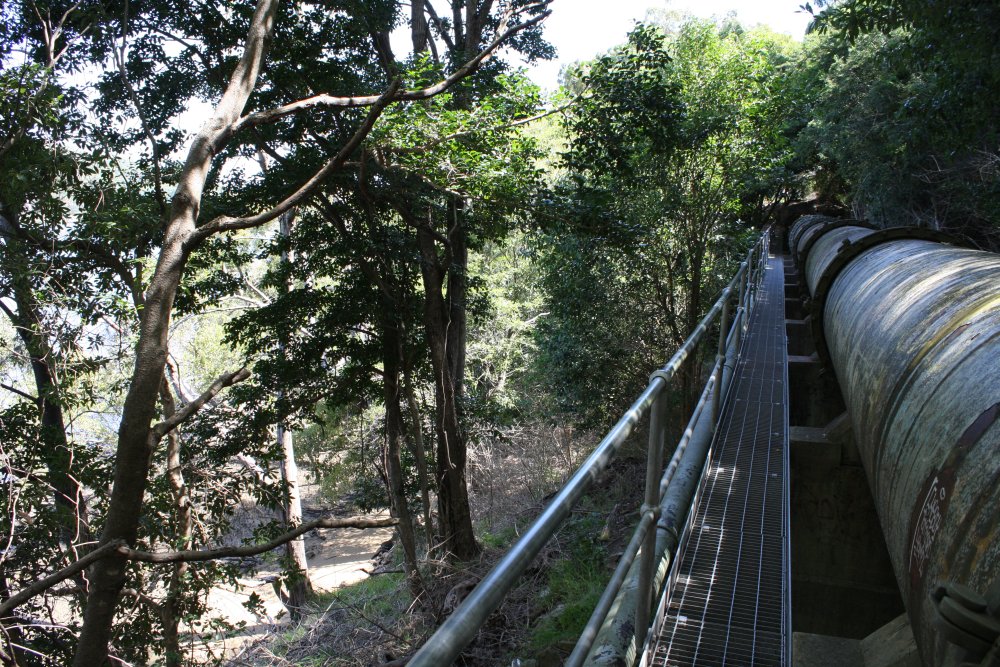
The old bridge wasn't formally open to the public but this was the early 1970's, when government had not yet gone safety-nazi crazy, so there was nothing to stop people using it if they wanted. You had a choice — either walk on the wooden rail sleepers (being careful not to miss your footing as you'd fall to the river below), or use the wooden plank walkway alongside the water pipeline. The problem with that was the planks were quite old, and only supported at the ends. If they broke, you'd fall to the river. Personally I prefered walking on the rail sleepers.
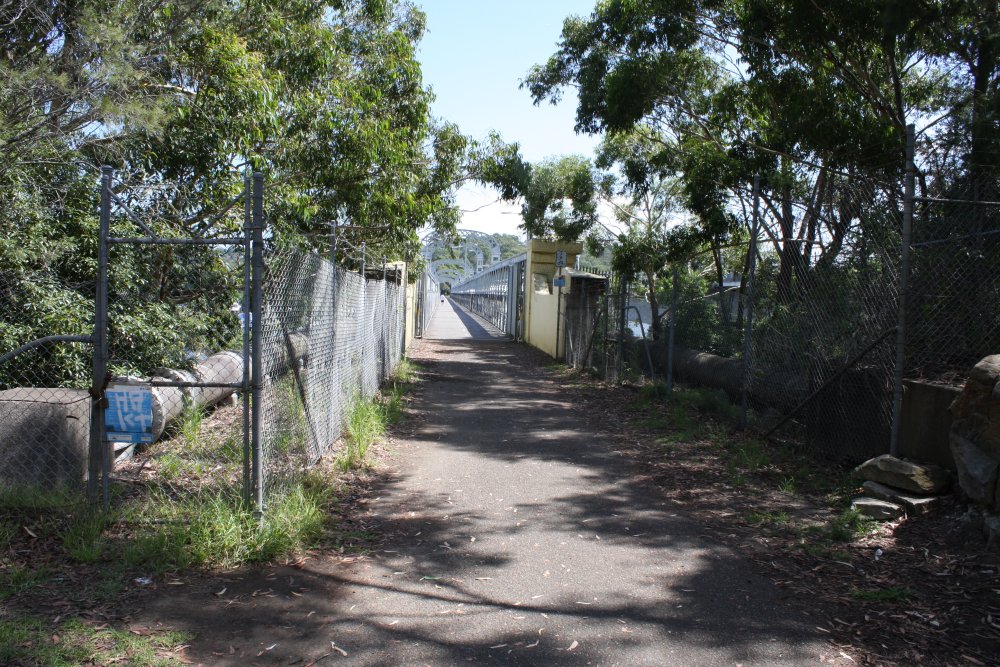
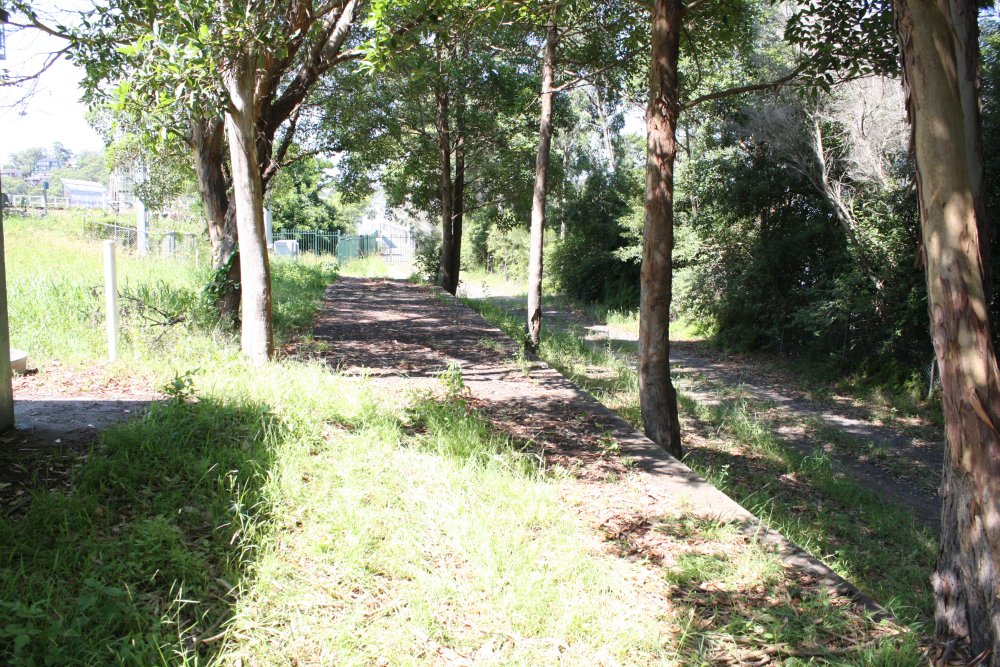
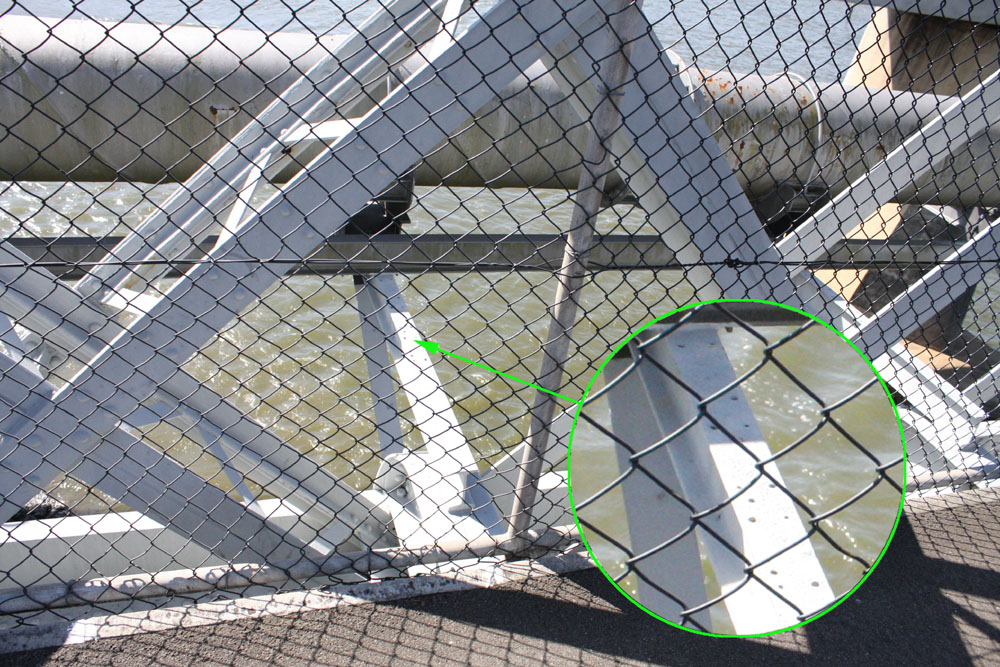 Nowadays the rail bed of the old bridge is converted to a pedestrian walkway and cycleway, complete with safety-nazi high mesh fence, and the old wooden pipe walkways are removed. But you can still see the bolt holes where the planks were attached.
In Oct 1972 I turned 17. At that time I often made small metal sculptures from found odds and ends, fabricated using the simple tools I had then - a small electric drill, files, hacksaw, soldering iron, etc. I liked making things in metal, both the sculptures and for my electronics hobby. But I was very poor, and had extremely limited ability to buy anything. I was a shy single-child teenager, with no transport, little money, not knowing anyone else who did metalworking or electronics, and no idea of where to buy anything that wasn't available from the few electronics shops I knew of in the city. One of my big problems was obtaining materials to work with. I had to make do with what I could find, and in general the nearby public tip provided most of what I used. Again, there were no safety-nazis then, and it was possible to rummage through the dumped stuff.
One day in late 72 or early 73 I'd walked across the old rail bridge, and was looking around the old station. It was all more or less as it had been except the buildings and rails were gone, and a little to the West the new rail line had obliterated any older structures. At that time it was all open public space; not even any fences along the active rail line. I don't have any photos of how it looked then, but here it is in more recent years.
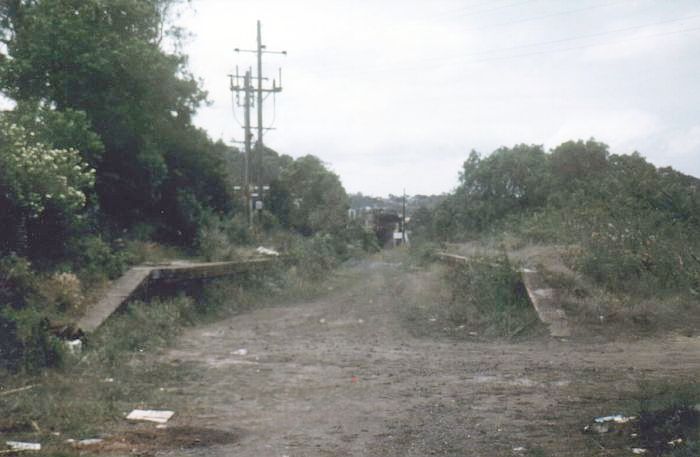 1986 (© Graeme Skeet) |
 2003 (© Matthew Fitzhenry) |
 2015 |
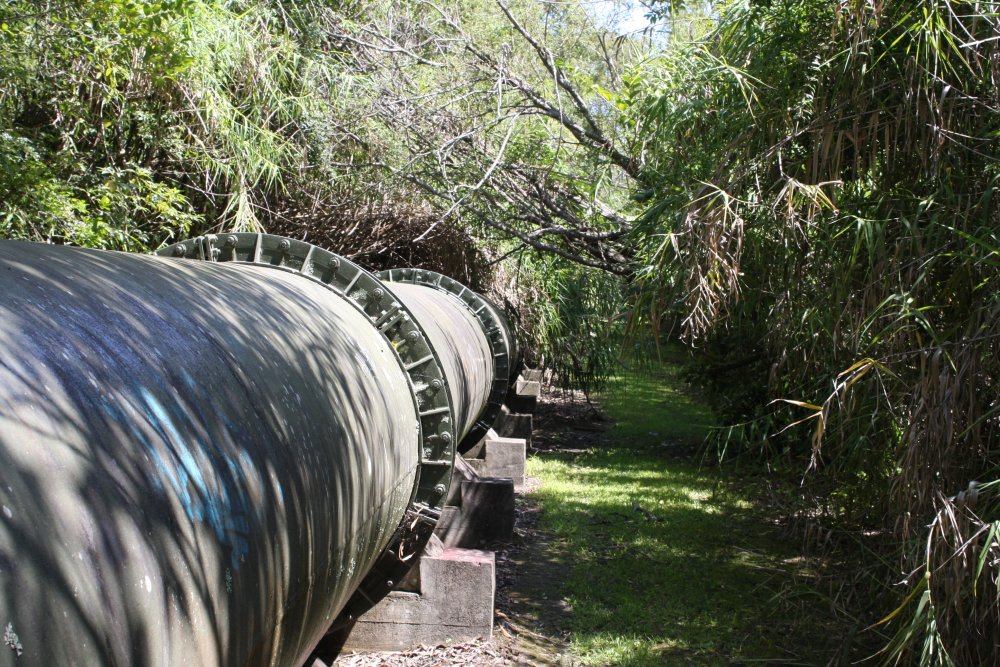
The cable contained 56 individually paper-insulated thick copper signal wires. There was no enamel on the wires, just the paper, which peeled off easily. Ah ha! I could use this wire for all kinds of things! At one end of the exposed run of cement troughs the cable disappeared underground. I was able to free something like 20 meters (I don't recall the exact length) of the cable from the exposed run of troughs, which altogether was impossible to lift. I hacksawed it into two lengths, that rolled up for carrying were still very heavy.
Pfft. You're right, but also silly. Something abandoned, vs something actually on a garbage tip, nobody cared then. Also I don't care for such opinions now, since their natural progression results in situations like people being charged with 'stealing' for picking up something from a roadside junk pile, or even randomly off the ground. "Stealing by Finding"; isn't the law great? There's a guy in gaol in the USA for collecting rainwater on his own property. What's next, stealing by breathing?
Of course, and it shouldn't even need saying but I'll make it clear for the dimwits, taking anything at all from rail (or any other) infrastructure that even faintly might not be ancient long-abandoned unwanted and disused rubbish, is a total no-no. Not least because if it was actually still in use, the absense could end up killing people. Also of course, the law doesn't make any such distinction about 'long abandoned rubbish'.
Note, the State recently announced that it's going to massively violate the property rights of thousands of Sydney residents, (including mine) for corrupt and lying reasons. So much for the Rule of Law.
With two or three such lengths done, that gave me a good stock of the wires, all in approximately one meter lengths. The remainder of the cable I stored under the house. For making sculptures with the wire, I straightened and hardened the wire pieces by stretching, with one end in a vice, and the other end in pliers. It was soft enough to just stretch it by hand, or I could use a hammer to tap it longer. Then when working with the straight lengths, I could cut multiple pieces to identical length using fine tin snips and end stops. Pieces were then soldered together in geodesic structures. It was quite a nice, satisfying process, producing objects that were very interesting to see. The major downside was they were also very fragile. Even light force applied to the middle of the wire struts would bend them, and it was almost impossible to get them looking perfectly straight again. Another problem is keeping them clean.
I made several constructions with some of that wire, including a major one for my HSC art final exam. That's a sad story, for another time. Today I only have two wire sculptures surviving since those years.
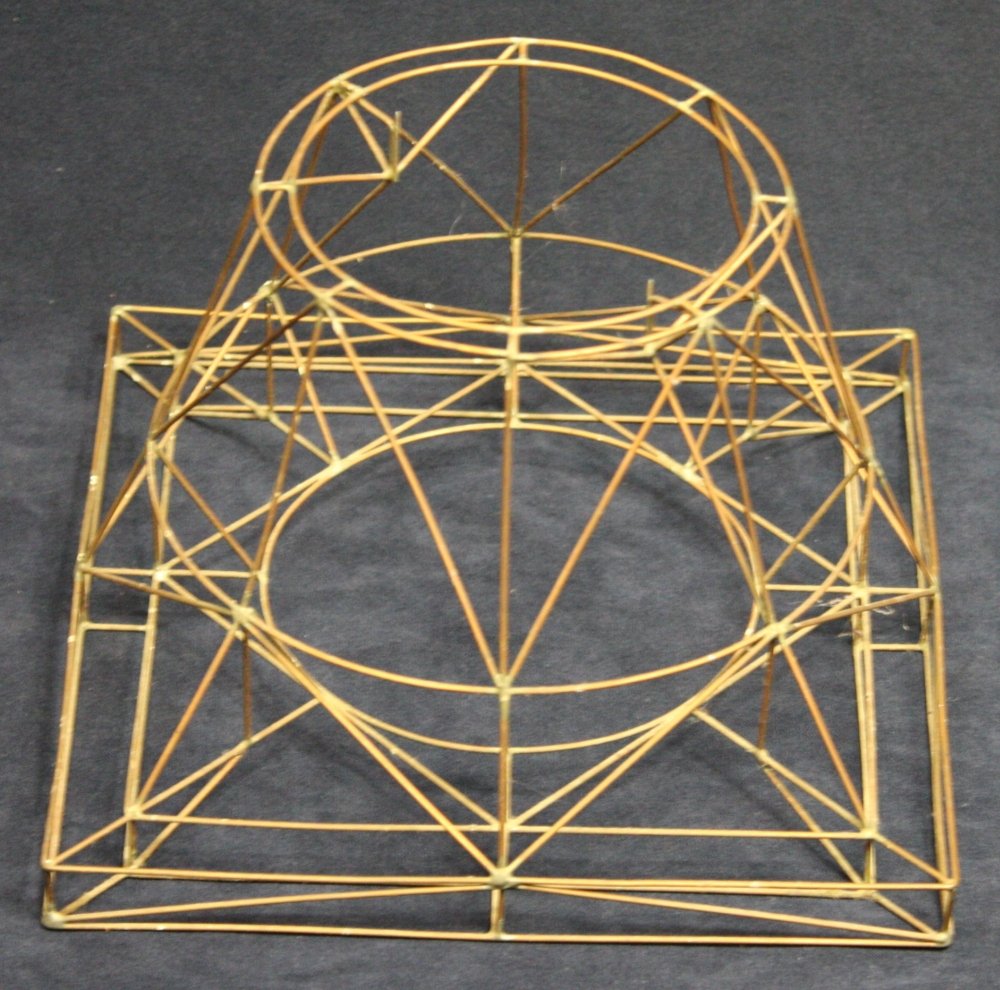
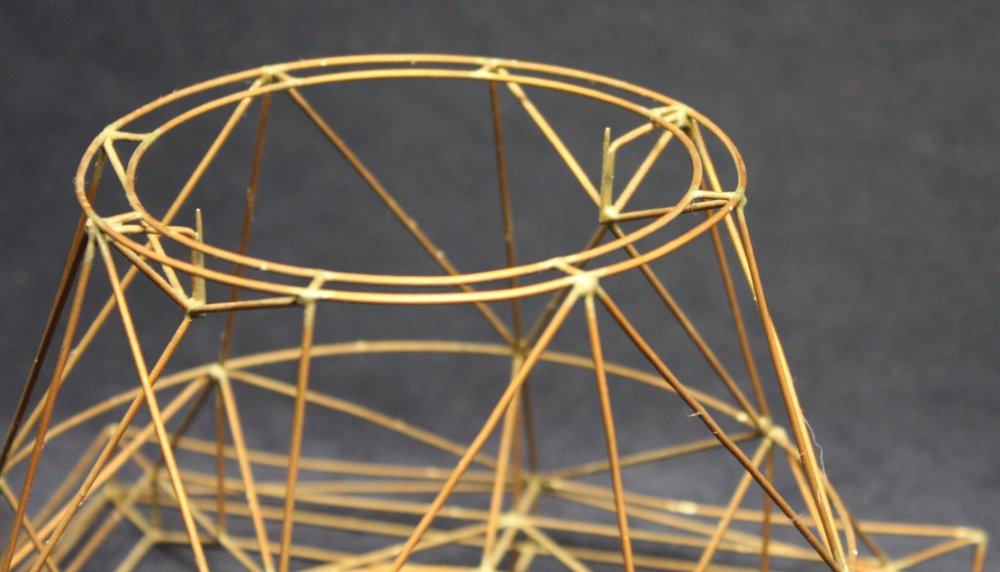
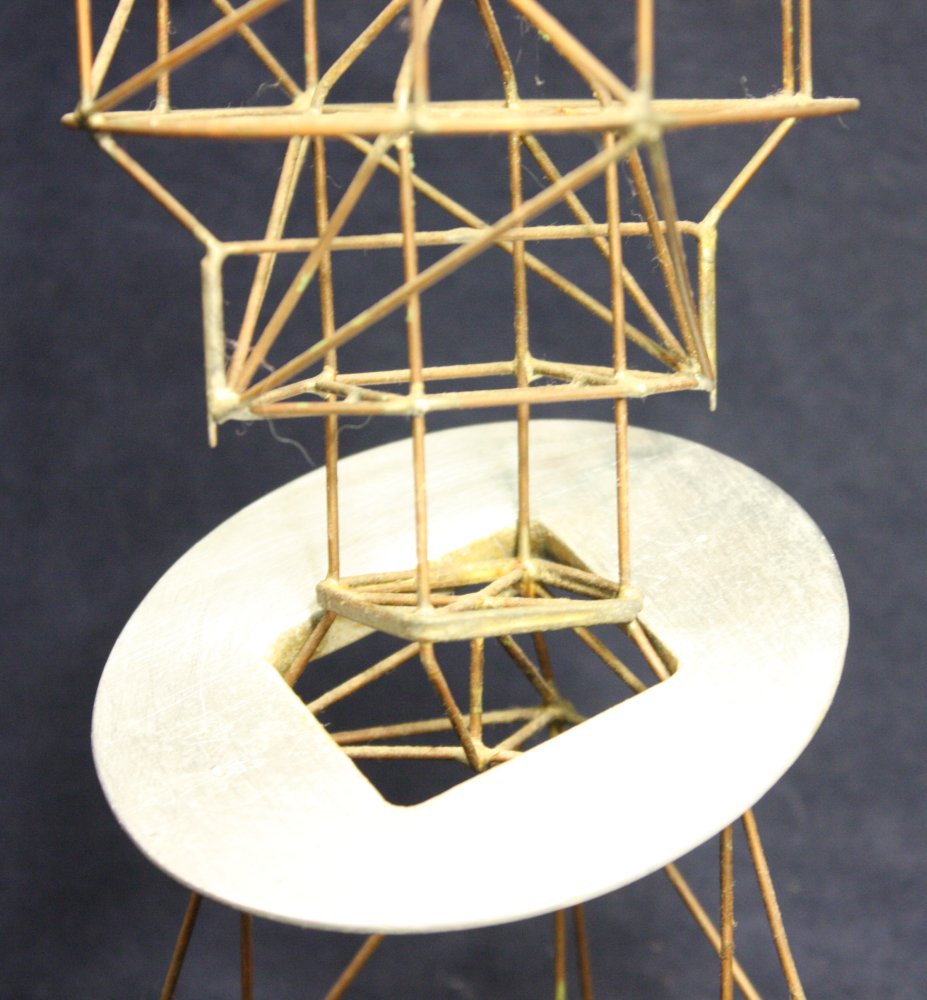
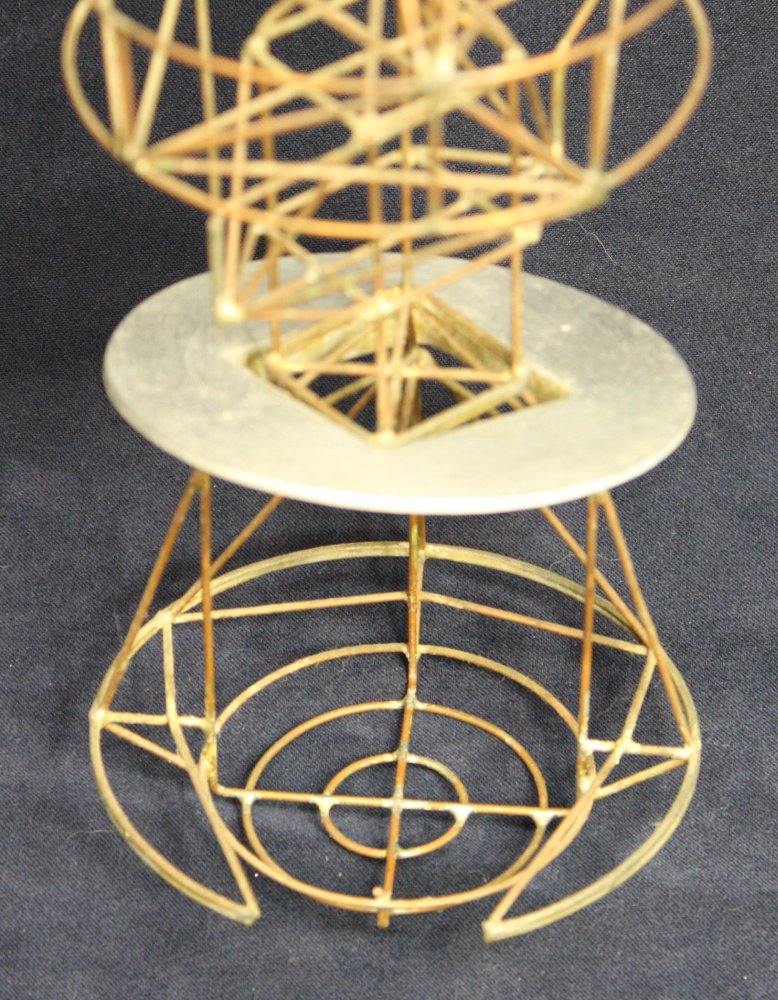
 One is this tower. It's gimballed and counter weighted at the base, and waves sedately in any breeze. Sadly the vertical part has been badly bent a few times over the years. The whole thing is also a dust magnet, since at 1.4m tall it's difficult to enclose.
For an animated gif of it moving, click the pic at left. 2.6MB file.
 |
 |
 |
The base supports the tower gimbal plate on two pin-points. Literally dressmaking pins, with their points rounded off. I used the springy steel kind, not the soft bendy ones. They are soldered to the copper wire support frame.
 |
 |
 |
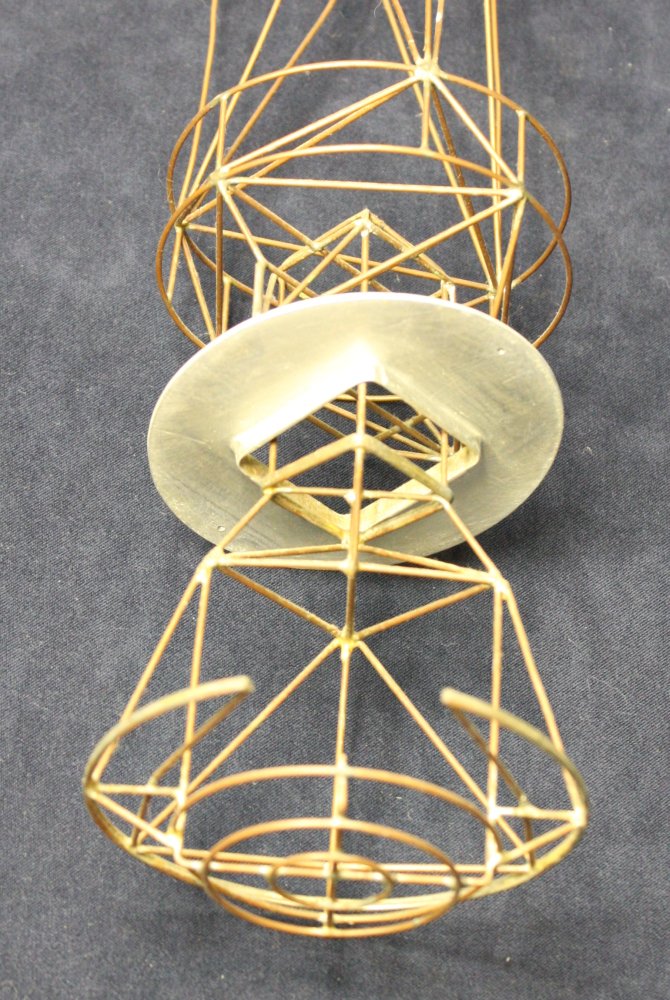 |
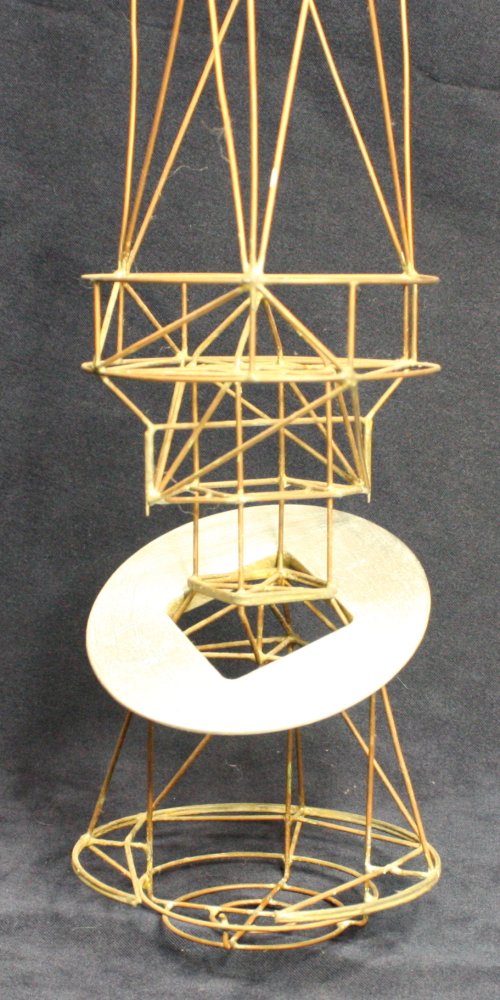
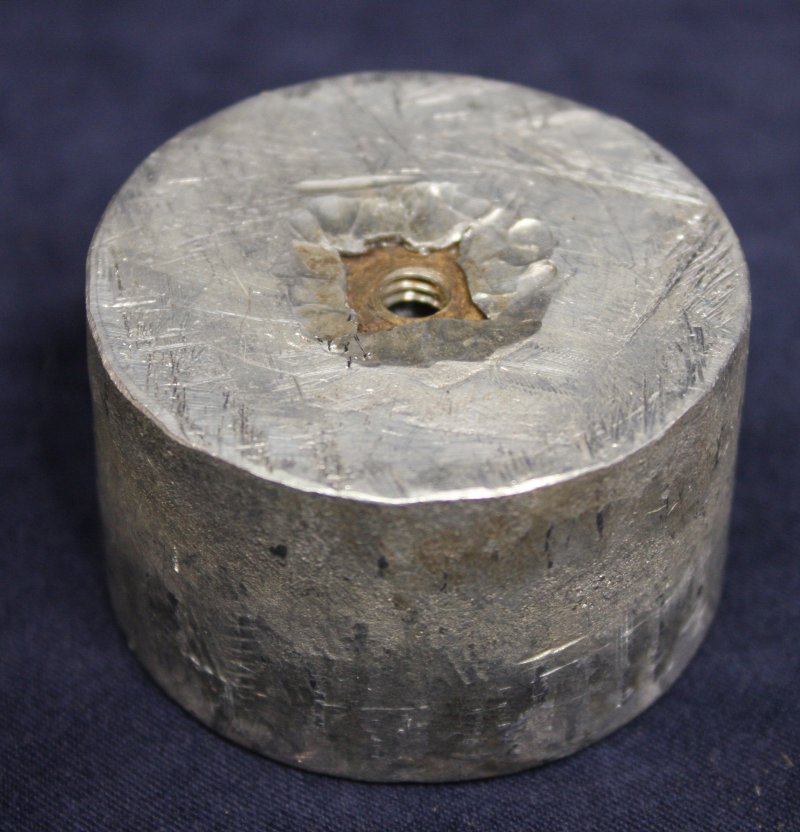
The tower also has a pair of pinpoints, that rest on the gimbal plate. The plate I cut from a bit of scrap aluminium, then beat over a lip for strength around the center hole. Each side of the plate has a pair of small indents, in which the pivoting pinpoints rest.
 |
 |
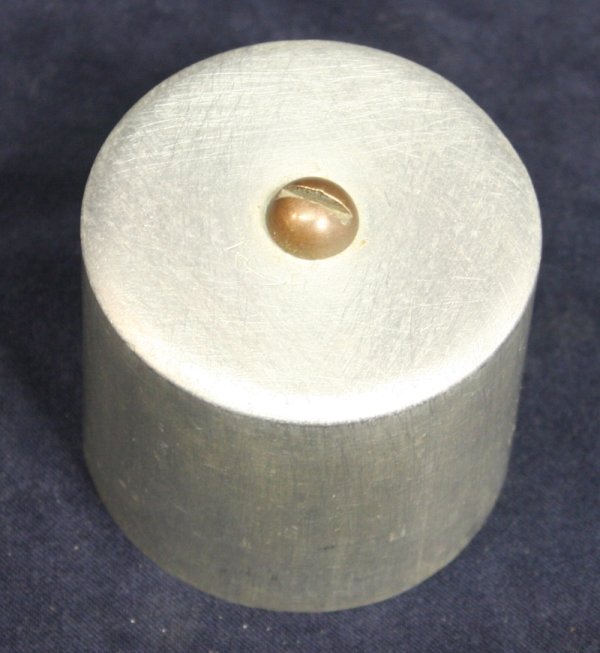 |
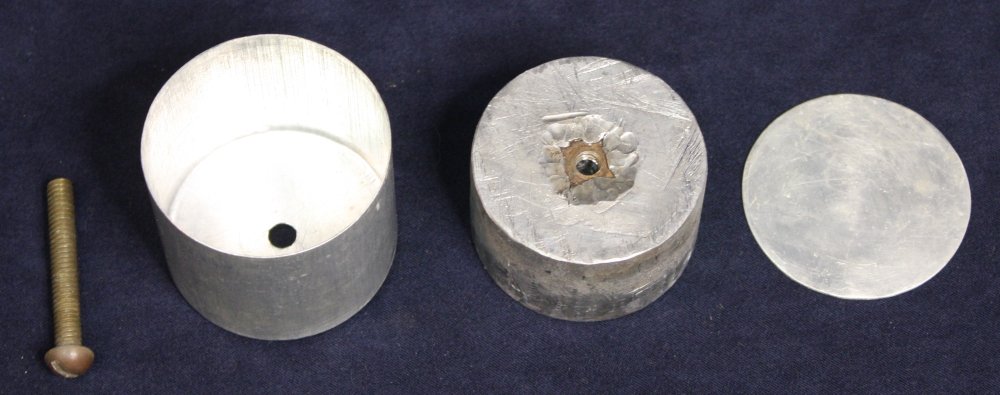
The base weight is a cylinder of lead, that I cast to fit the aluminium cover. The height of the lead weight inside the cover is adjustable, allowing the center of gravity of the whole moving structure to be shifted closer or further below the gimbal plate center. The closer the two are together, the slower the tower swings. I didn't make it possible to bring the two very close, since then any slight balance offsets make the tower rest position noticably off vertical. As it is it still gets out of adjustment (now that the tower itself is bent and wonky.) Centering adjustment is by very slightly bending the four vertical struts passing through the gimbal plate. Which is why they have no cross-bracing.
This tower was something I made for my first girlfriend, when I was 17 and she 16. She liked it and took good care of it. Fortunately when we split up a couple of years later she gave it back. It has some fine memories attached.
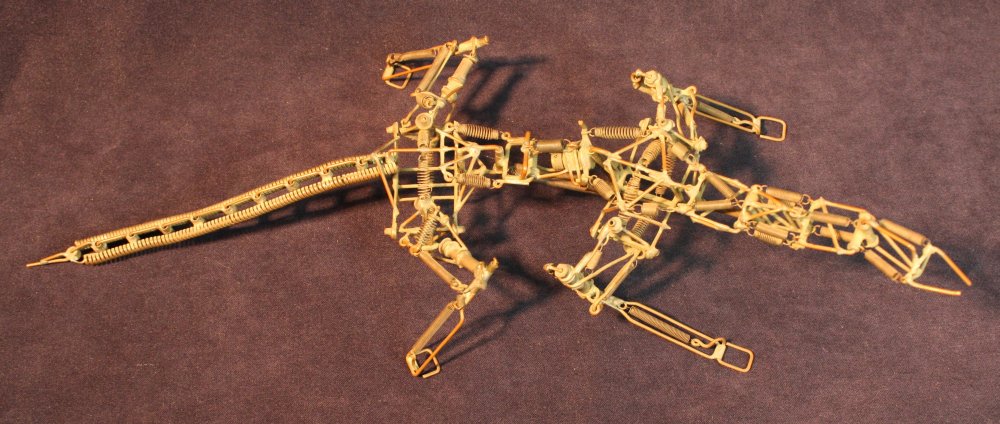
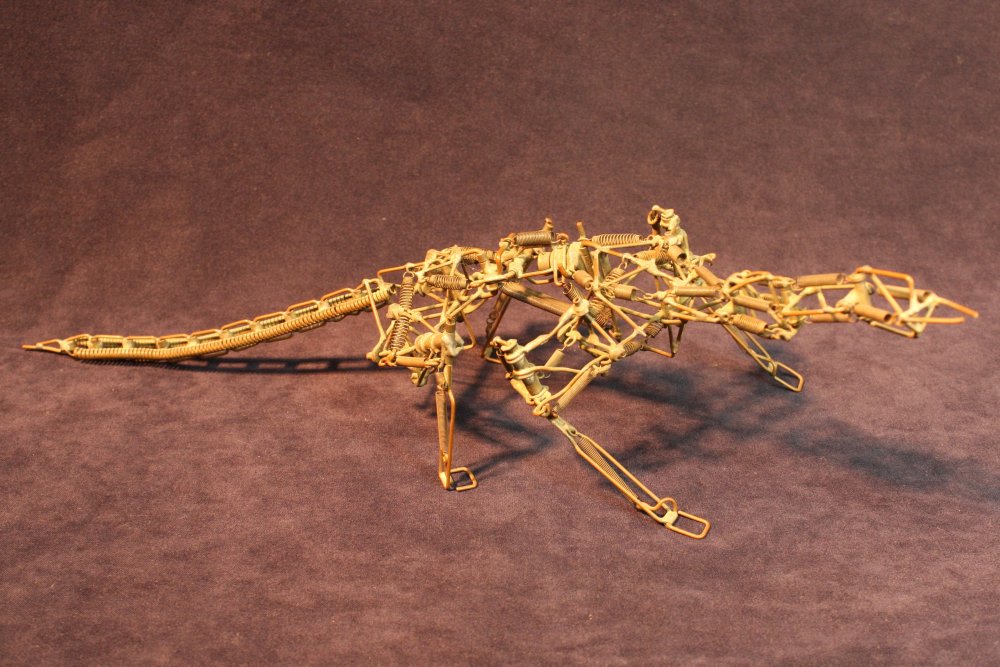
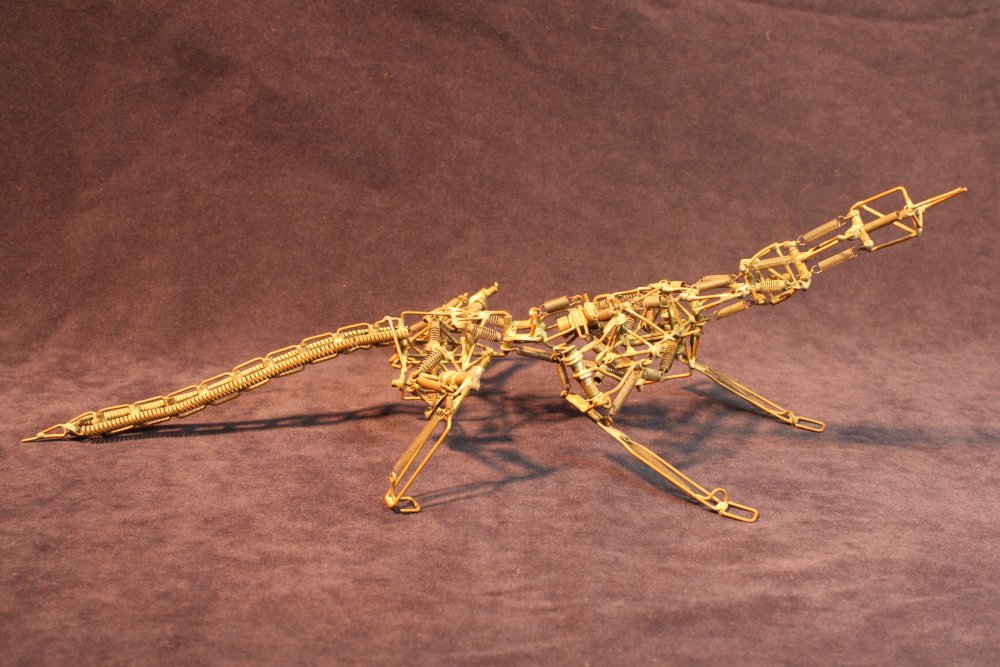
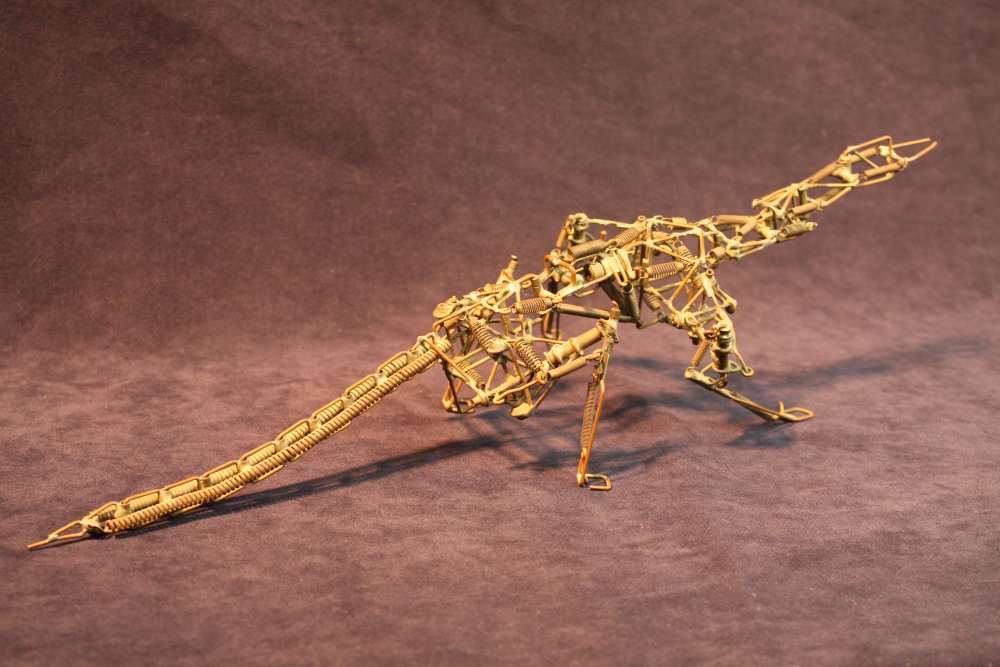
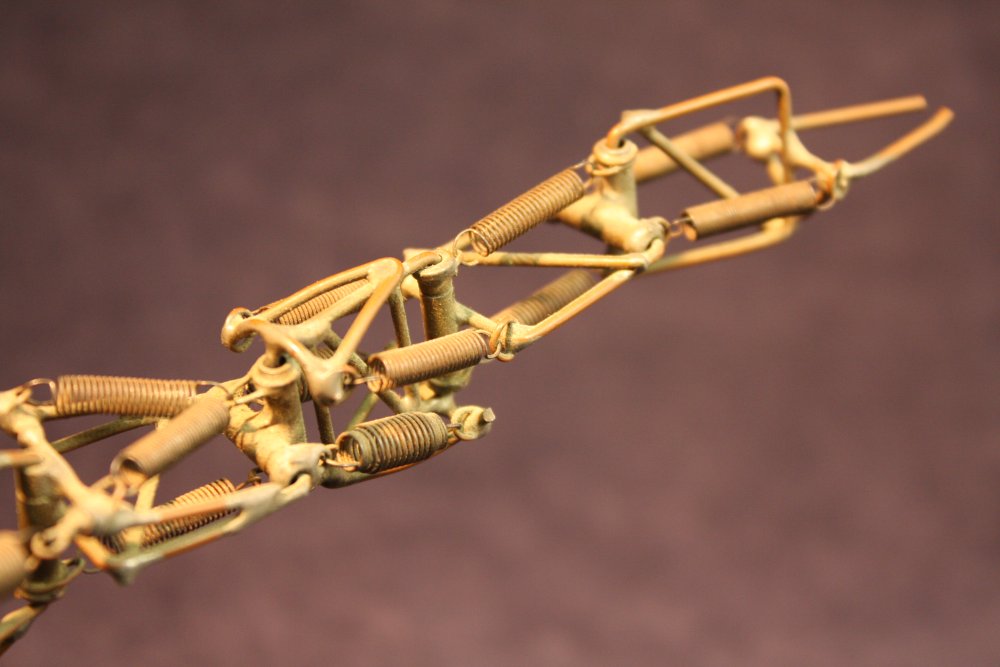
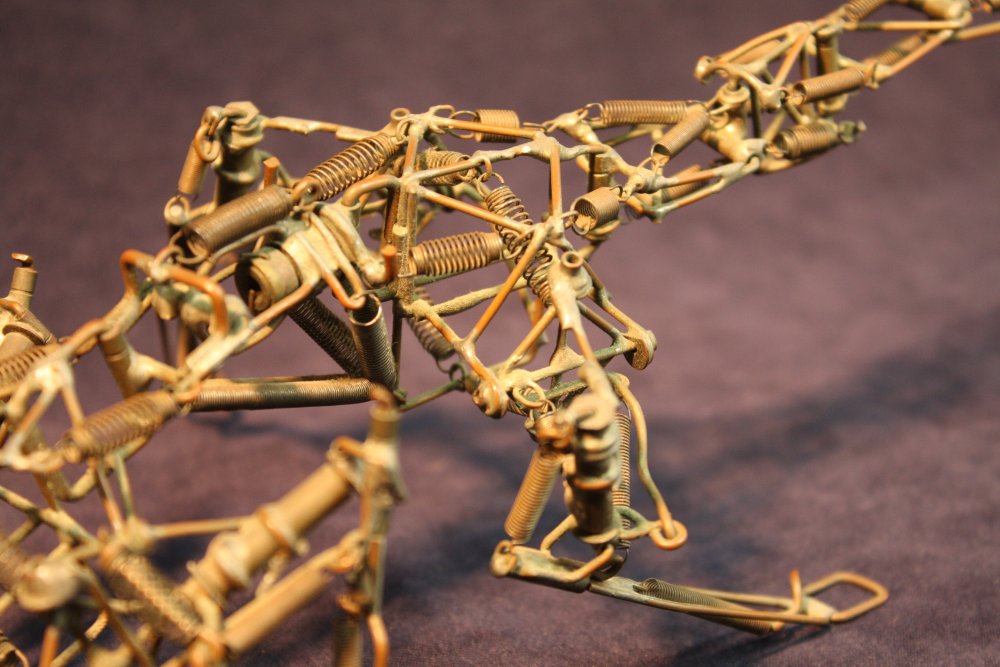
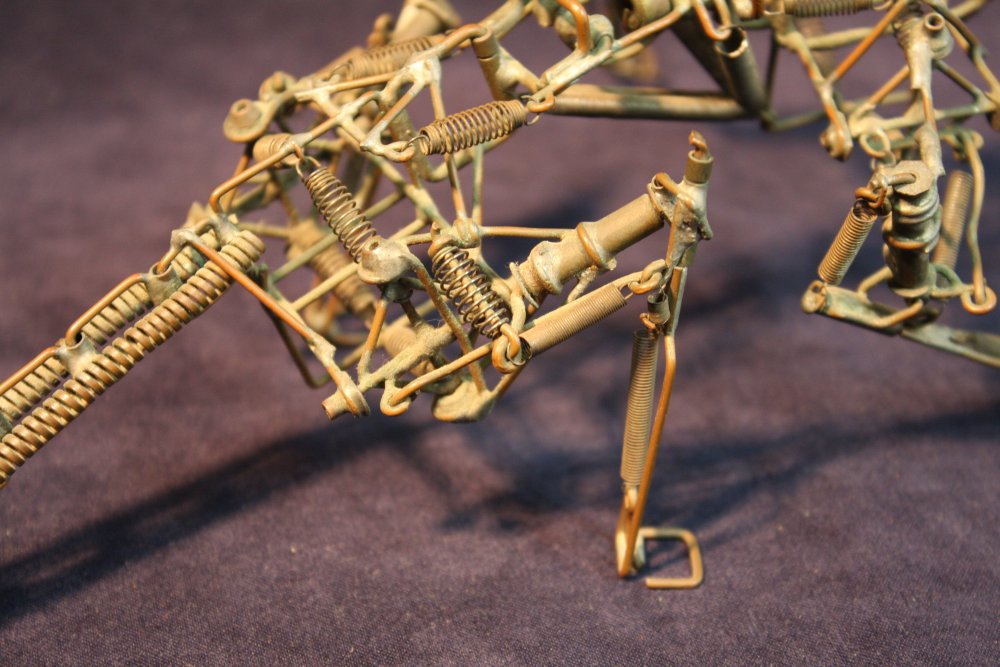
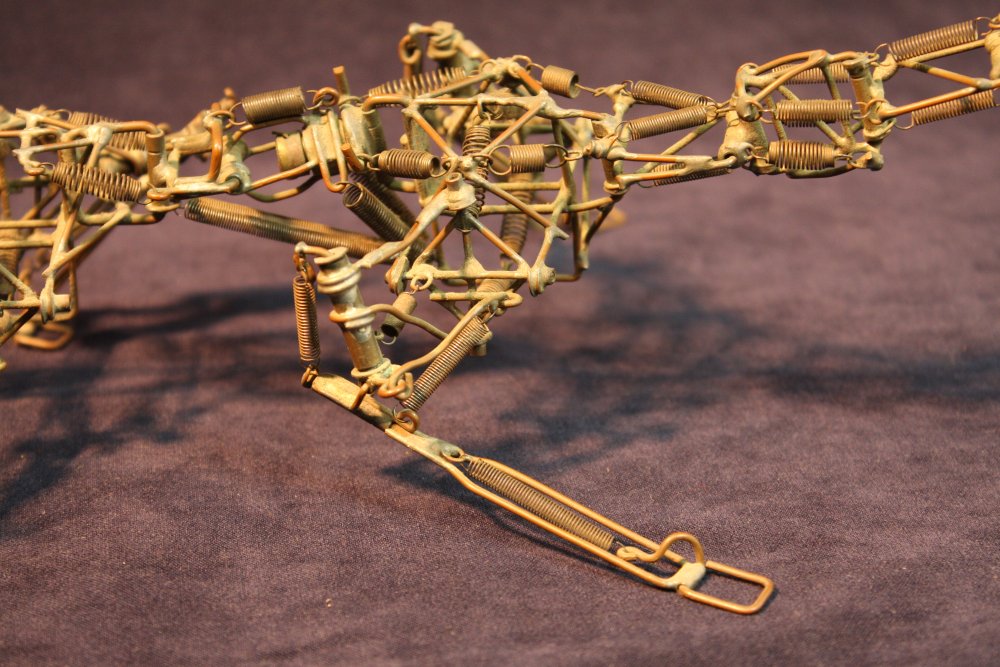
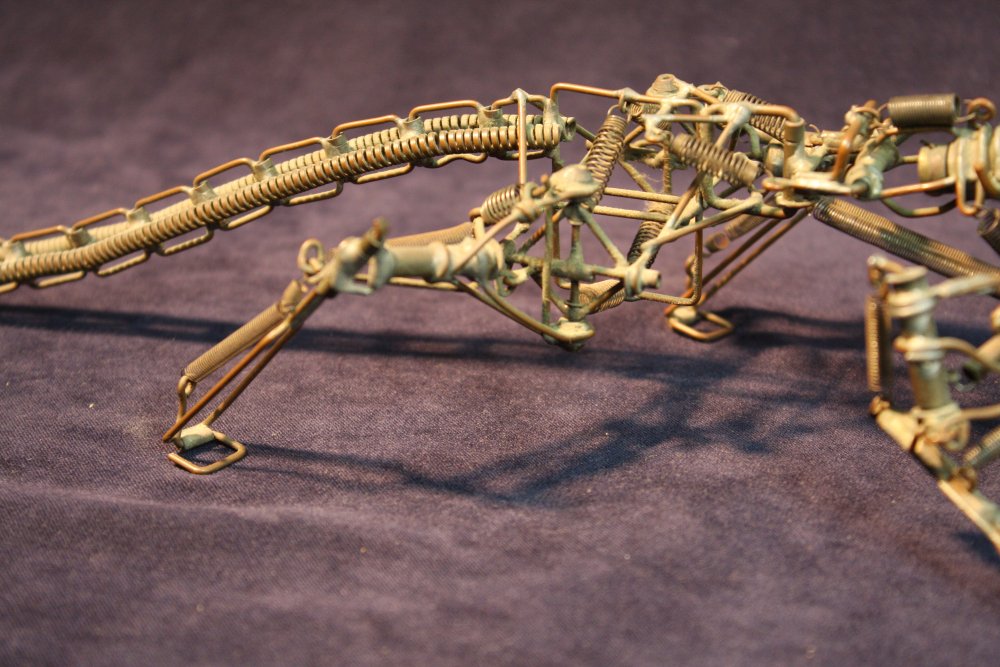
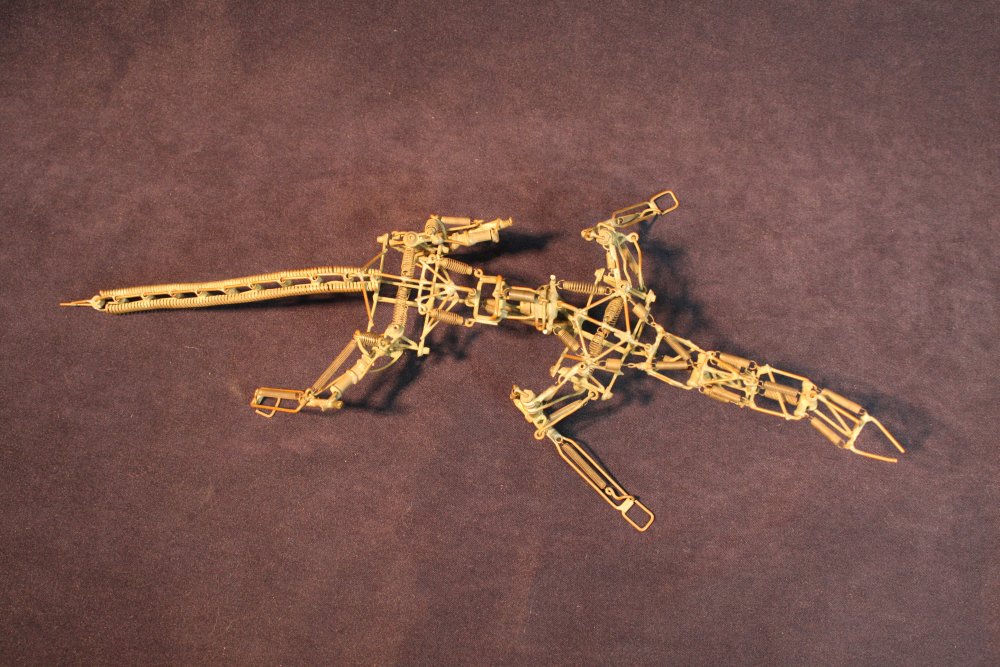
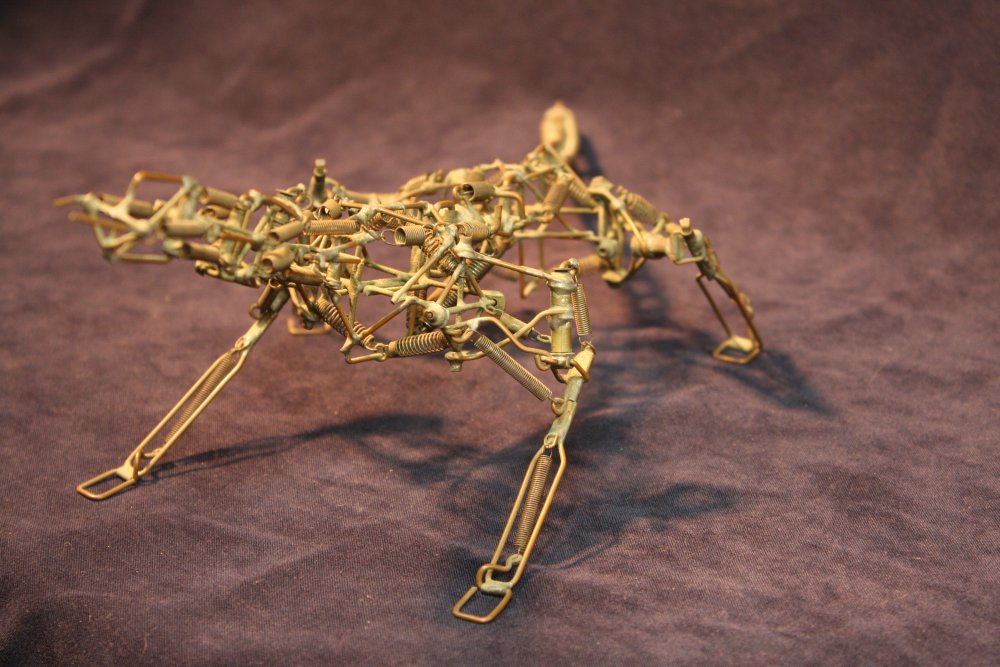
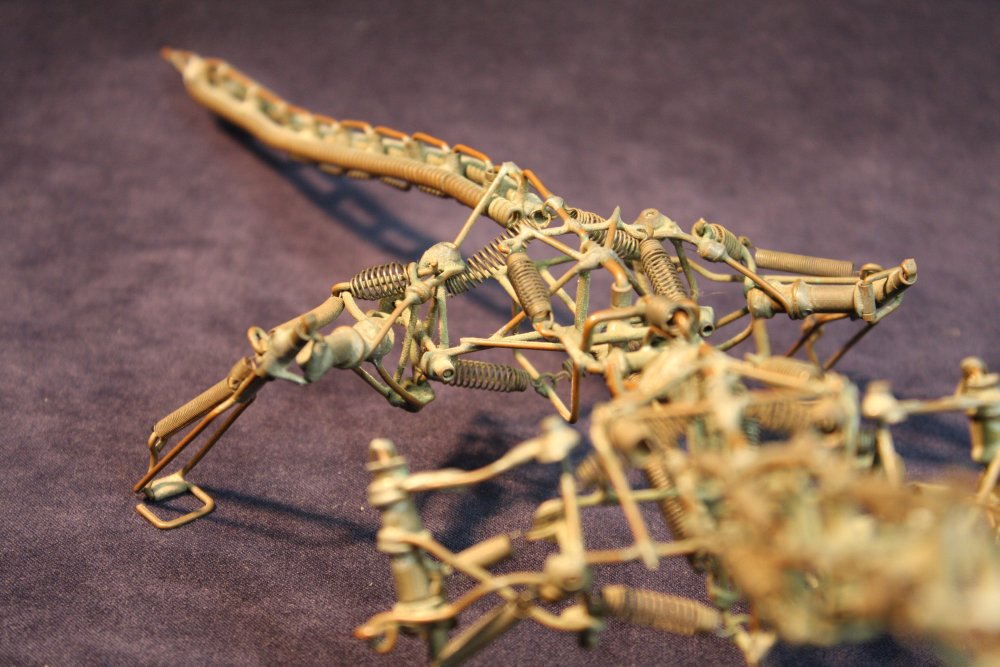
The other survivor is this guy.
 |
 |
 |
 |
 |
 |
 |
 |
 |
 |
 |
 |
The springs and small brass sleeves are mostly from an old mechanical calculator I'd found years before. The spirals for his tail are from a bicycle brake cable sheath. I'd wanted to represent the head, but found any more weight there was too much for the overall balance, and made him look like a cow grazing.
In general this geodesic wire frame system is not really a terribly practical sculptural construction method, since the result is so fragile. But I was naive then, and didn't yet know how careless the world (and other people) can be.
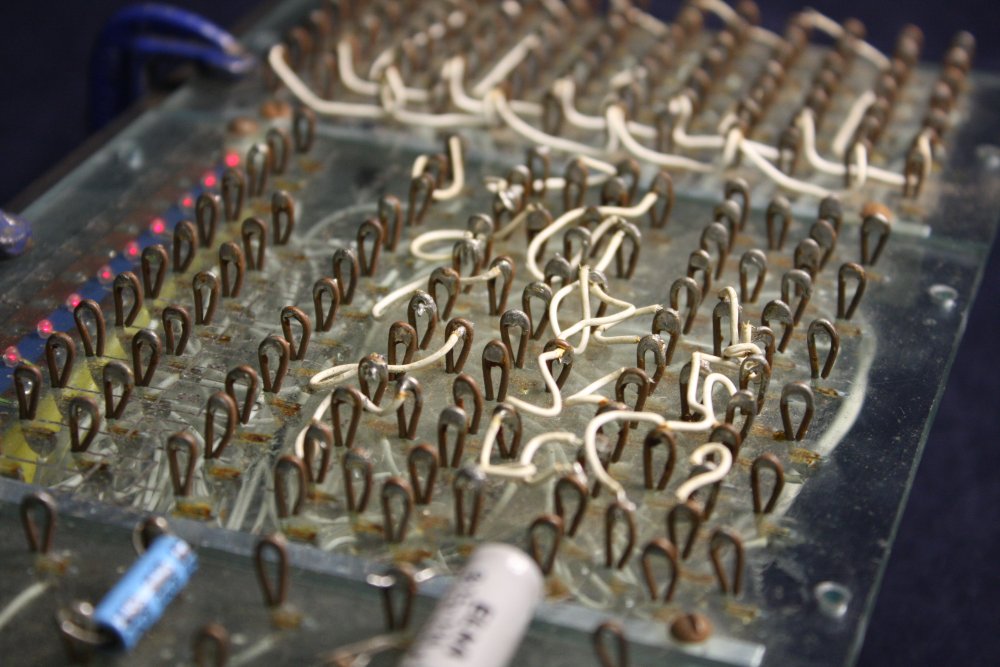
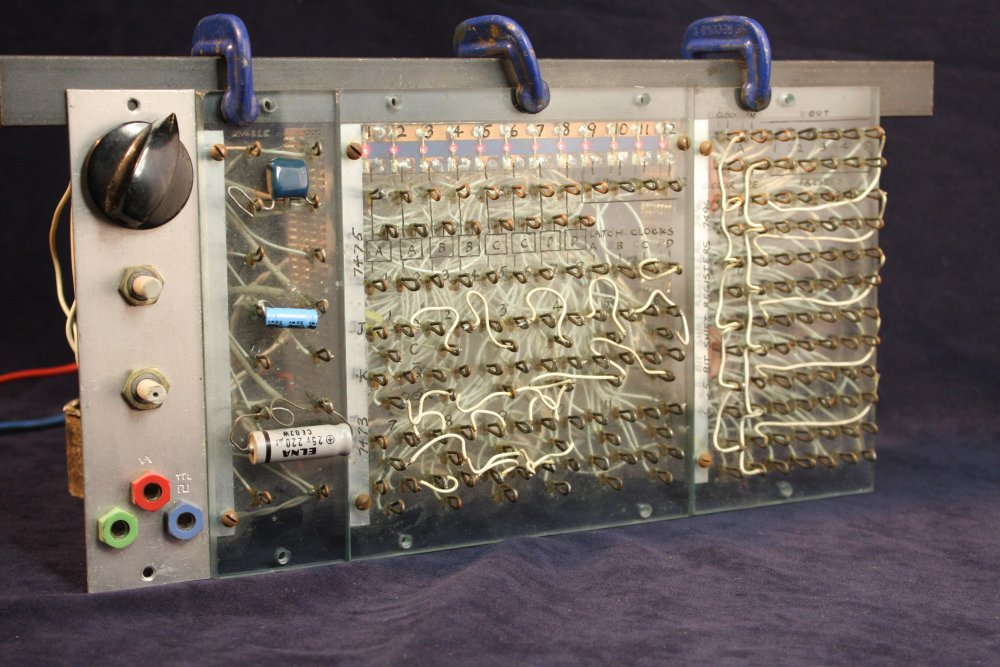
Here's another use of some of that wire. During my mid-teens I'd been constructing a modular system for playing with electronic sound generation. I wouldn't say it deserved to be called a synthesizer, since it was very much a bunch of bits cobbled together. Some of the modules were just blocks of 7400-series logic ICs, with all the functional pins brought out to a front patch panel. The idea was to allow patching simple logic functions into the rest of the not-quite-a-synthesizer.
Of course that required a lot of patch points. Remember I was poor. Buying a couple of hundred small patch sockets and matching plugs was out of the question. I did have a bunch of cheap alligator clip leads. So how to make, for free, a dense patch panel that could use aligator clip leads? And also allowed semi-permanent soldered wire jumpers?
If you have some nice thick copper wire, like this:
 |
 |
 |
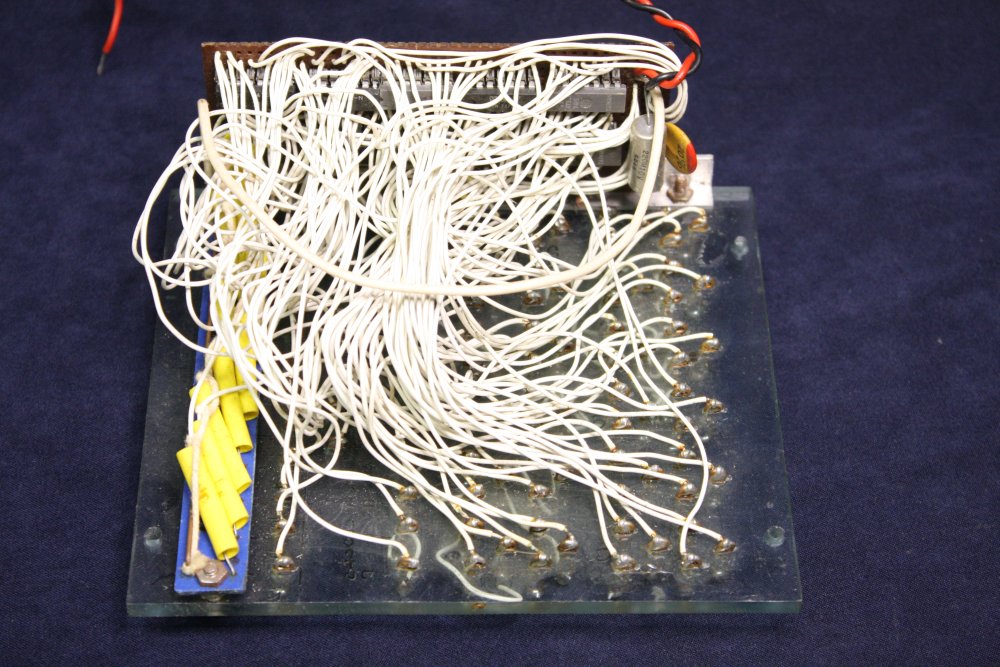 |
Those are just three of the modules, g-clamped to a bar for the photo. The original frame is long gone. I do still have most of the other modules, though some had parts harvested. Urrgh! At that time I was just starting to teach myself about TTL logic. Now looking at my efforts then, it's horrifying. No pullups on floating inputs (ie all of them), bad grounding, no static protection, no distributed power rail caps... Yet it worked. Plain old TTL was very forgiving.
After the disaster of the HSC piece I never made any more of the wire sculptures. That left the majority of the original cable, plus a bundle of leftover extracted wire. That bundle served me as a source of bits of thick copper wire for the next 45 years till recently, when it finally ran out. That and other recent events had brought me to thinking back over old memories, such as those wire sculptures. It occured to me that the remaining un-extracted cables were definitely the longest uncompleted 'todo' I have, and for me now it would be easy. So, I'd made a note to bring the rest of them home. Also good to clean out that old junk from under mum's house.
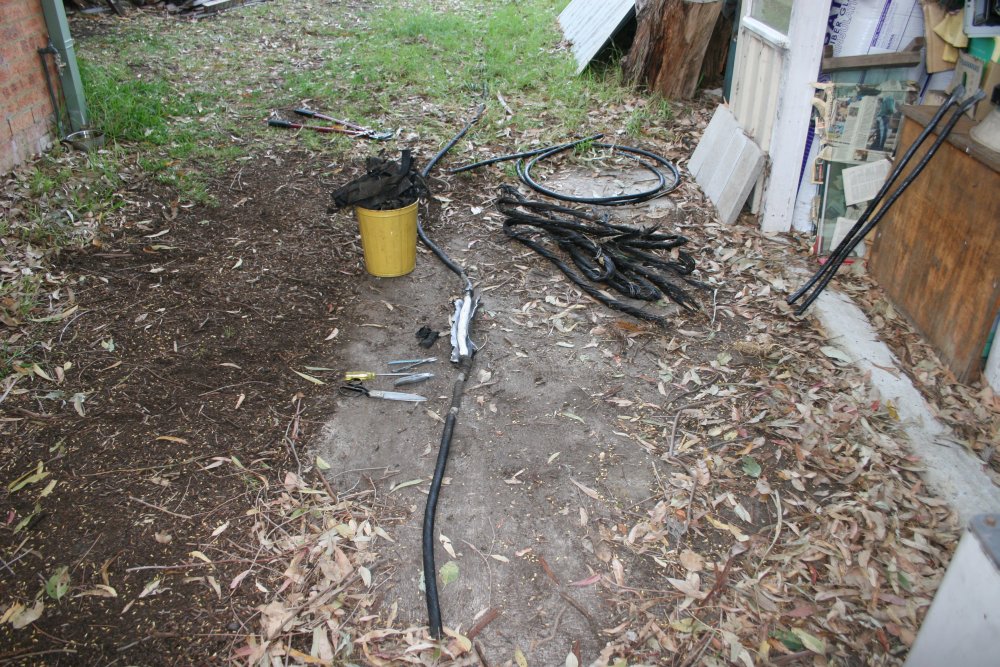
At home the next day I decided that rather than leave the two heavy, bulky sections of cable stored here somewhere as they are, with 'extraction' merely added to my absurdly overflowing 'to do' list, I'd extract the copper core wires immediately. This would also make storage easier since I'd be keeping only the wire in my workshop, for easy access. So I set about deconstructing the cables. I knew I could get the wires out intact from the entire lengths, unlike in my teens.
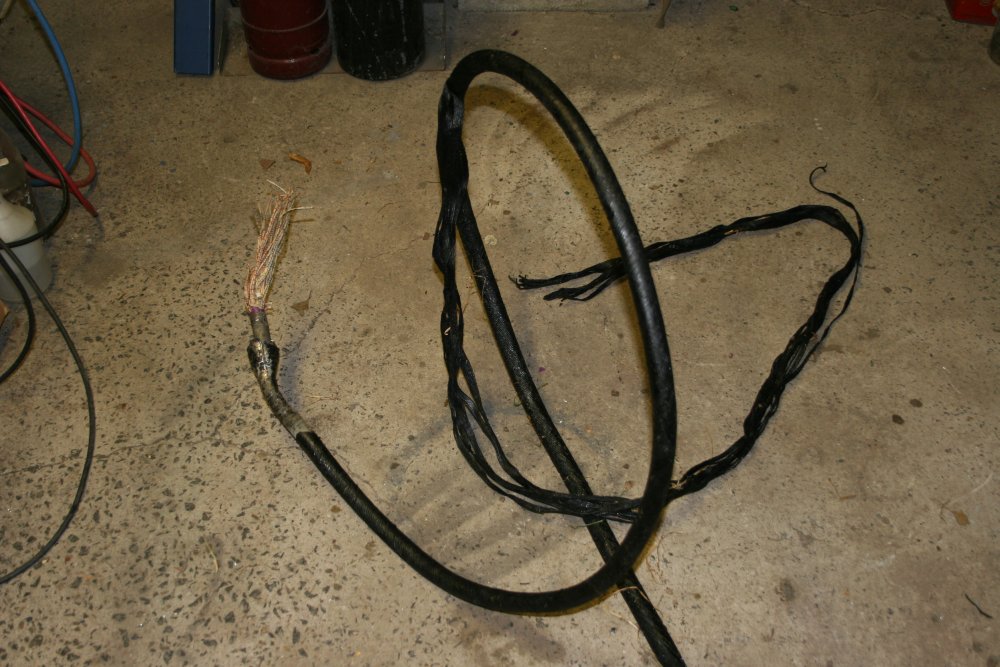
The first stage was to peel off the outer layers of tarred cord, armoring wire, and another layer of tarred cord. This is a really messy job since apart from the dried-out surface layer, the tar is still sticky. Also the steel wires are very stiff. But at least now I could bolt-cutter the wires as lengths were unwound, to avoid getting tangled up in the springy, sticky black-tarred wire. Also, gloves! I can't recall if I used gloves in my teens; possibly not. I did have one pair of welding gloves, but probably would have avoided getting them covered in sticky tar.
While stripping off the outer armoring steel wires I was thinking that this cable is really old, I'm unlikely to ever see another piece like it, and it's also one of very few relics I still posess from that period of my life. The cable was probably installed during the electrification of the Illawarrah rail line's original Como station in 1926, though as a rail signals cable it might have been earlier. Anyway it was certainly already very old when I found it. Now it's nearly another 50 years on.
Up till this point it still hadn't occured to me to take photos. It's just a bit of old cable, who cares, right?
 |
 |
 |
 |
 |
After stripping the outer armor sheaths I started to open up something on the cable that was quite interesting. A splice!
I was very curious to see what technique was used back then to join a multi-cored, paper-insulated and lead-sheathed armored underground cable. I had never seen this before. Uh... and only when I saw the very carefully done cloth binding did it occur to me that hardly anyone else ever has either, so I should take photos. Made me feel a bit stupid for not thinking of this before I began the cable deconstruction.
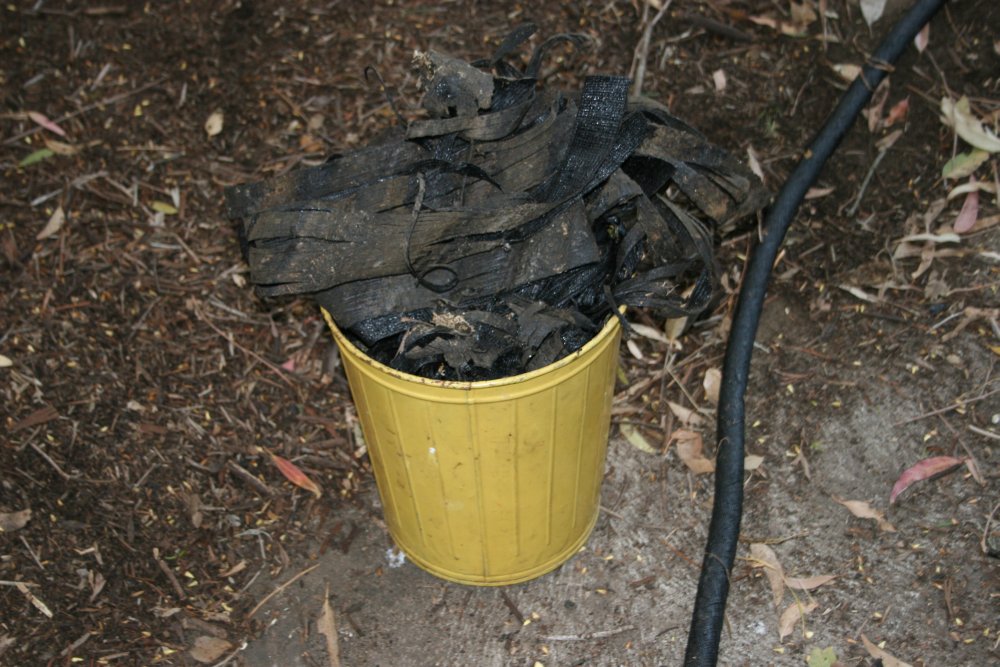
The black stuff in the yellow bin is the tar-soaked cord wrapping. I think I'll keep this! I tried burning a bit, and now I know how those 'flaming firebrands' you see in movies are made. It's this stuff or something similar, wrapped around the end of a stick. If I ever need to provision an angry mob, this will come in handy. I should keep an eye open for a bulk deal on pitchforks.
In contrast, the tarry steel armor wires in pic 4 are useless and a pain to handle. They're riding with my next trip to the metal recyclers.
The last pic, is starting to unwrap the fine calico binding tape. Not sure if this feels like unwrapping a present, or a mummy.
 |
 |
 |
 |
 |
Ah ha! So that's how they kept the overall join so uniform in thickness. They carefully staggered the joins of groups of wires.
Next question, how did they know which wires to join to which? The paper insulation is all the same colour, and although it has numbering bands, they only run 1, 2, 3 & 4 bands, with blue and red colours. That's not enough codes...
Spreading the join, it turns out there are also group coding threads, with different combinations of colours and number of threads spiralling around each group of four wires. With those all wires are unique, and joining cable ends unambiguously is possible.
Each wire join is twisted multiple turns, and the end soldered. So the solder joint has no mechanical stress.
The joins are wrapped in several turns of paper, that looks like it was sticky on one side. Maybe a water-activated glue, like old stamps?
Each bundle of 4 are all joined at the same length, but the different bundle joins are staggered to keep the overall thickness of the splice constant.
Then the whole wire set is tightly wrapped with plain white calico tape, secured at the ends with knots.
The taped-up splice is then sheathed with a larger-diameter lead pipe, so the splice is loose inside that pipe.
 |
 |
 |
 |
 |
Admirably skillful as it is, I still want the wire. And so someone's nice work from possibly a century ago gets cut to pieces.
The last two pics give a better idea of the bundle tagging. There's a central group of four sets of four (two red, two blue); only one red-blue pair of which has white threads. Around that the outer bundles of four wires each have combinations of black, yellow, and white threads.
The wires are 1.28mm diameter. There are 14 x 4 = 56 wires.
 |
 |
 |
 |
 |
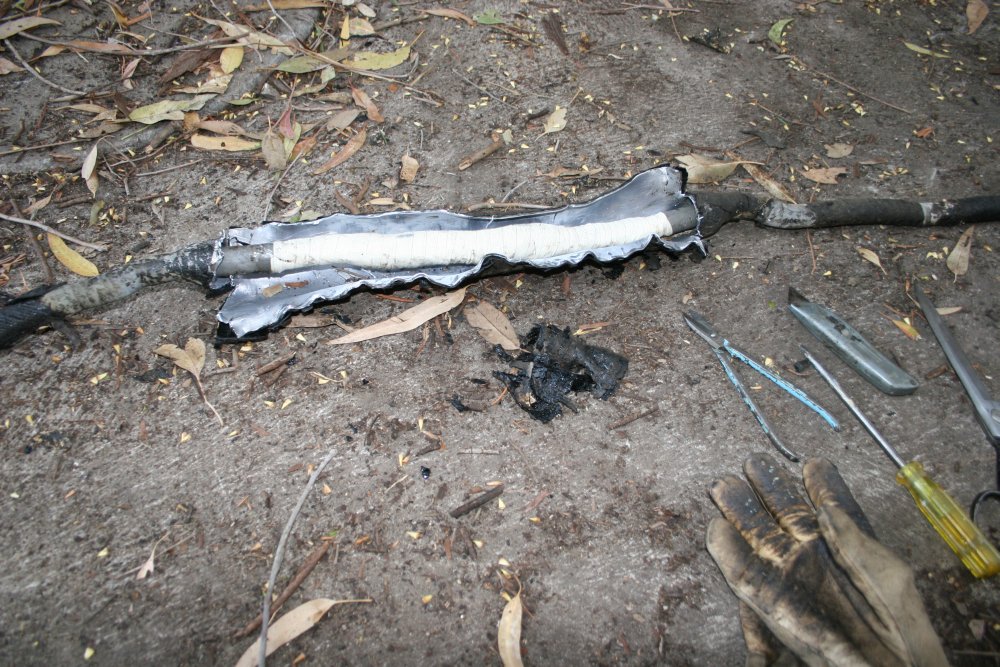
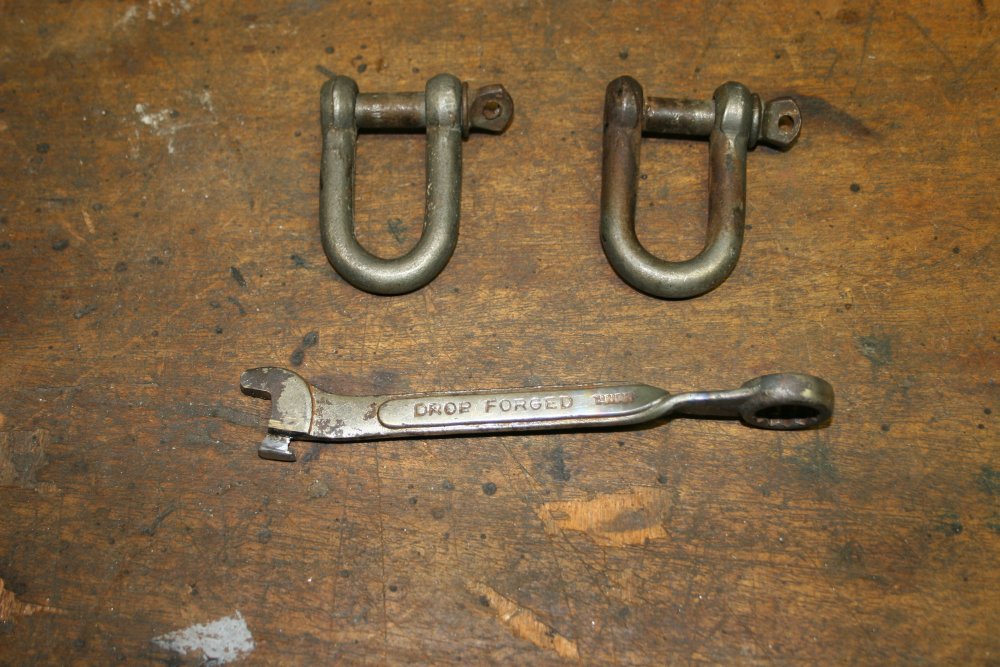
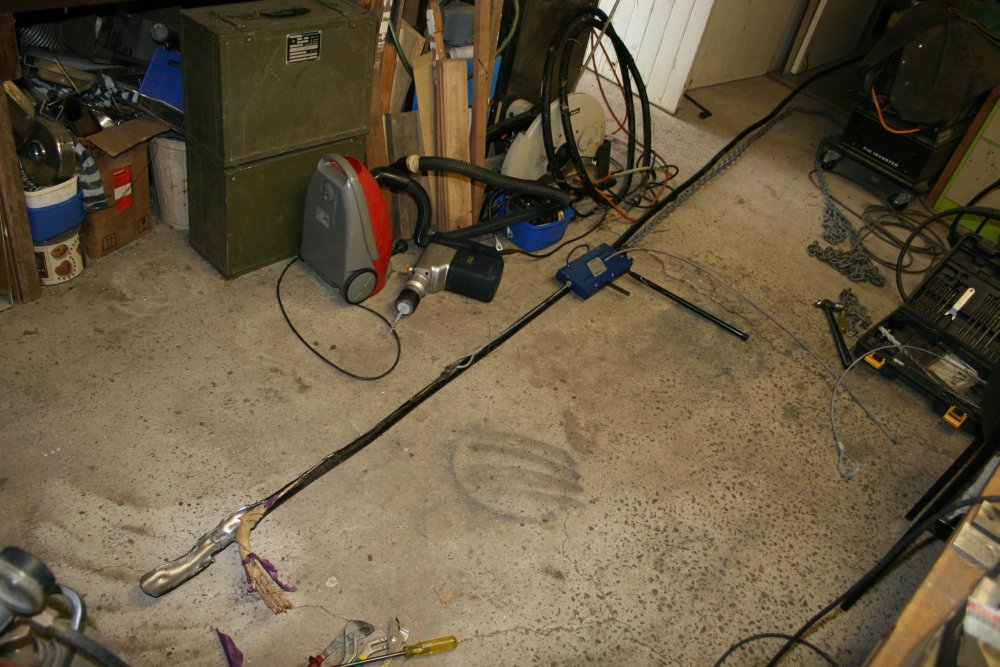
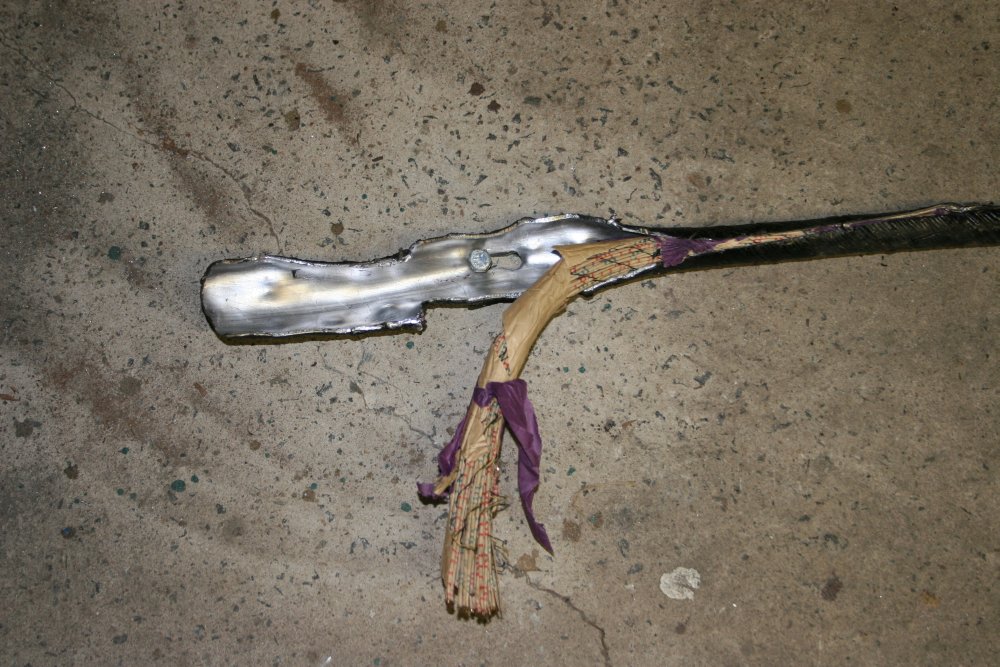
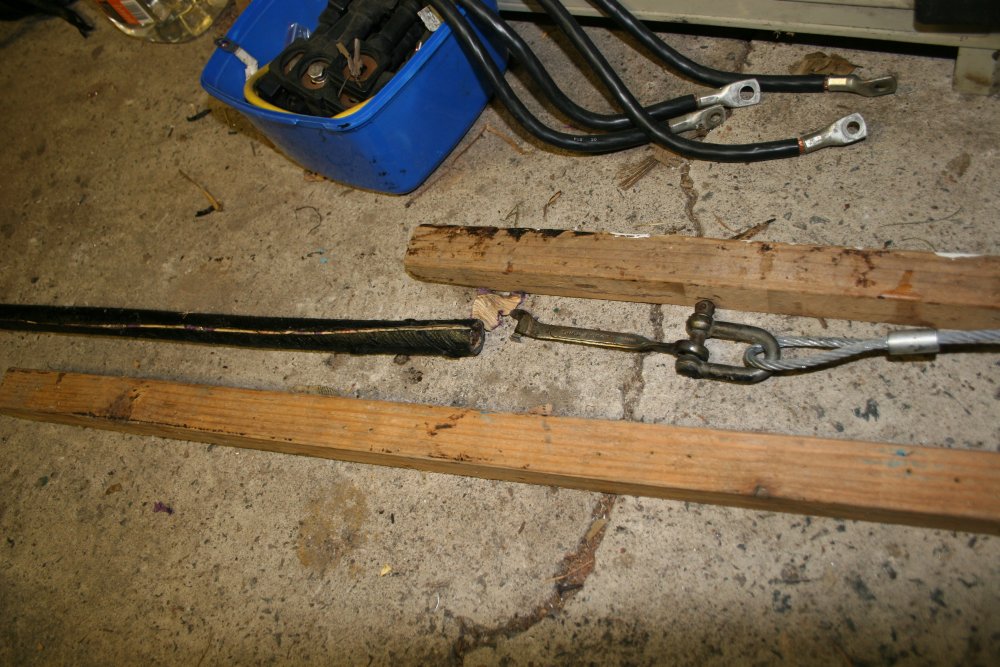
Then there was the problem of slitting open the lead sheath. There's probably a tool somewhere specifically for this. But it's quicker to make something than to search and buy, not to mention free.
I started with a rusty old spanner, and shaped it by eye using a thin cutting disk in an angle grinder. The general idea is like those seam-slitting blades you'll find in every sewing kit. Here the difficult part was to shape the 'foot' so it would stay down under the lead sheath, but not dig into the copper wires. Best if their paper insulation is undamaged, as it seems to protect the copper from oxidation. Possibly it's chemically treated?
The twist in the stem of the spanner is there because initially I'd envisaged some kind of ratcheting lever, stuck through the ring and working along the cable. Ultimately I just used a winch, so the twist was not needed. But it did no harm so I left it.
Yes, my machine tools shed has big cracks in the floor. It's an old single garage, and whatever idiot built it in maybe 1940, used absolutely no steel reinforcing mesh. Thanks! Anyway it's all moot now, since I'm inevitably going to lose this property. It still remains to be seen if the process will result in something better, or nothing.
 |
 |
 |
 |
 |
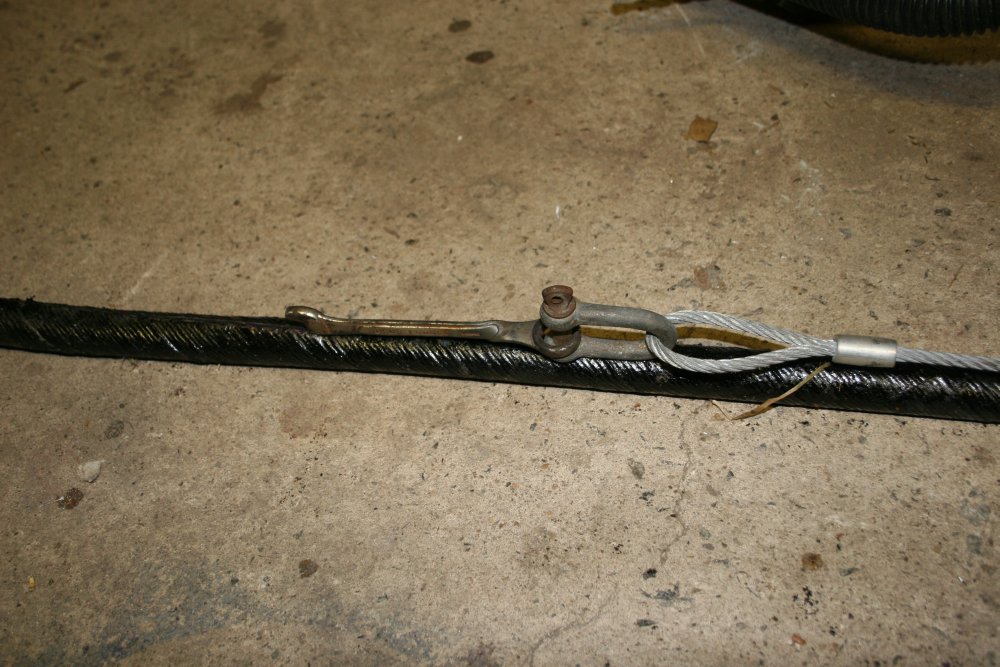
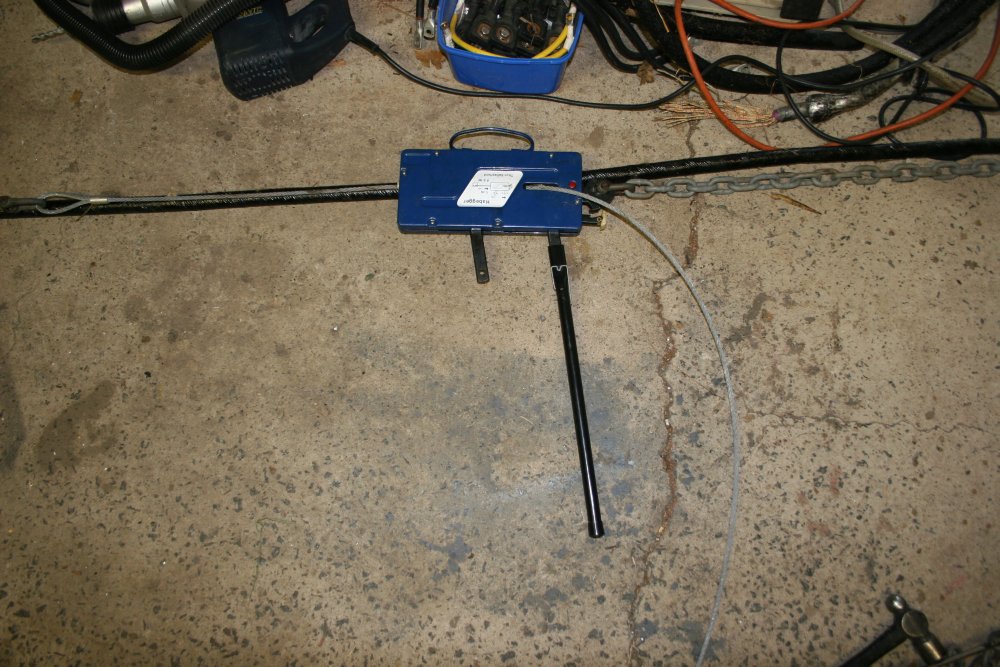
For the winching, I just drilled a couple of holes in the crappy old concrete floor, and slid bolts loosely into them for anchors.
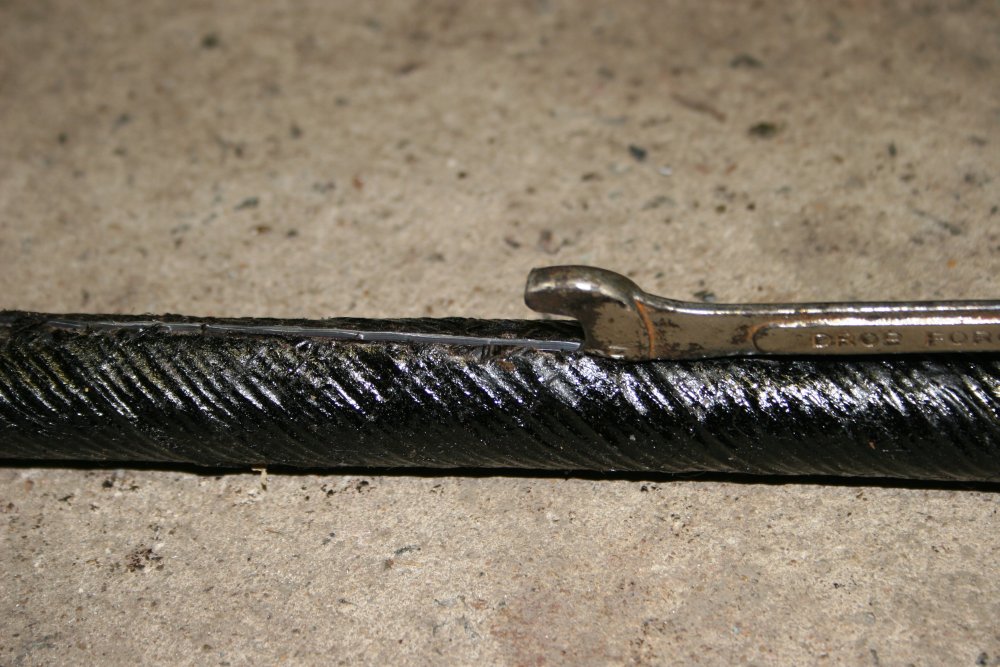
It went well, though I had to hand guide the slitting 'blade' or it would vear off to the side, or pop up through the sheath.
Once the lead sheath was slit, the wire bundle could be pulled out easily.
 |
 |
 |
 |
 |
The second cable length still had the inner tar-cord layer, and for some reason it was extra hard to unwrap.
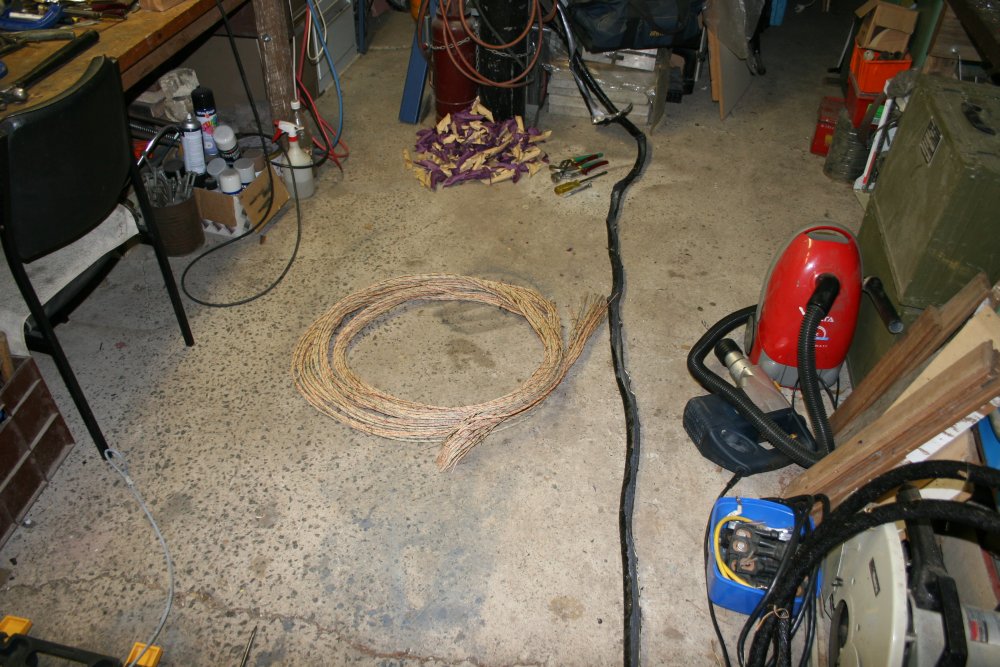
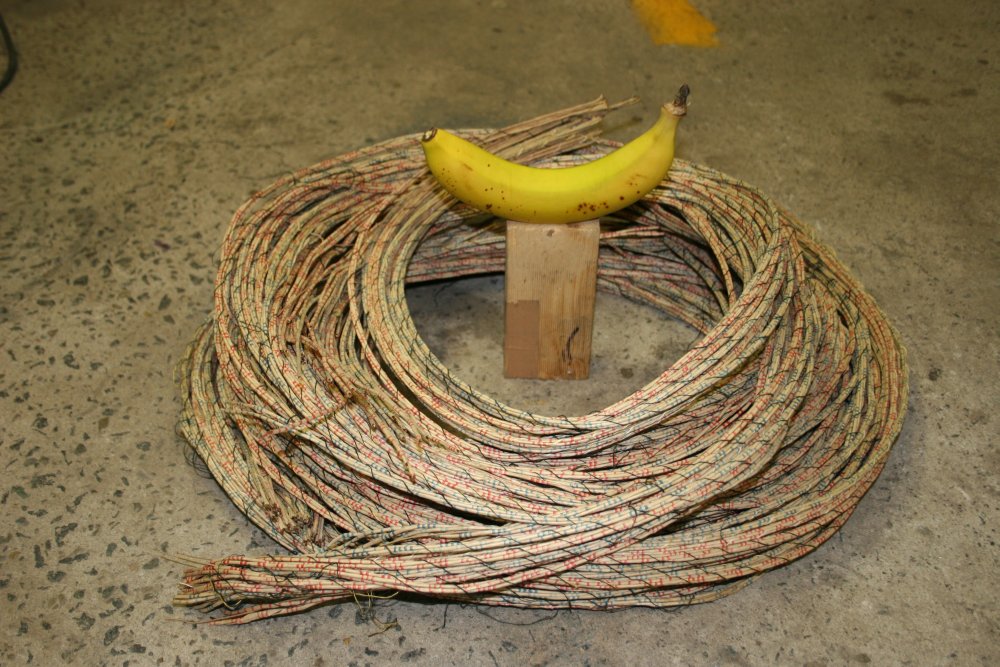
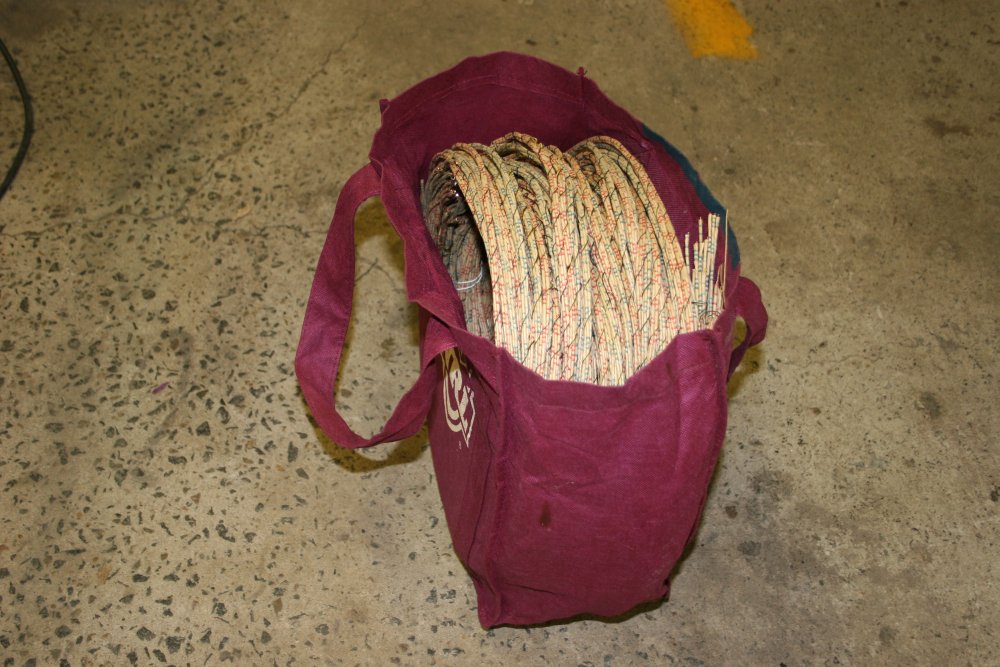
But finally, all done! There's all the wire in one bundle, banana for scale. Then in an old shopping bag, ready to be stored in the 'cables' closet. Whether I'll ever make more of these geodesic forms with this wire — unlikely. Once I get good enough at TIG welding I might try it with thicker, stronger stainless steel wire. Much more robust!
This was a job I started (and shelved as too hard) when I was 17. Now it's completed in Dec 2014, and I'll turn 60 in 2015. Is 42 years a record for longest procrastination?
After finishing dissecting the cable, when starting to write this up I realised the story needed some historical and present day context. I found some details online but also thought I should go there again and see if I could get some photos of that old cable duct.
Ha ha ha! Fat chance of that.
Here are aerial photos of the location, when there was only one bridge, vs current times.
 Aerial view, 1943. |
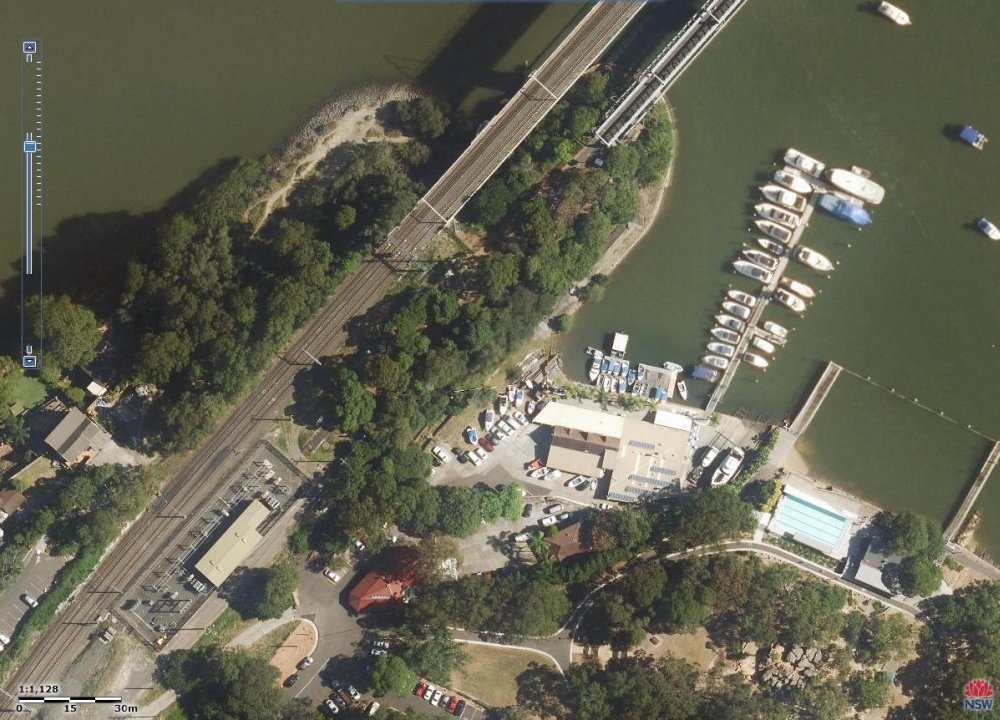 Present Day. |
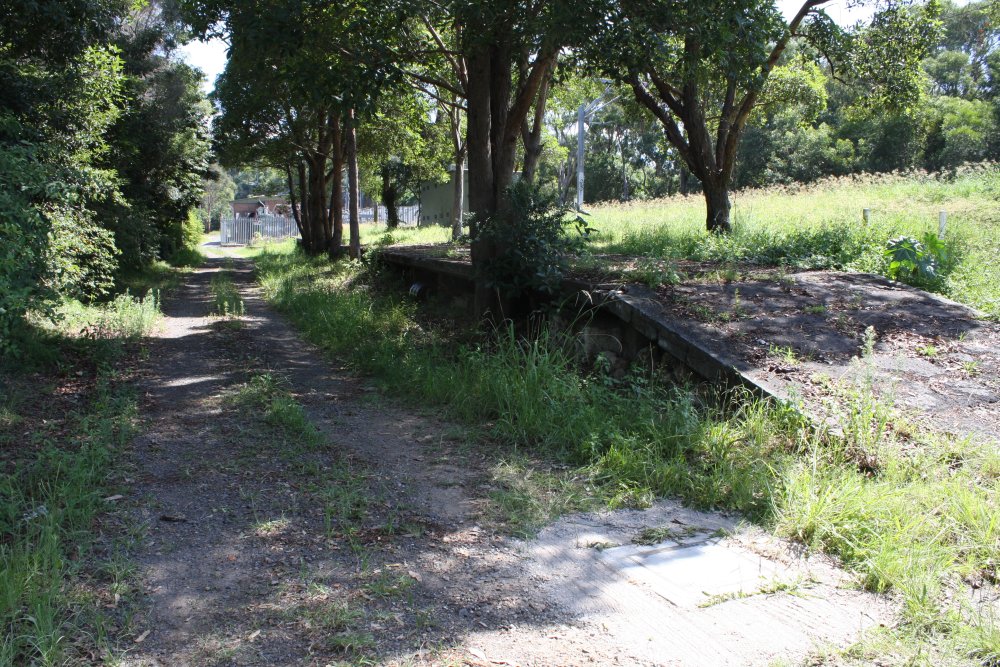
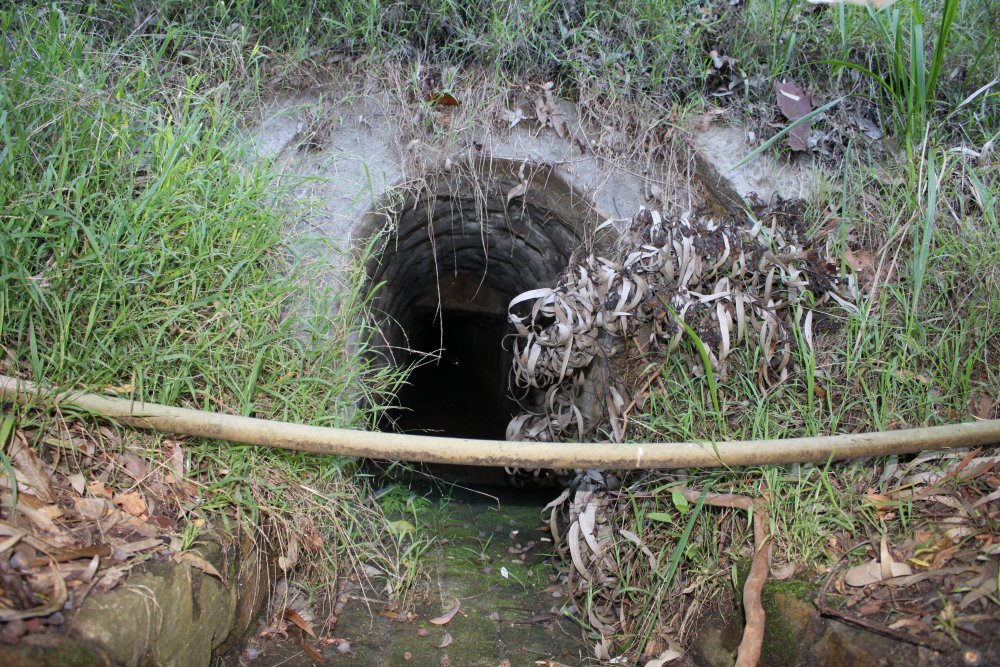
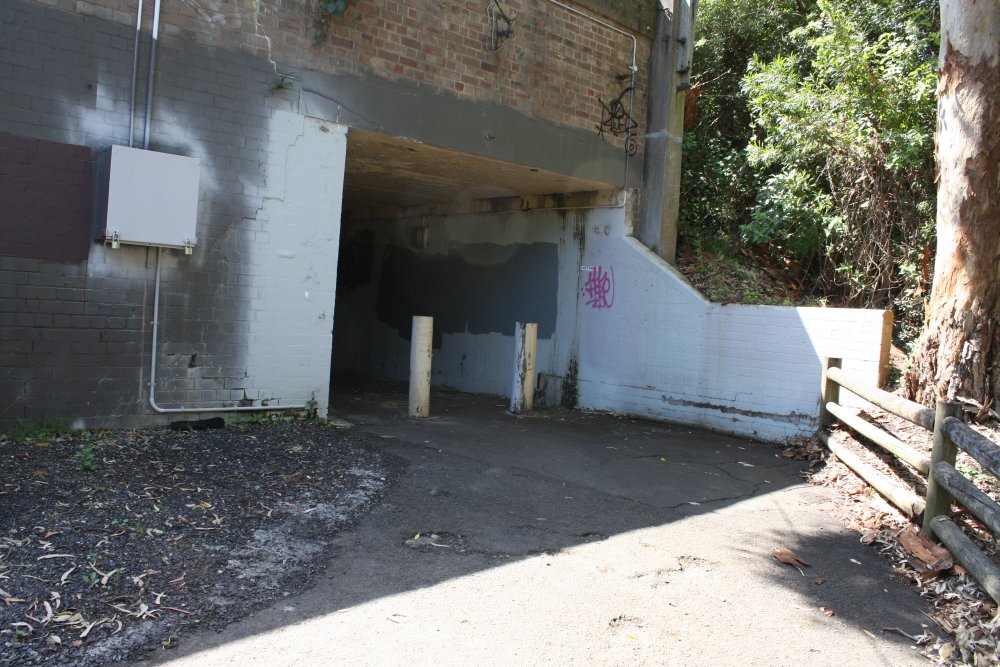
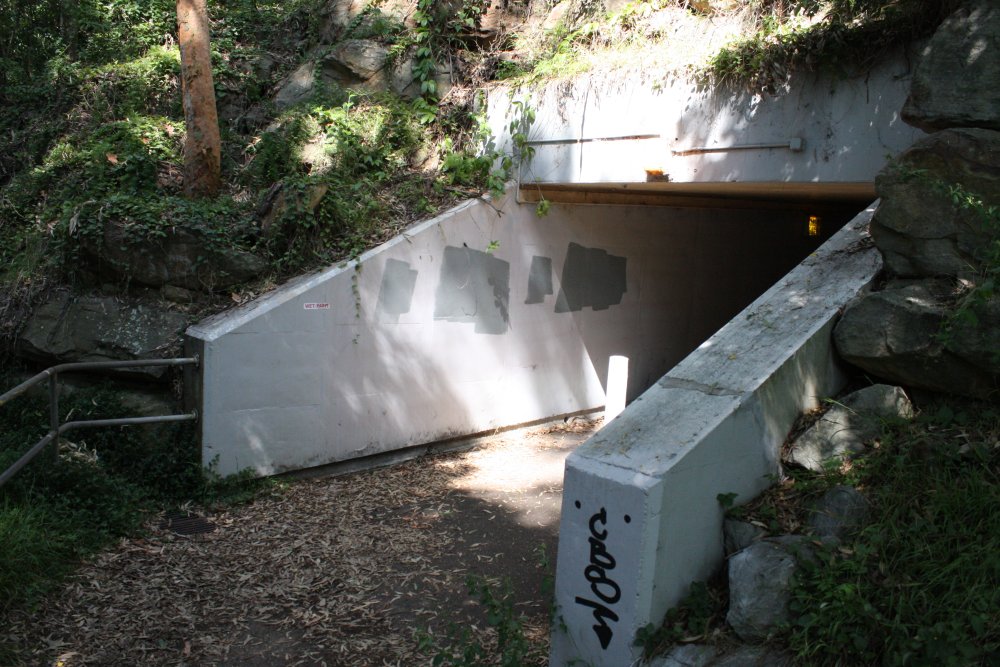
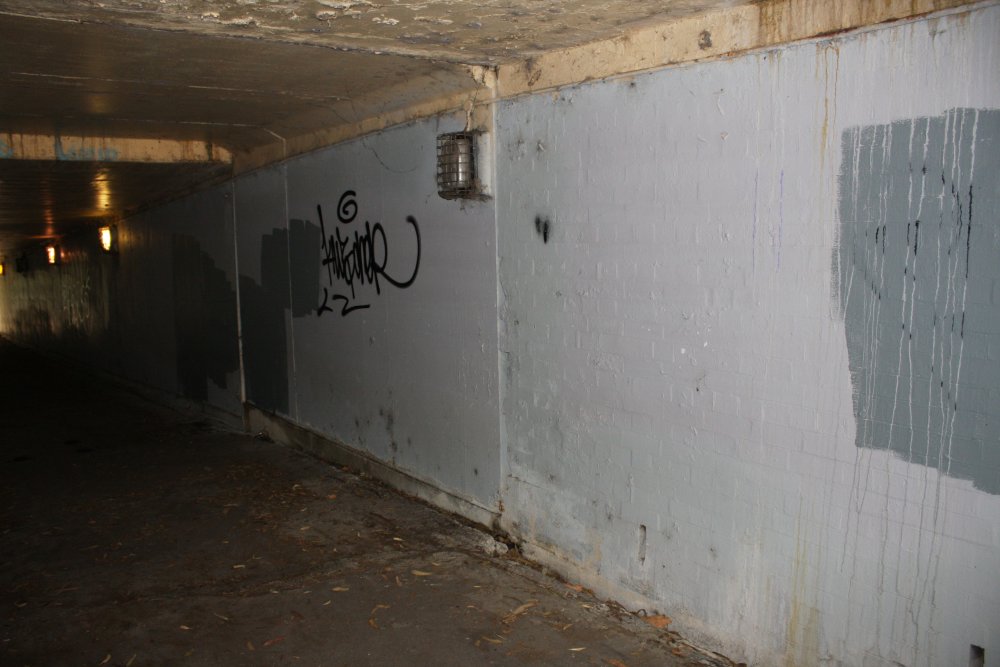
The changes since the early 1970s and today are dramatic. For one thing, in building the footpath and cycleway off the South end of the bridge they removed the old Eastern side platform and changed the profile of the hill, to fit the sloping down ramp of the walkway. Back then the embankments were mostly bare too, but now they are densely grown with trees and undergrowth. Most confusingly, although there is presently a pedestrian tunnel under the line, it doesn't seen to match my memory of the old tunnel at all.
I spent an afternoon clambering around in the thickets of the old embankment, trying to find anything that seemed familiar. Nothing. It's amazing what 40+ years of memory-fade combined with landscape changes can do.
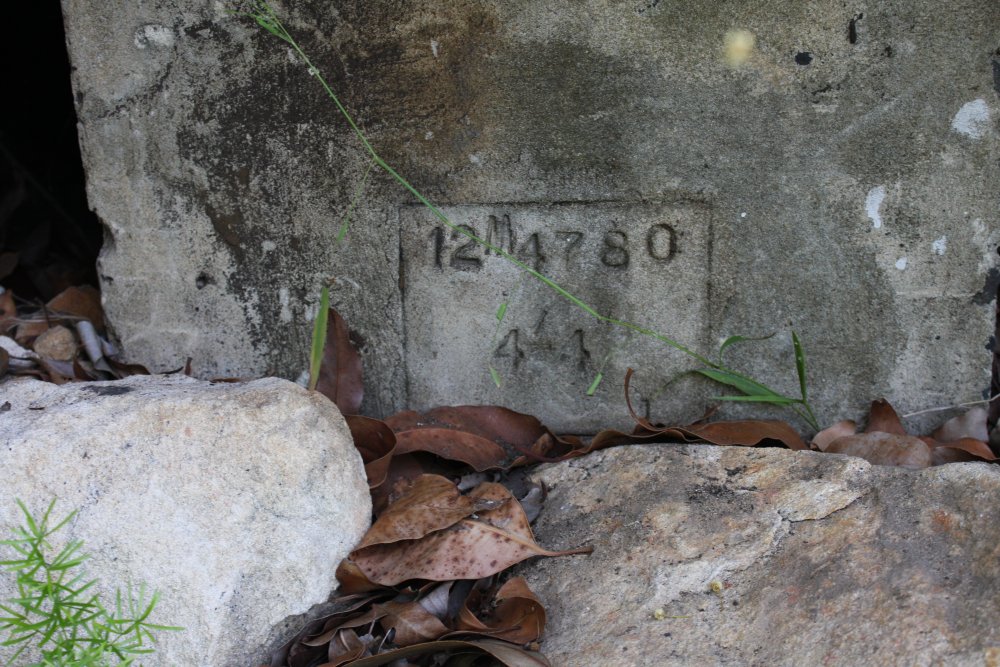
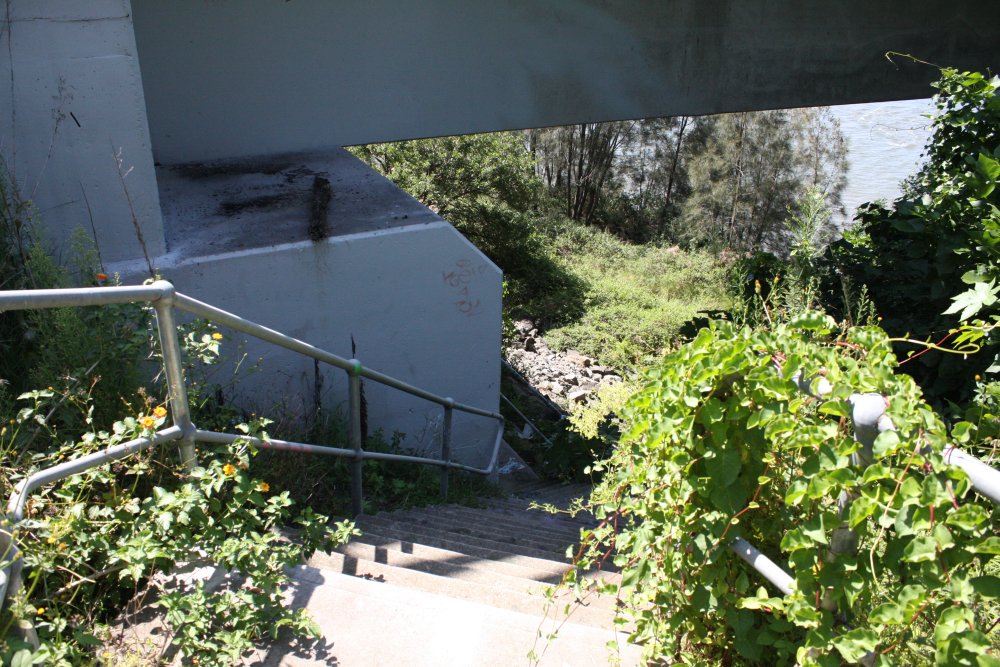
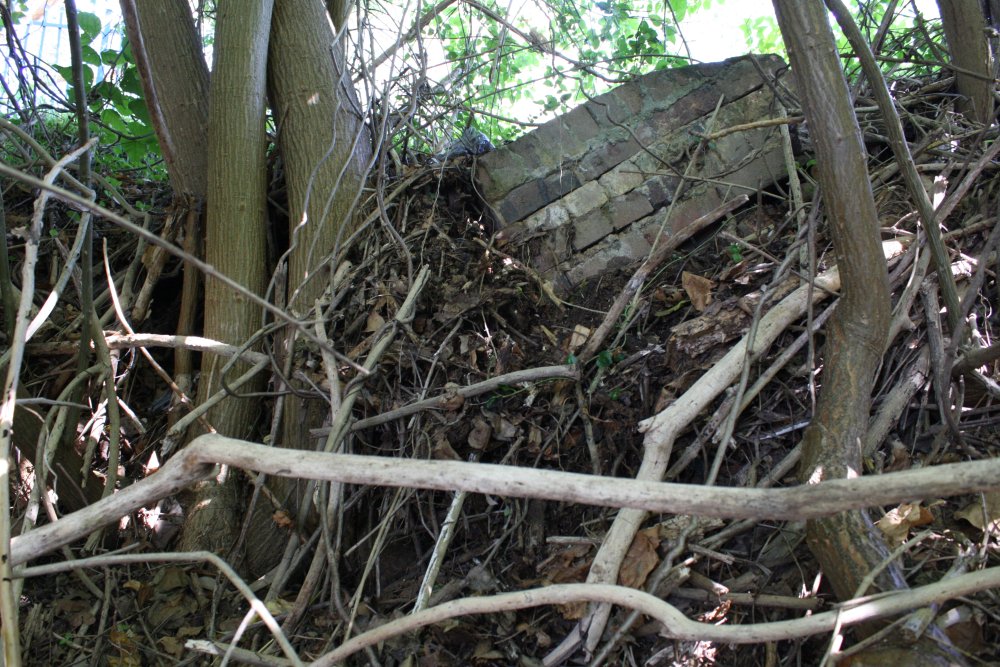
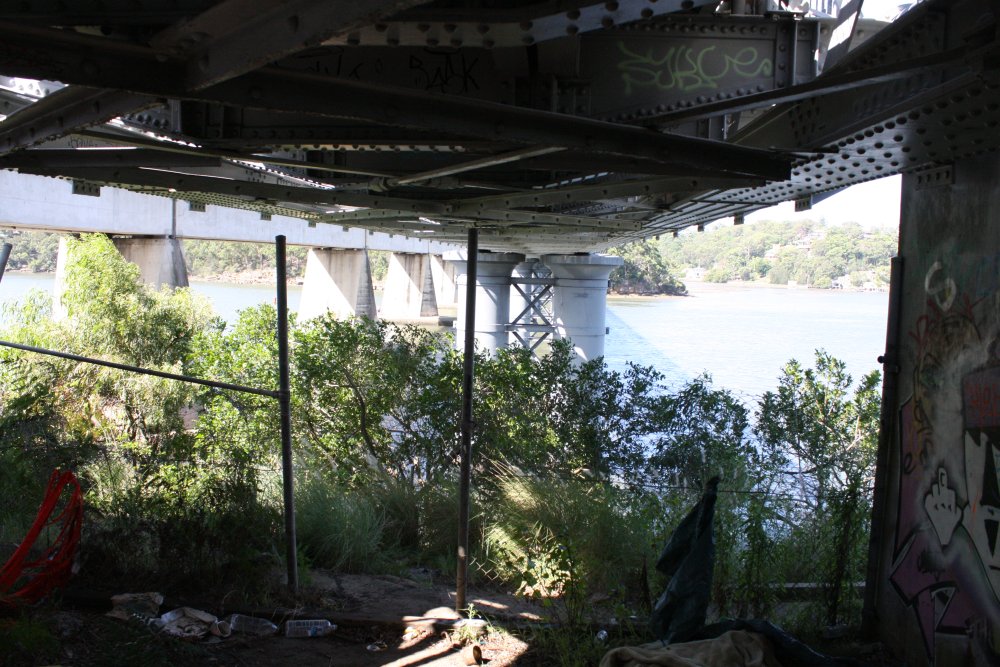
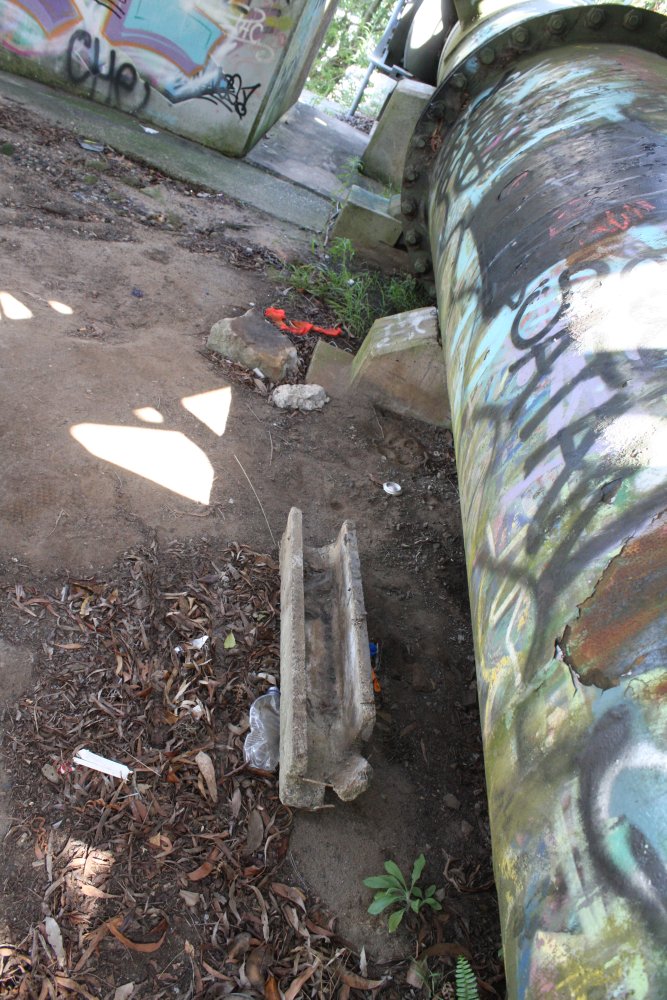 In the end I found only one small echo of my memories. It's a section of the concrete cable tray. Definitely the same type. What it's doing here under the bridge, who knows. Perhaps someone found it nearby and carried it here to use as a seat. It was the only such piece I saw.
Como Excursion, 20150123
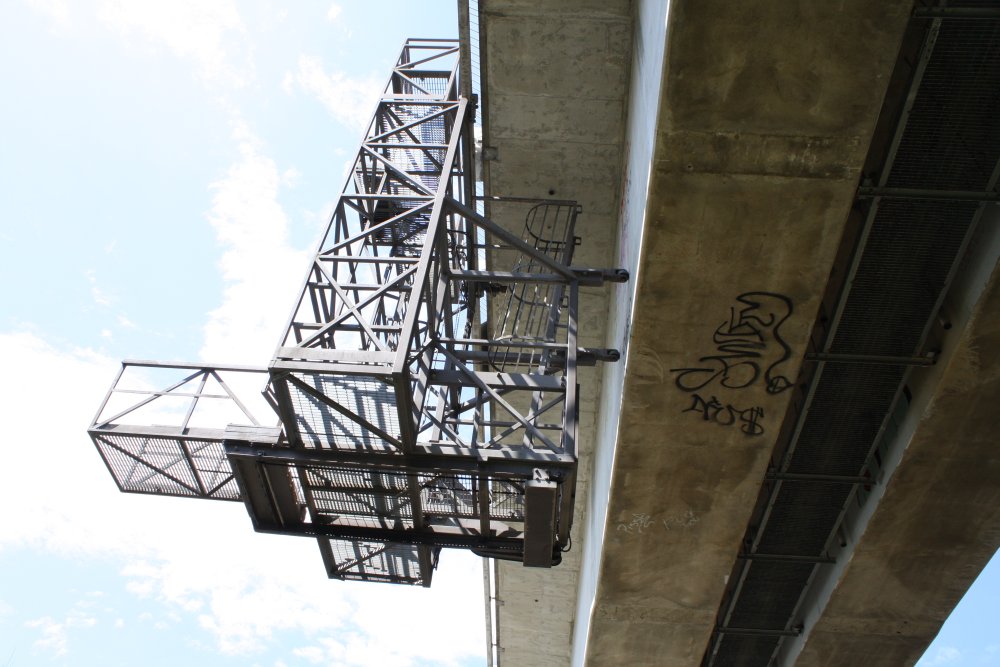
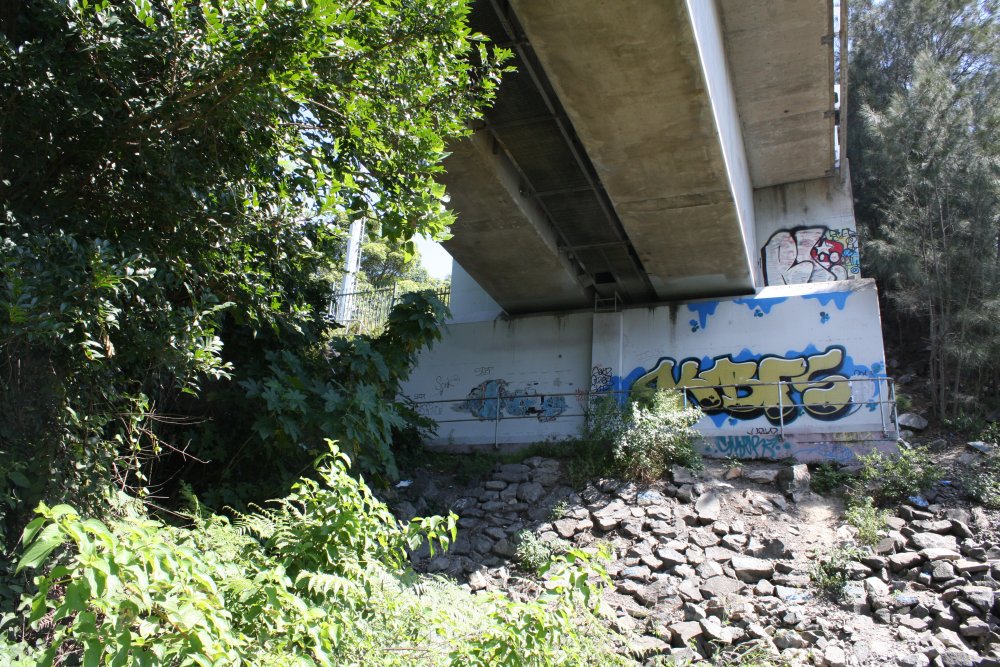
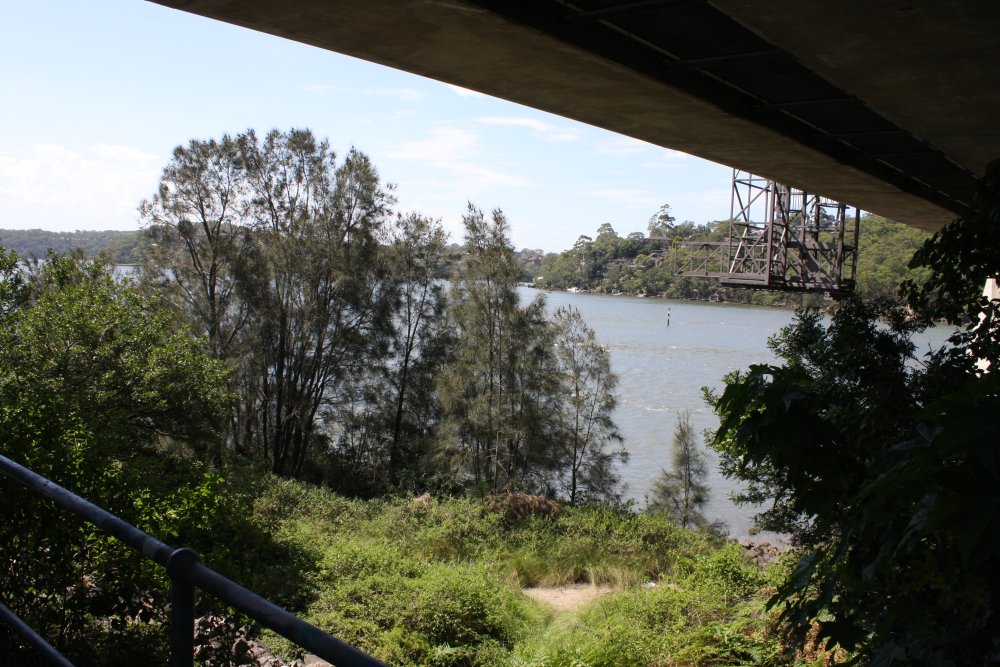
Some other photos from my trip down to Como via the old rail bridge.
 |
 |
 |
 |
 |
 |
 |
 |
 |
 |
 |
 |
 |
 |
 |
 |
 |
 |
 |
 |
 |
 |
 |
 |
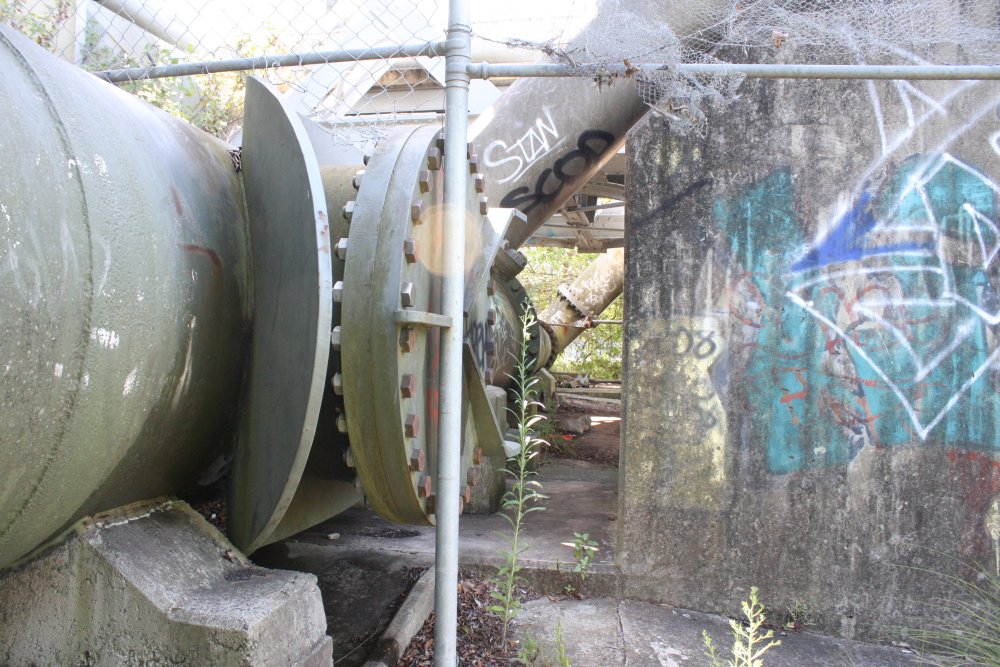 |
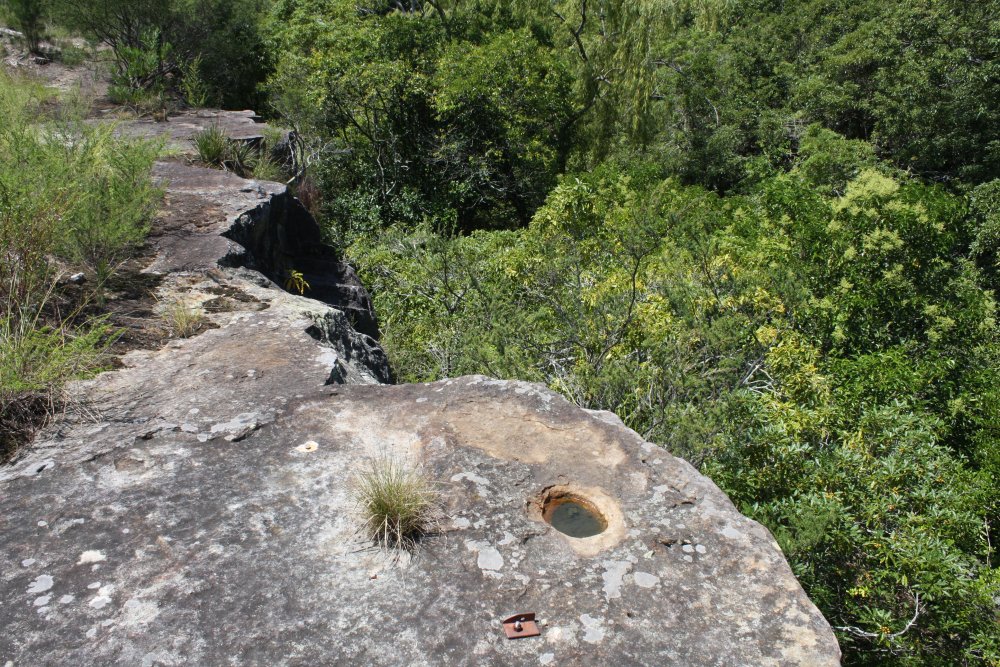
Note the true genius in the very last photo. Yes, the fencepost is hard up against the pipeline access hatch.
The 4th photo in 2nd row is sad. No way to know, but perhaps this says something about the ultimate futility of the safety-nazi mindset?