Apart from the owner-builder construction projects at my place, over the years I've done some home maintenance at my mum's place. This is a photo-album of those projects.
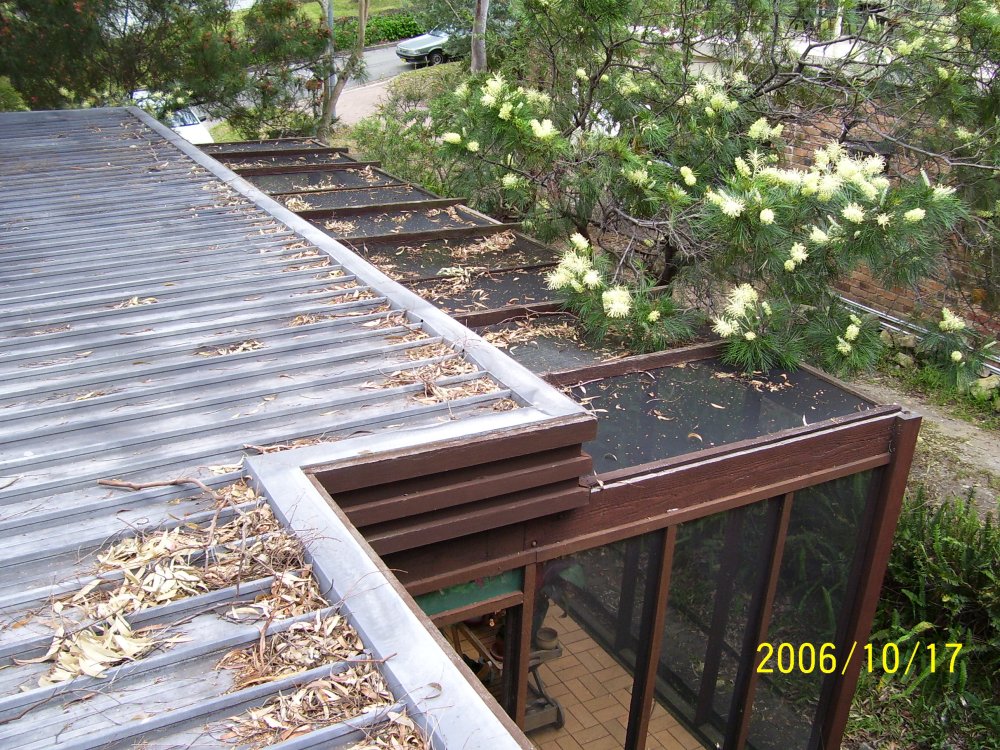
The house was built around 1969. My parents weren't well off, and so it was a fairly small and modest home. It looked nice, but it had some elements that turned out to be maintenance hassles. First mistake was having a flat metal roof, under trees. This was a very bad idea. At least I think so, because I'm the one who ever since had the job of getting up on the roof every few weeks and clearing the leaves off the roof and gutters. Also the roof metal has had to be replaced once already, and will soon require another replacement.
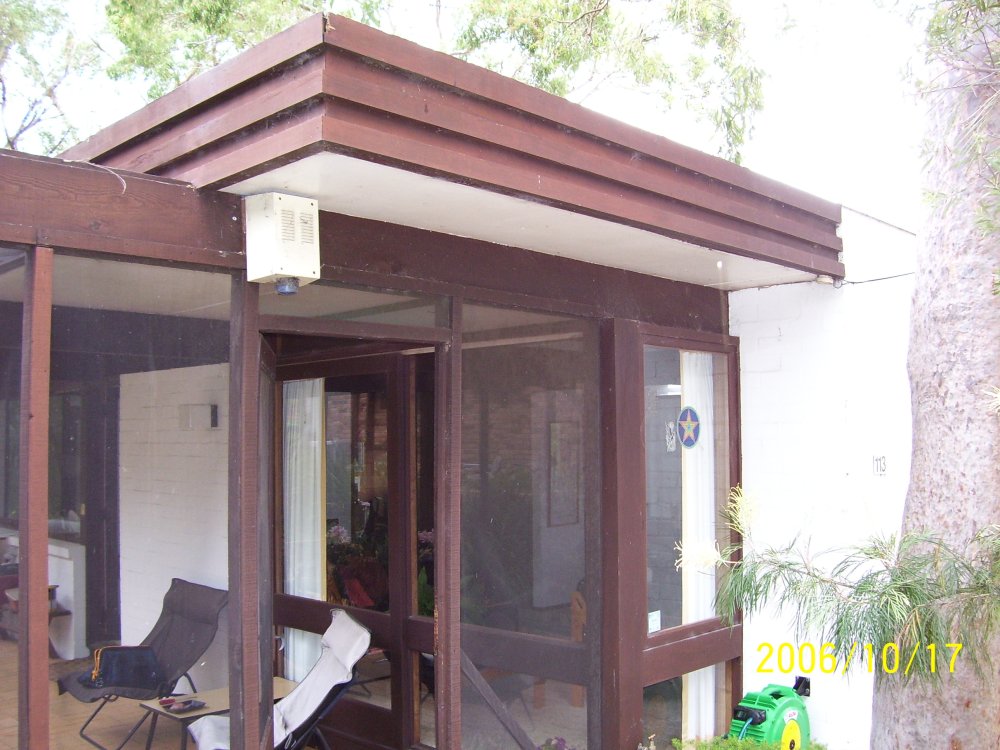
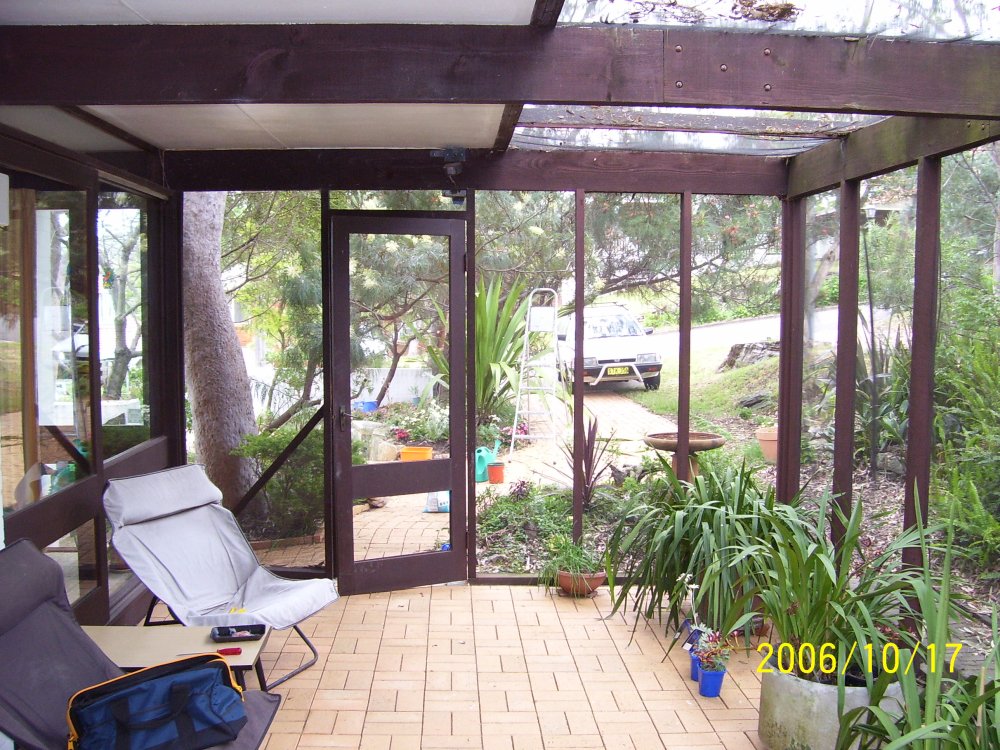
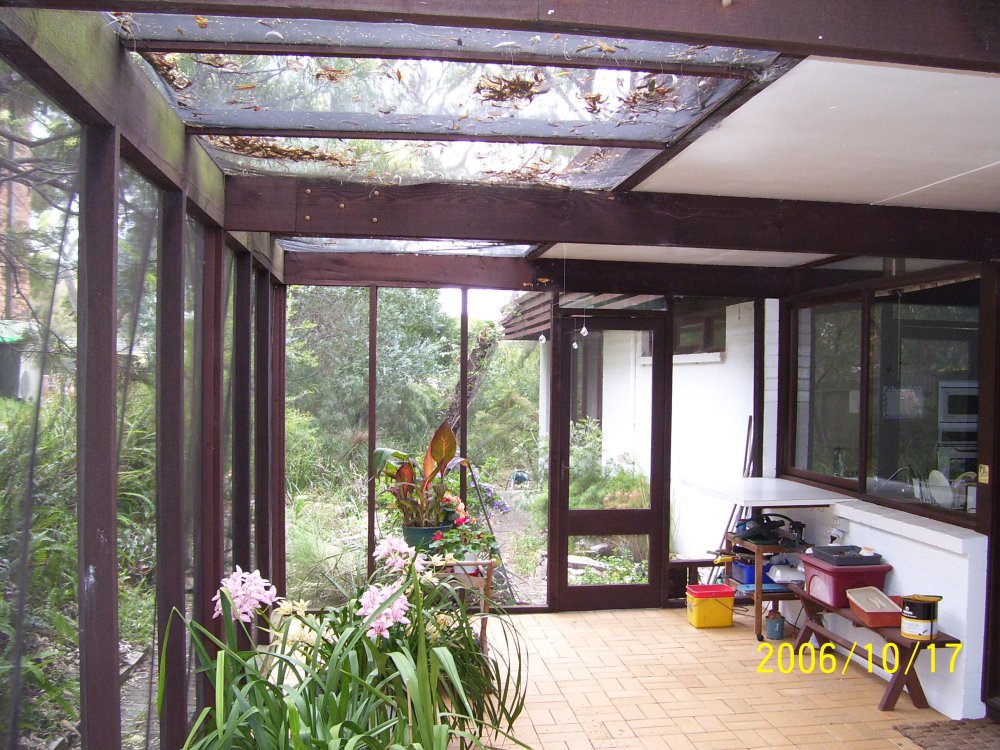
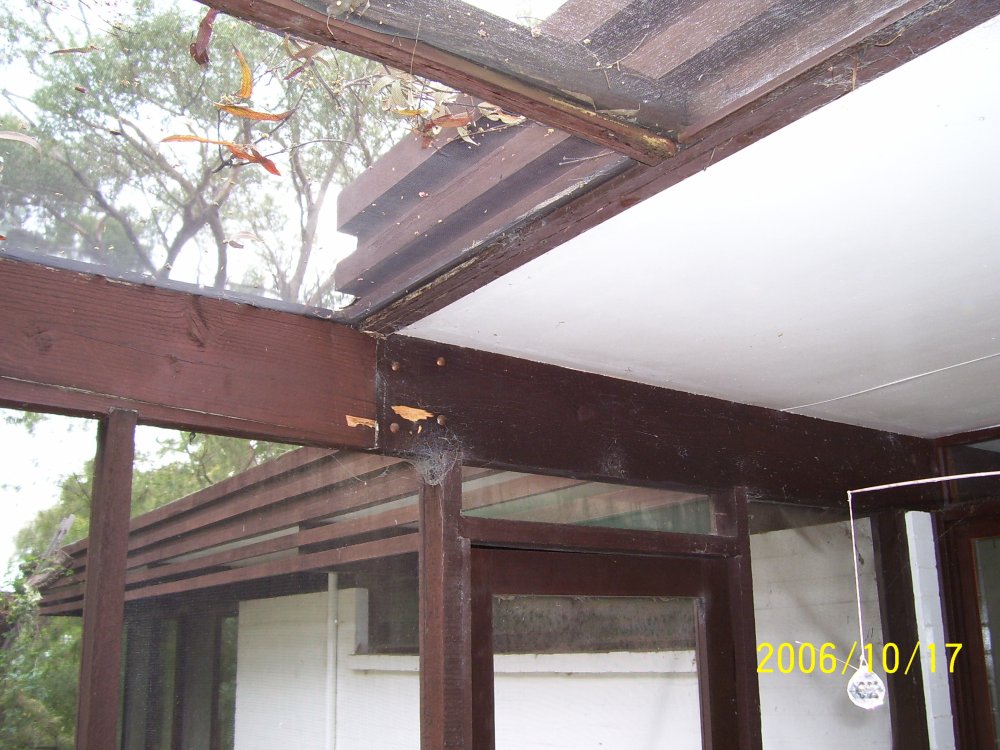
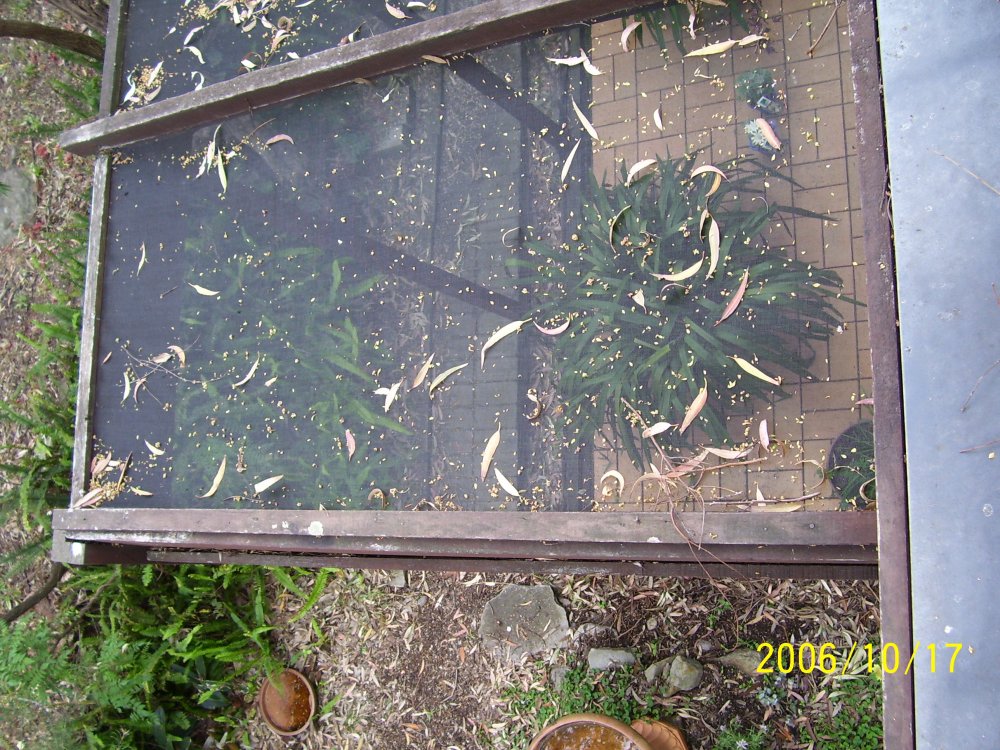
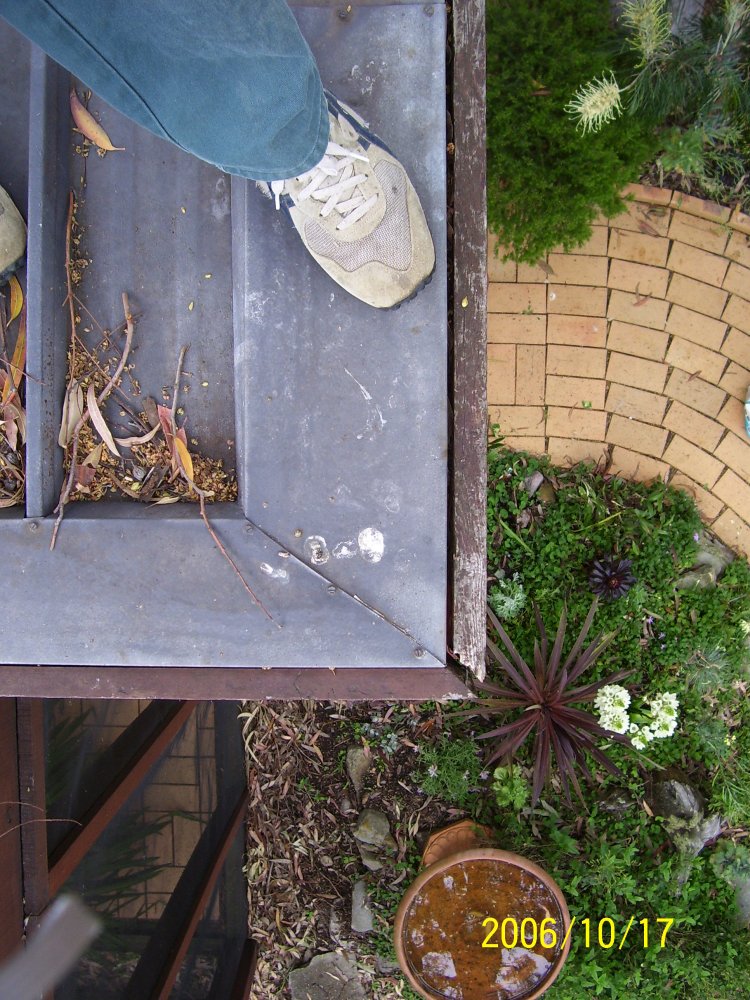
Another problem was the liberal use of timber exposed to the weather. All the window frames and facia around the edge of the roof were Western Red Cedar with an oil stain. A large fly-screen enclosed patio was made of softwood framing, also stained the same way. Worst of all, several major wooden beams that were interior exposed ceiling features, projected out into the weather as part of the patio structure. These were some type of softwood, and rain water would seep along them from the patio area, under the roof structure.
The first thing to completely rot out was the patio framing. I'd already replaced that whole structure once in the past, in identical form except used hardwood and gave it some anti-rot treatment. But still, timber exposed to weather never lasts.
|
|
|
|
|
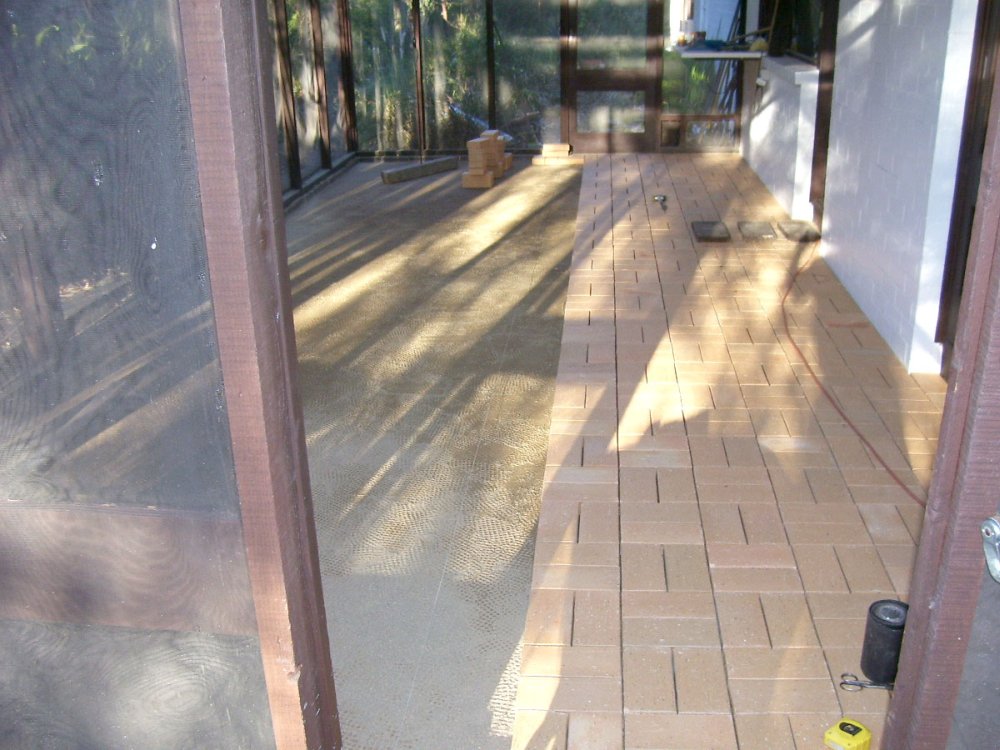
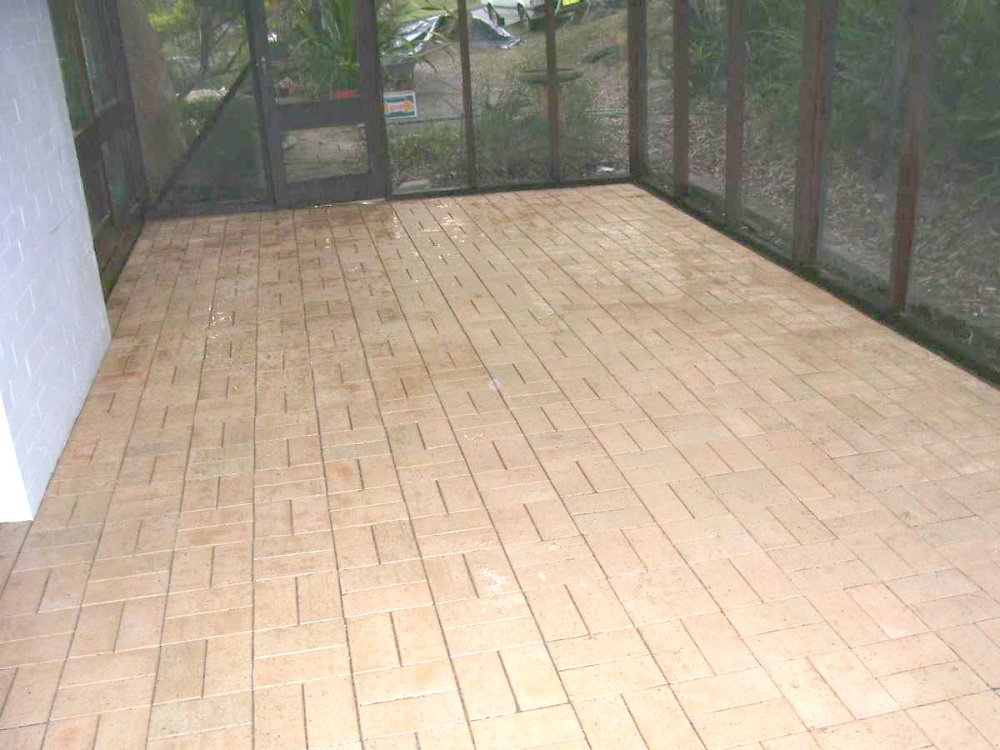
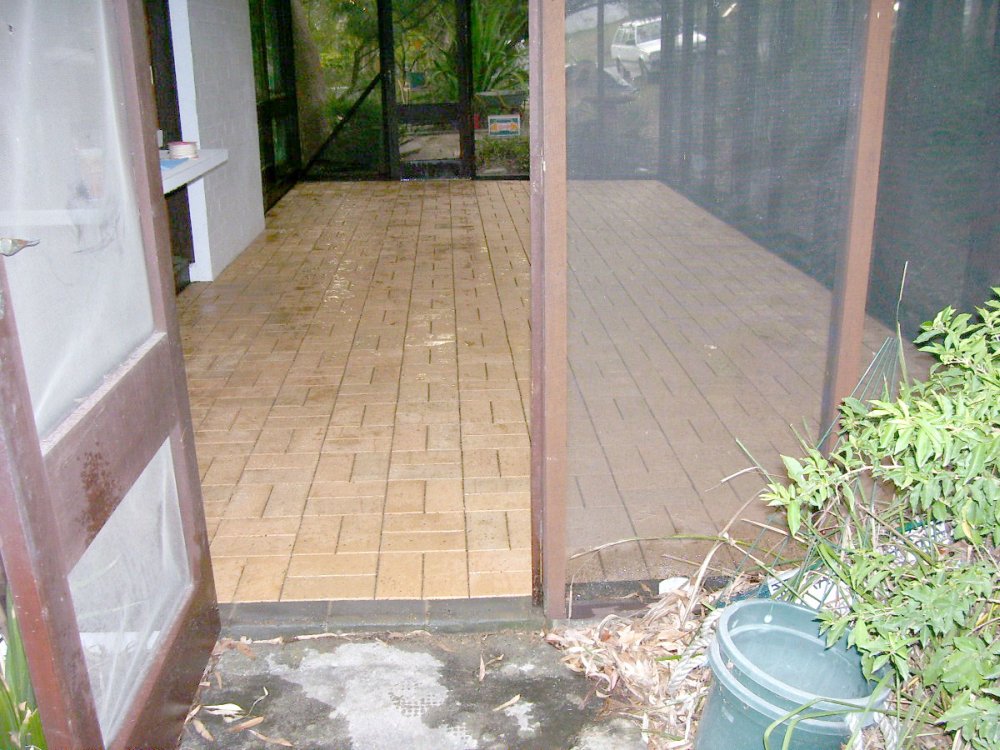
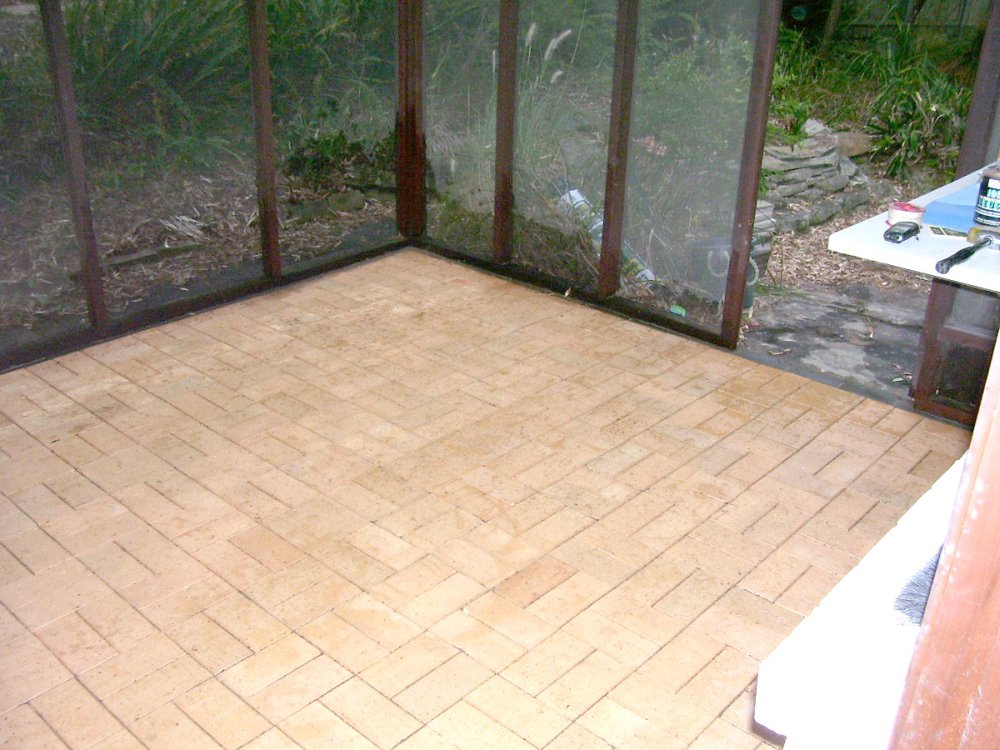
April 2006. The paving in the patio had been made of concrete tiles, laid on plain white sand by the house builder. By 2006 they were getting very uneven, so I redid that area using fired brick pavers and proper paving sand. That stuff is coarser than plain sand, and has a range of grain sizes including some silt. The result is it compacts better, and once in place tends to set fairly rigidly. It also makes less of an ideal medium for ant nests.
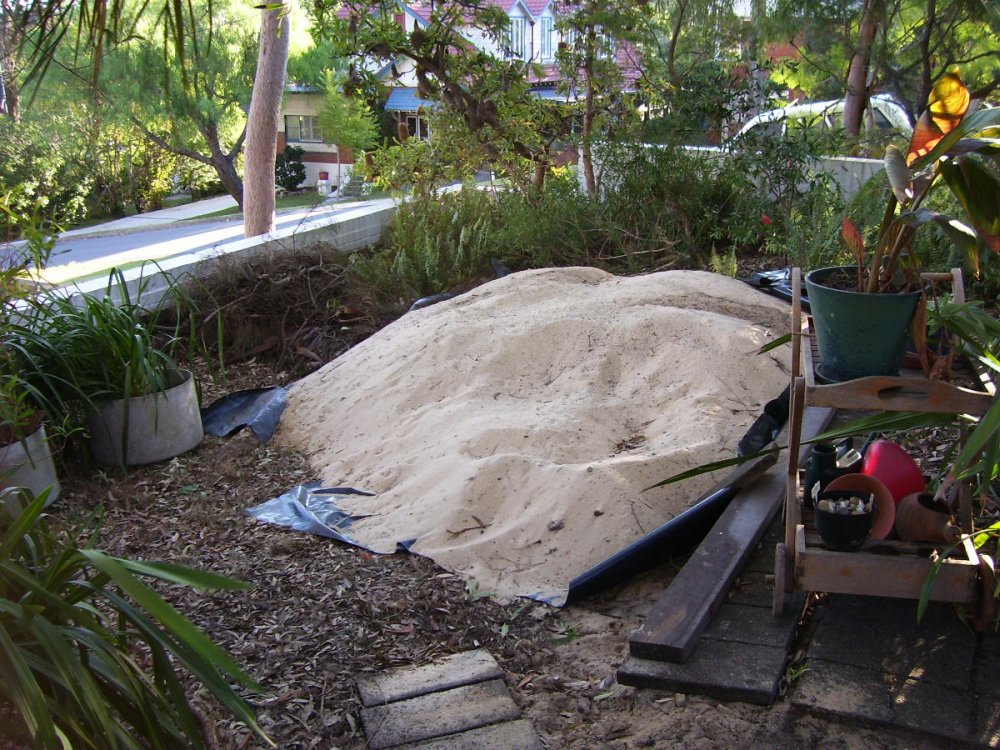
The pile of sand in pic 2, is what I removed from under the old patio pavers and dumped in the front garden. For a while I thought I'd have to get rid of it somehow. But eventually it got used in the next project.
 |
 |
 |
 |
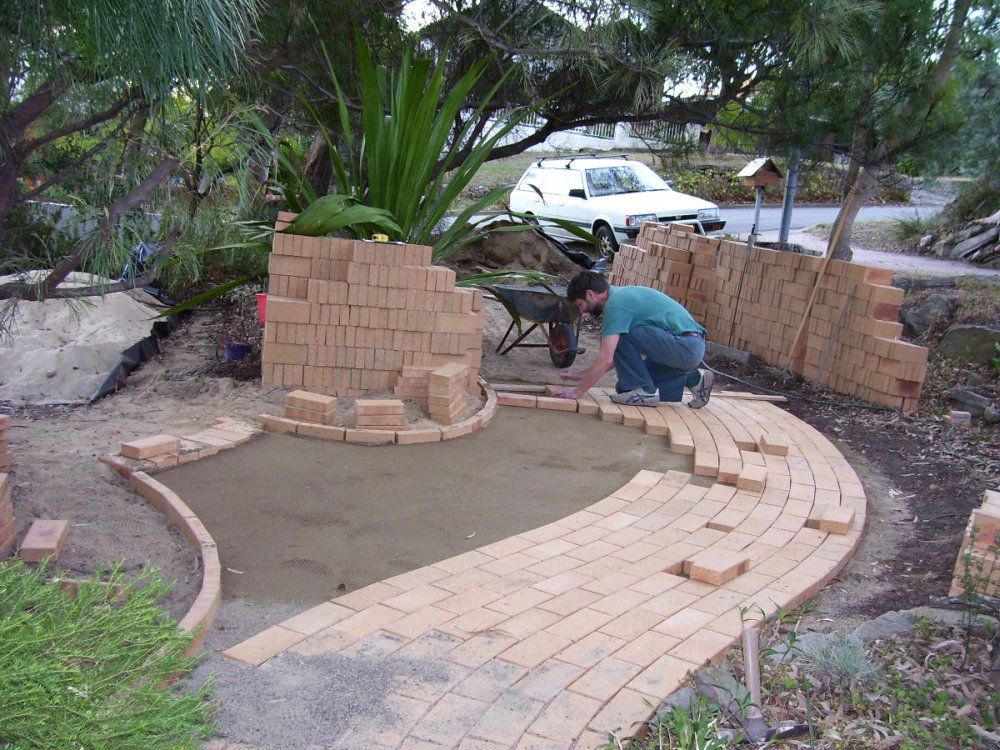 |
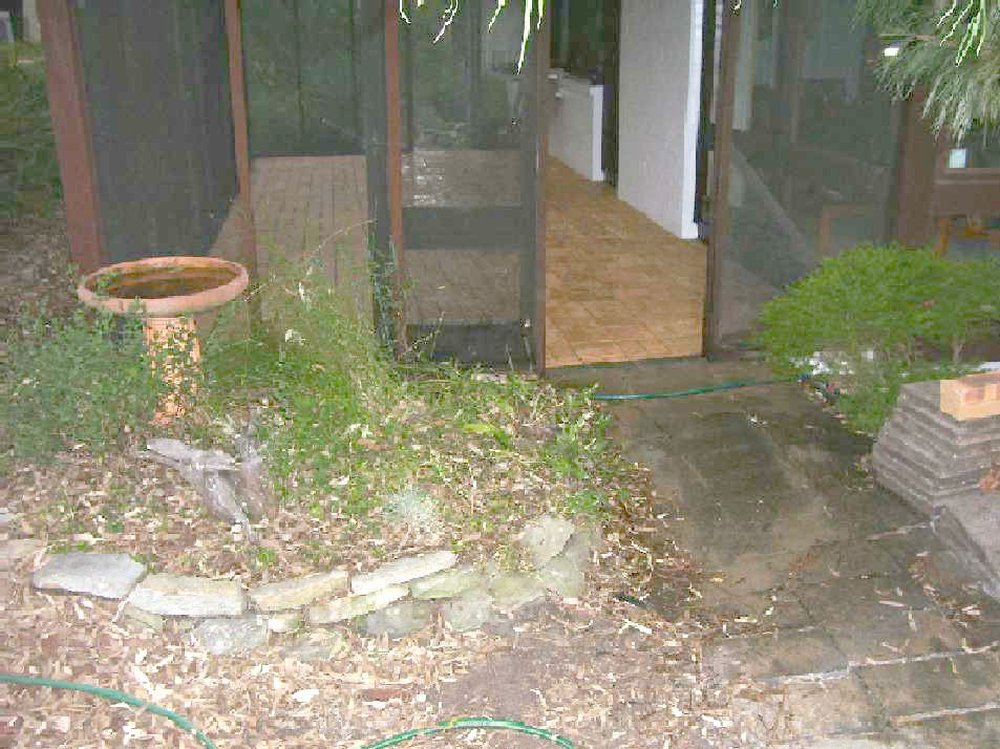
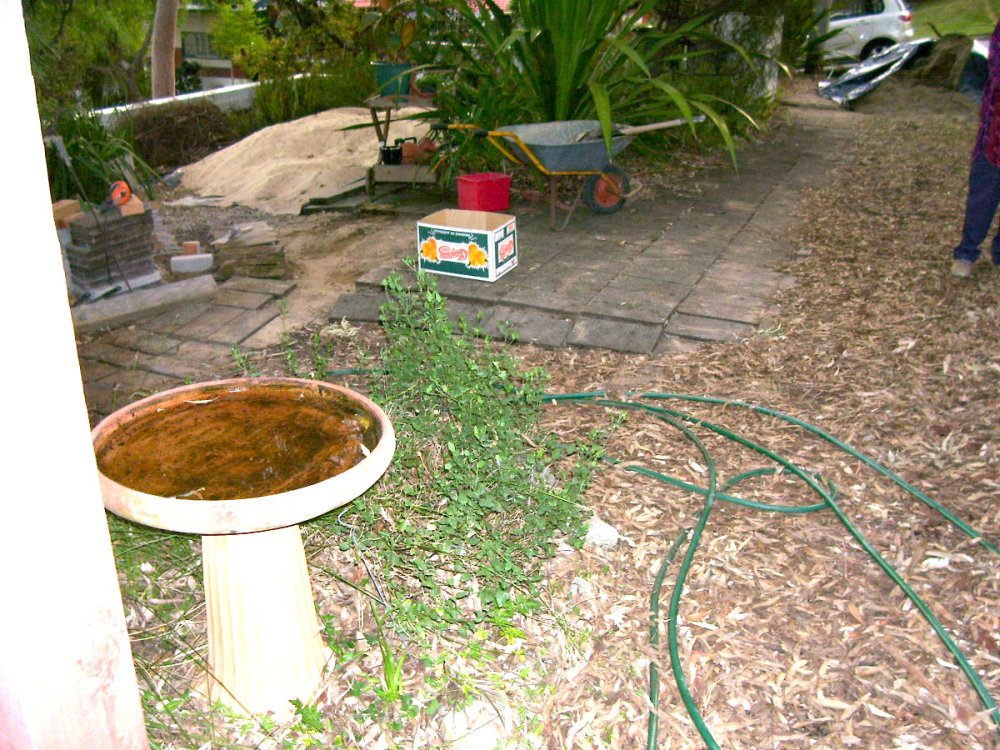
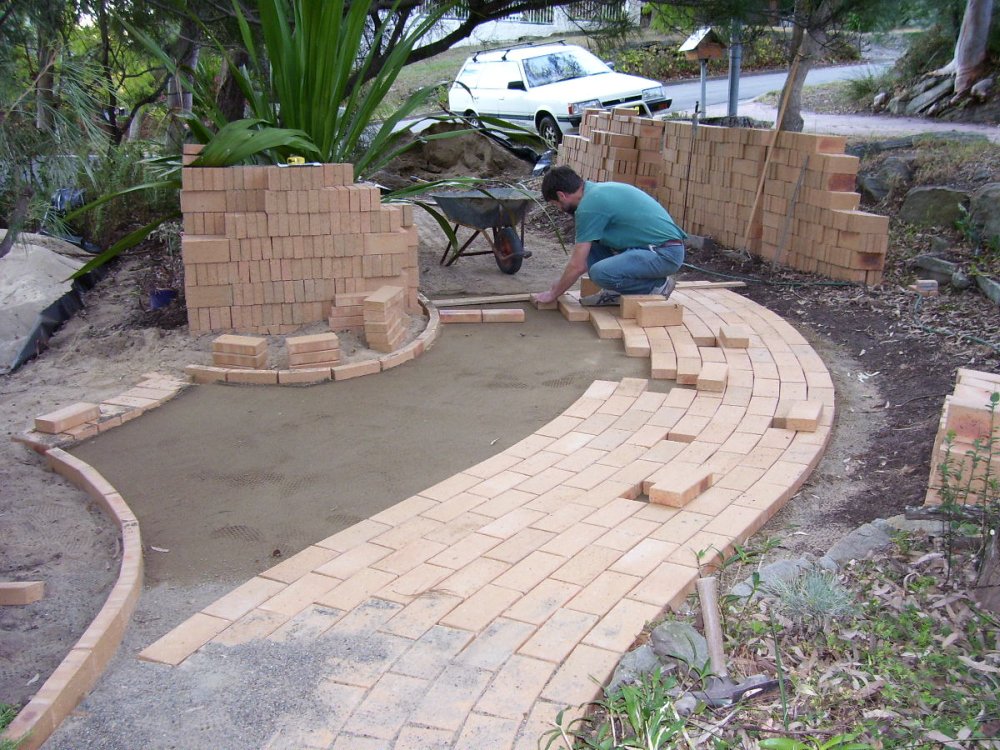
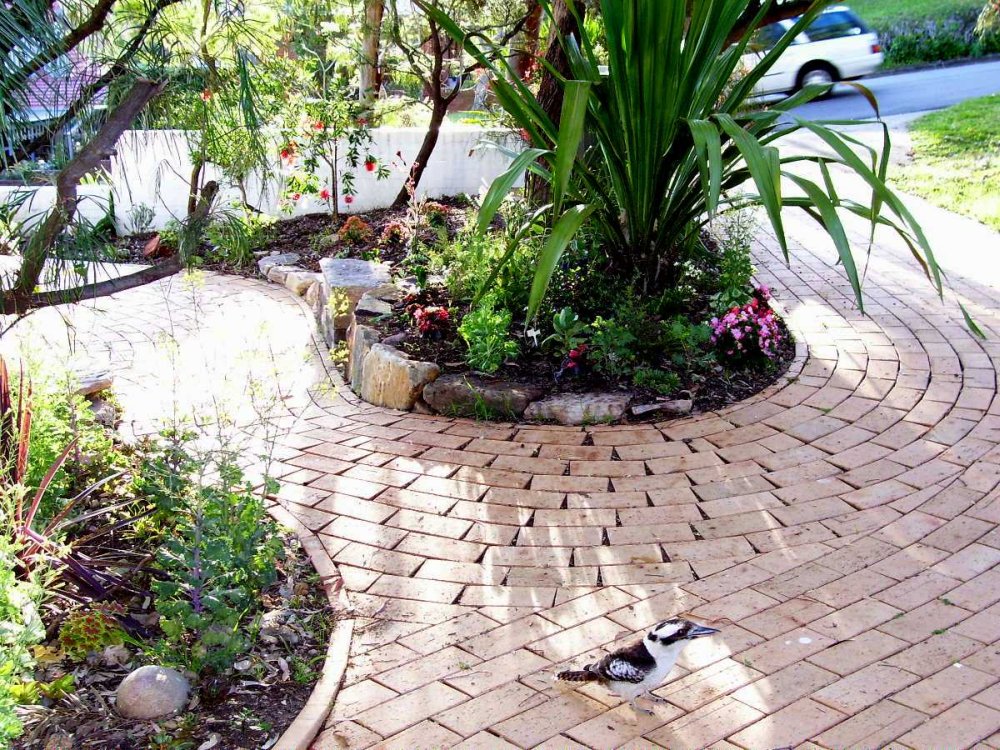
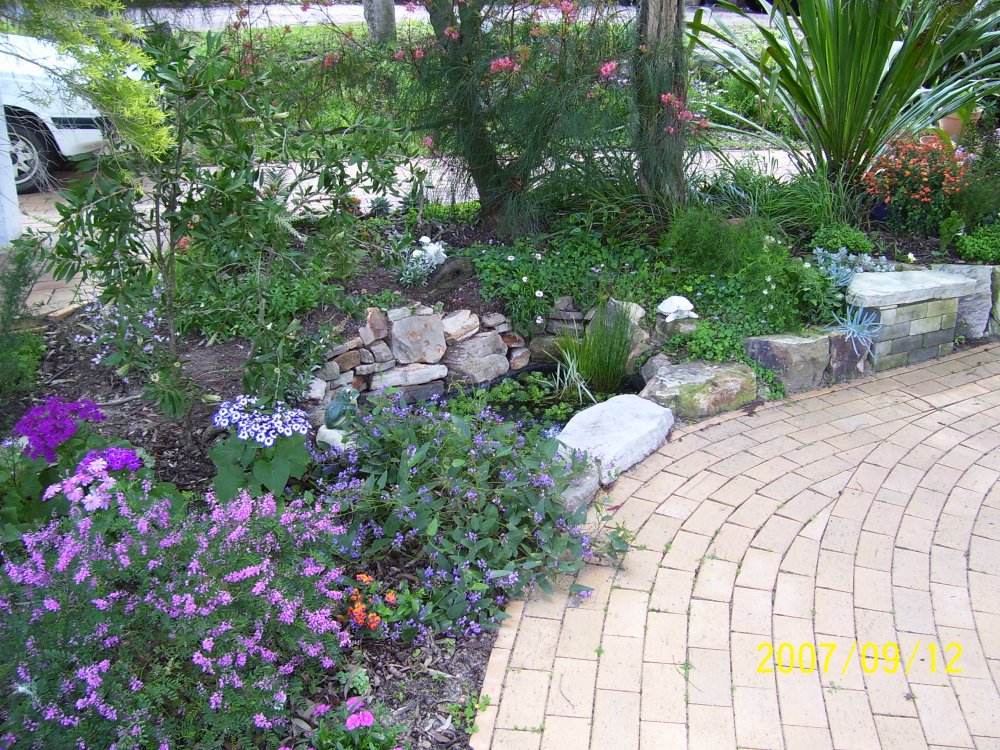
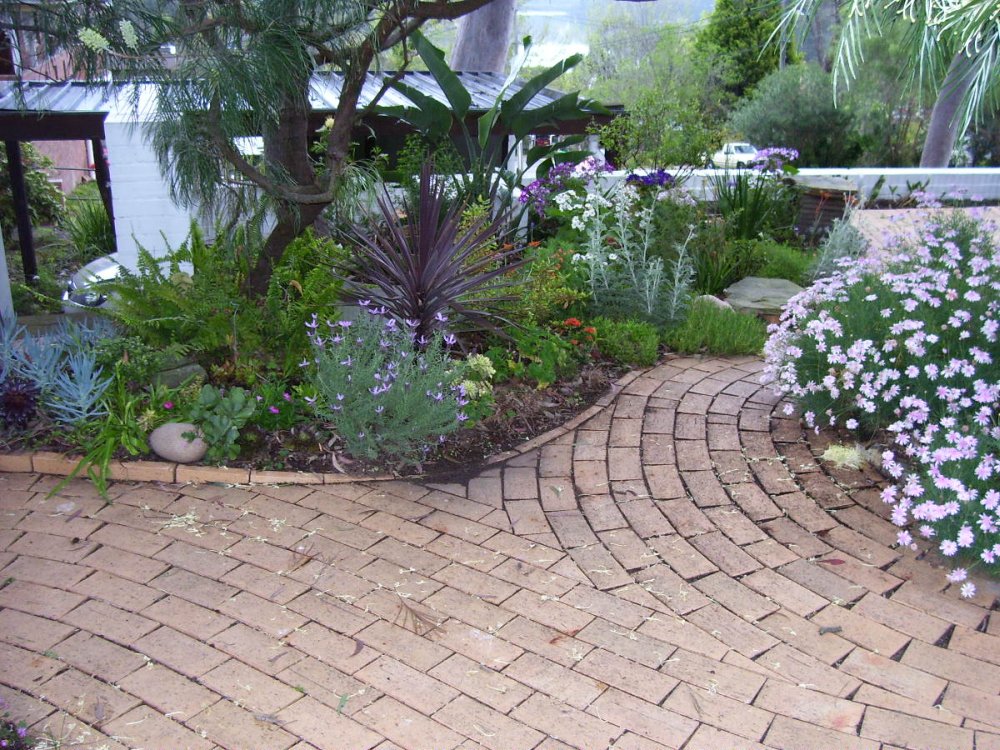
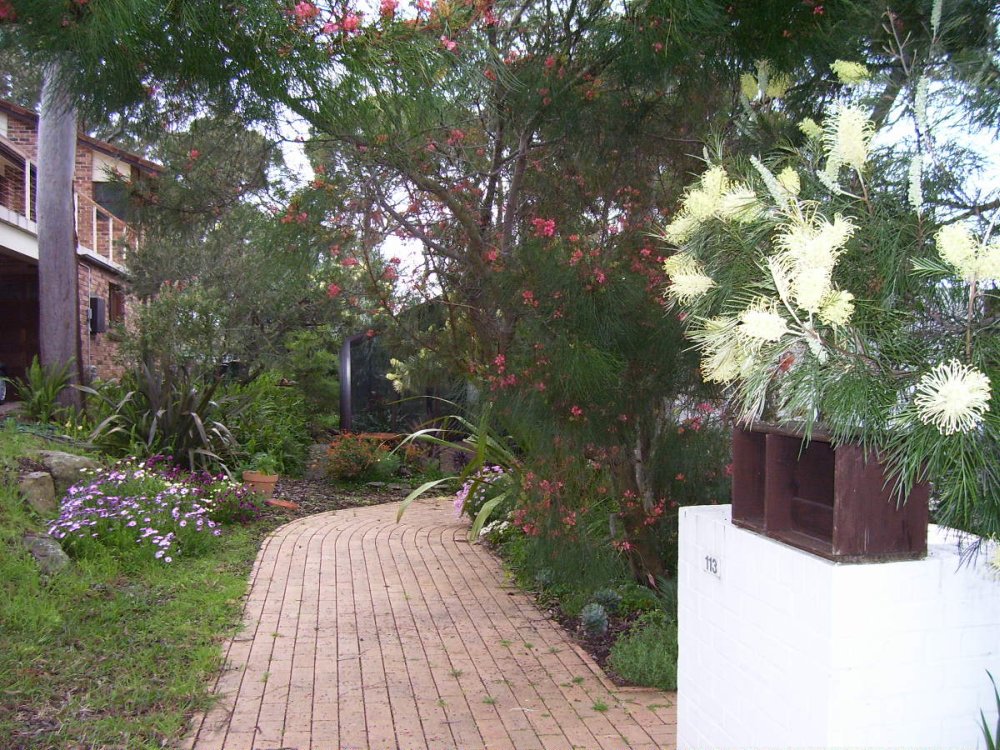
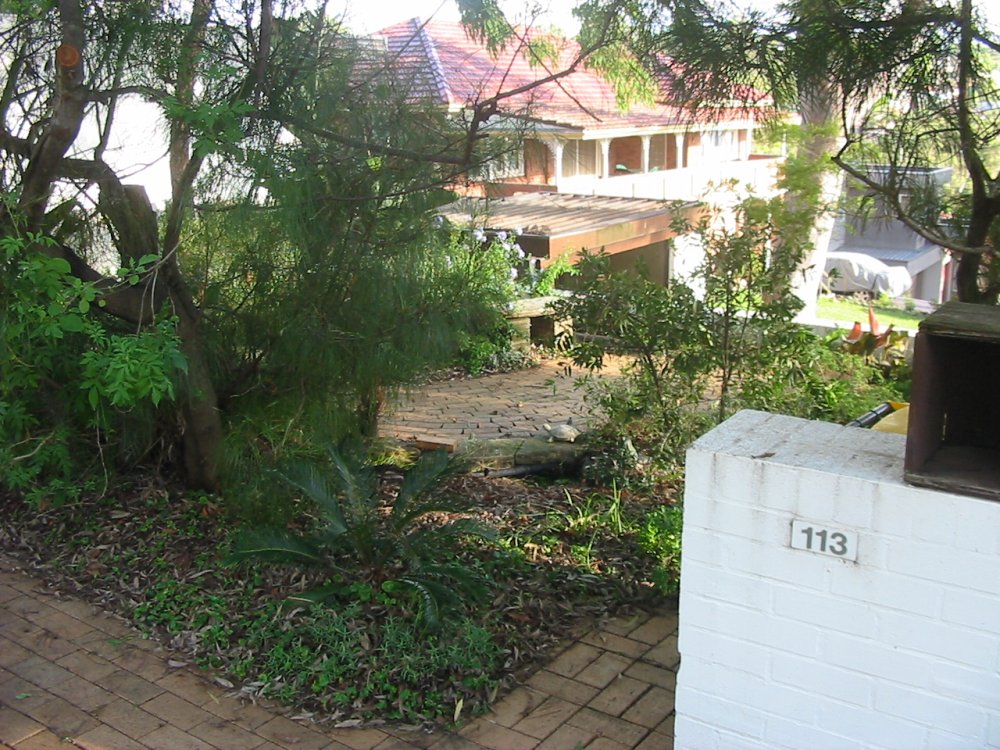
May 2006. The front yard paths used those same old concrete tiles. Also there'd been a drain channel and a step-up formed of timber planks, that of course had rotted away. My mum was getting on in years, so that unevenness was becoming a problem. Also the wonky paving and general lack of visual structure of the front garden looked crappy. My dad had designed the layout, but he'd made it all rectilinear, presumably to match the style of the house. Personally I like a bit of contrast, and more flowing forms.
So the next project was to landscape the front garden, also with nicer paving. After showing my mum some sketches, here's the paving under way.
 |
 |
 |
 |
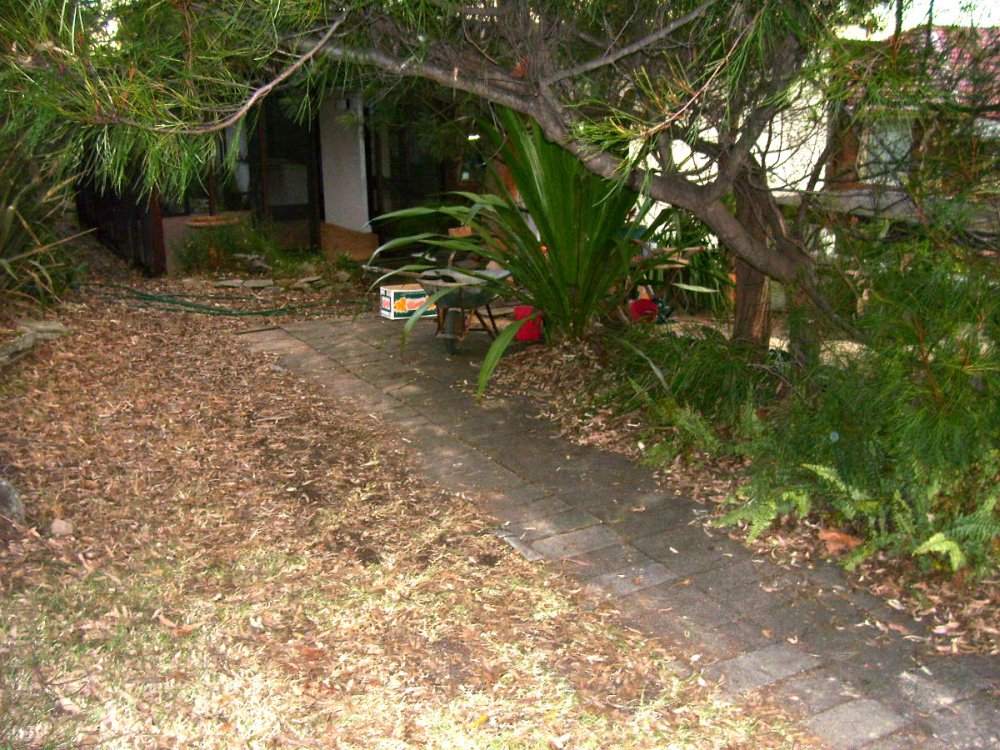
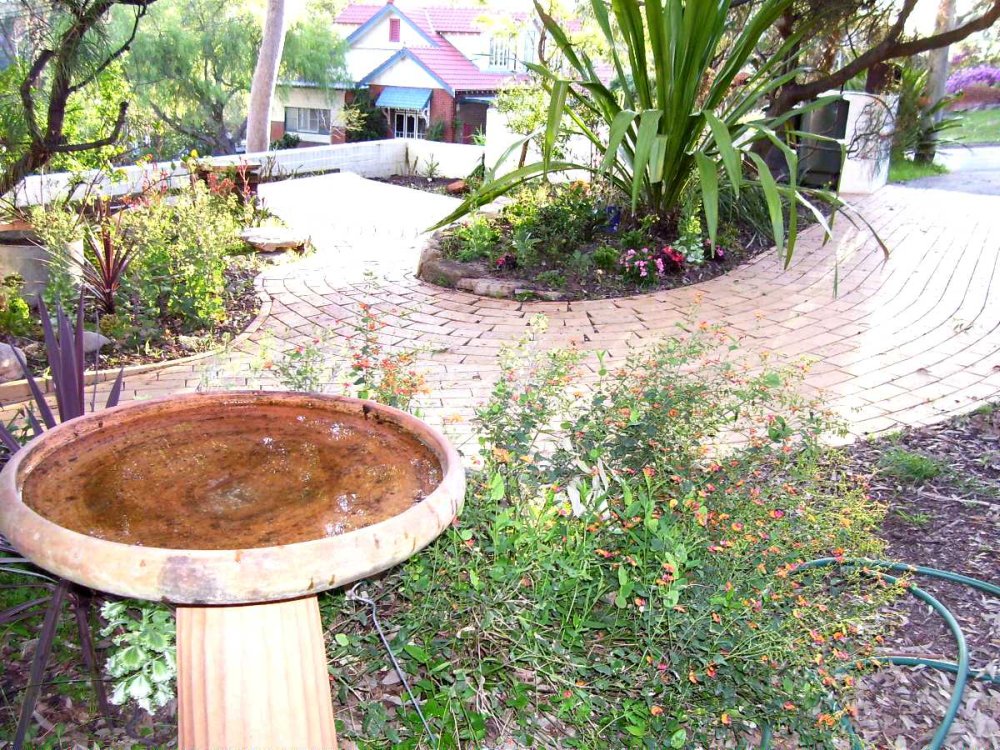
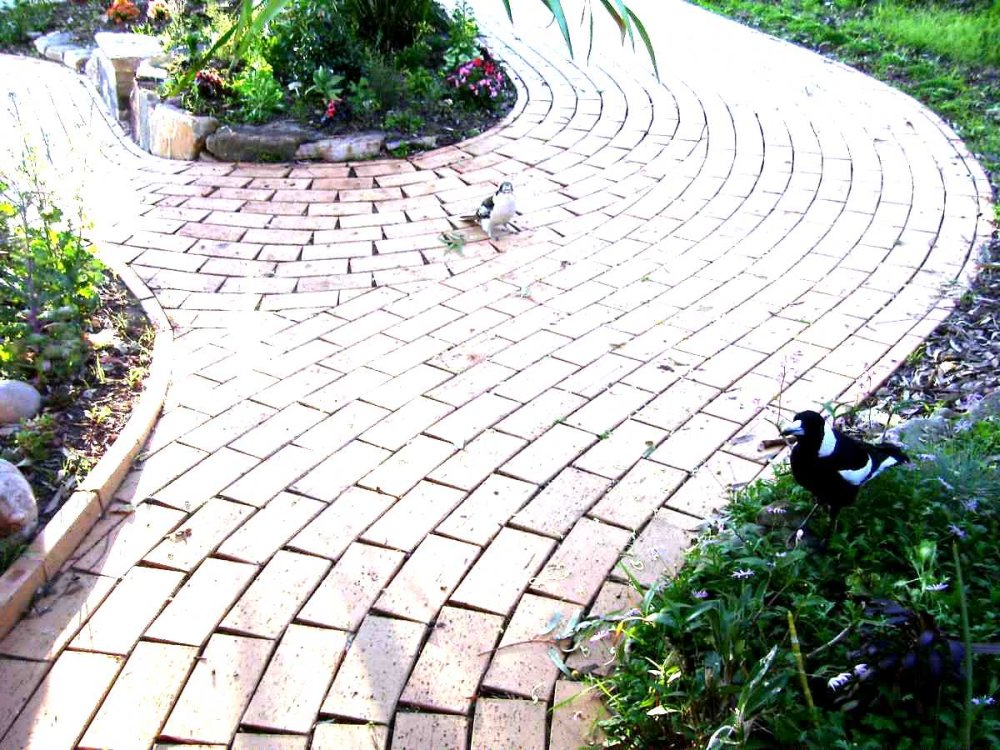
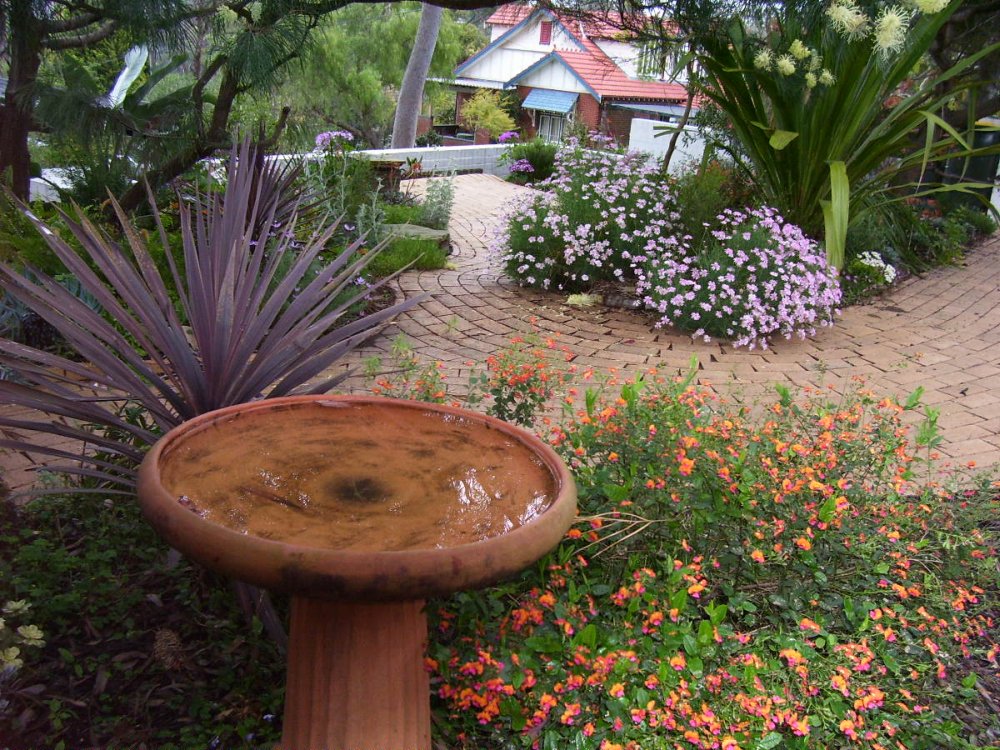
November 2006. A while later with new plants established the garden is starting to look nice.
 |
 |
 |
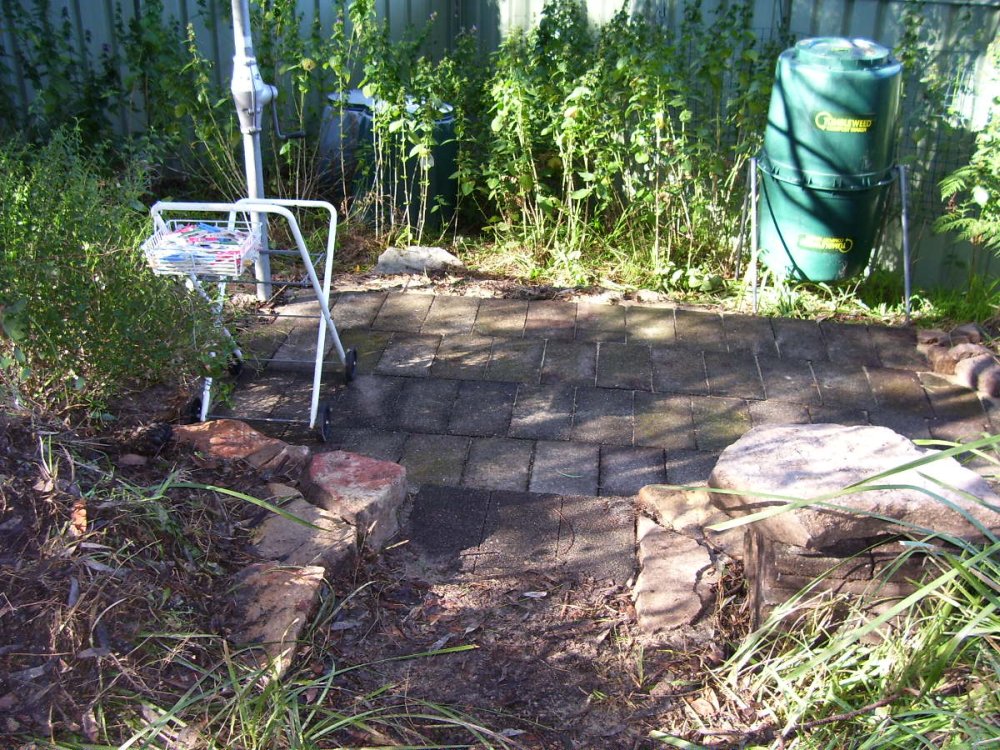 |
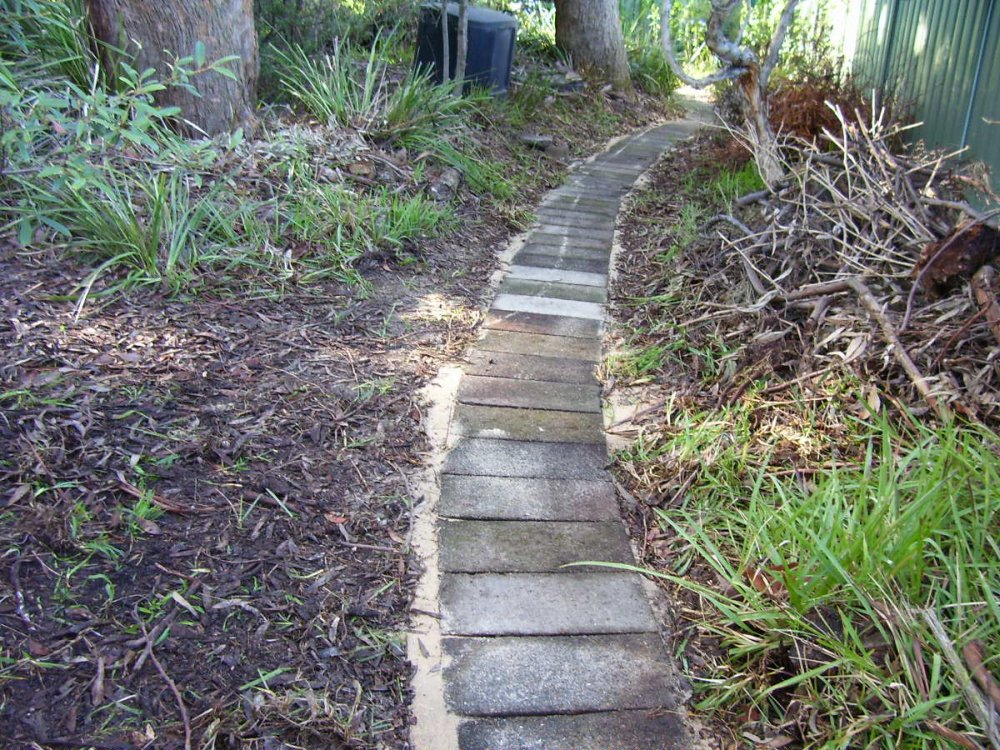
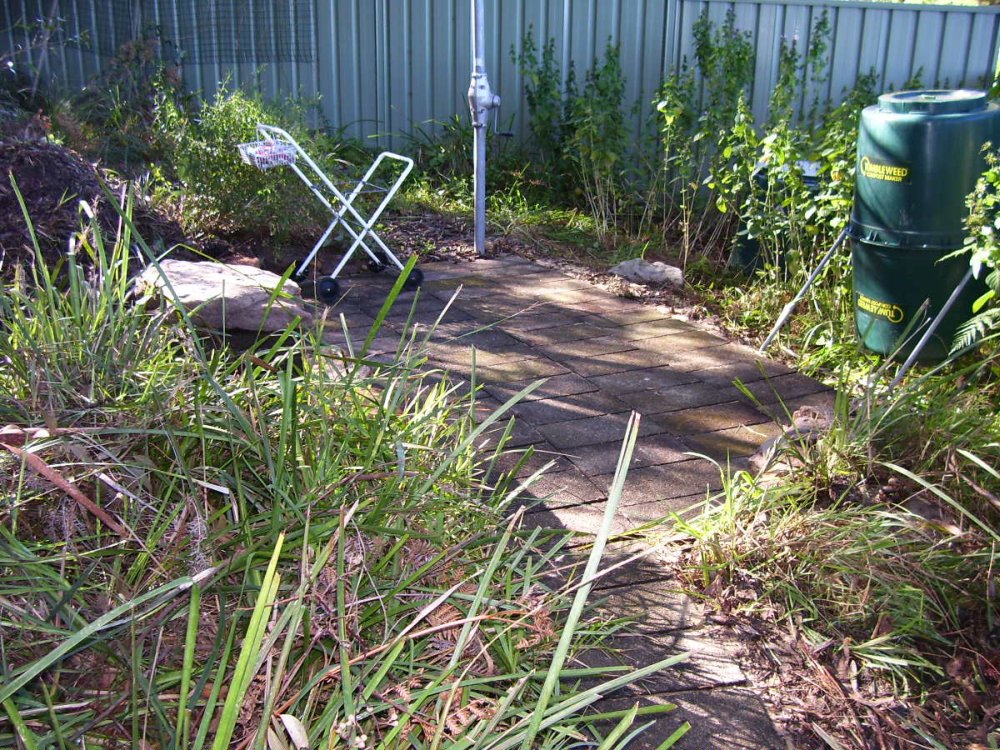
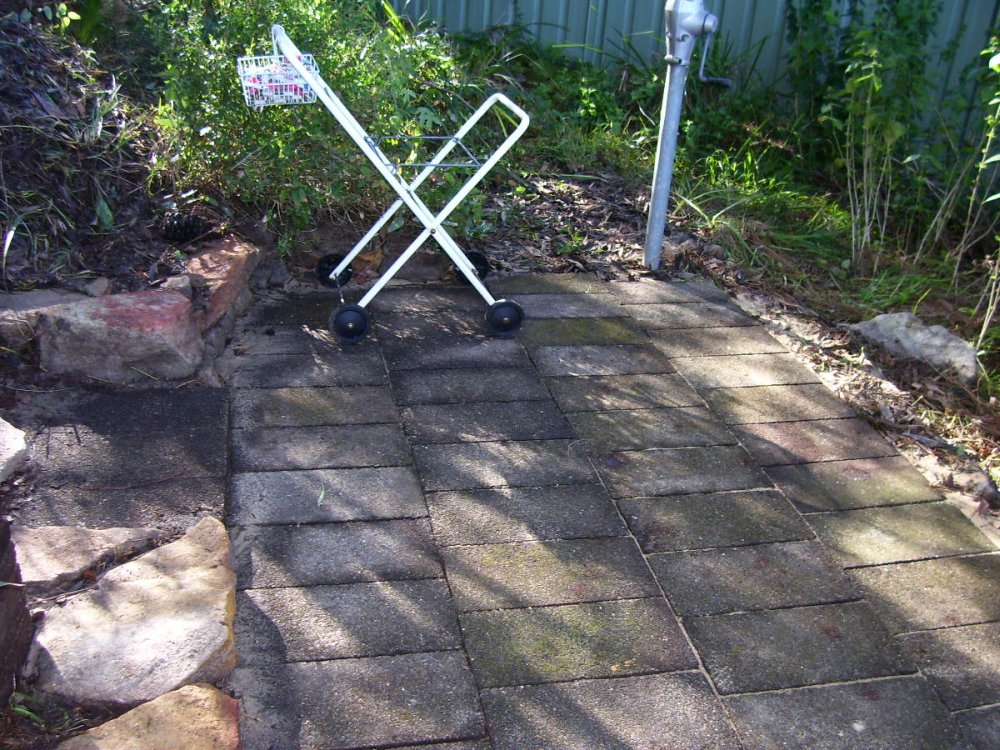
August 2006. Now I had a large pile of surplus concrete paving stones. The path down the back to the clothes hoist was just bare dirt. So I used some of the pavers to do a little winding path and paved area around the clothes hoist.
 |
 |
 |
 |
 |
 |
 |
 |
 |
 |
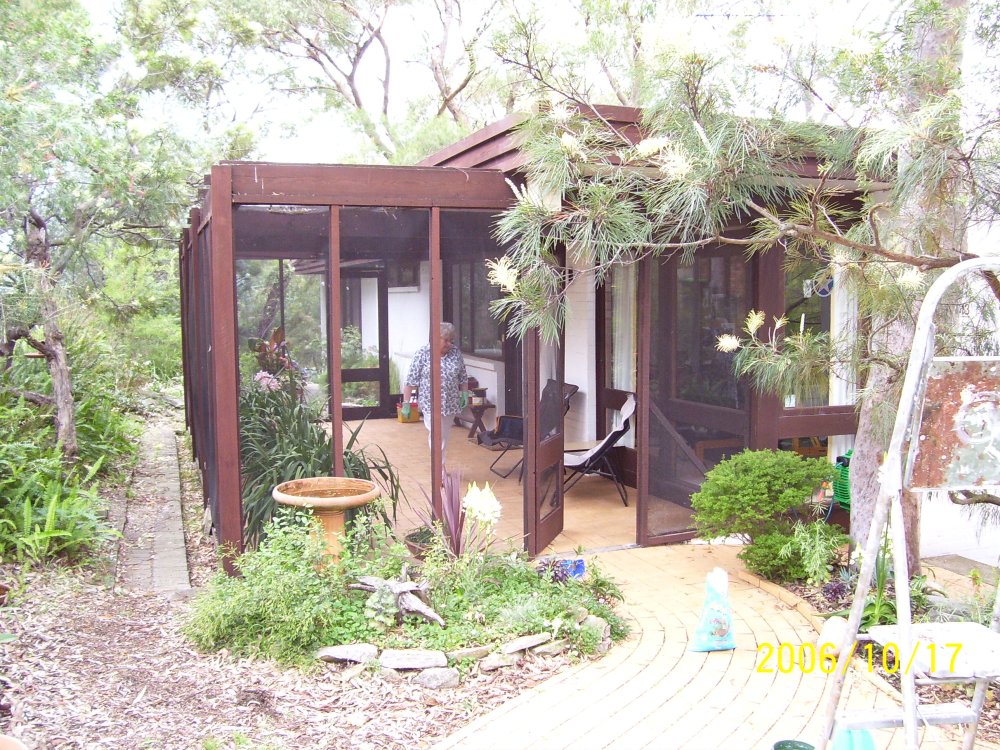
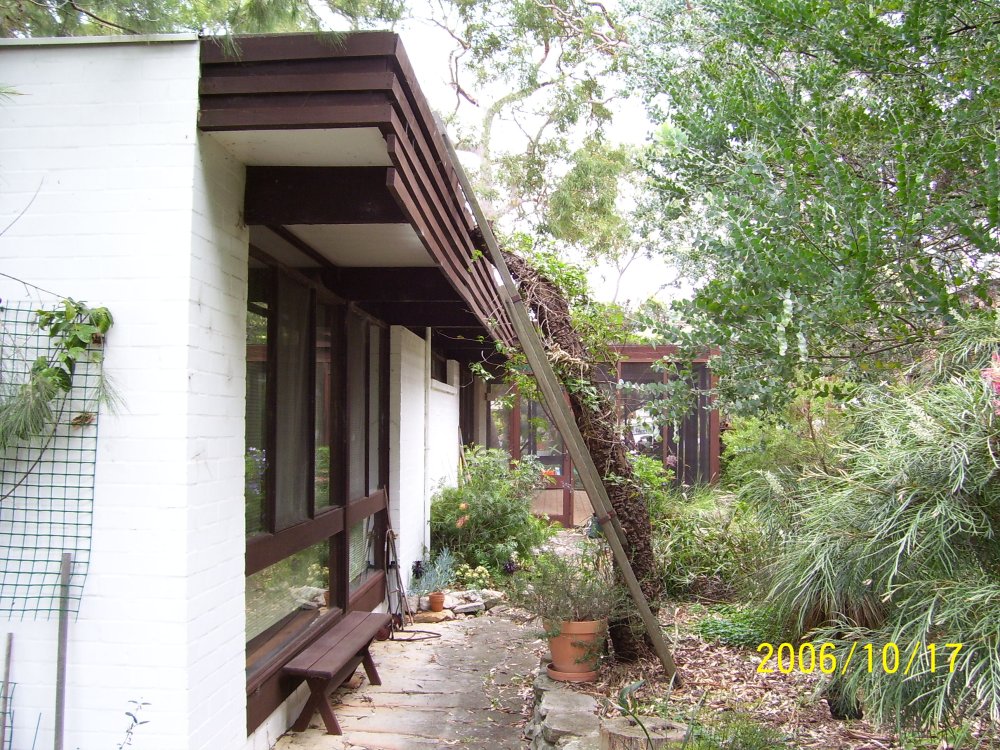
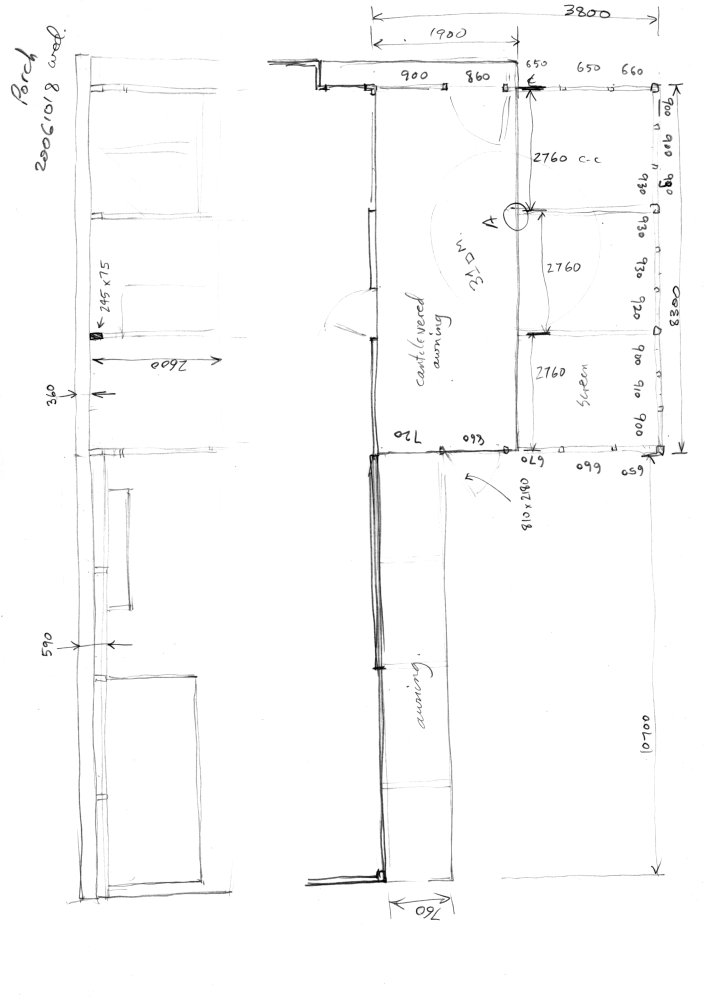
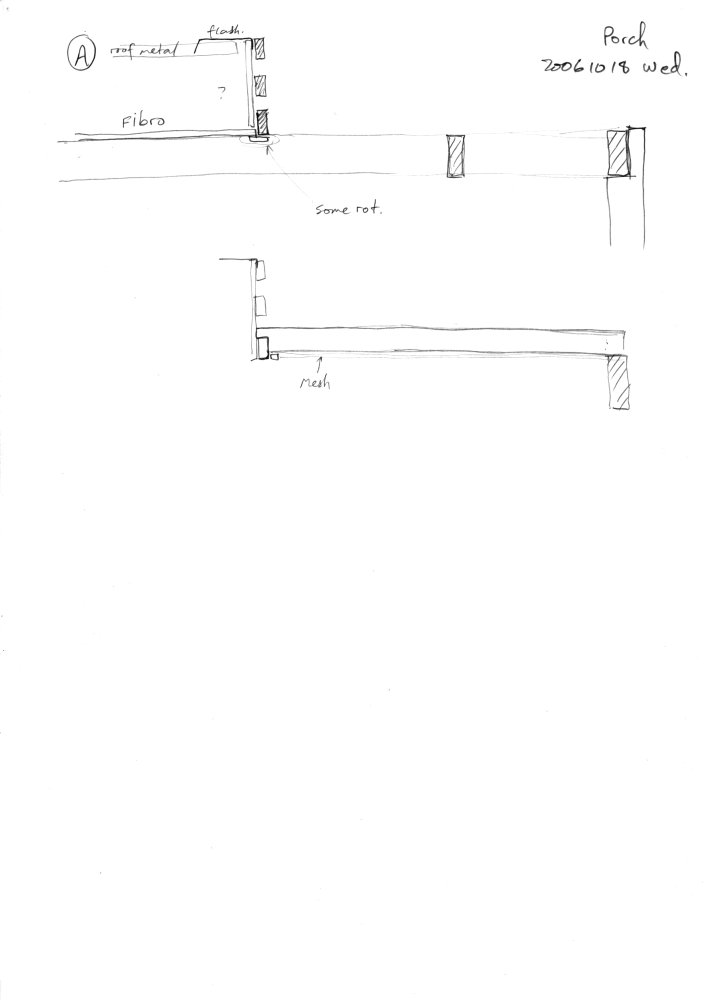
October 2006. It was becoming obvious something had to be done about several problems:
Still, having to mostly only do hand sketches makes things so much easier.
The first stage was dealing with the roof edge problem, together with the major beam damp-rot problem.
 |
 |
 |
 |
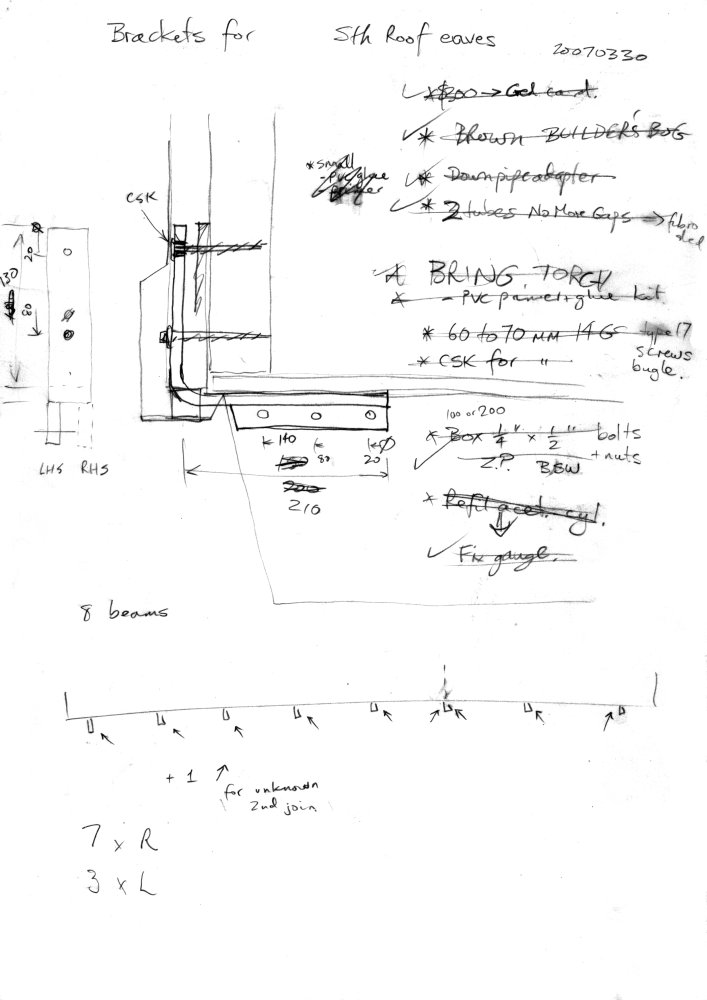 |
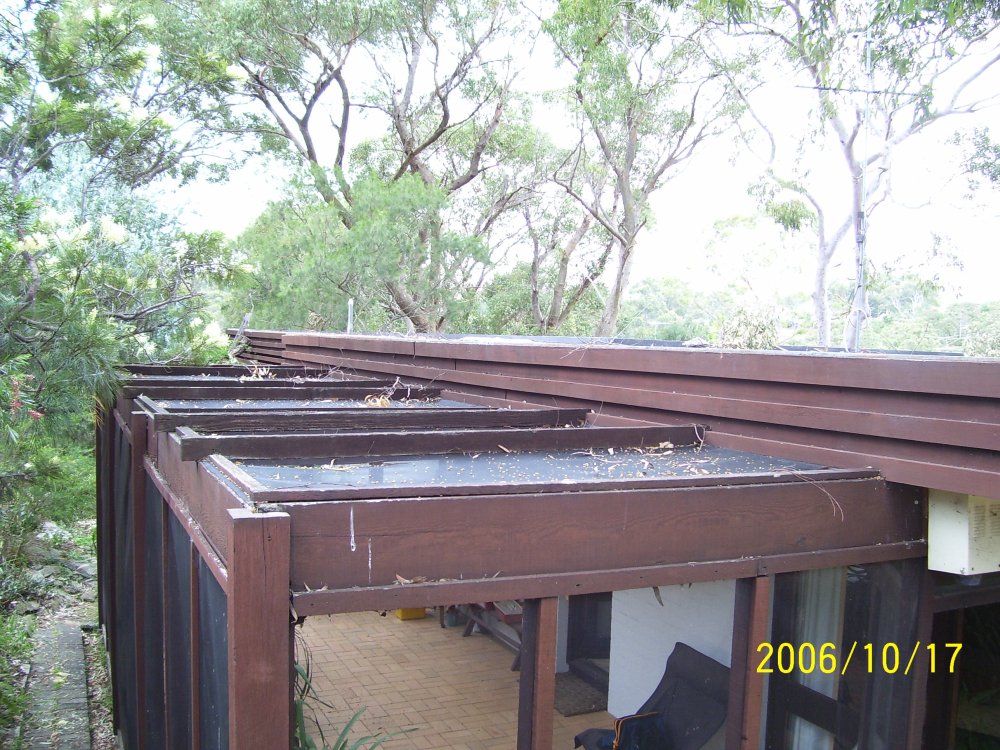
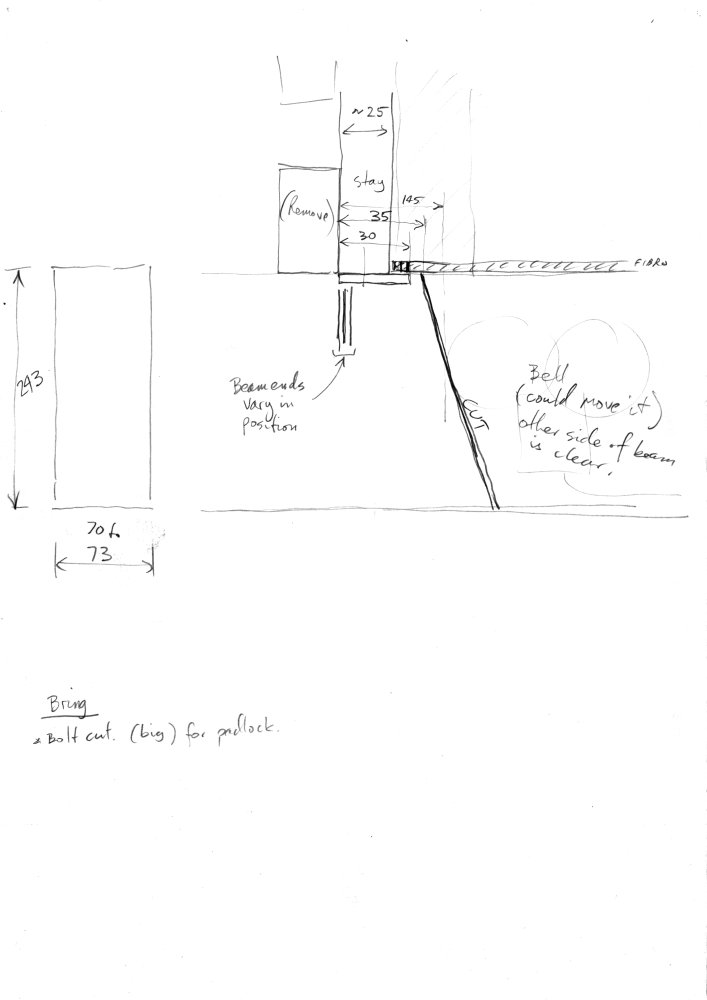
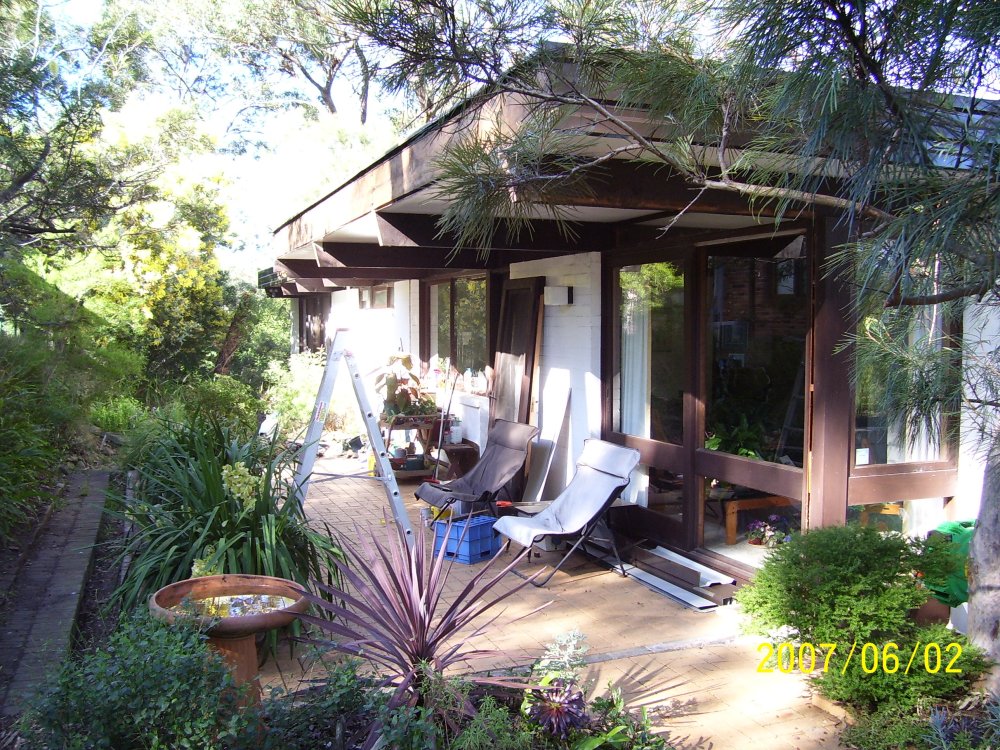
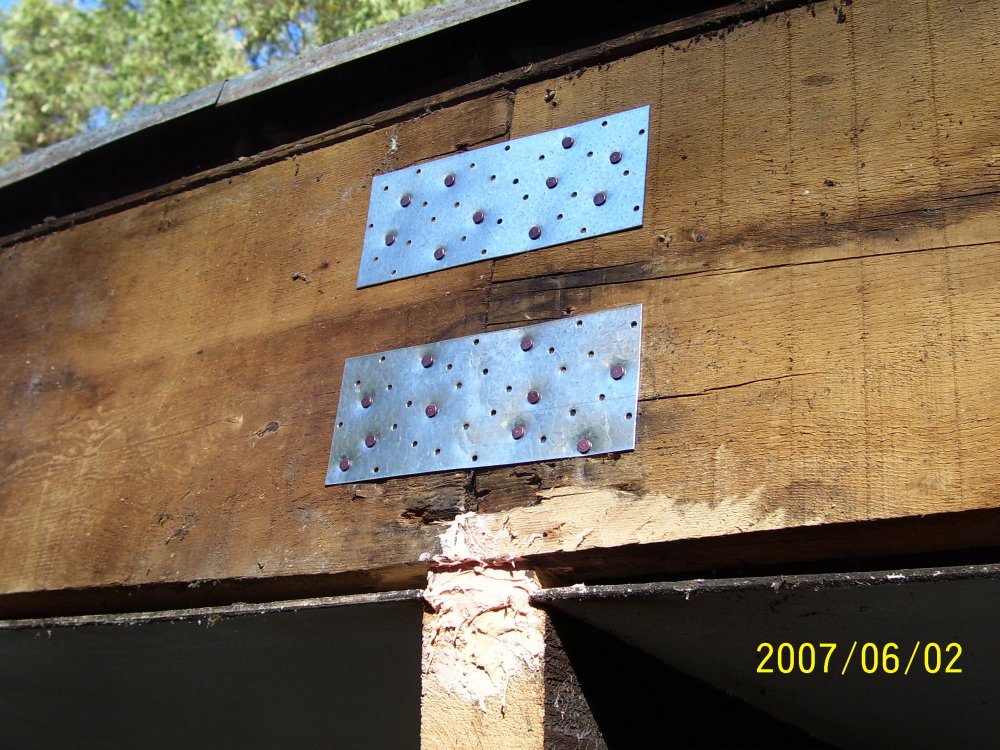
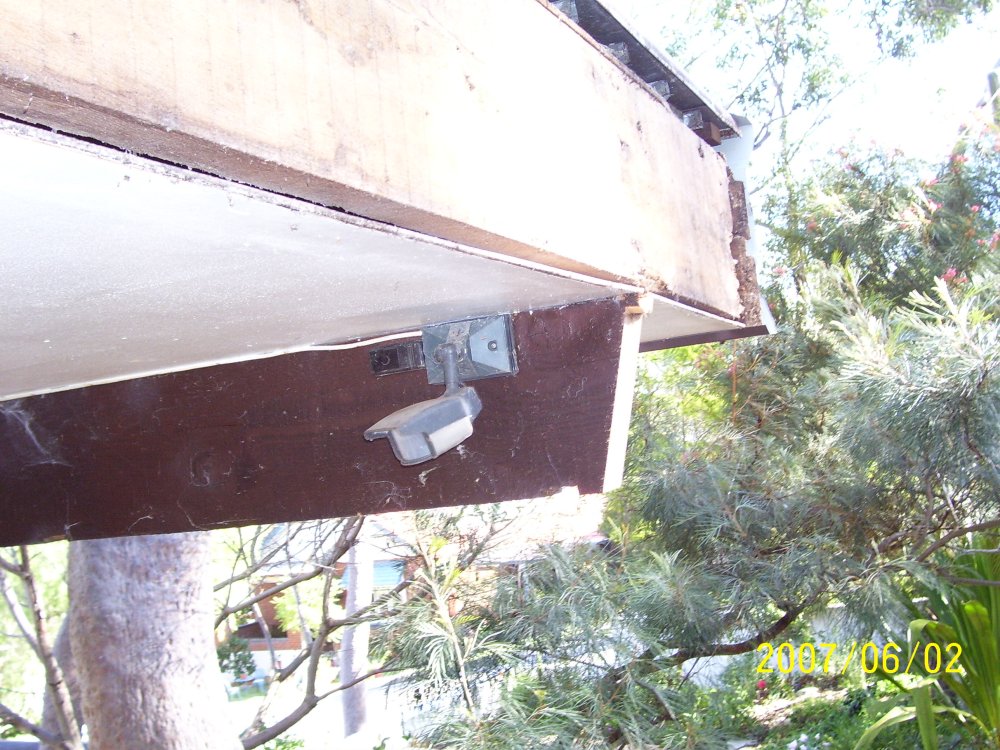
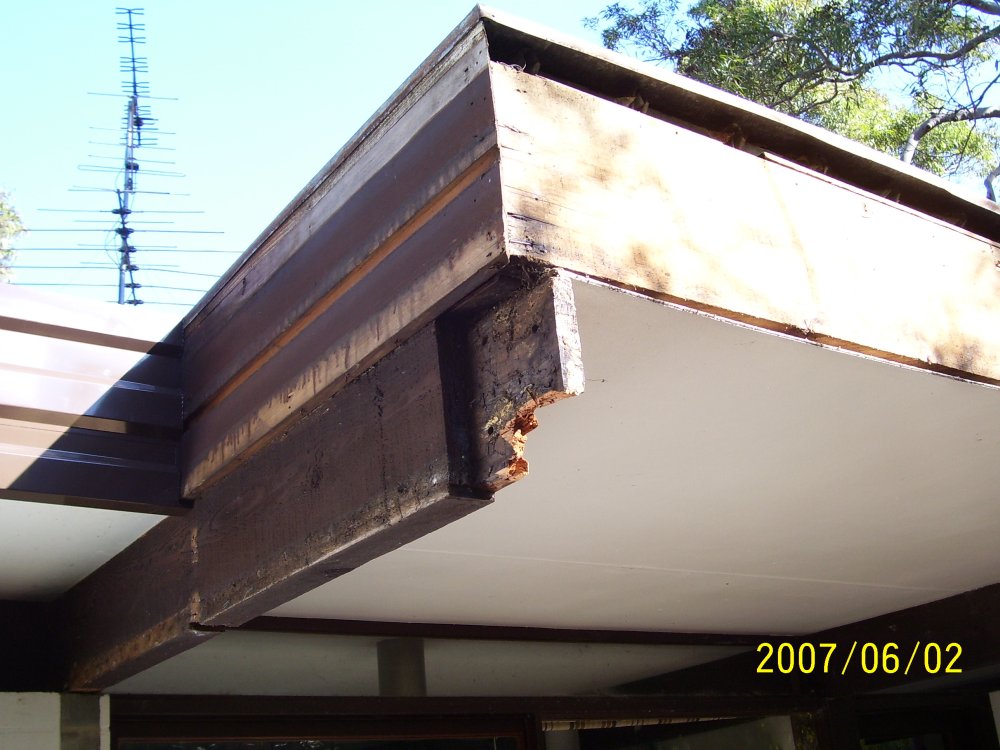
Jan-Mar 2007. Pics 1 & 2 are the existing structure of the roof edges. The thick wooden beam projects out to the very edge of the facia.
Pic 3 is where I would cut off the beam ends, at an angle. But how to cut them neatly, all the same?
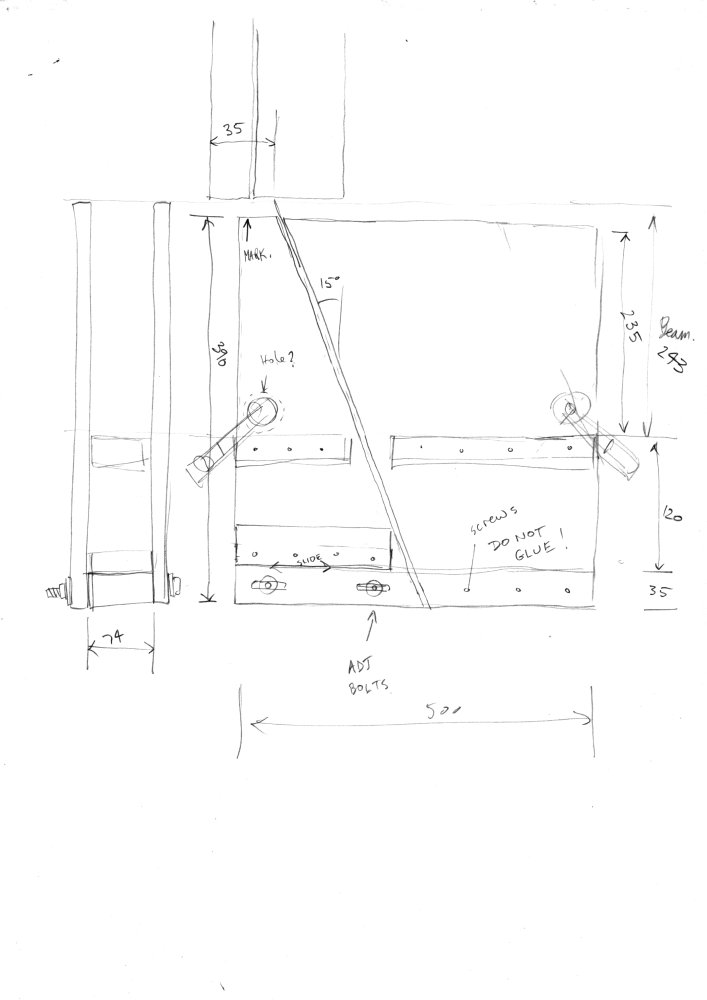
Pic 4 is a saw guide jig, to be G-clamped to the beam and allows use of a hand saw. Ha ha... about 16 large beam ends to do, all of them being upwards cuts while standing on ladders. This buggered my shoulder, which slowed things down for a while.
Pic 5 is a metal bracket, 1 or 2 of which were required per beam end, to reinforce the eave backing boards.
 |
 |
 |
 |
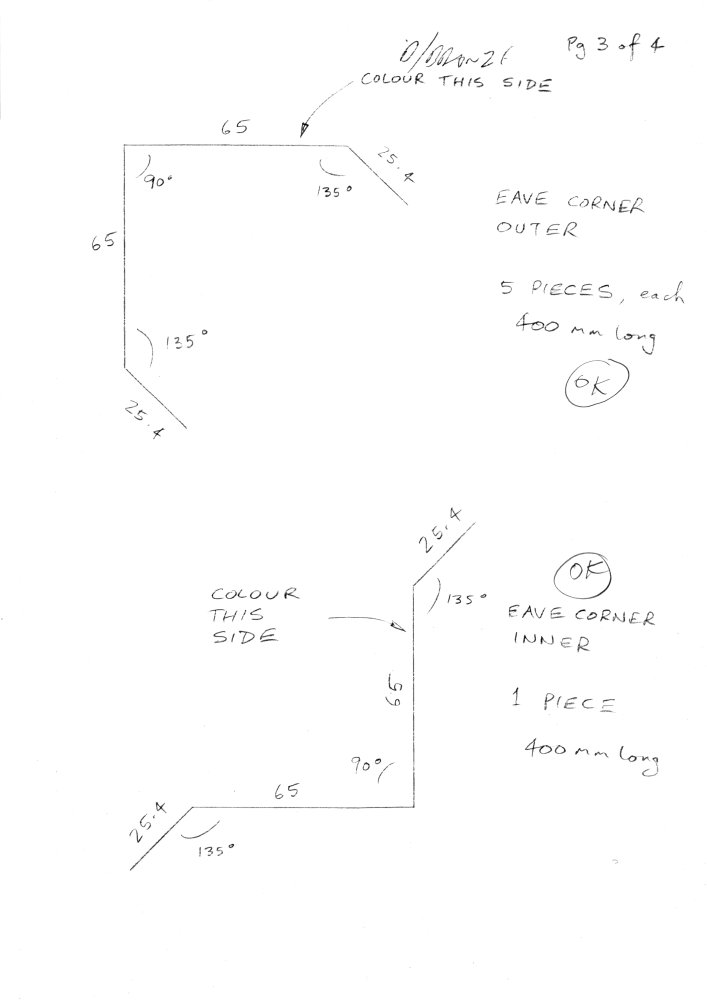 |
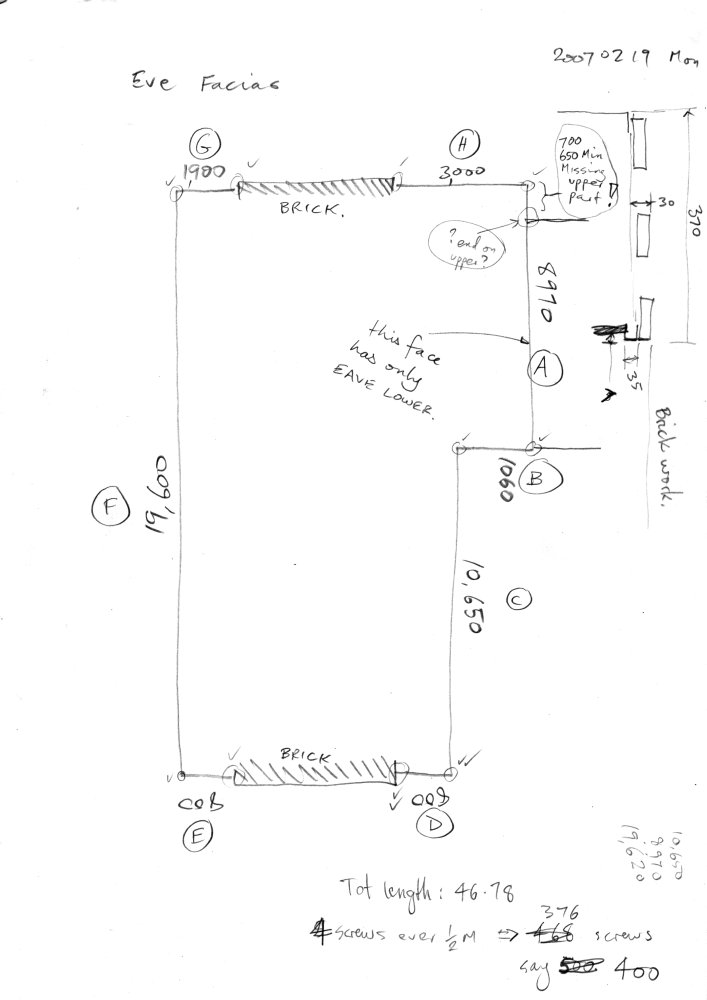
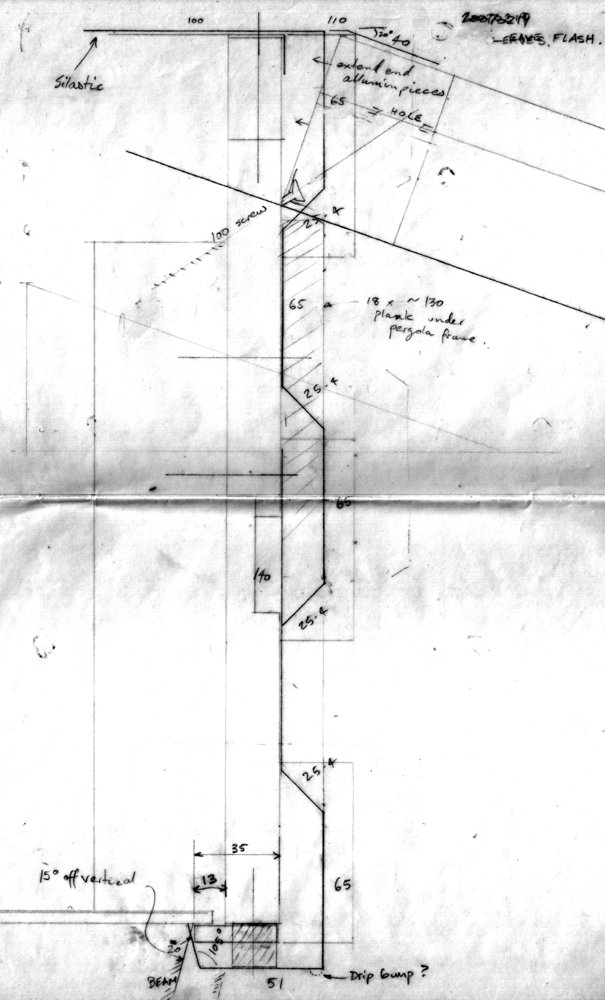
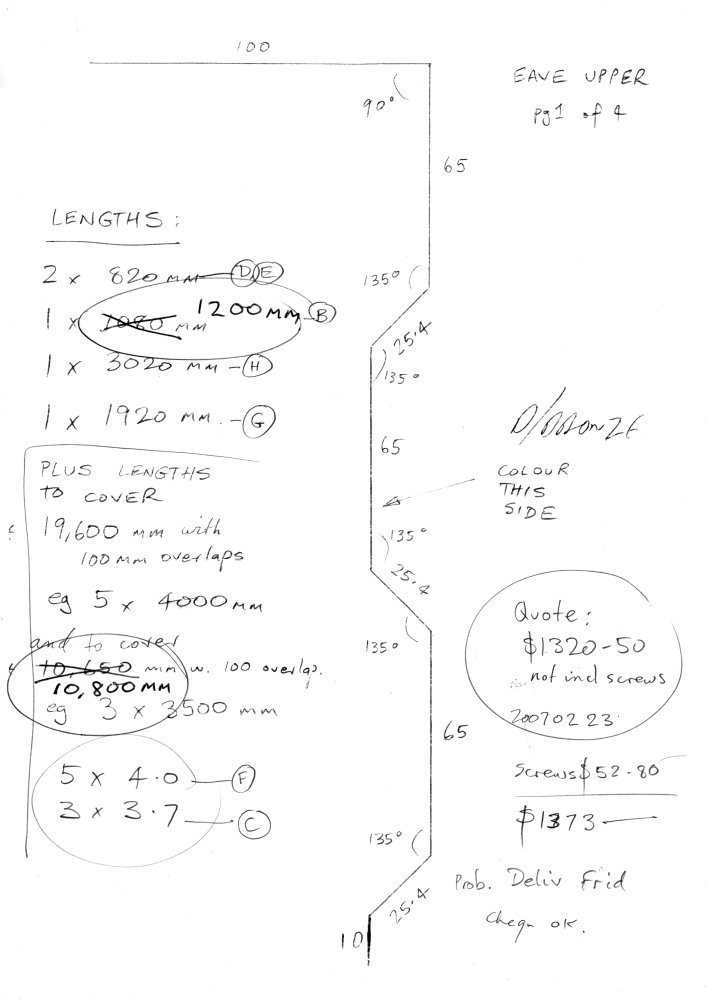
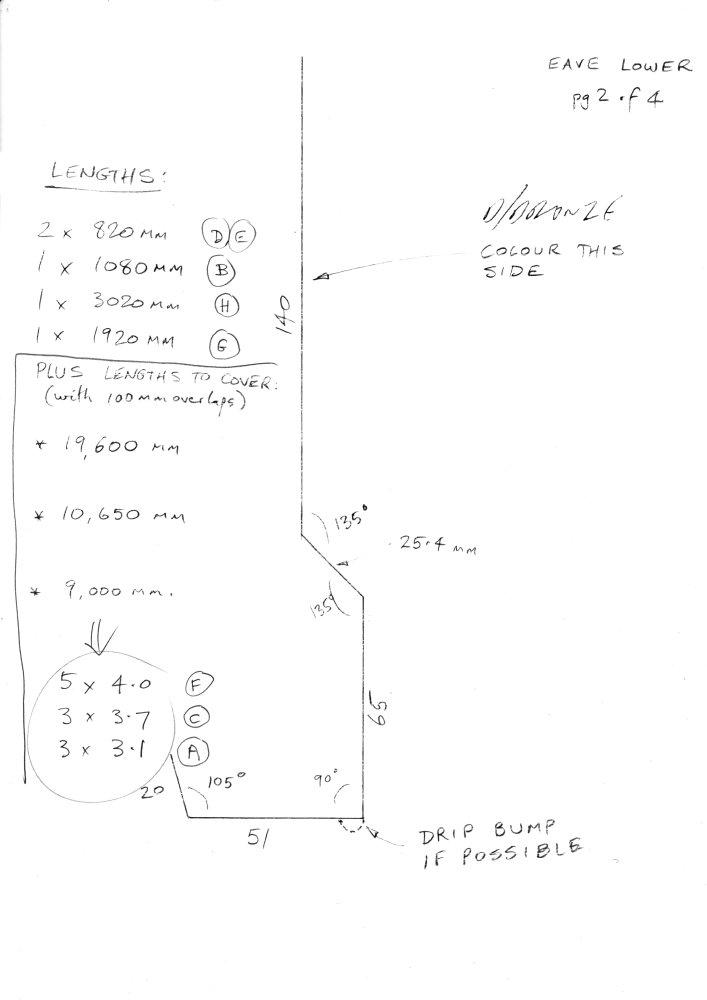
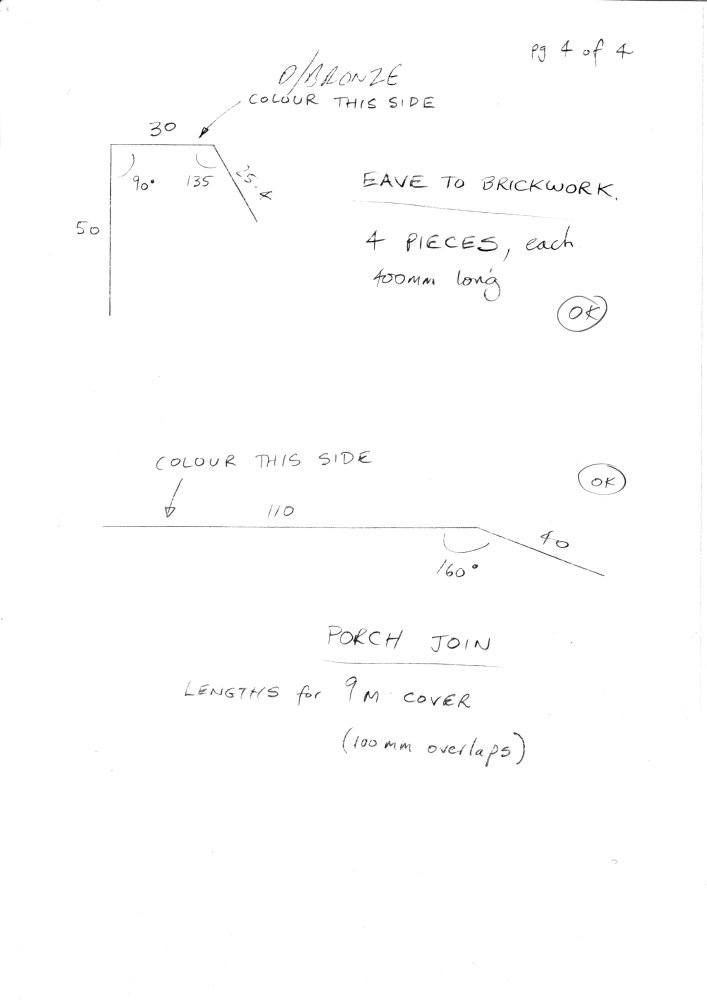
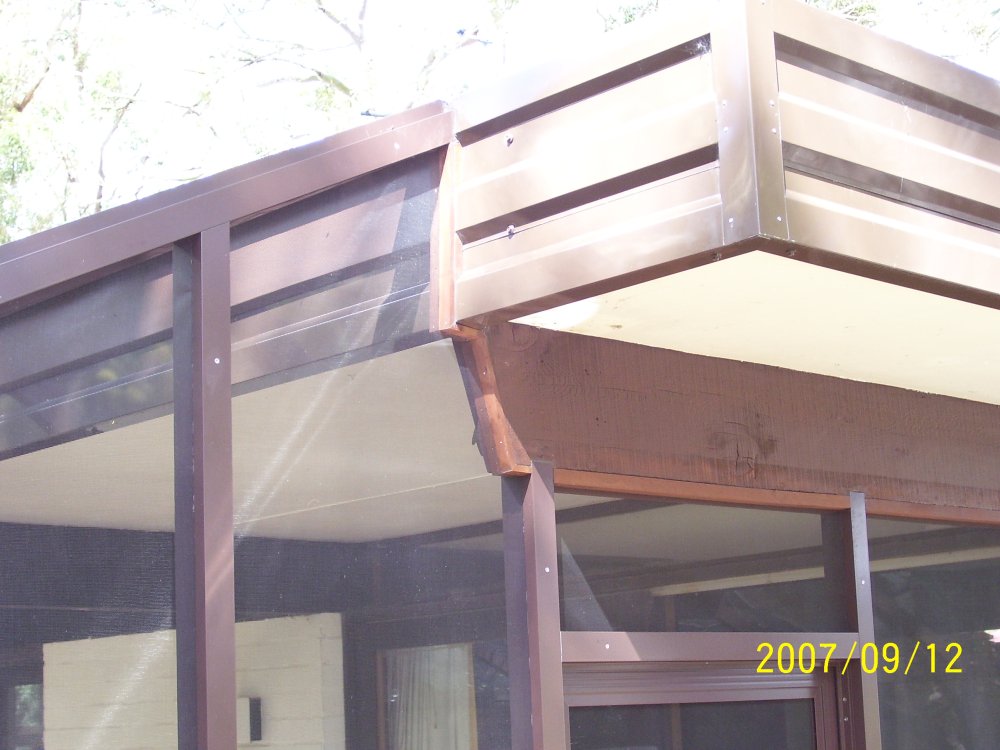
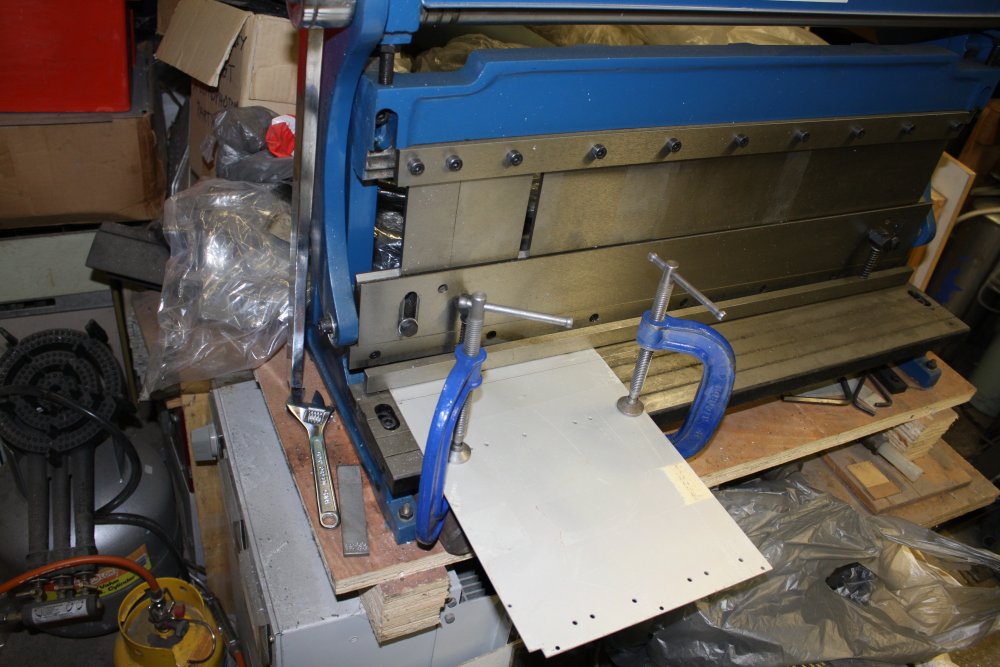
To replace the old wooden trim on the eaves, I had sheet metal colourbond folded to give an appearance similar to the original wooden strips. Pic 1 was done full size on two sheets of drafting film. The bottom sheet has the original wooden structure. The top sheet has the new metal profile. Pics 2 — 5 are the drawings given to the sheet metal folding company. The colourbond colour was chosen to be similar to the existing appearance.
 |
 |
 |
 |
 |
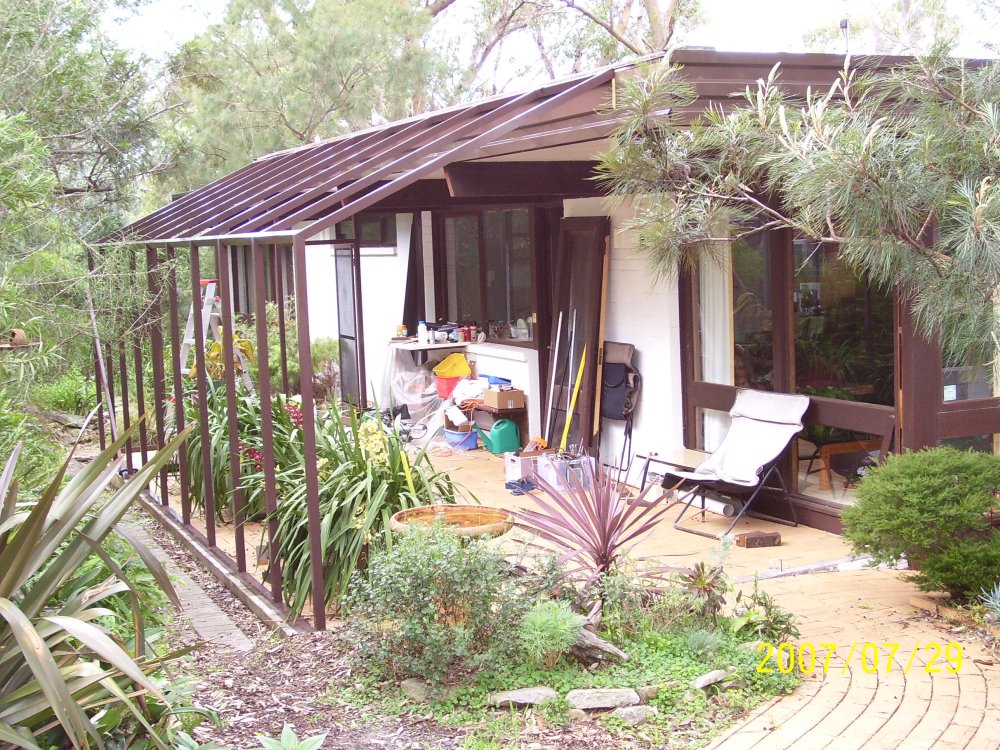
June 2007. Some photos of the old porch demolished. At this point the new metal eaves were finished all around the house except in the porch area. Not very good views of the new eave fascias in the first and 4th pics.
The last pic is the pile of newly bought materials for the porch structure.
 |
 |
 |
 |
 |
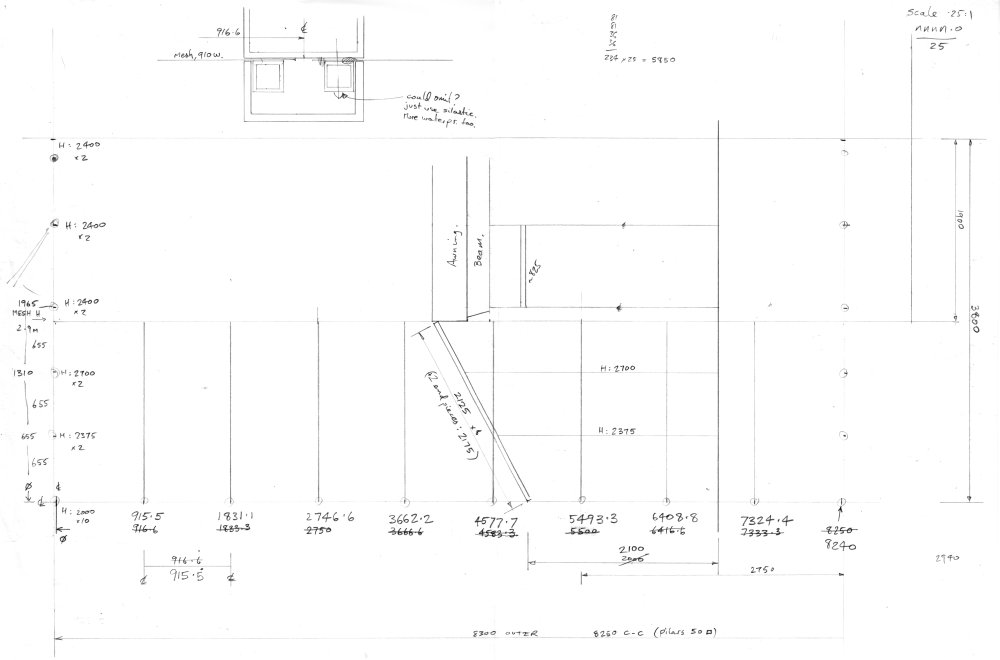 |
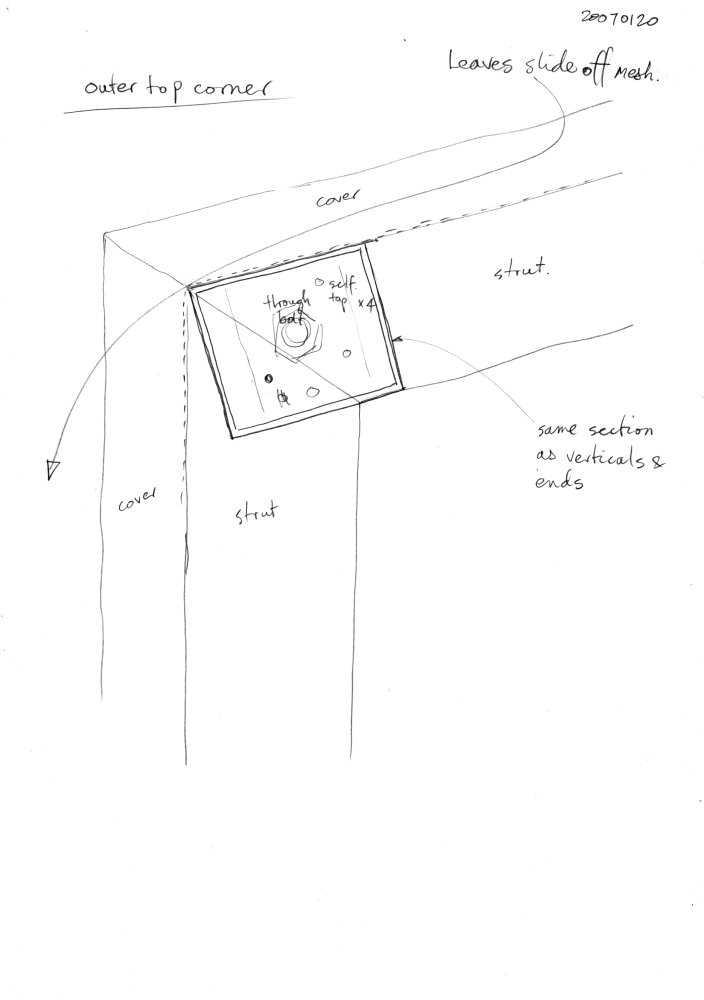
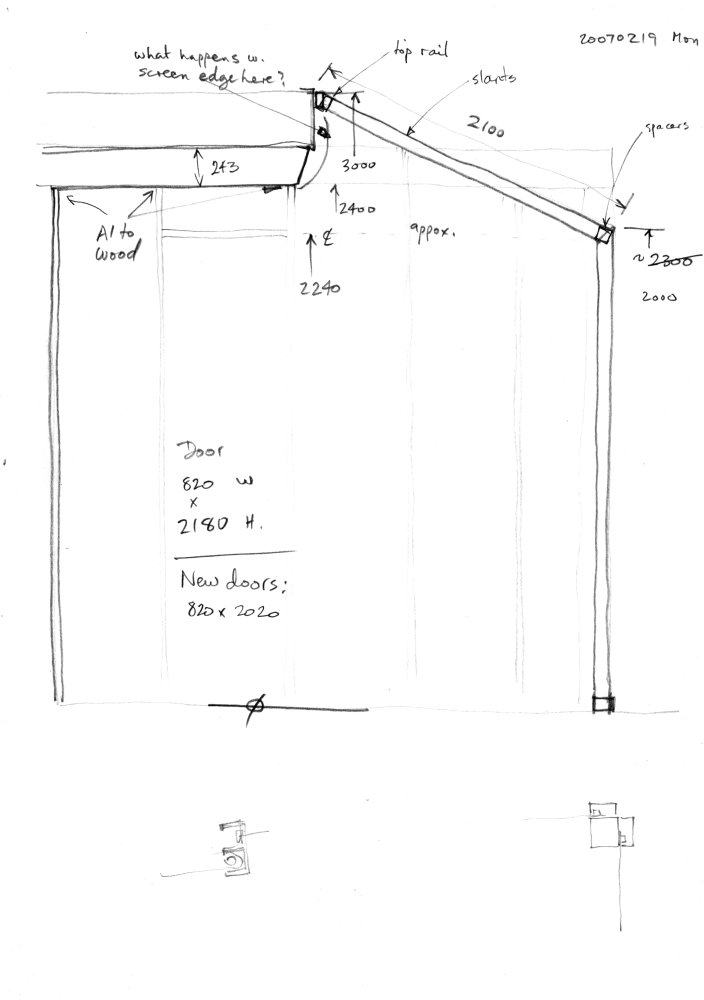
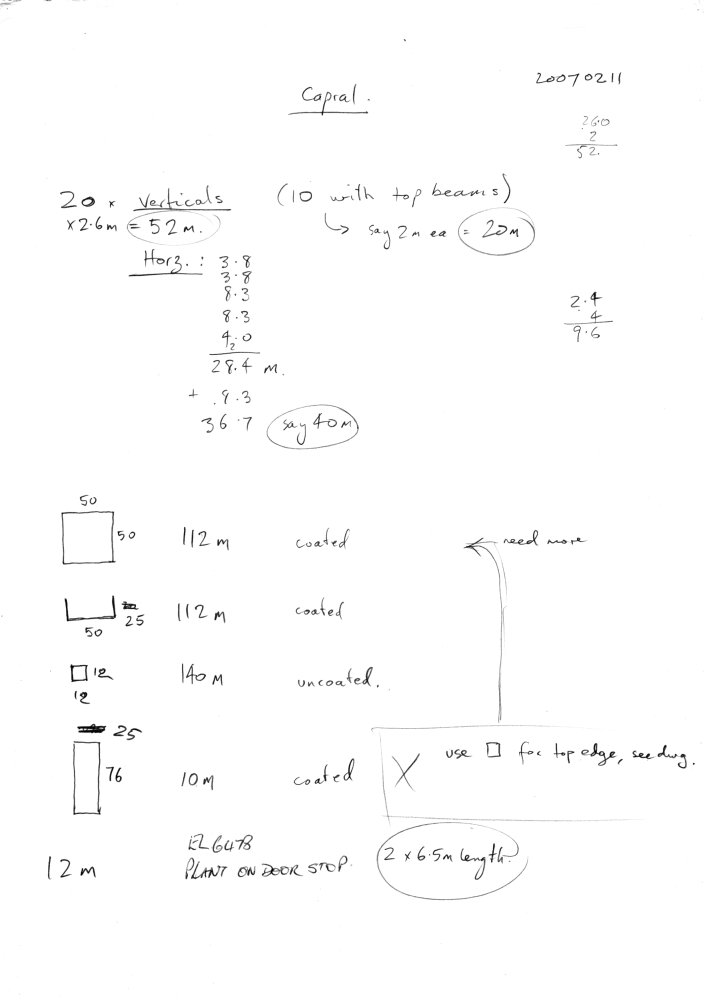
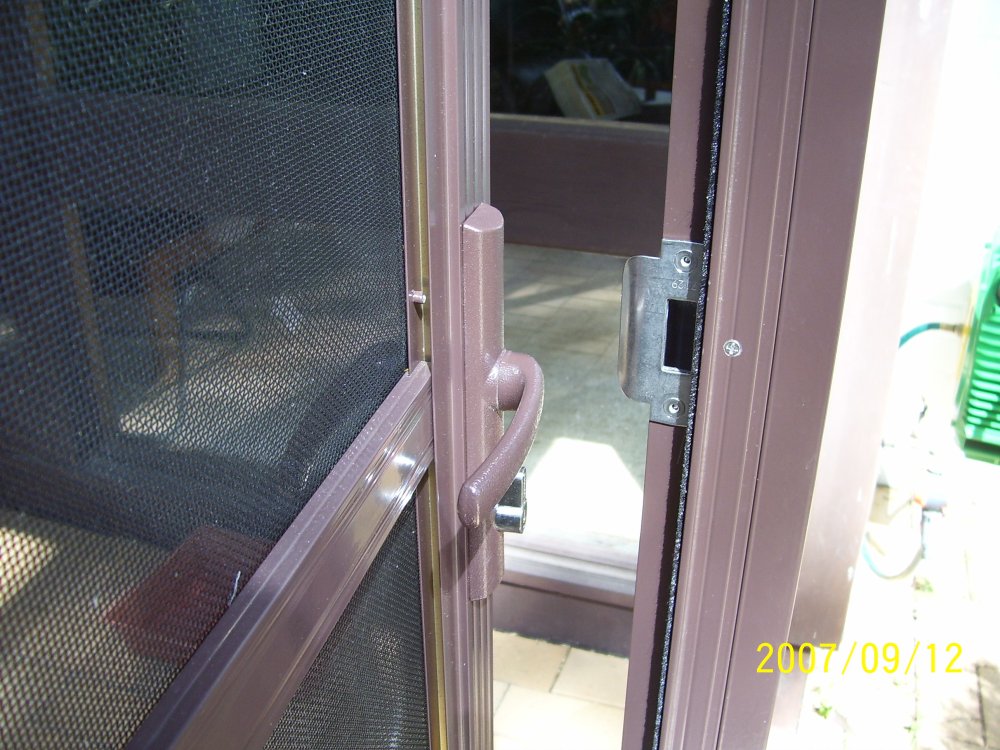
Oct 2006. The design of the new porch had been worked out before removing the old one. This design was severely constrained by the available simple aluminium section shapes. It turns out that more complex sections as you see in aluminium window frames and commercial construction, are all proprietry and made only to order for companies specializing in architectural products. So for an individual, available products are mostly limited to just the simple square, rectangle, round, U-channel and bar stocks.
How do you make a nice looking screened patio using only simple section shapes? The primary problem is how to secure the flyscreen. Also I wanted the top to be sloped enough for leaves to slide off, and that also meant there mustn't be anything at the lip to stop them, or there'd be a leaf buildup there.
 |
 |
 |
 |
 |
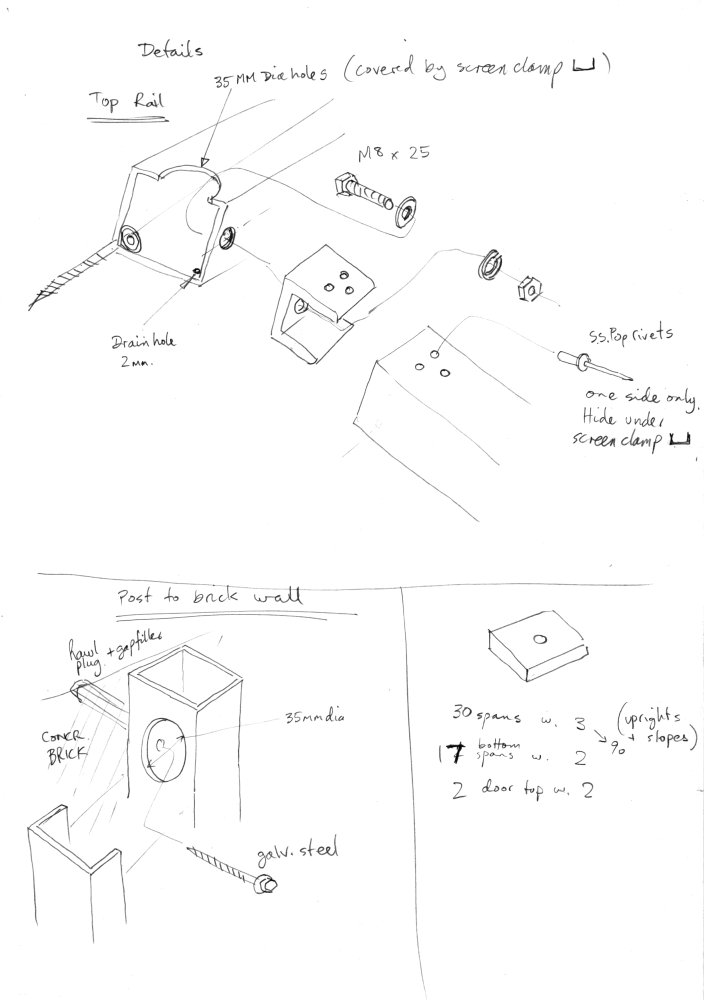
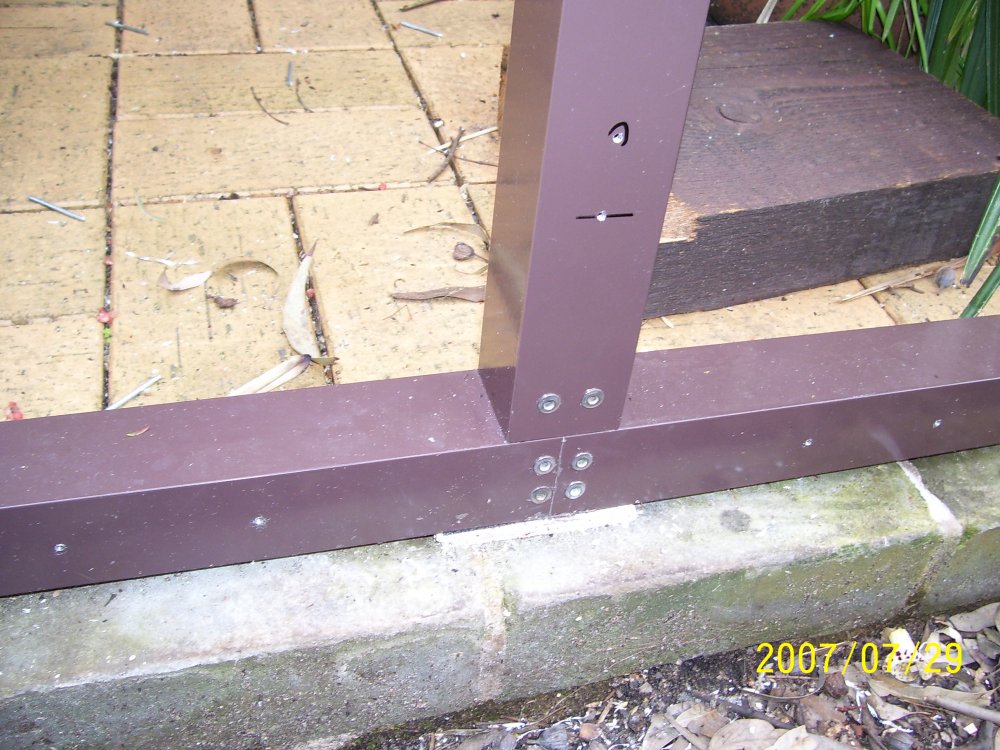
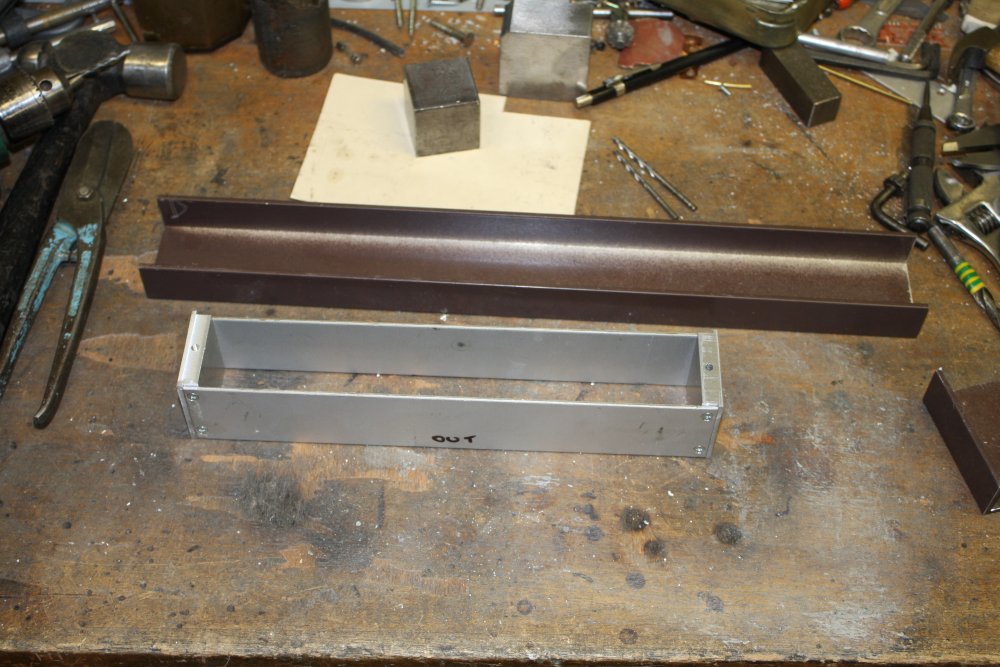
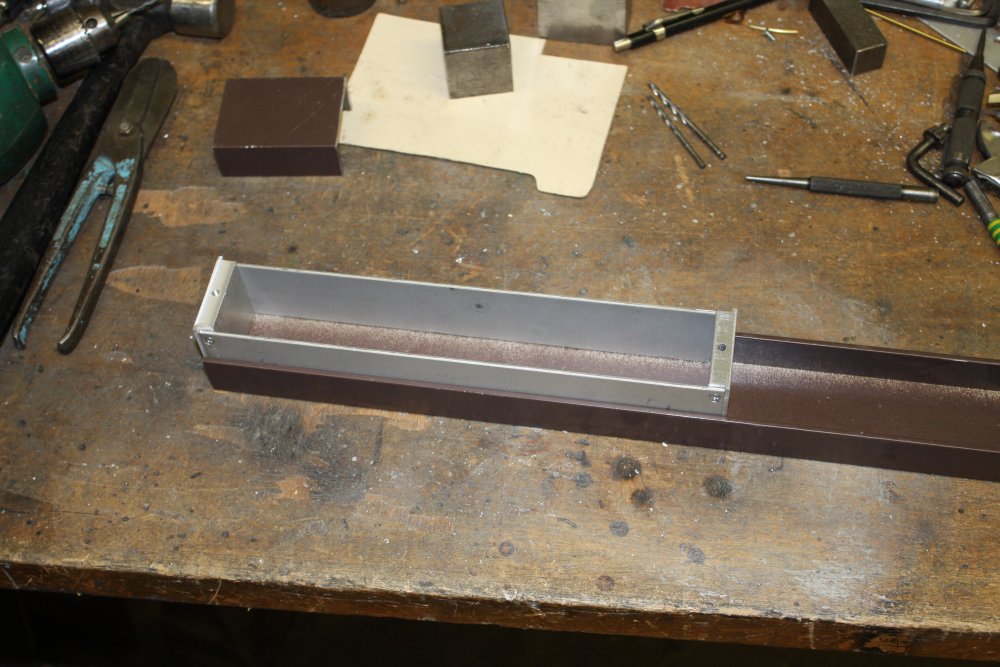
The method I came up with uses plain square sections for the structural frame, with the screen held on by clips, that also act as positioning guides for U-section covers over the screen edges, screen clips, and access holes for the interconnecting brackets and anchor screws.
 |
 |
 |
 |
 |
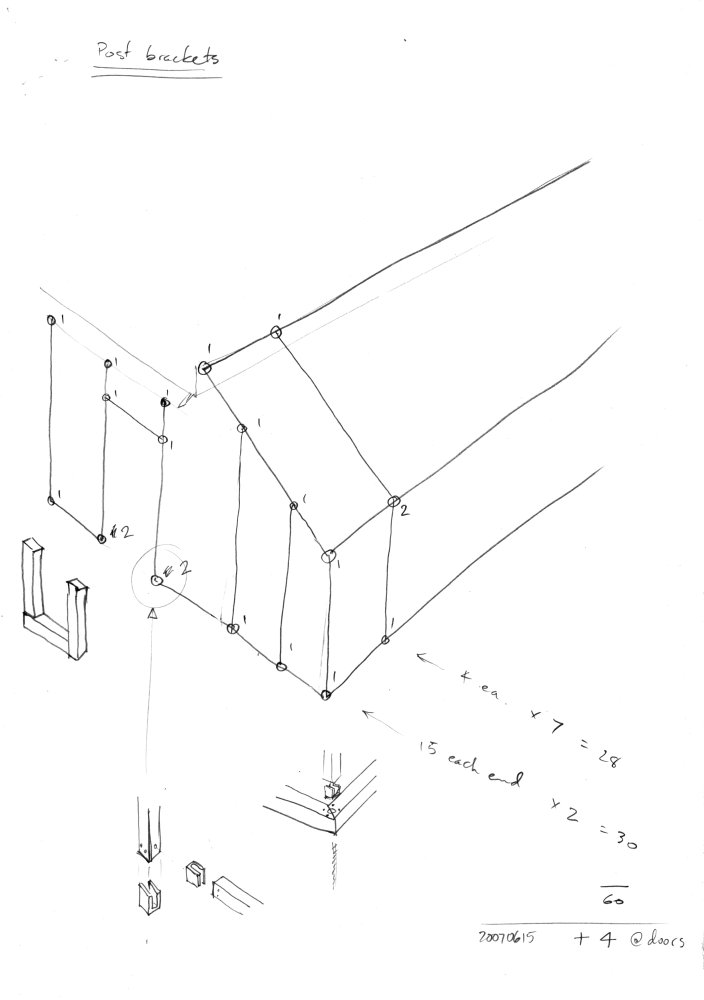
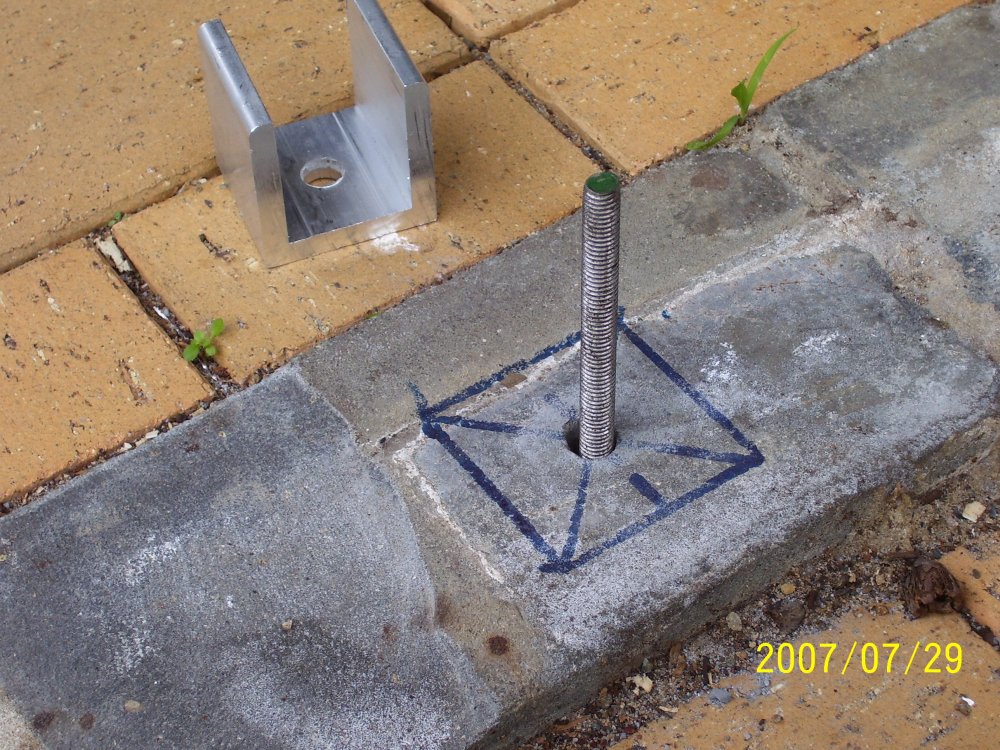
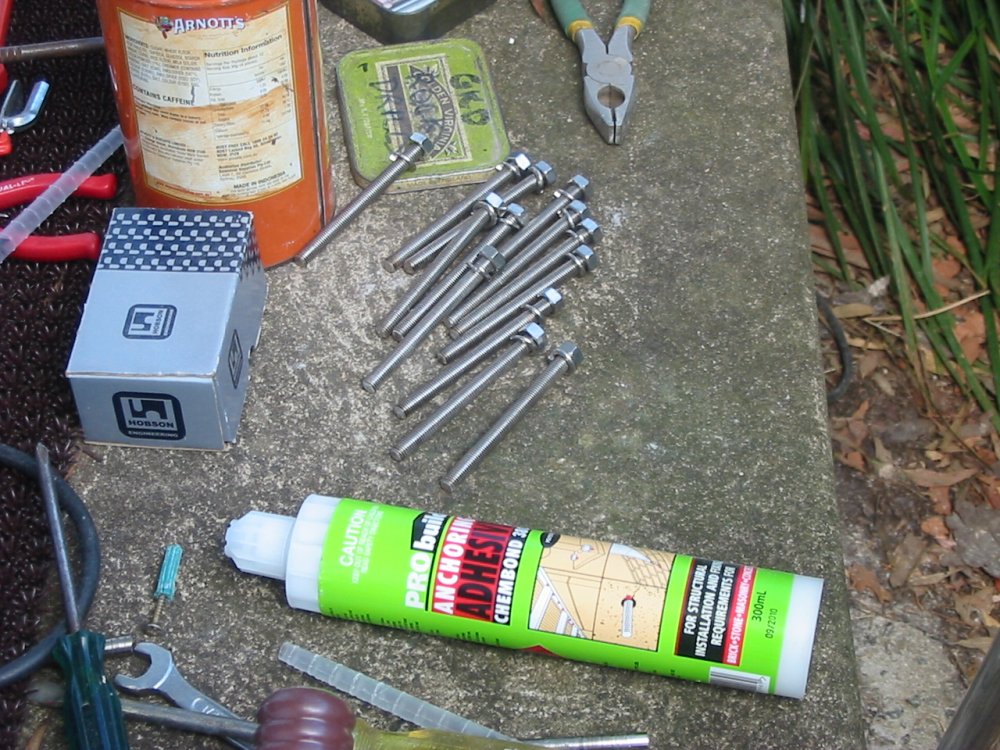
The anchor points used epoxy chemical anchors, which are small glass tubes containing a two-part epoxy. You drill a hole in the brick or rock, drop in the glass tube, then with a stainless steel threaded rod that has a bevelled end, drive that into the hole with a drill. The rod breaks the glass and mixes the epoxy. A few hours later you have a really solid mount point.
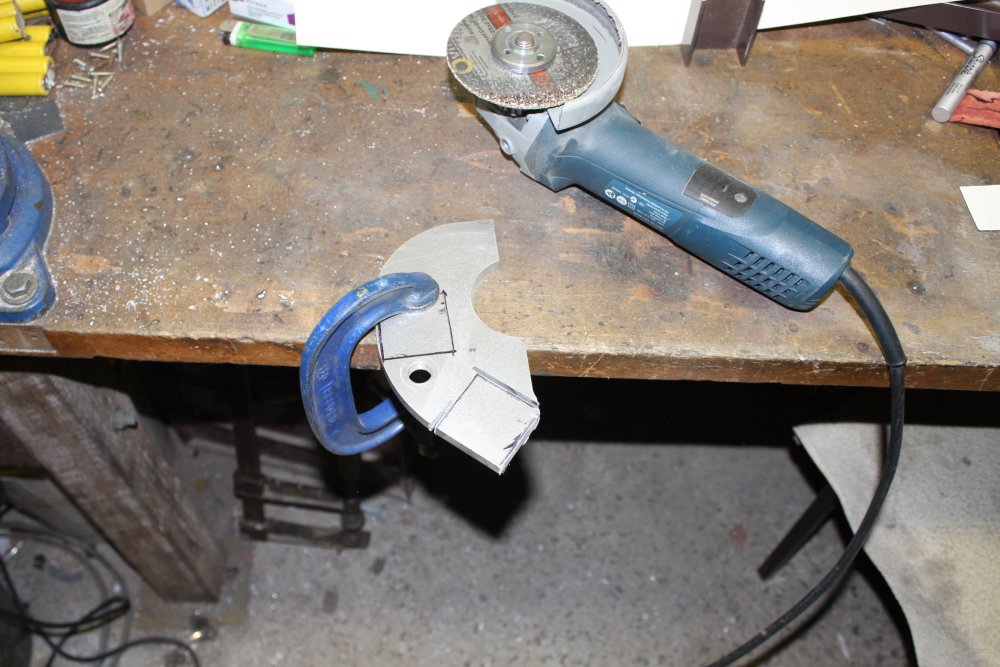
Make the rods longer than you need, then once the epoxy is set, cut the excess off with an angle grinder. That way you don't have any damaged thread due to the drill chuck.
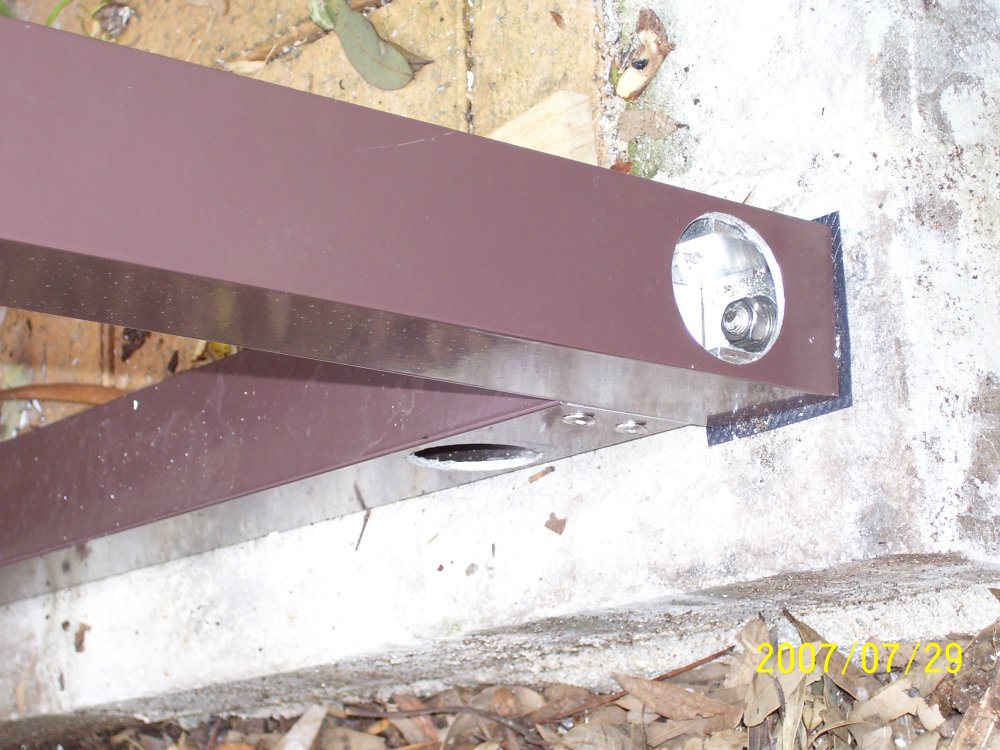
The brackets are secured to the ends of the square sections using very big stainless steel pop rivets. For which had to buy the only special tool I didn't already have - a giant pop rivet gun. For cutting the aluminium neatly I already had a drop saw with a fine toothed cutting wheel.
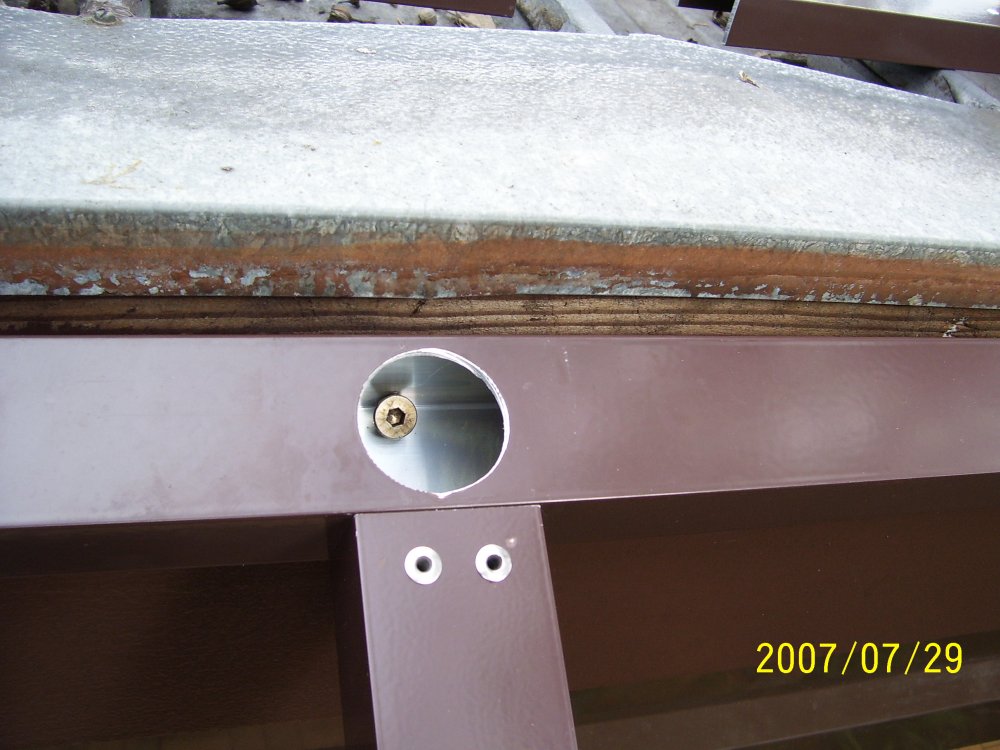
In pic 3 the smaller holes in the section faces are tapped for the screws used for the flyscreen securing clips and the U-channel covers.
The large holes are for access to the connecting bolts (also stainless) and get hidden by the covers.
 |
 |
 |
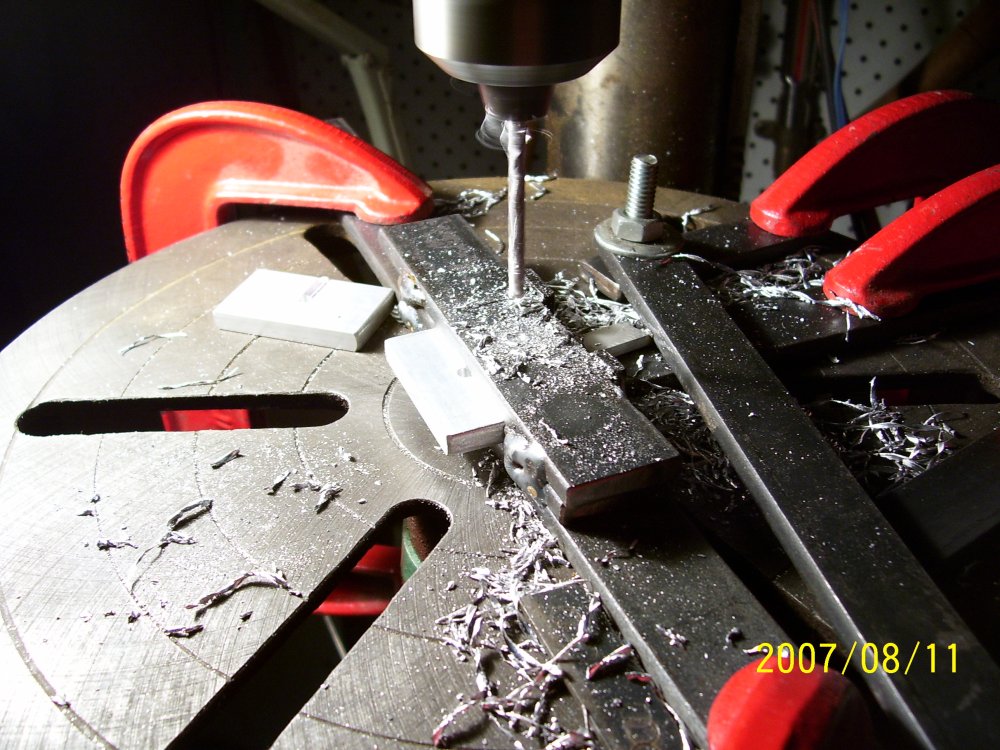 |
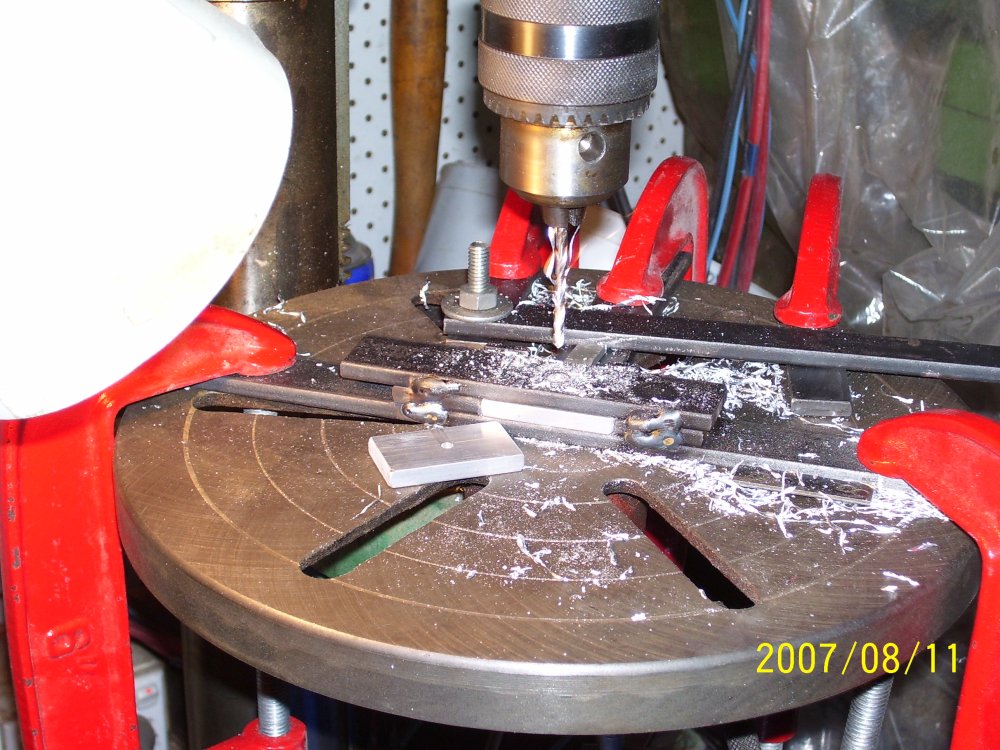
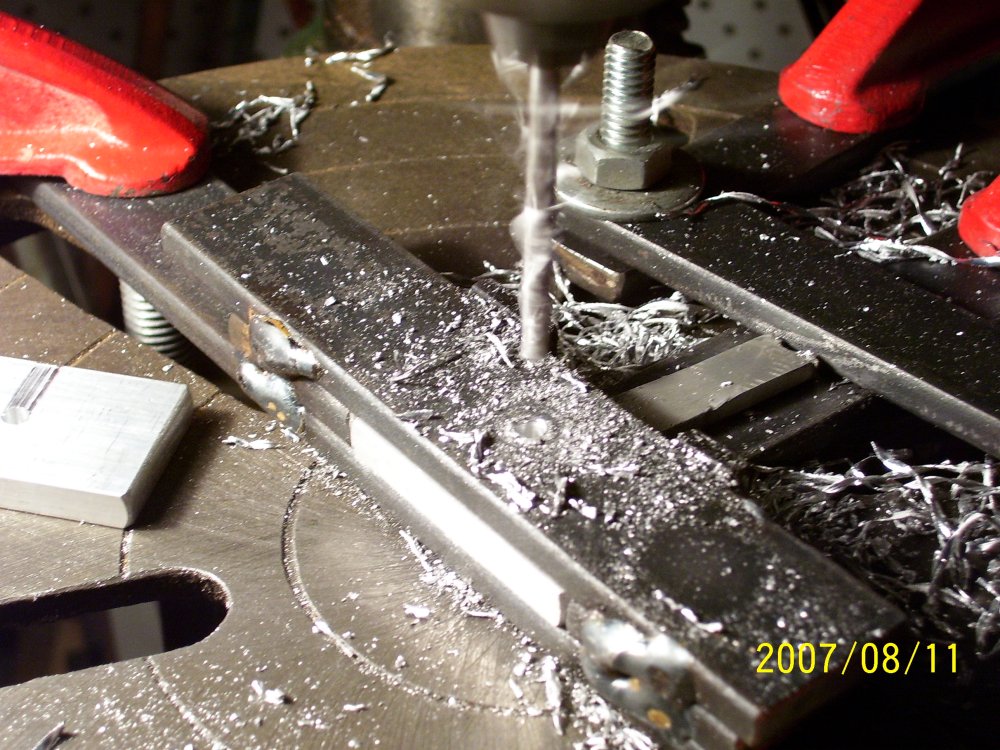
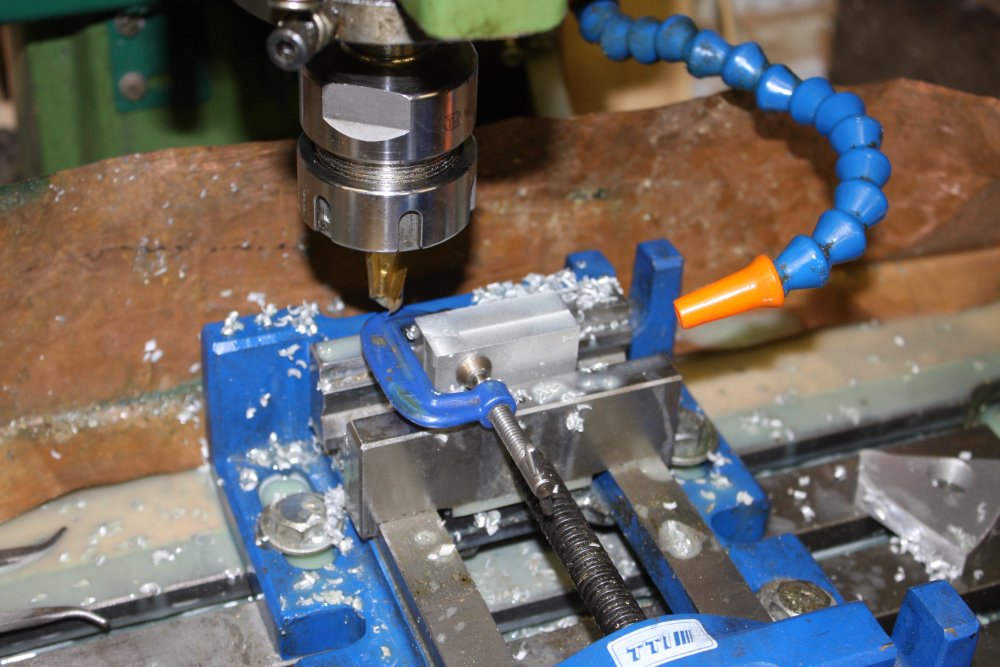
Pic 1 is a jig made for cutting lots of the flyscreen retaining clips from aluminium flat bar. The jig was clamped in the drop saw, and adjusted to get pieces that were an accurate fit in the open side of the U-channel cover sections.
Pics 2 - 4 are a drilling jig for the center holes in those retaining clips. It was very important the holes be exactly in the center, otherwise the cover U-sections would not line up exactly with the edges of the square frame sections. I also had a jig for drilling the holes in the square and U-sections. The result was no visible positioning errors in the framework.
 |
 |
 |
 |
 |
 |
 |
 |
 |
 |
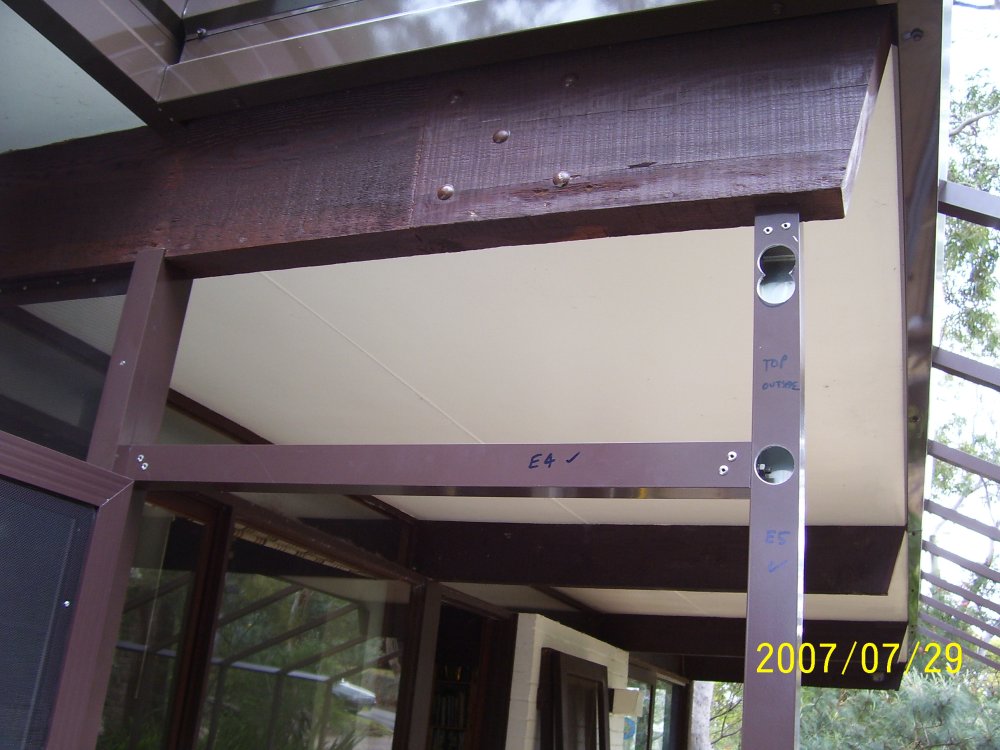
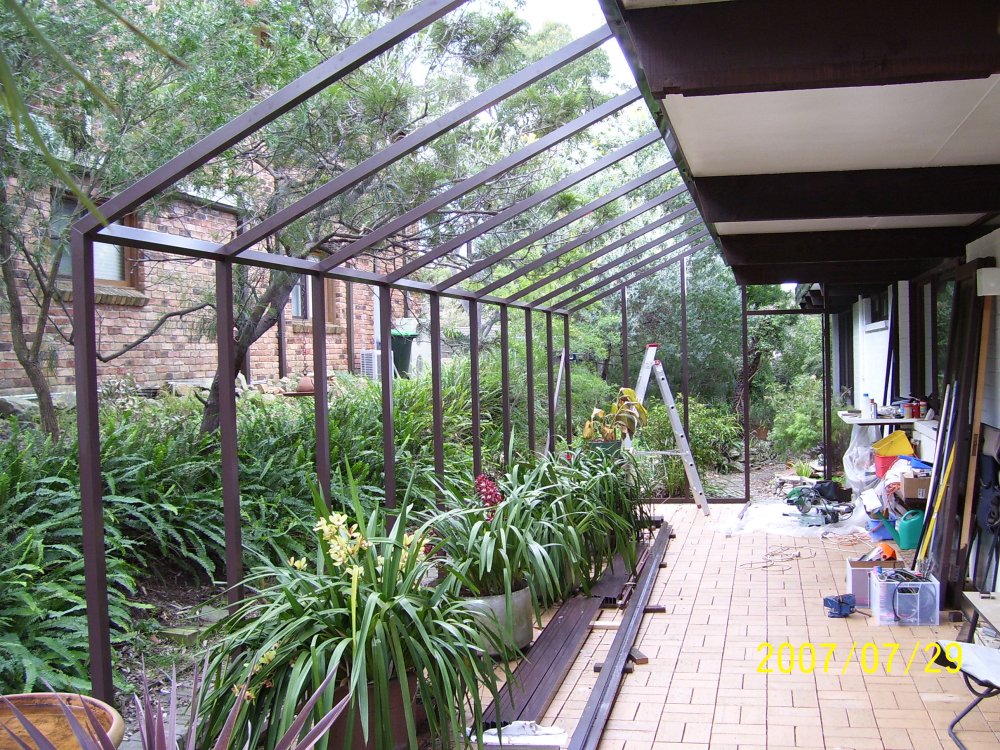
July 2007. Pics 1 & 2 - Coming along, most of the frame is up. Note the temporary diagonal brace G-clamped to the framework, and the sheet of plastic around the drop saw. Cutting aluminium creates ridiculous amounts of fine shiny metal chips, which are a pain to clean up. Better to capture them from the start, or you'll be vacuuming them up out of paving cracks for hours.
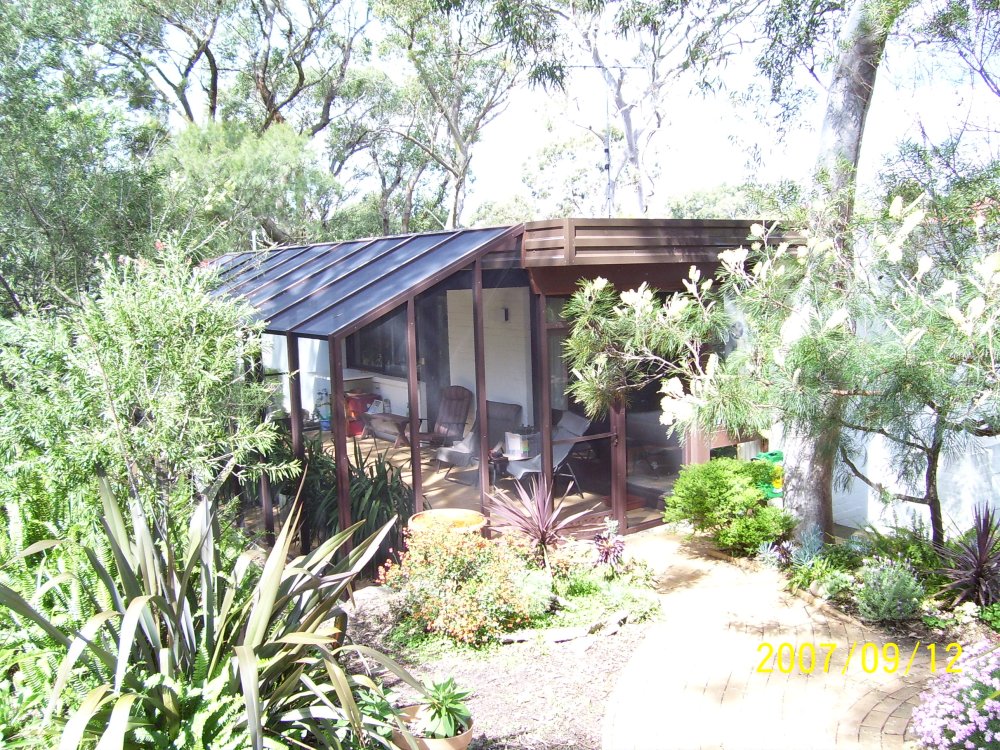
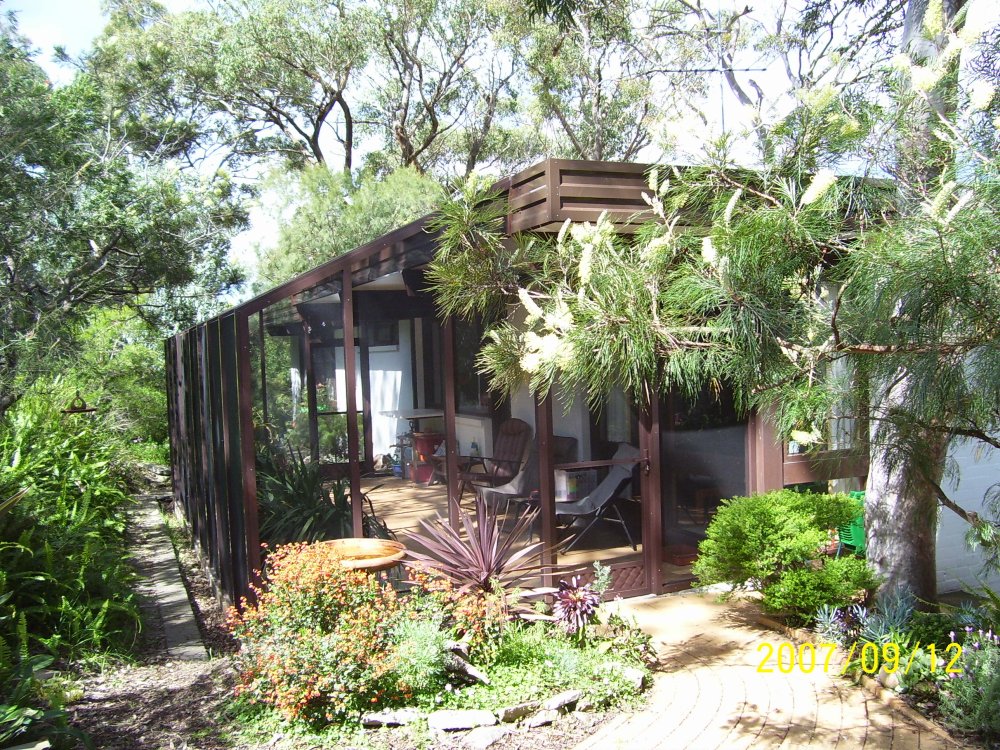
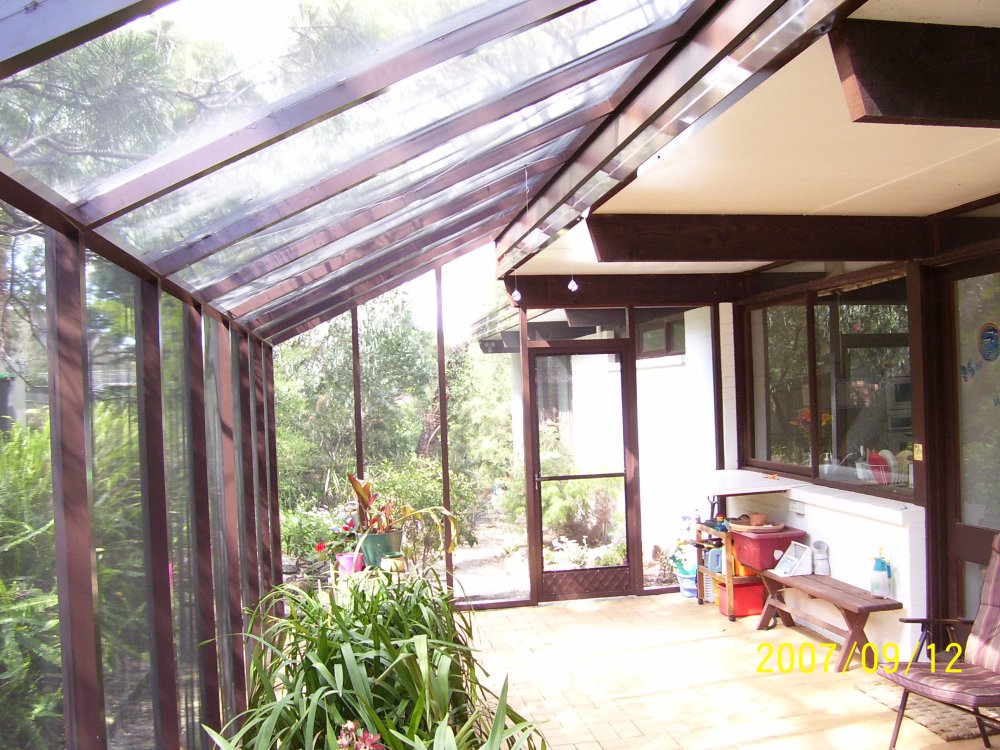
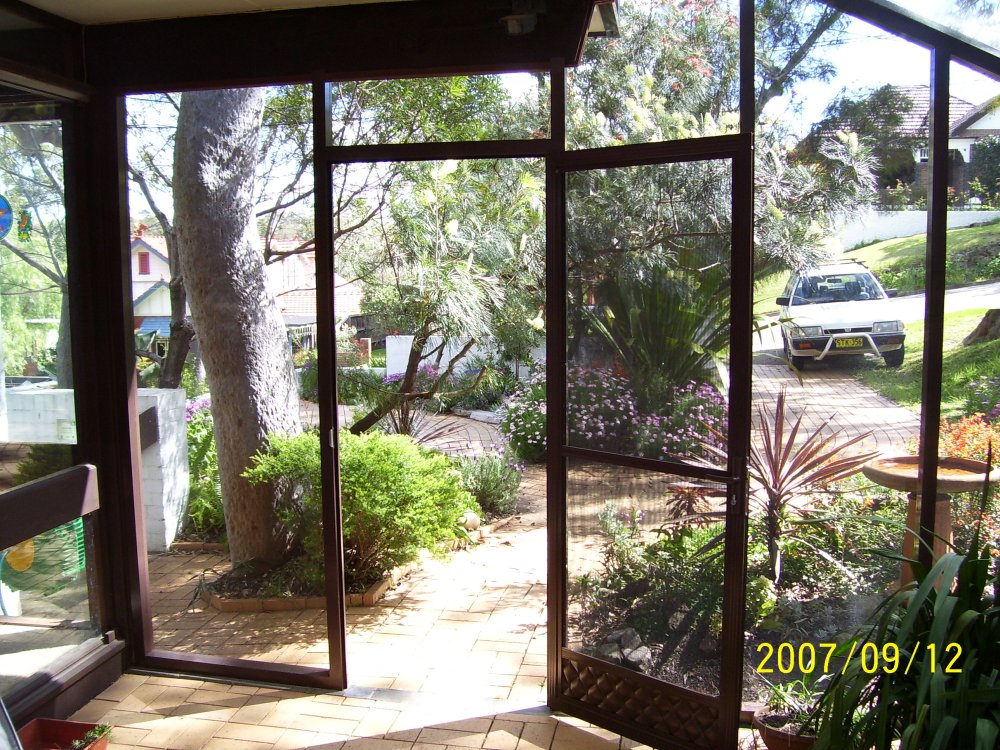
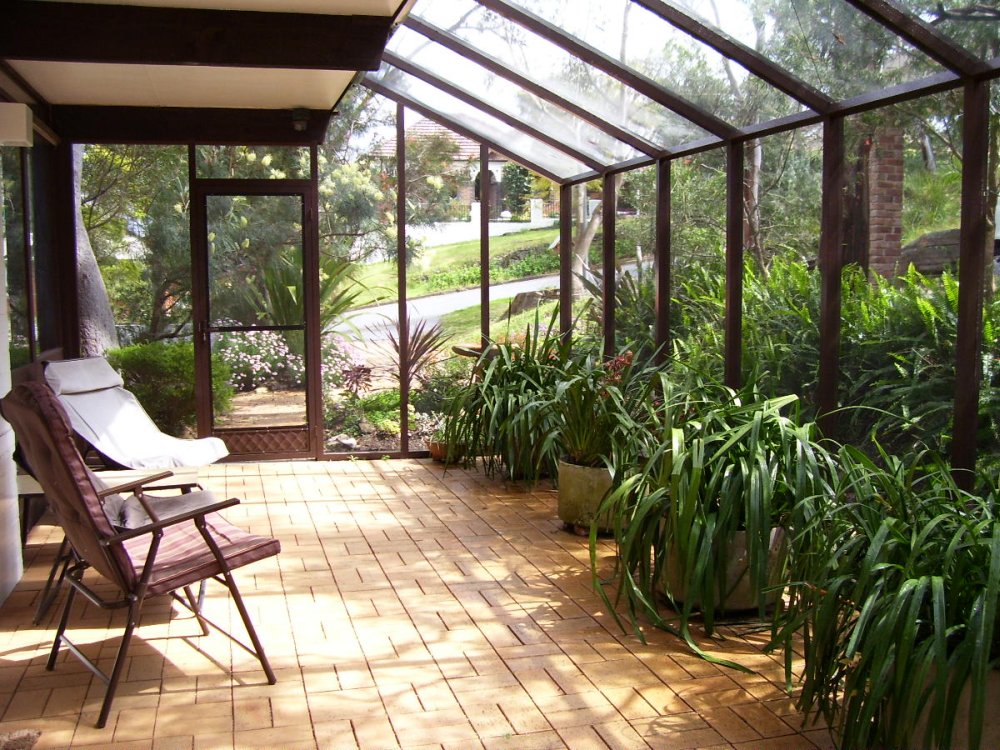
Sept 2007. Completed! It had taken a while (due to the usual life dramas) but worked out quite well.
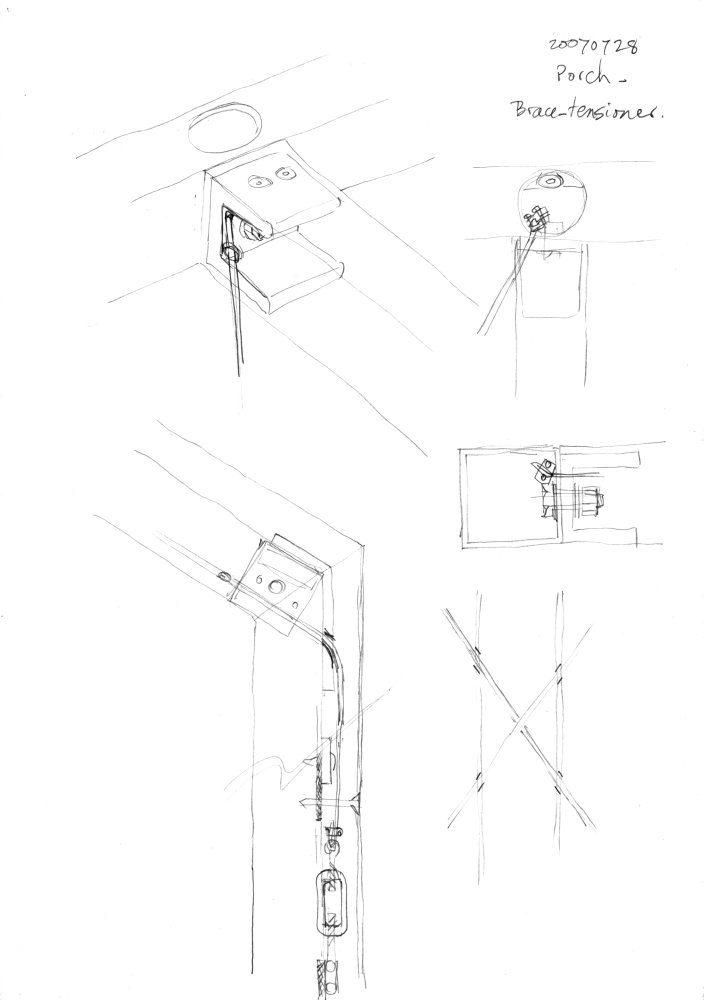
In the 1st pic second row, you can see the tensioned cable cross brace across two of the top panels, that gives the whole structure sideways rigidity. The cables are tensioned with turnbuckles down under the outside vertical cover channels.
 |
 |
 |
 |
 |
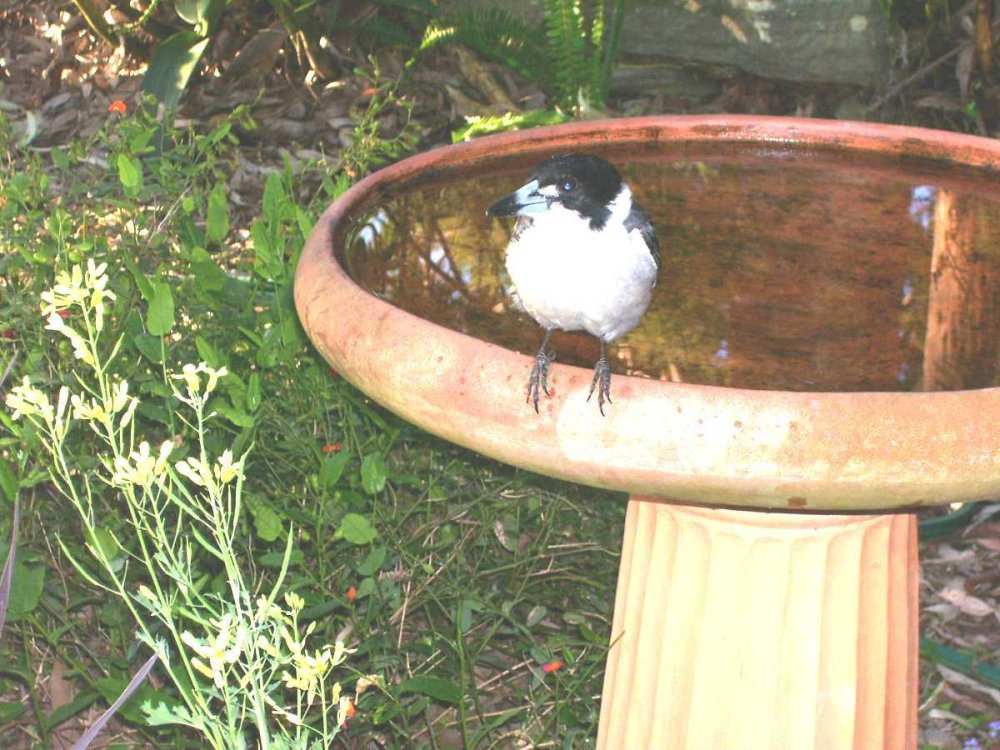
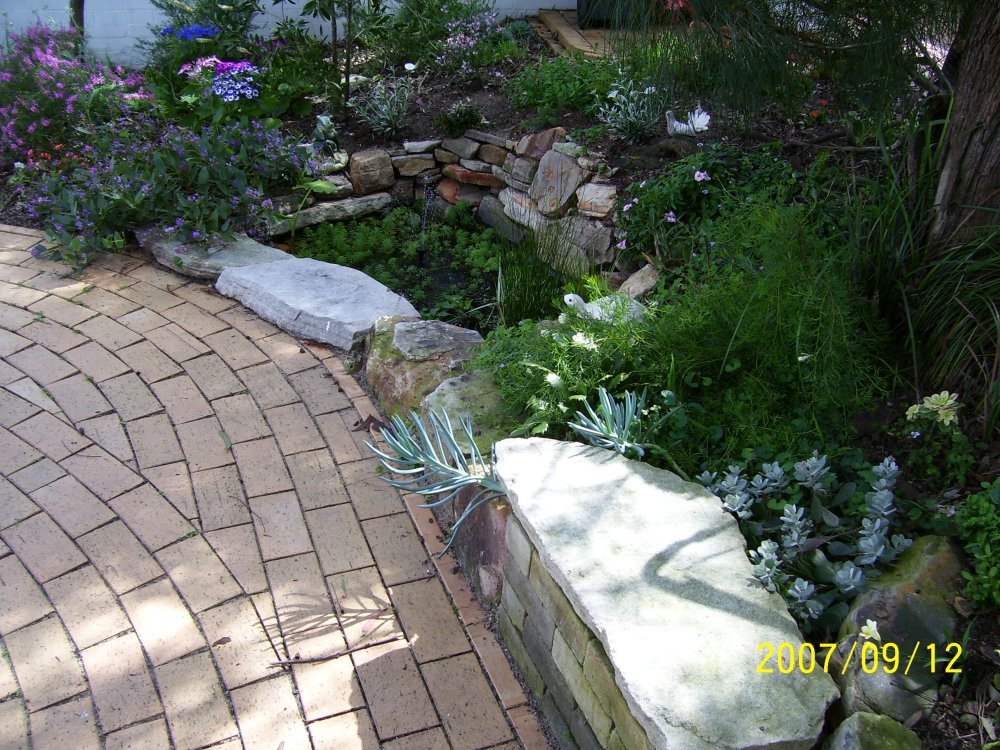
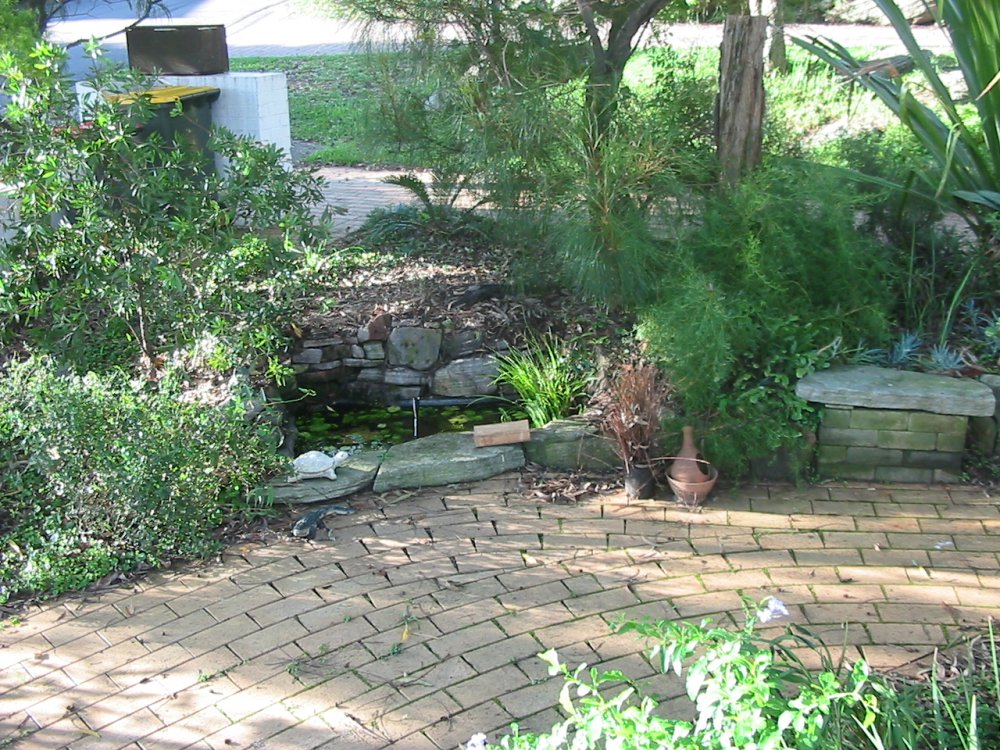
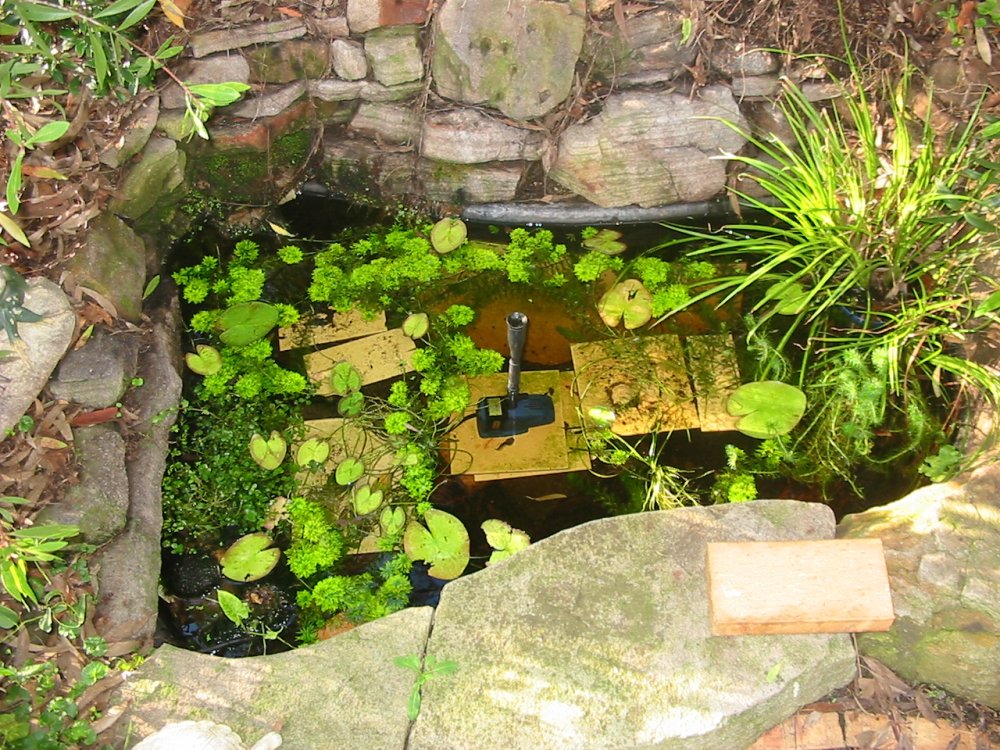
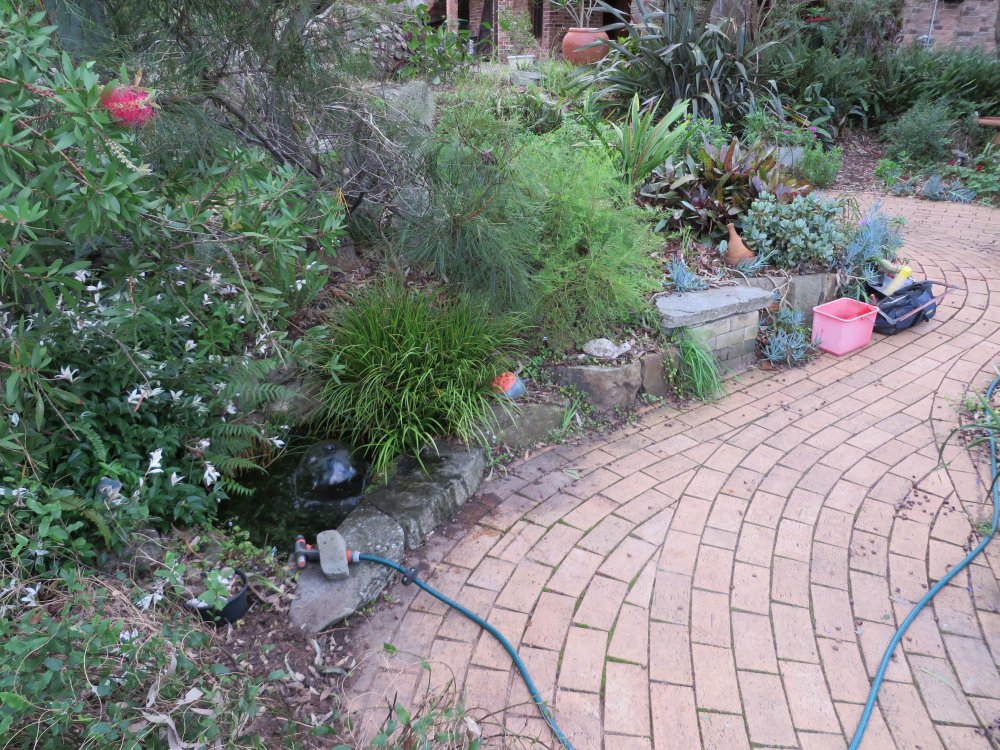
One of those life dramas during 2007 involved a neighbor and his wacky complaints about a small garden pond I'd put in down the side of my mum's house a year before at her request. That's another story. He was quite demented about the whole thing, but since he was being scarily abusive of my mother (and regularly poisoning the pond), in an attempt to mollify him I'd moved the pond to the front yard. At considerable effort, due to the new location being solid rock under a few inches of soil. Anyway, here's the pond in it's new location. The garden is coming along nicely too.
 |
 |
 |
 |
 |
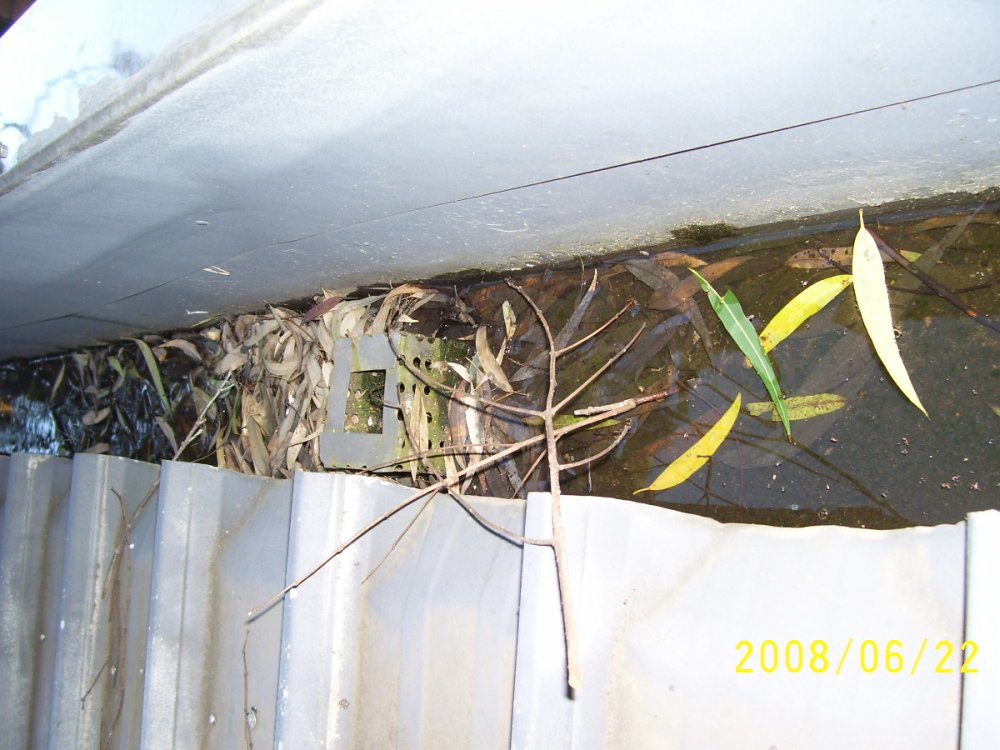
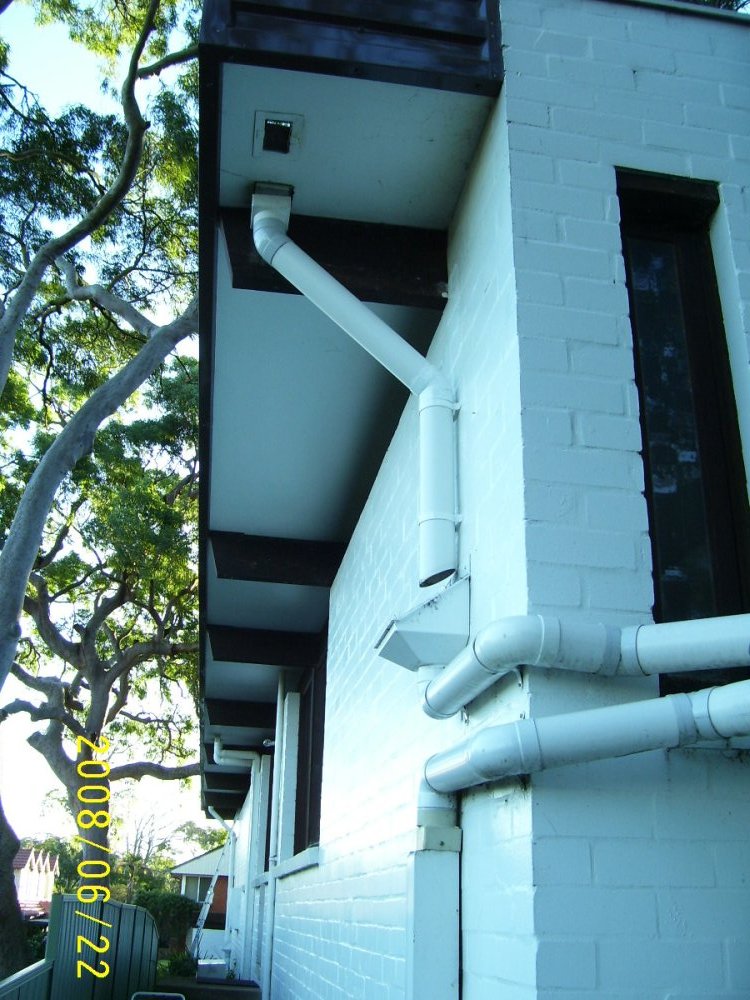
June 2008. With the large flat roof having a gutter along only one side, and there being only two downpipes, now and then the leaf buildup would block the downpipes. I normally check and clear the gutter out every few weeks, but it's easy to forget. Then in heavy rain the gutter overfows, and thanks to the whole roof being a stupid design that can cause water to enter the house.
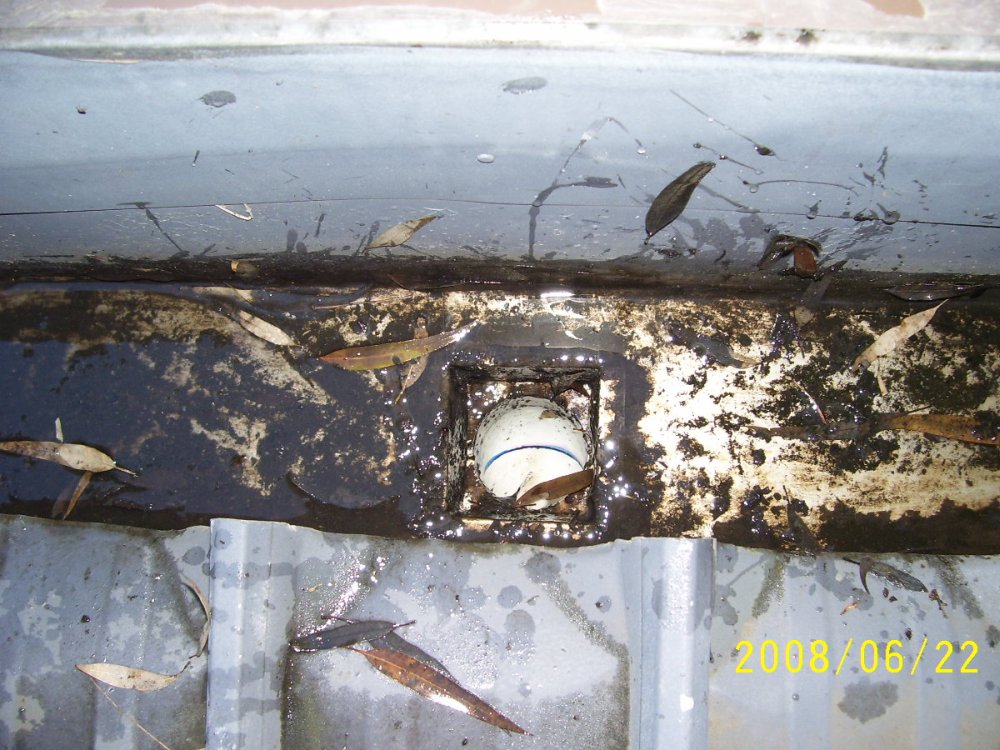
Part of the problem is that to prevent leaves and twigs forming difficult to fix blockages down in the pipe, there are these leaf guards at the gutter entries. (Pic 1.) Result: the leaf guards block up.
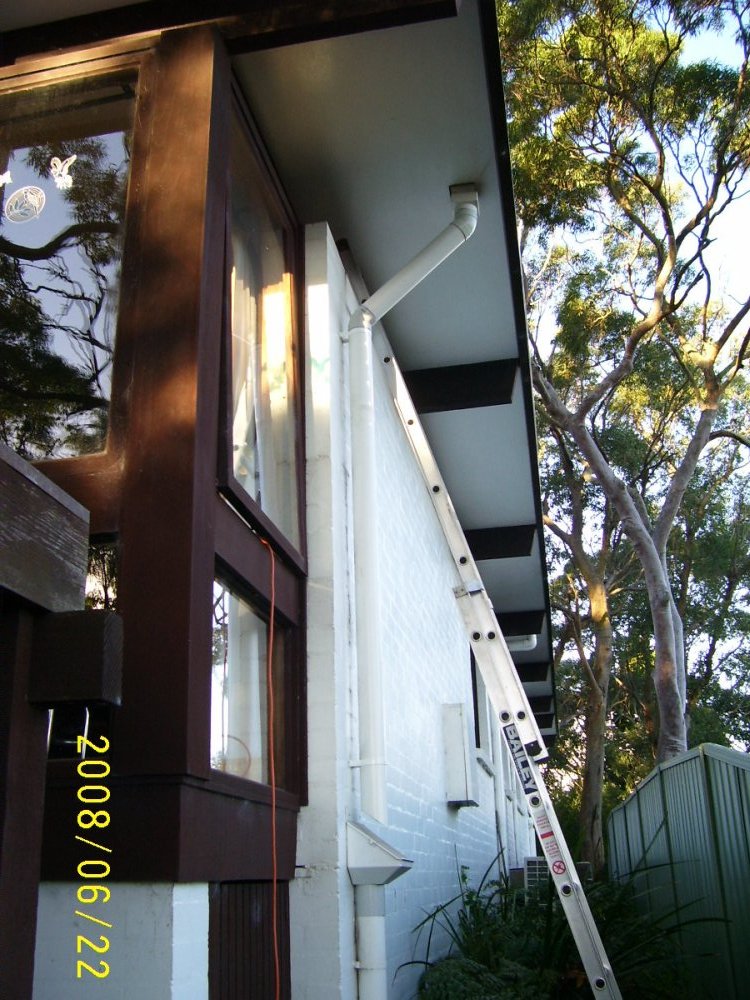
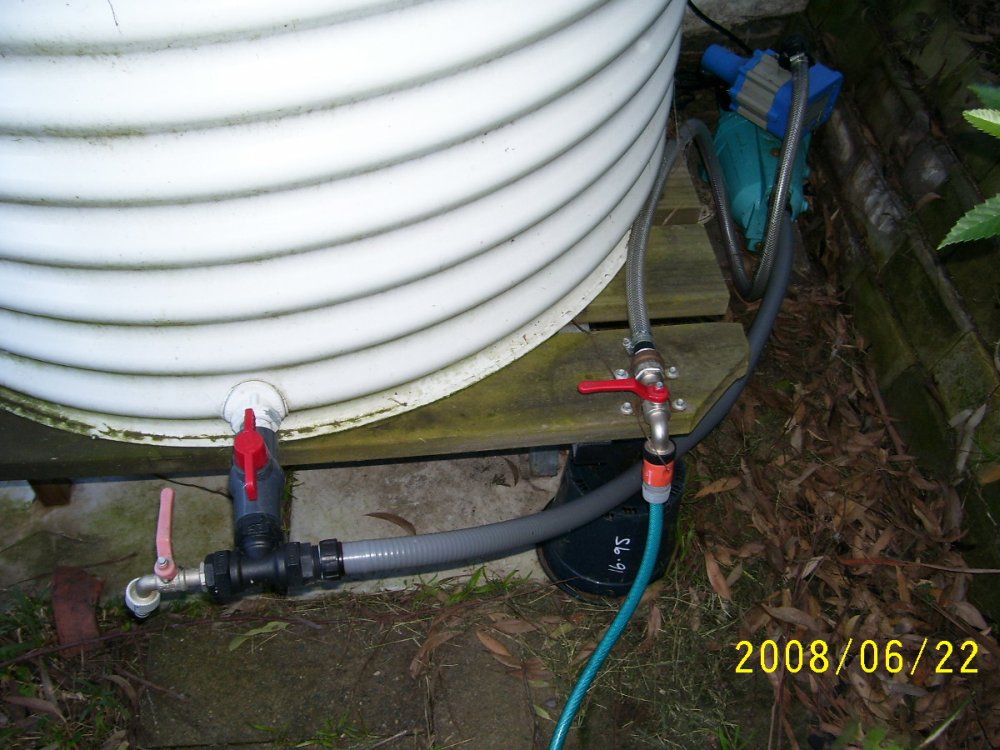
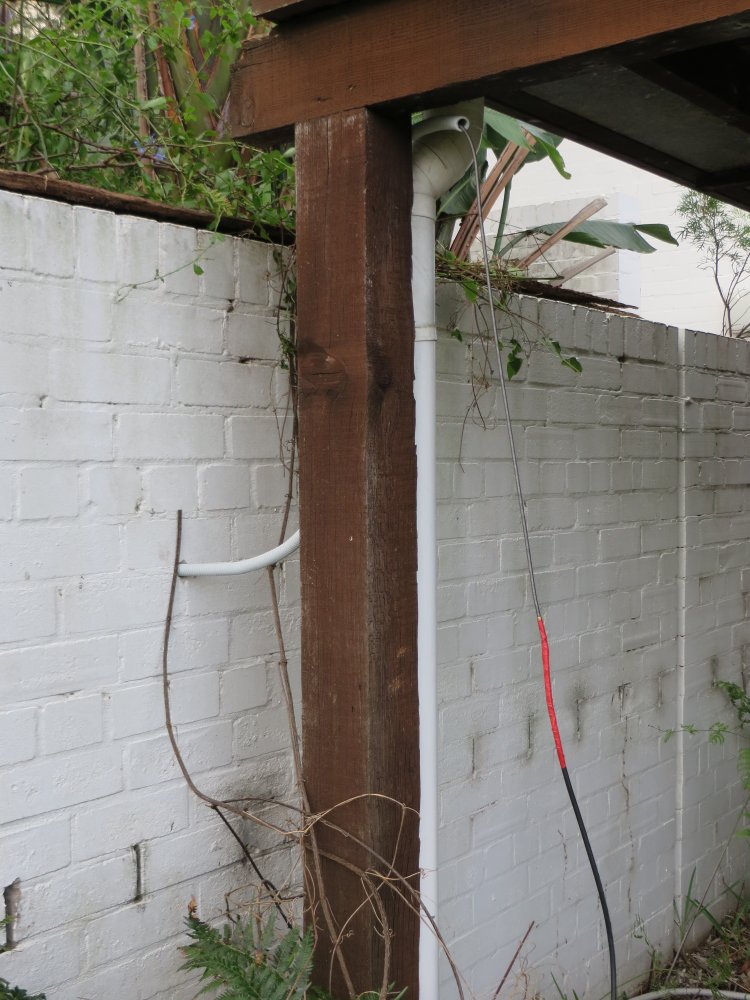
In 2008 I came across a solution. It's a device that ejects leaves from the flow in the downpipe, and at worst case, just overflows to the ground. Here they are installed.
I'd also at the same time installed a water pump to the rainwater storage tank, for use in watering the garden. (Yes, it normally is under a weather cover.)
Last pic is the downpipe entry, with no leaf guard. The leaves can wash down it all they like now.
 |
 |
 |
 |
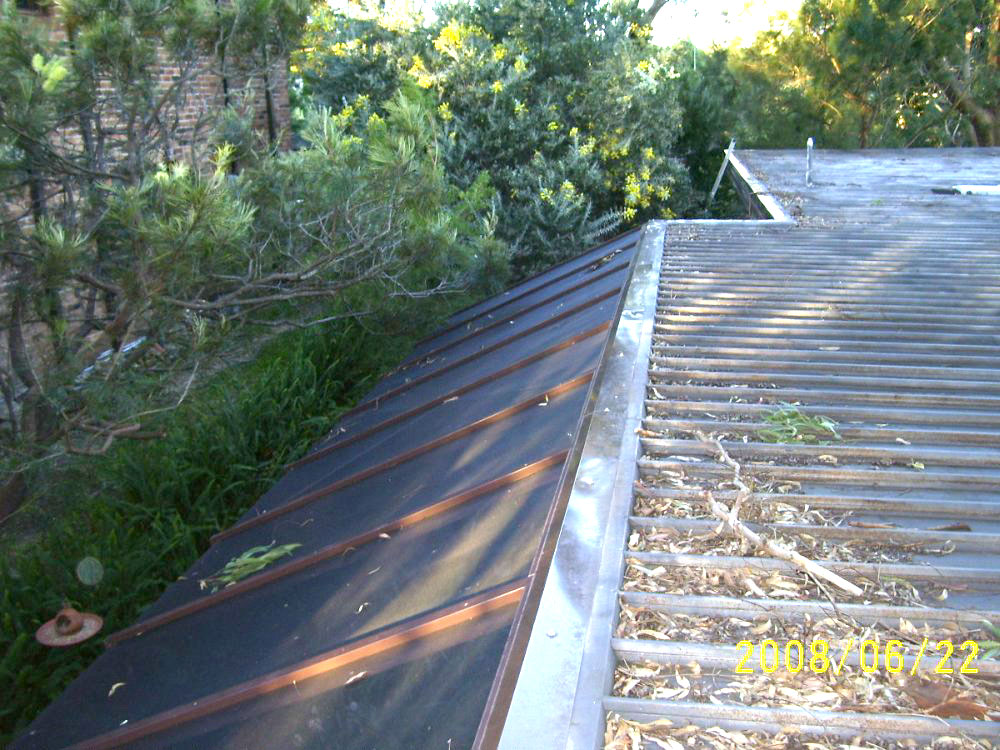
Meanwhile the slopey top of the flyscreen porch was working as intended. Leaves just slide off.
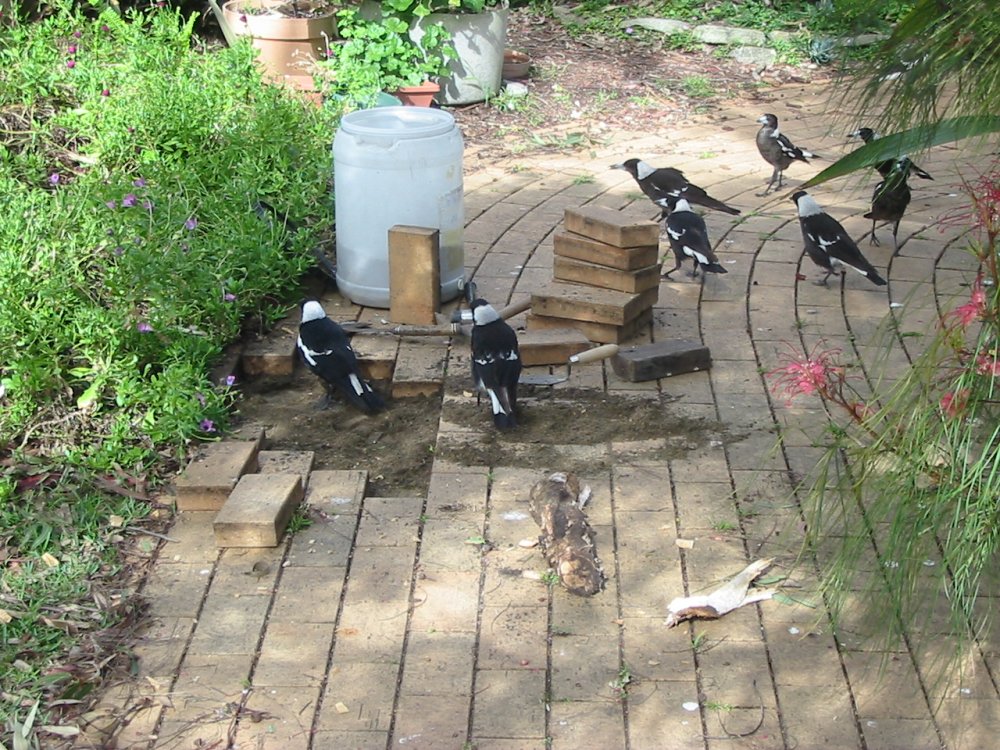
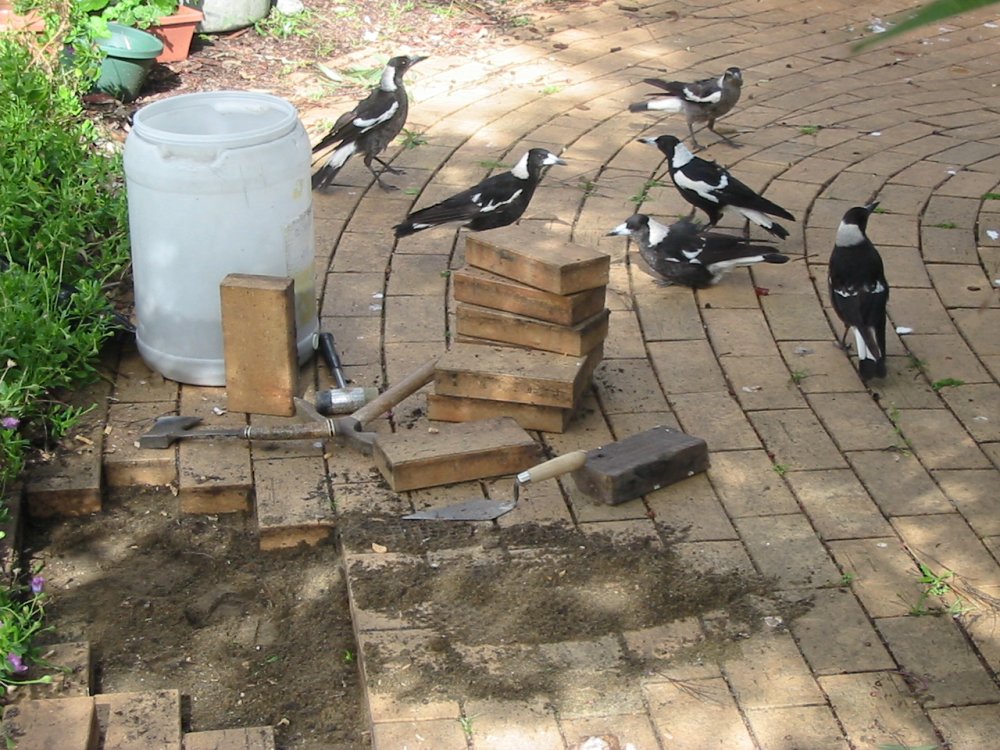
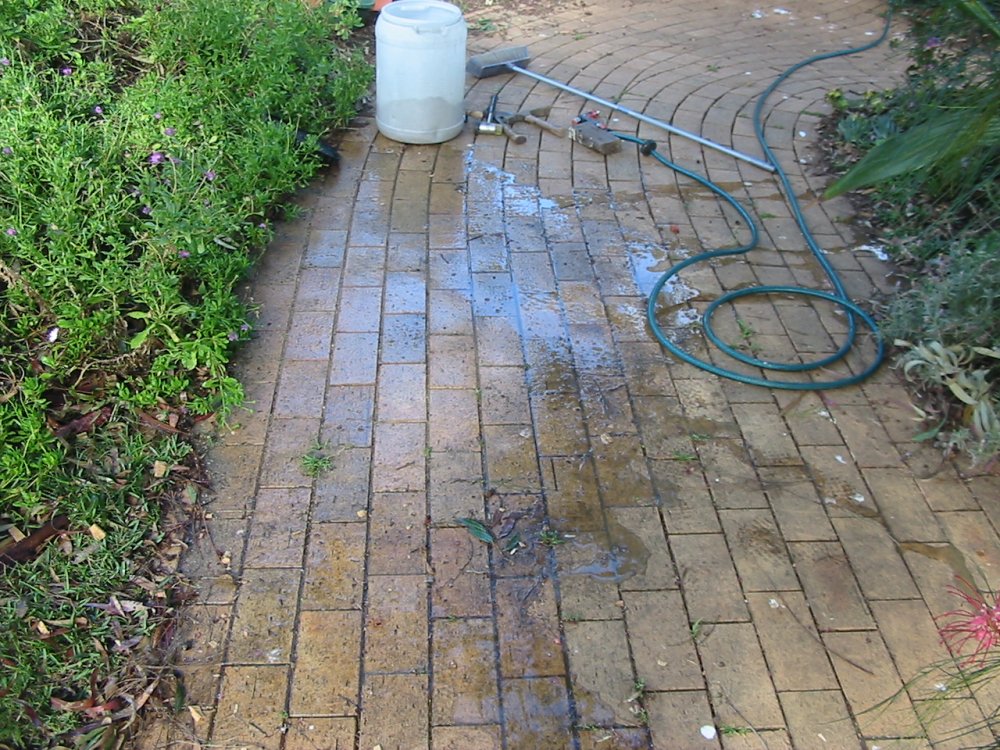
Oct 2009. Over three years, a tree root had bumped up some of the front driveway pavers. During the quick fix some of my mum's tame Currawongs hung around looking for worms and bugs.
 |
 |
 |
 |
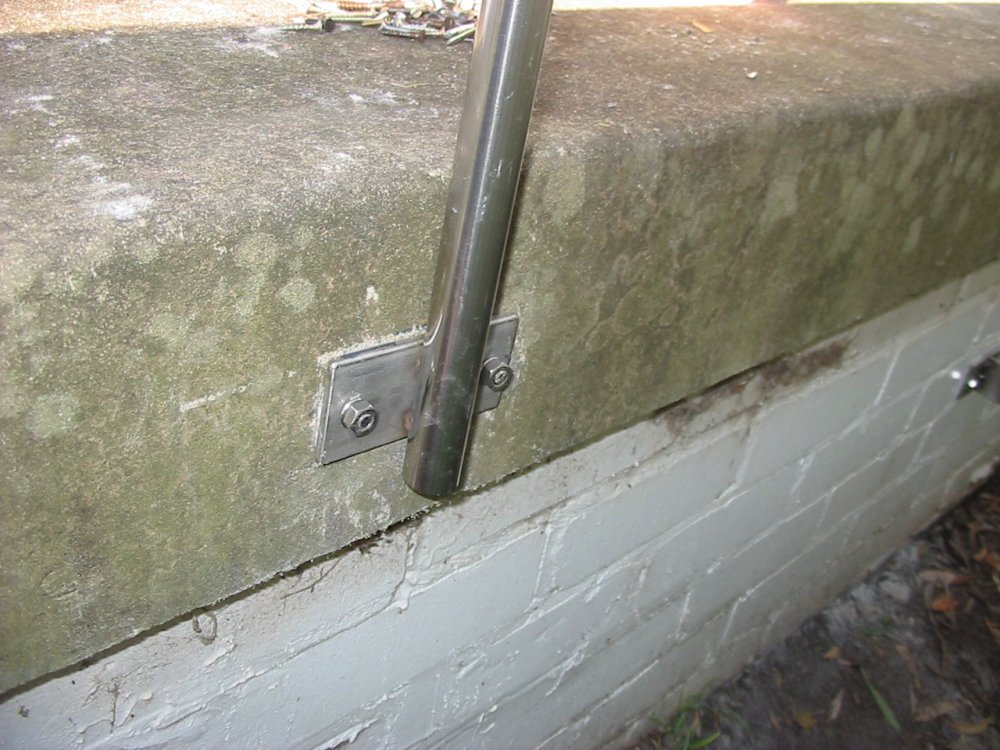
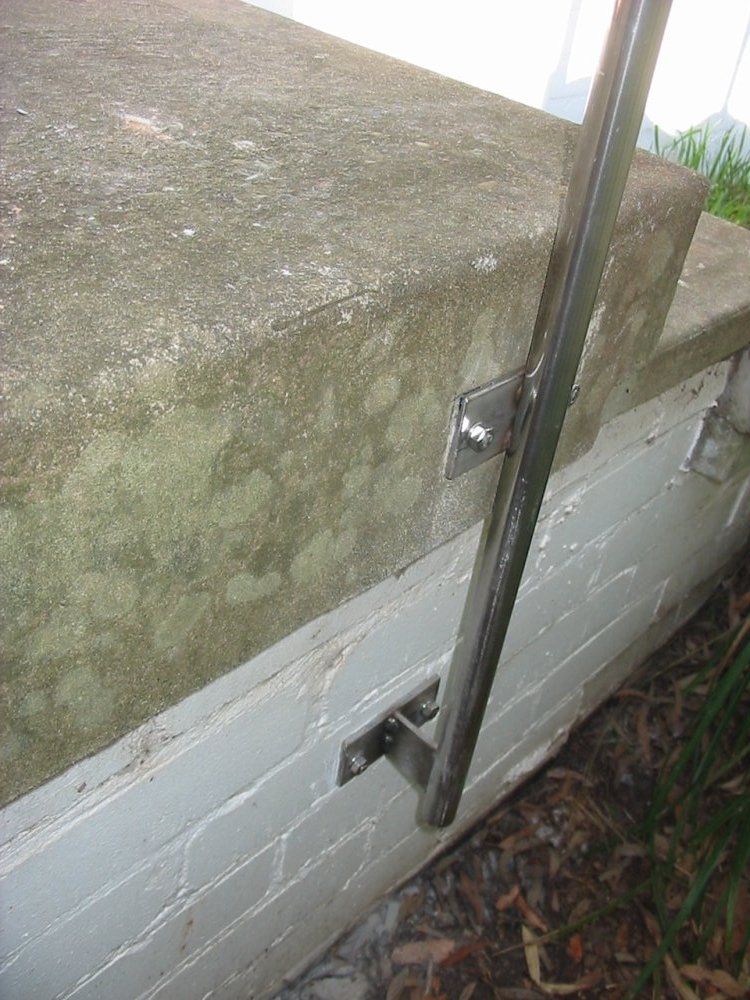
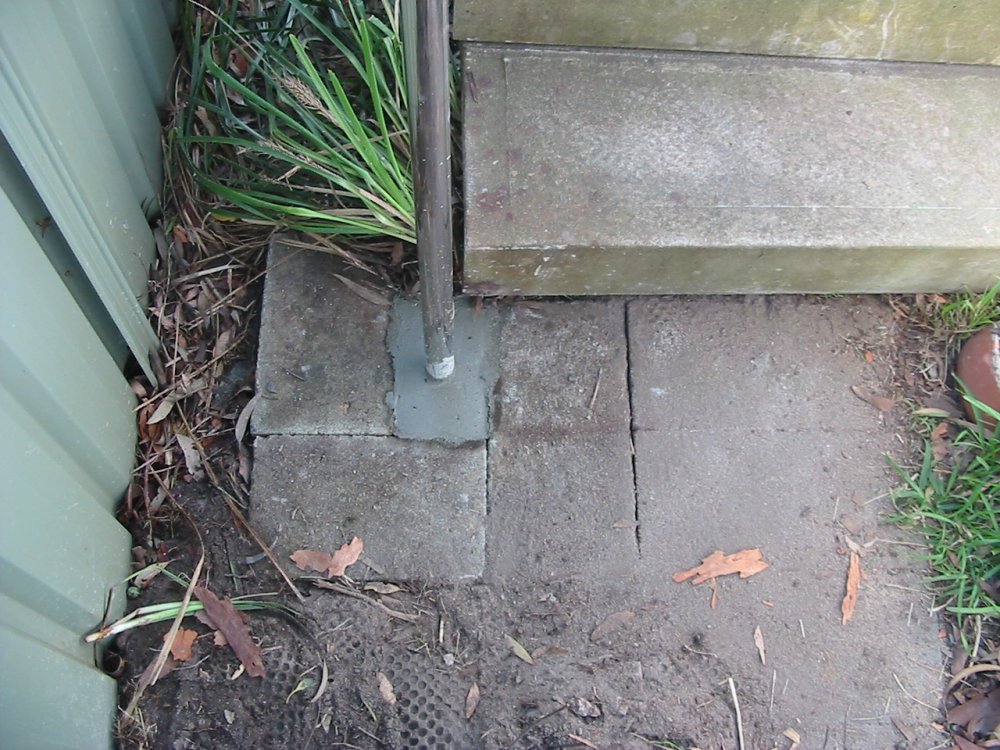
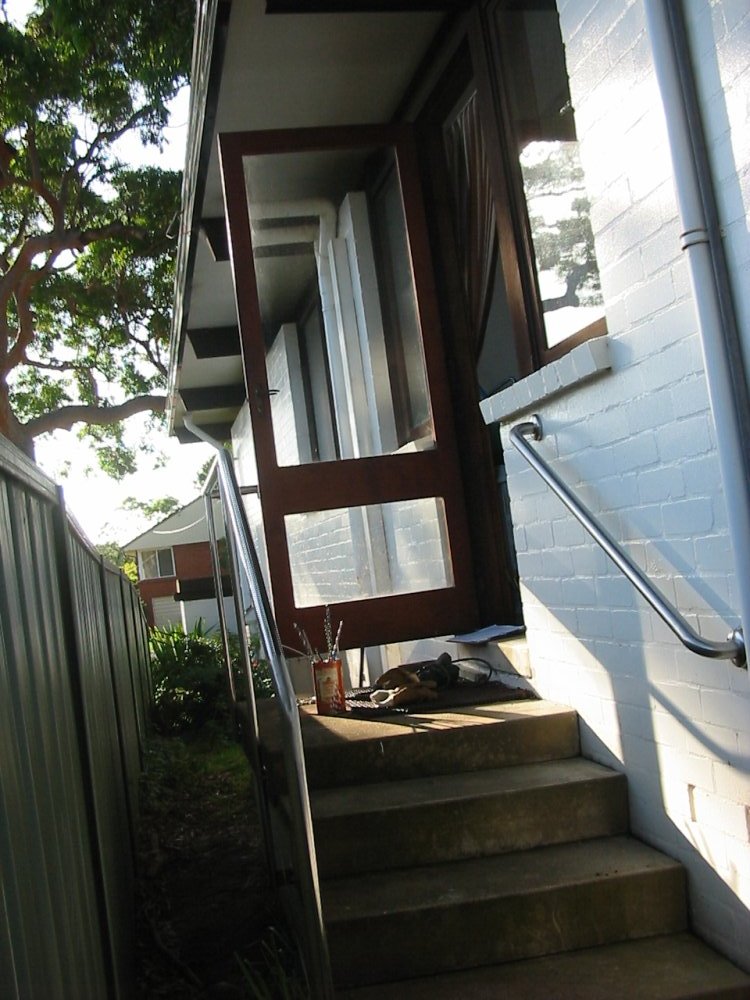
Nov 2009. The back door of the house opens onto a small raised concrete slab with four steps down to the path leading to the clothes hoist. With my mum getting a bit unsteady on her feet, it was time to add a railing and handrails down the stairs.
I'm still very unenthusiastic about the idea of outdoors woodwork, so they had to be metal. But galvanized railings don't look very nice, so I decided to try doing them in stainless steel.
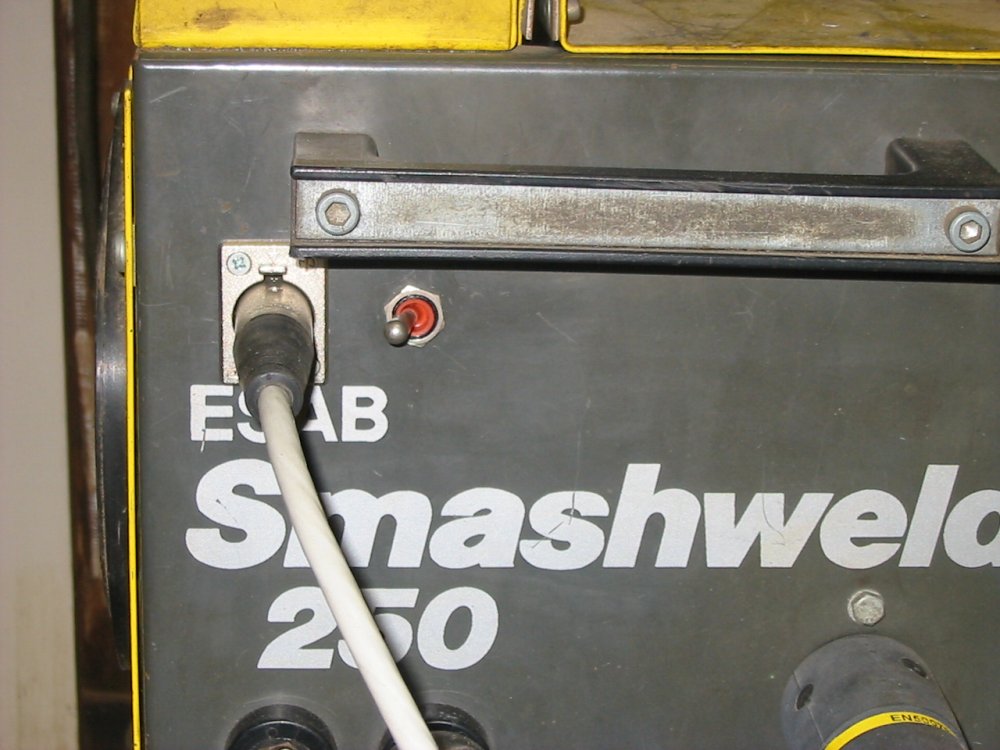
Now I do have a MIG welder, and have tried welding stainless, more or less successfully. Could I do it well enough for railings? Not only do the welds have to look good, but they have to be guaranteed not to fail as well.
 |
 |
 |
 |
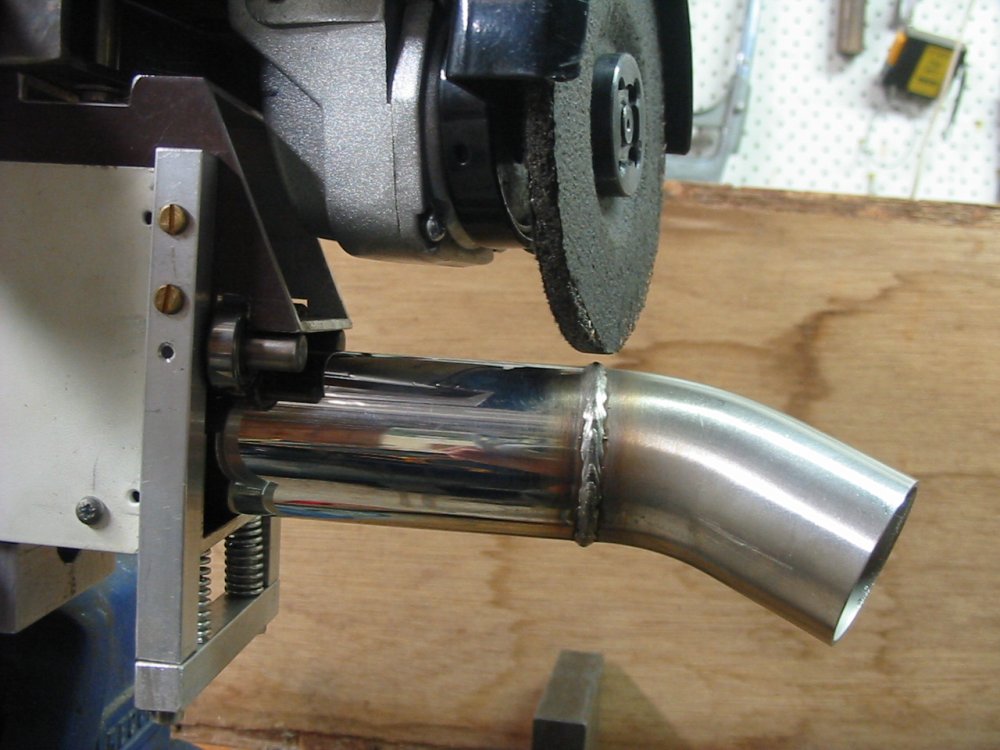 |
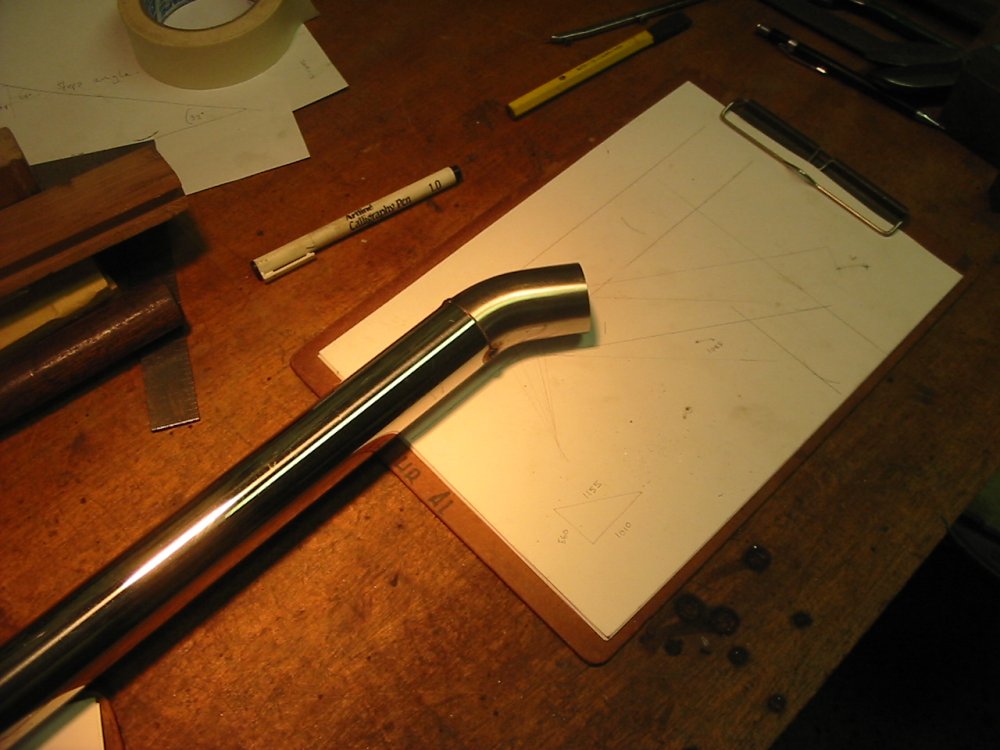
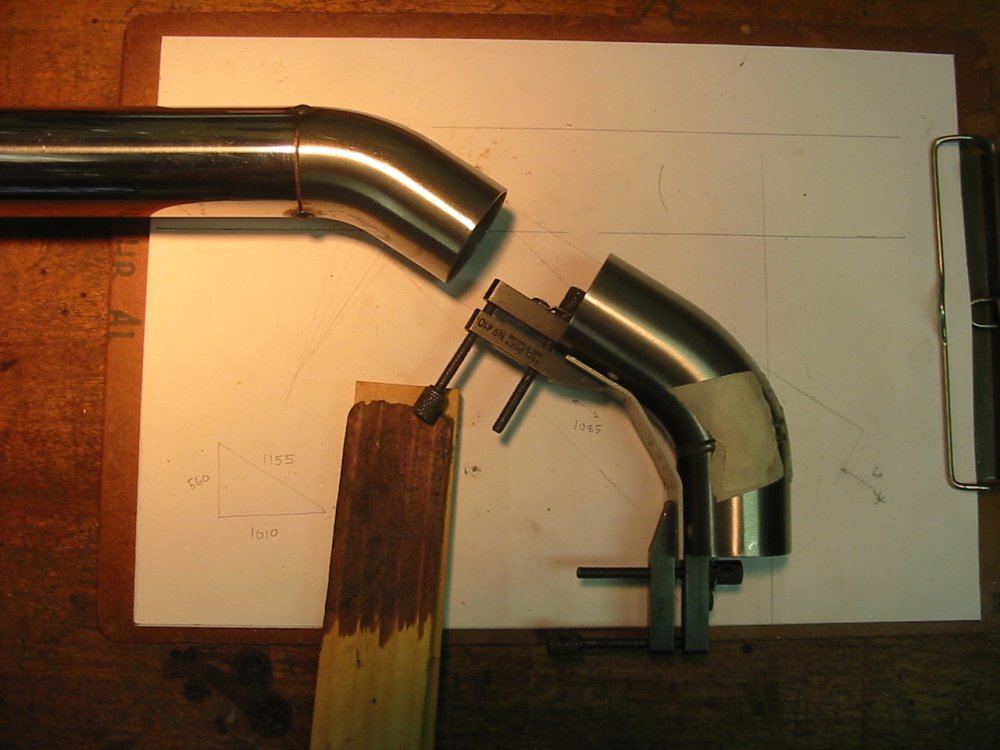
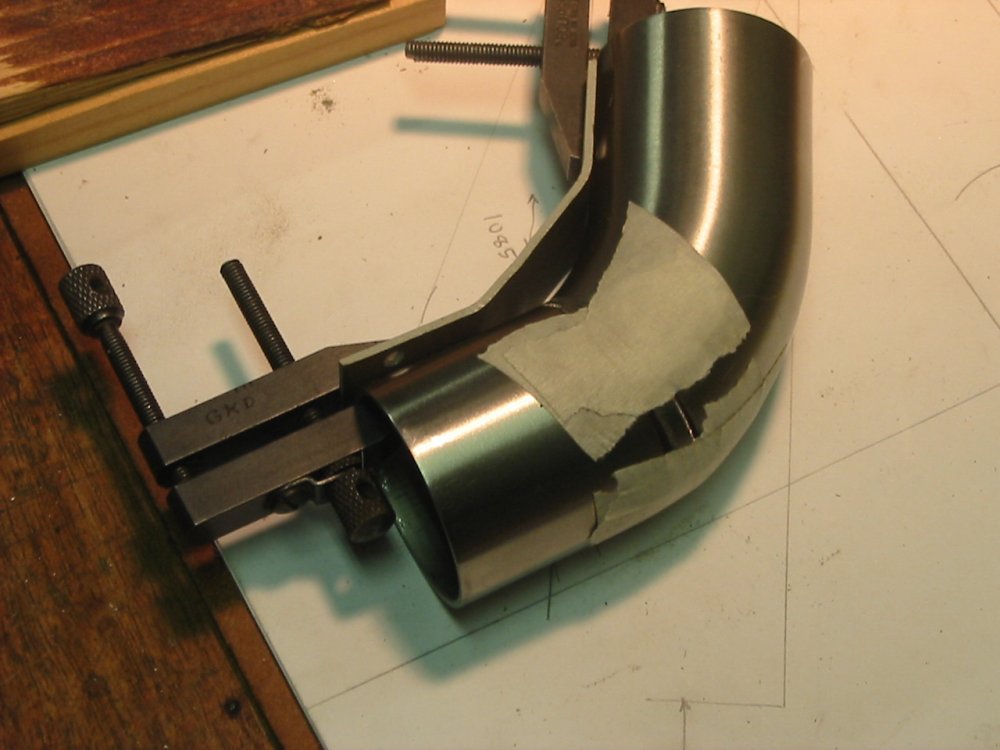
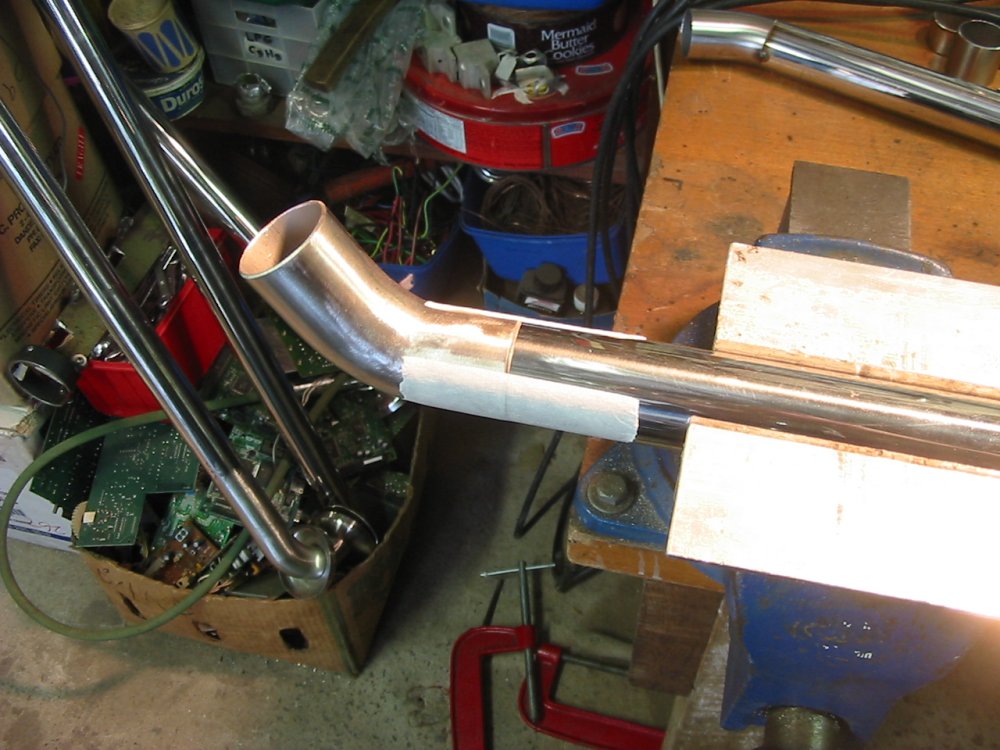
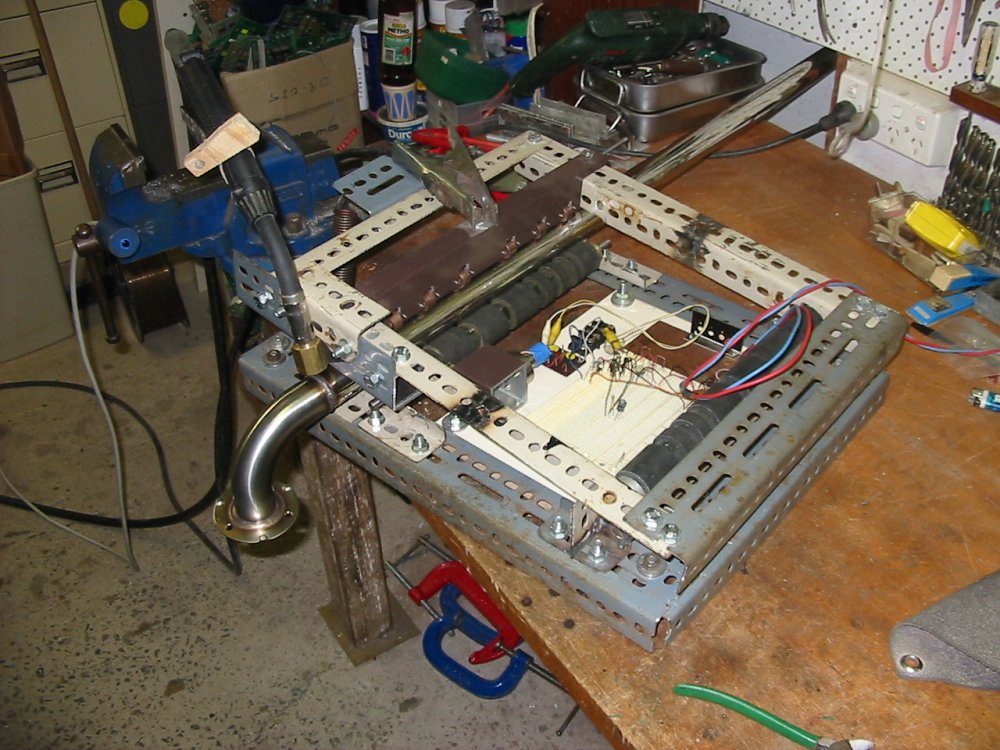
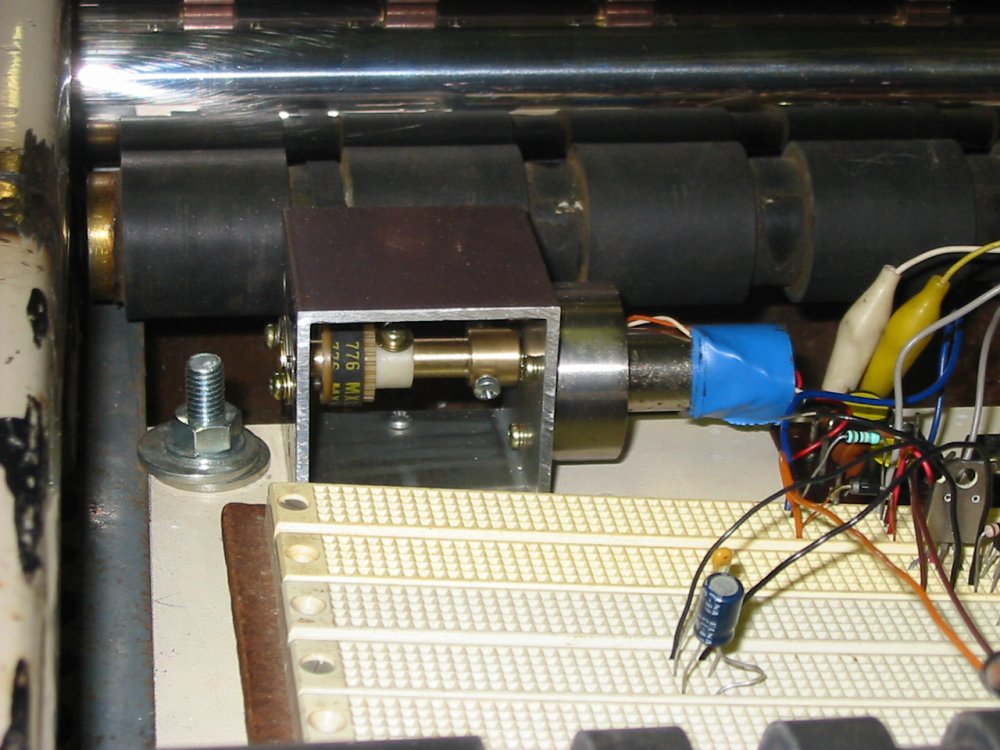
It took the rest of Nov-Dec 2009 to build the tools and jigs needed to get decent pipe welds and grind them smooth. See A Pipe Rotator. But finally...
 |
 |
 |
 |
 |
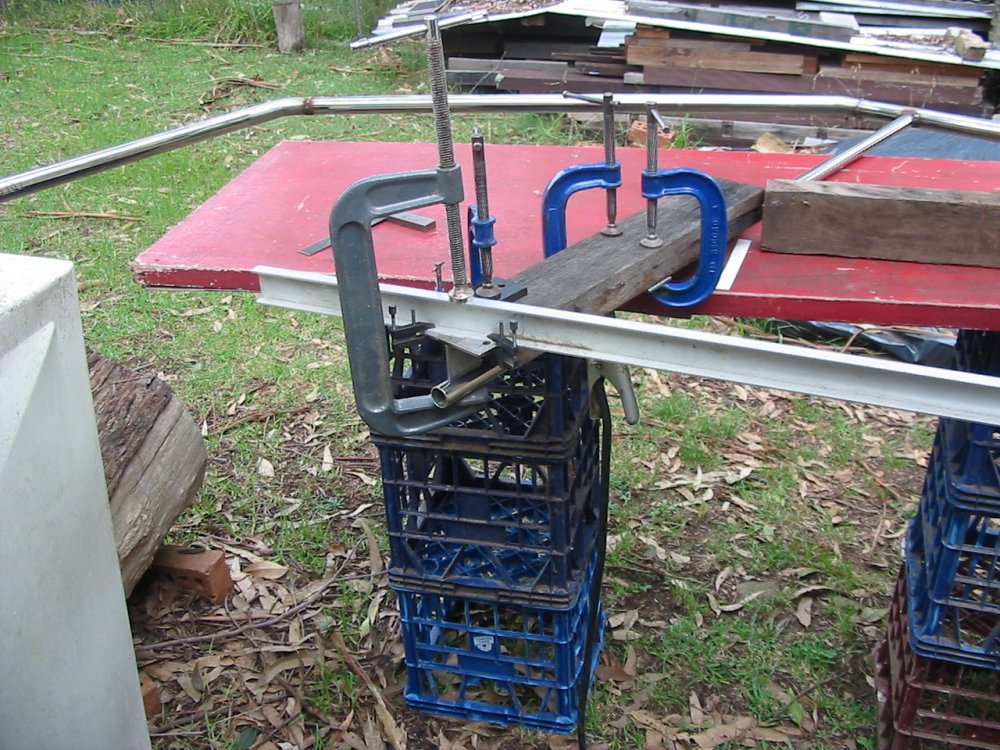
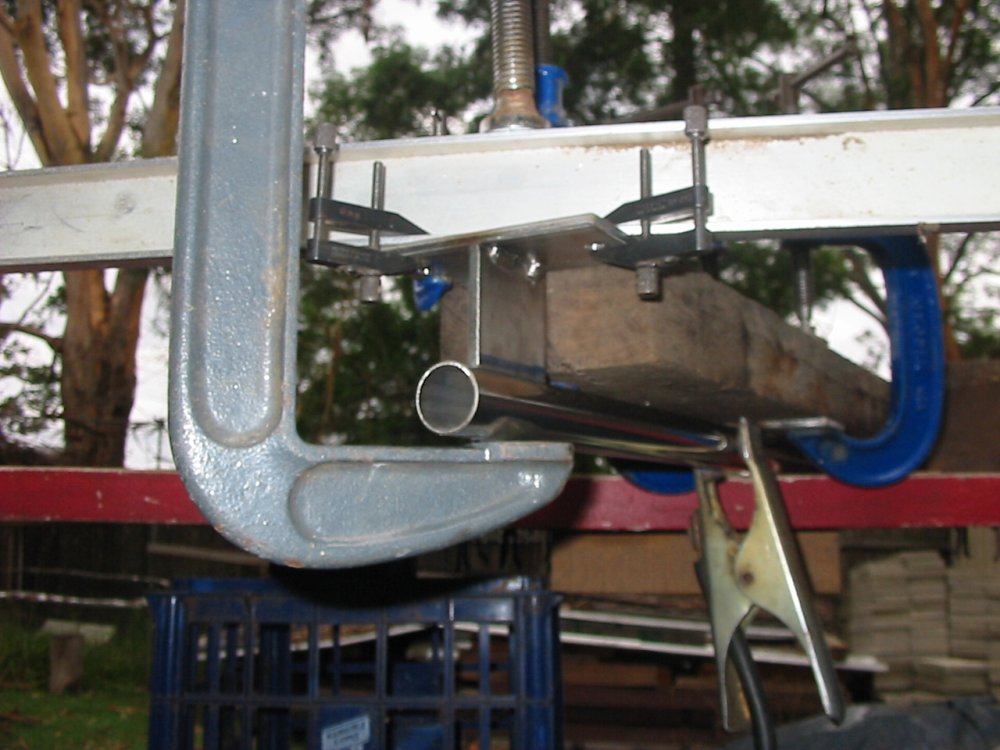
Welding the mounting brackets to the railing. All the bars and clamps are to make sure the mounting tabs are correctly aligned to each other.
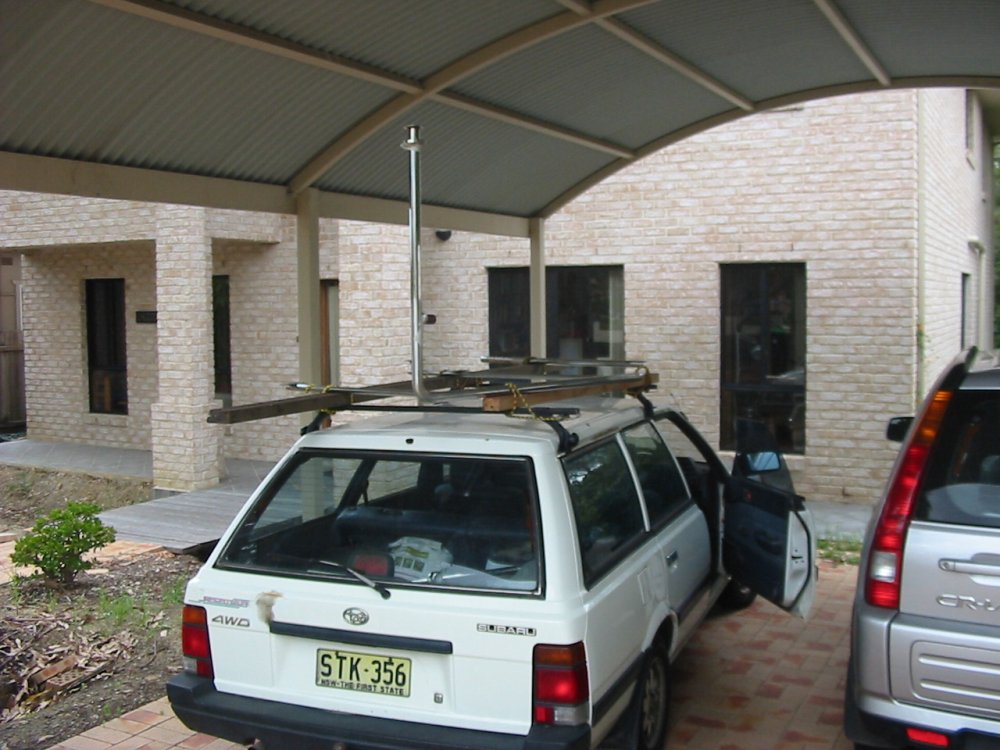
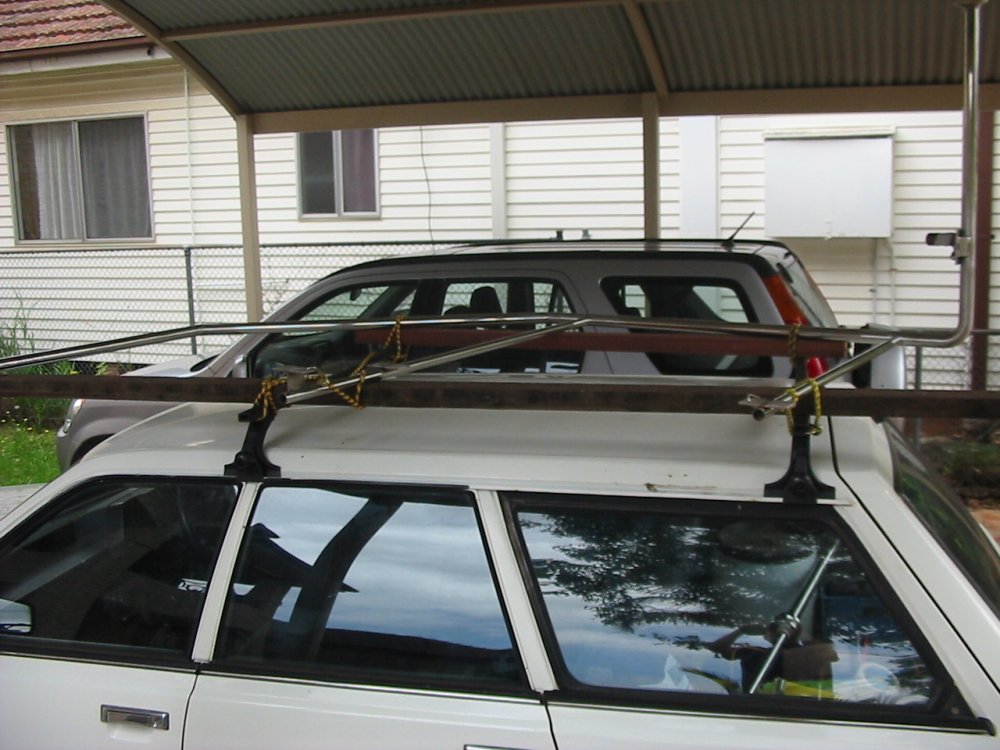
Then mounting such an awkward item securely on the car's roofrack was a non-trivial exercise.
 |
 |
 |
 |
 |
 |
 |
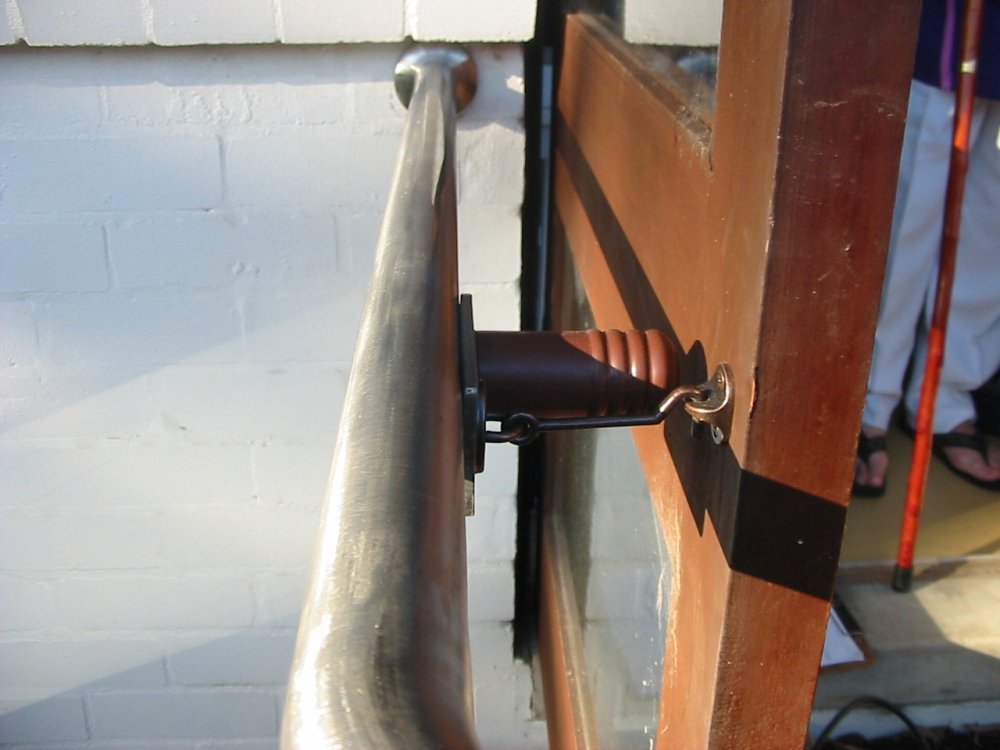 |
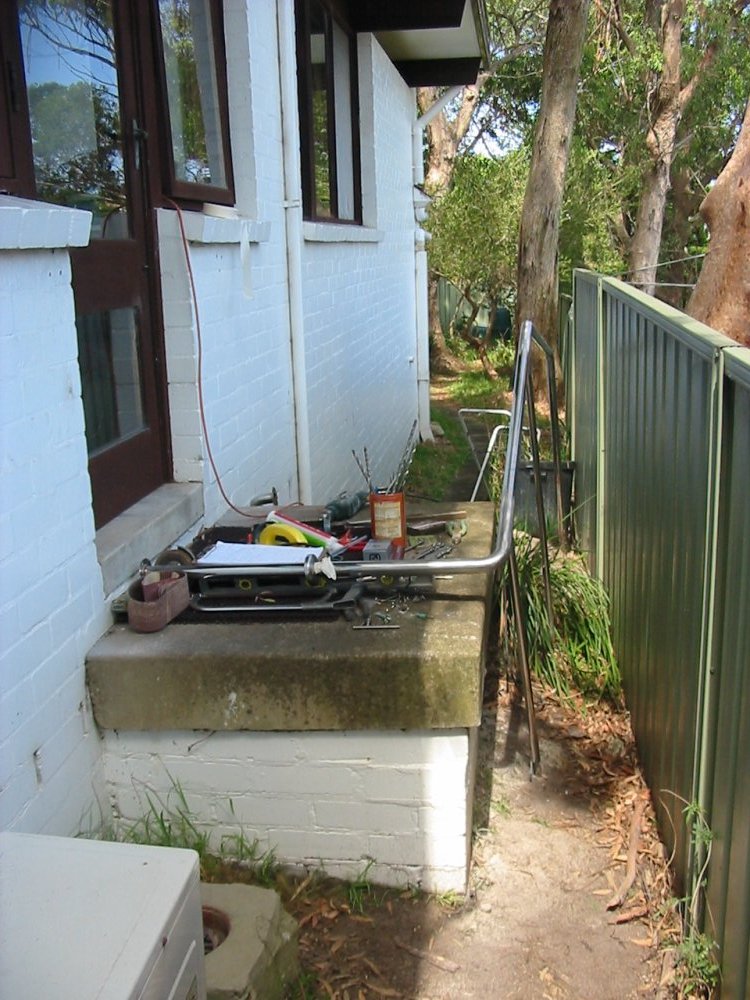
Mounting it to the walls and landing went without any hitches. Such a lot of work getting to that point, I'm glad the installation was easy. Finished on 8th Jan 2010.
 |
 |
 |
 |
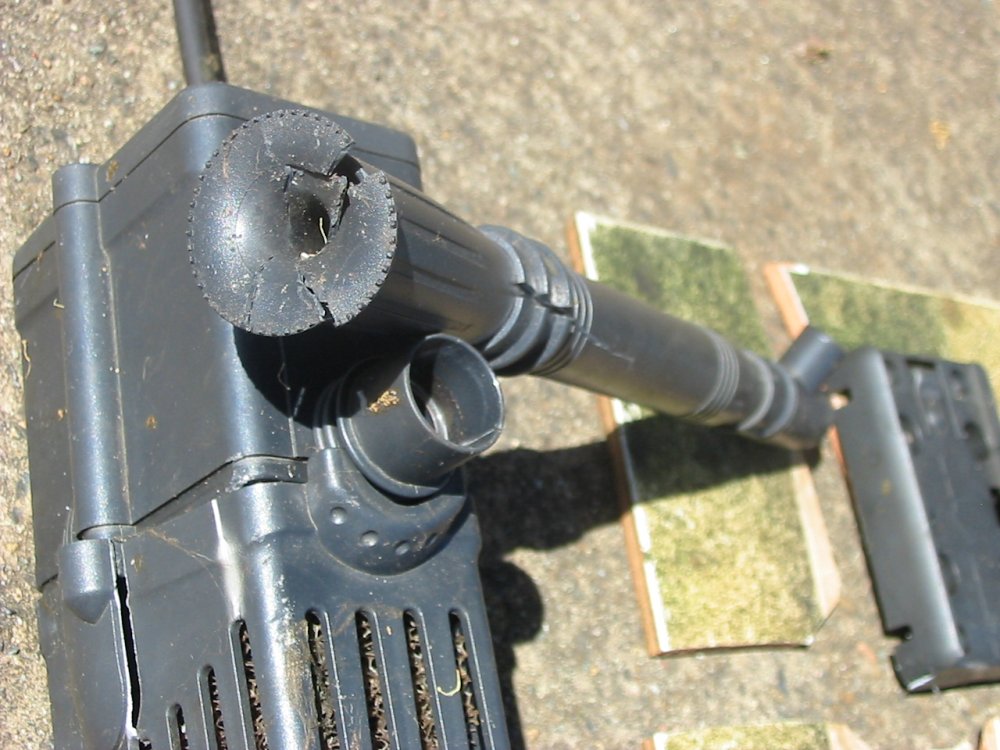 |
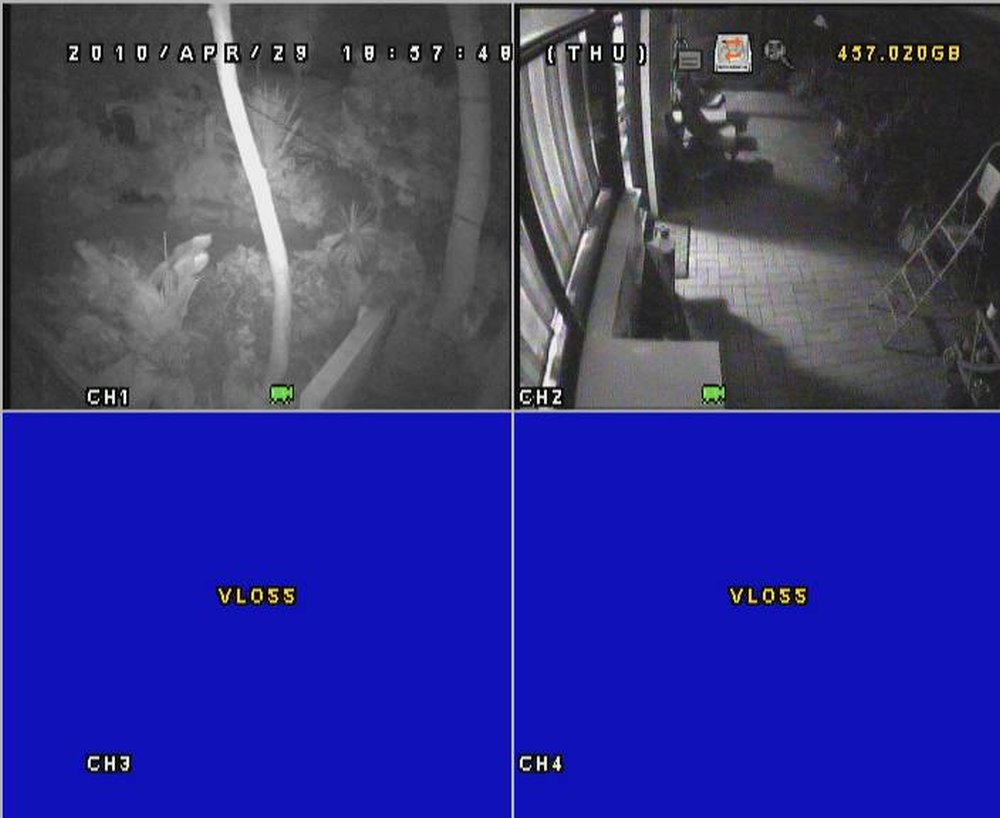
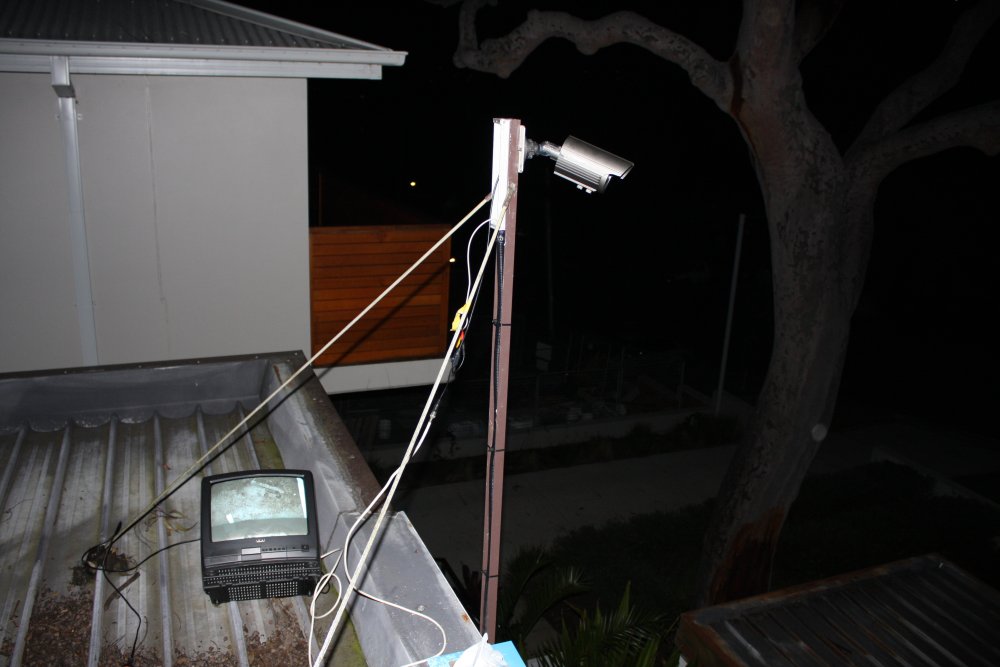
Feb 2010. Meanwhile the demented neighbor had resumed his attacks on my mum's small fishpond. He has a fixation that this pond is responsible for the existence of all the frogs in the area, and they were driving him mad. Never mind that it's a leafy suburb, has always had frogs, there's a native creek and swamp about 80 meters away so frogs are inevitable, and they only croak when it's likely to rain soon (as they always have.) But no... he had to keep pouring chemicals into the pond, killing the fish and most of the plants. Chlorine, oil, detergent, nothing subtle about this guy. In April 2010 I installed a 2-camera video security system, which stopped him for a while. Then in Dec 2010 he smashed the pond pump with a rolled up newspaper. It was rainy weather, presumably the frogs told him to do it. By Murphy's Law, in the night time on an evening when a spider had chosen to make a web on the IR illuminated security camera lens. So the recording didn't show anything but one very, very bright spider.
The 'Frogs Saga' is pretty funny. It's online, but not public.
So, replace the pump. Again.
 |
 |
 |
 |
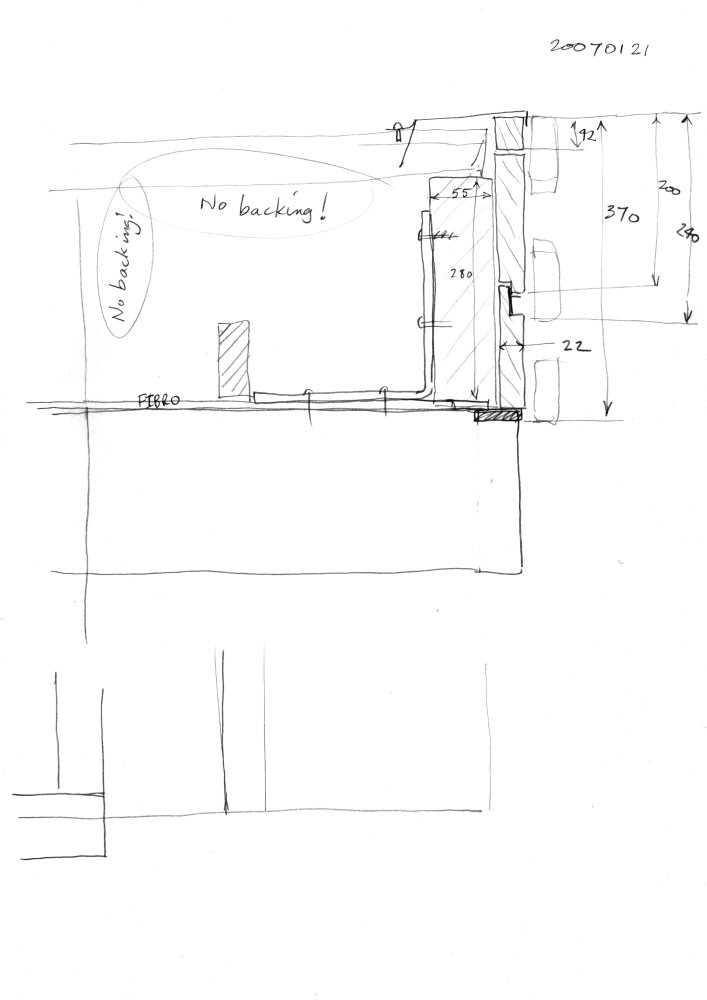
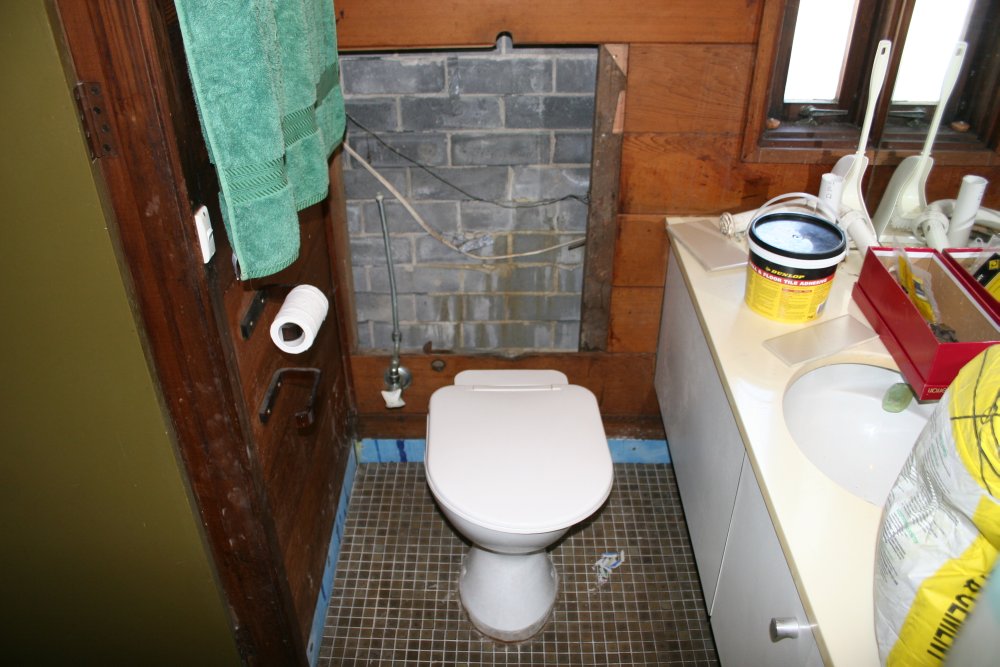
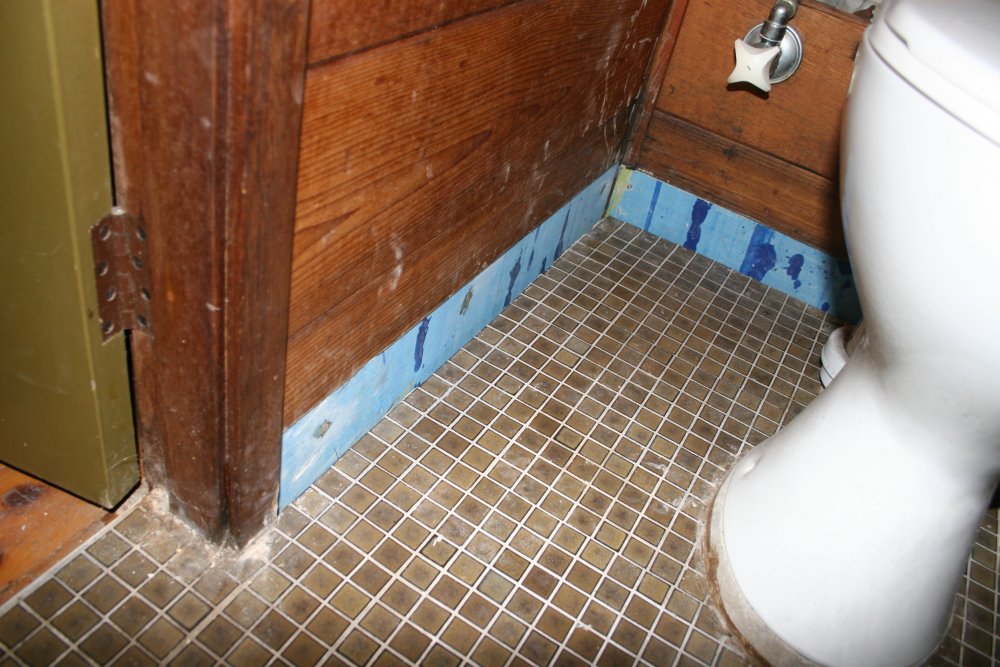
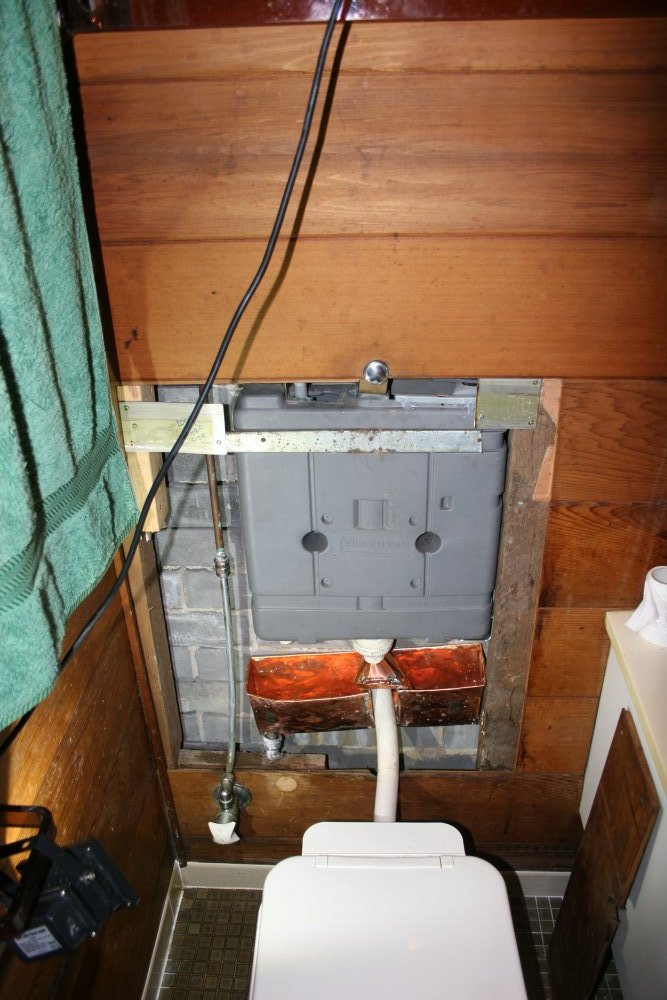
Nov 2013. The master bedroom in my mum's house is used for storage, and I don't think the toilet in there is ever used. Late in 2013 I was in there and went 'oh oh'. I could hear water dripping somewhere. Which could only be inside the wall, where the toilet cistern is. It wasn't the overflow pipe, which comes out of the wall and water would run to the floor drain. Experimentally I tapped the tiled lower border on the wall with my shoe... which went into the wall. Oh great.
On examination, the whole lower section of wall was sodden. The tiles had been laid on something similar to gyprock, which was now a wet paste. The water was coming from a join in the plastic tank of the cistern, which had cracked. Because whoever had mounted the cistern originally (the builder) hadn't bothered to actually set it on anything solid, but had simply tacked it in place with a couple of bits of wire, so the tank was stressed.
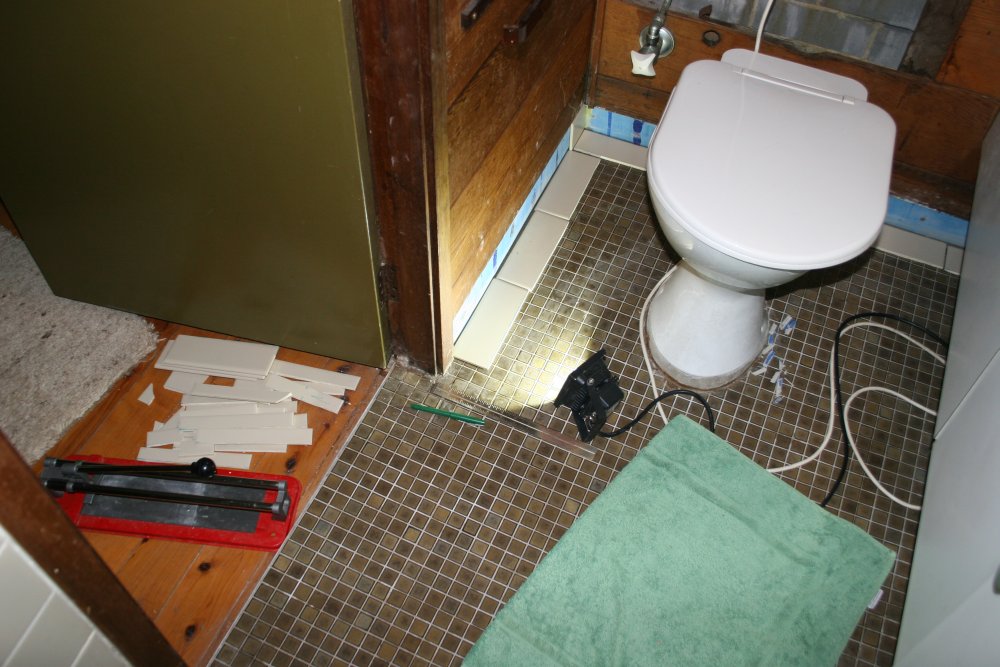
Fortunately this didn't seem to have been going on long enough to rot the wall frame timbers. I turned off the water at the stopcock, removed the tank, removed all the sodden pulpy tiles backing, cleaned up as much of the mess as possible, and left the wall to dry out.
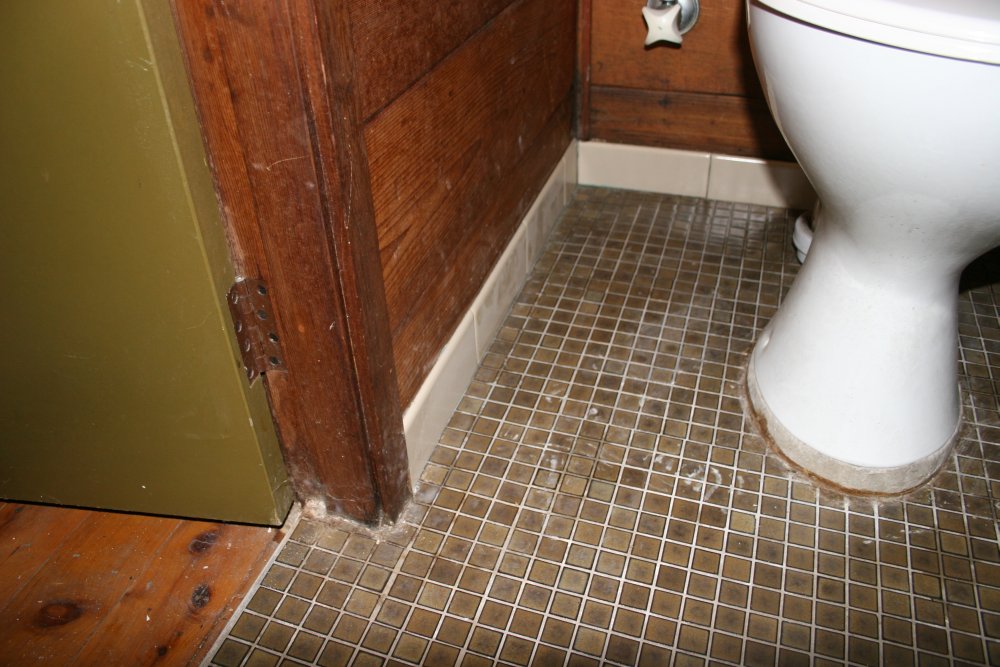
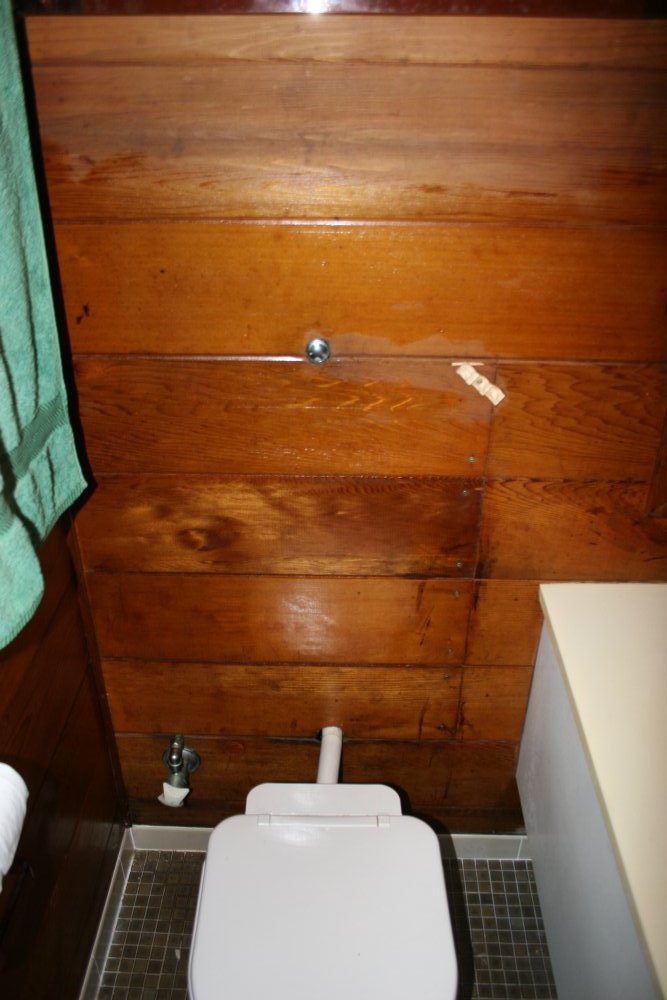
In December I repaired the wall, using proper water resistant backing fibrosheet, then tiled it.
That left the problem of what to do about the cistern. The wall cavity is narrow, and this cistern format isn't made any more. Replacing it didn't seem possible. For a while I couldn't decide what to do.
 |
 |
 |
 |
 |
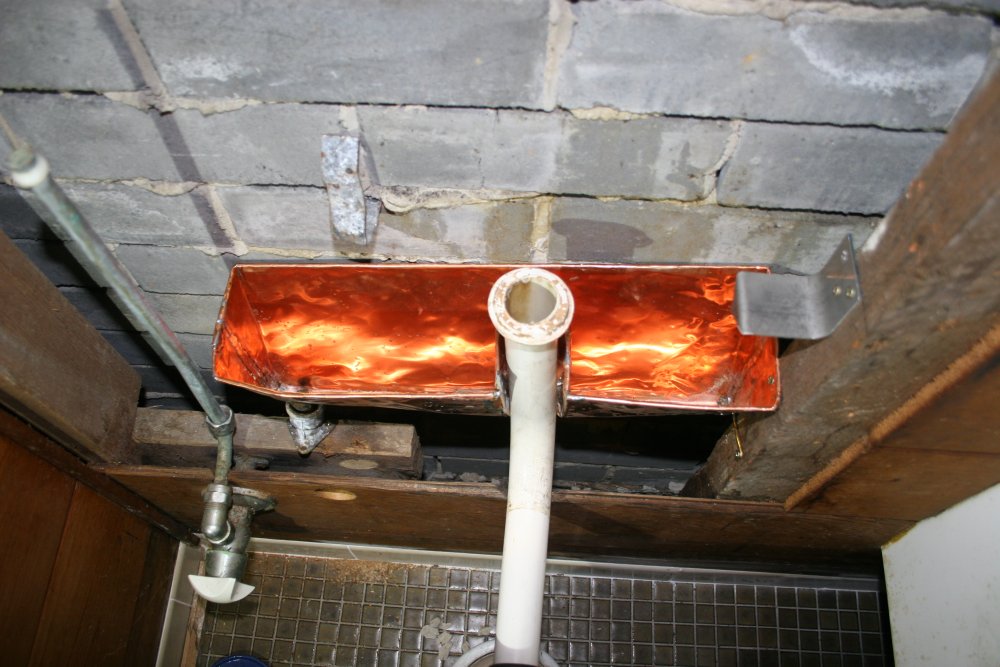
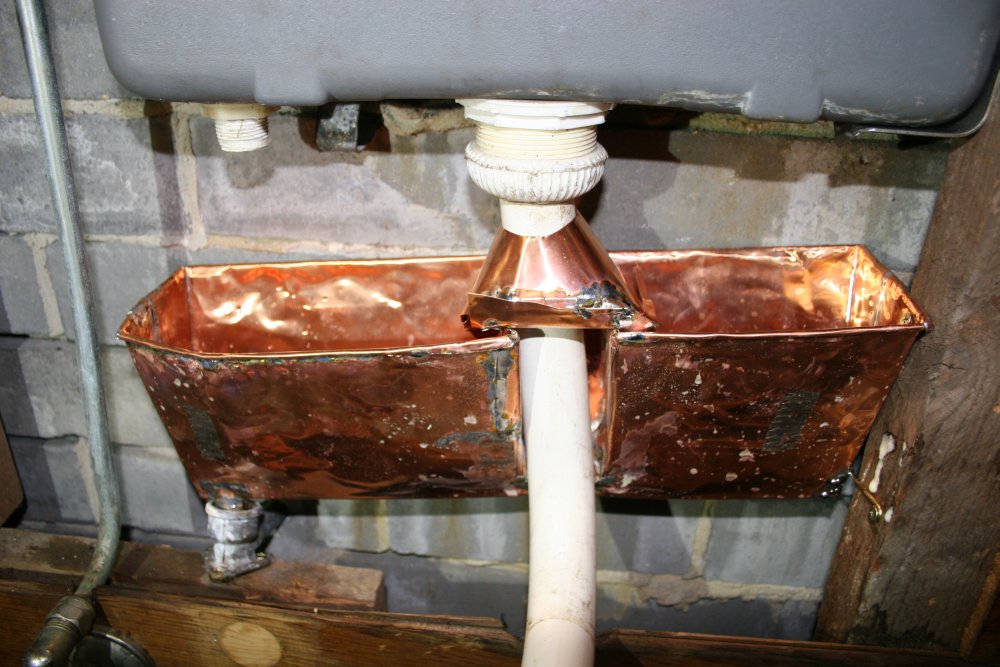
April 2014. Eventually I decided there wasn't much else I could do but see if I could repair the old cistern, then mount it so as not to stress it so much. I used compressed air to blow PVC primer then plumber's PVC pipe glue through the crack in the plastic, and also reinforced it as much as I could.
To make sure the wall didn't get wet even if the cistern leaked again, I made a catcher tray out of sheet copper. And rather than drain into the room as before, this time the drain pipe goes to outside (into the back garden.)
So far, it hasn't leaked again.
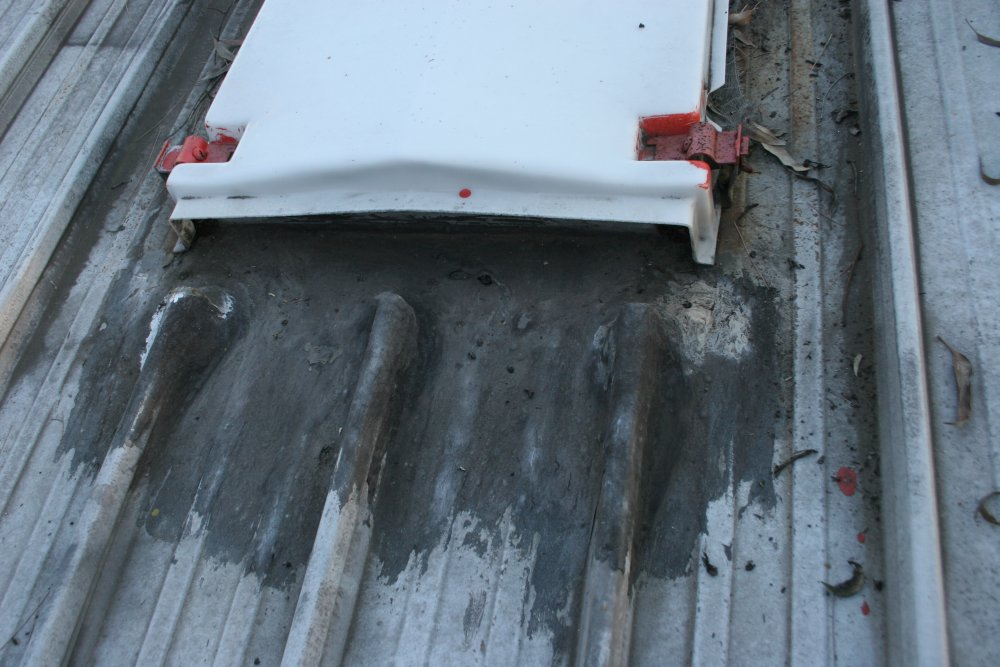
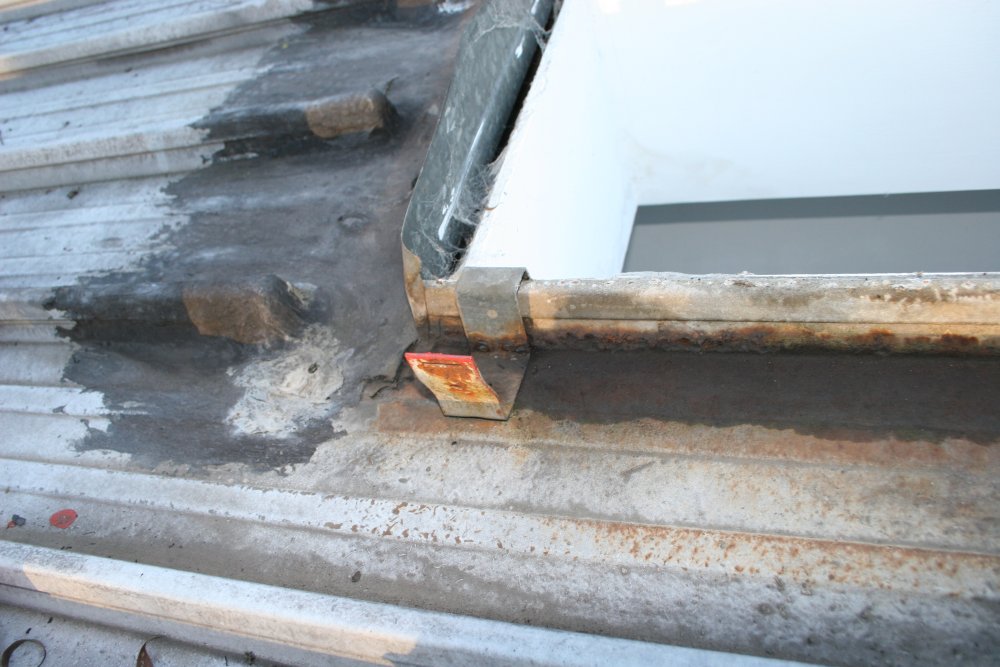
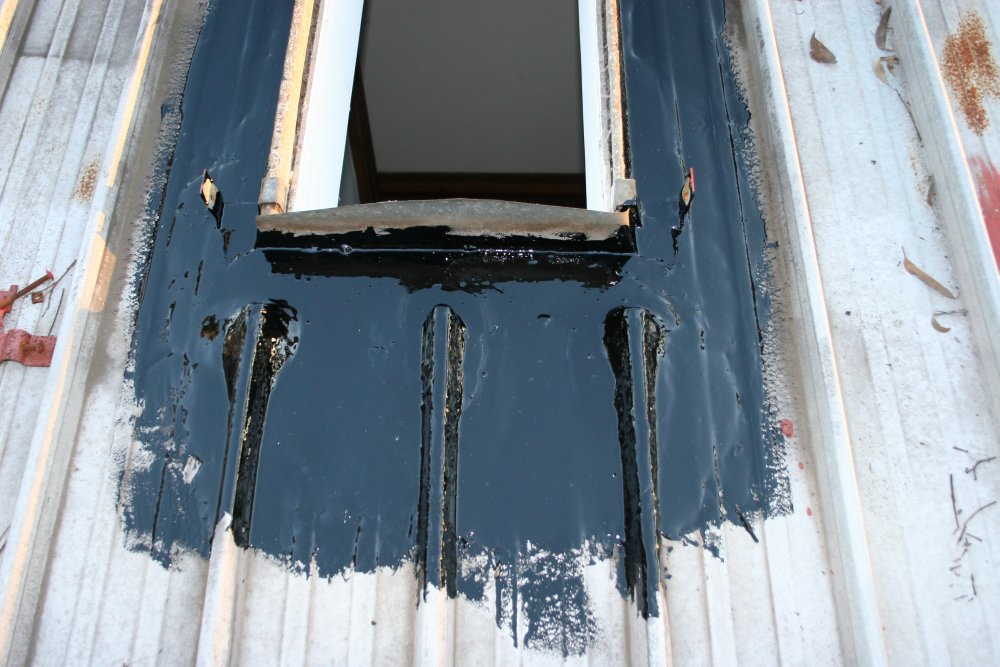
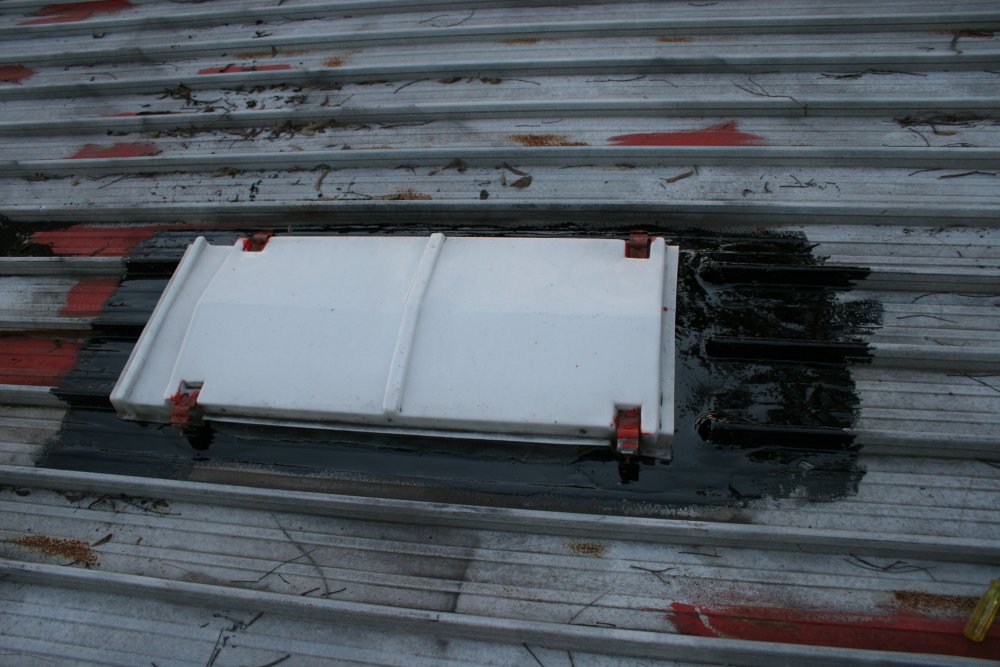
Sept 2014. Another leak, this time the roof. When the roofers originally soldered in the trim around a bathroom skylight, they used a lot of flux or something, and left it between two layers of sheet metal. Which eventually rusted through in spots. There's no real solution other than to replace several sheets of the roof, but it would be preferable to put that off till the whole roof is next replaced. So in the meantime, tar. Lots of it.
The existing tar had developed a leak. Time for more tar.
 |
 |
 |
 |
Oct 2014. Constructed another set of stainless steel handrails, this time for the front carport steps.
See 20141016_railings.htm
April 2015. The pond pump again. This time died of natural causes. Also a lesson on trouble shooting — don't make assumptions. Just because there is power to the power point, the day timer at that power point is running, and even with it switched to 'manual; ON' the pond pump doesn't run, and taking the pump apart to check that the rotor is free to turn and has no sign of activity, does not mean the pump is dead.
Unfortunately I'd forgotten to bring my VoltAlert mains voltage sensor with me that day. And so my mum bought a new pump because I'd told her the old one had died.
When I came to put it in, this time I brought the usual kit, including the VoltAlert. Anyway, I spliced the new pump onto the end of the cable near the pool. Switched it on. Nothing. Uh....?
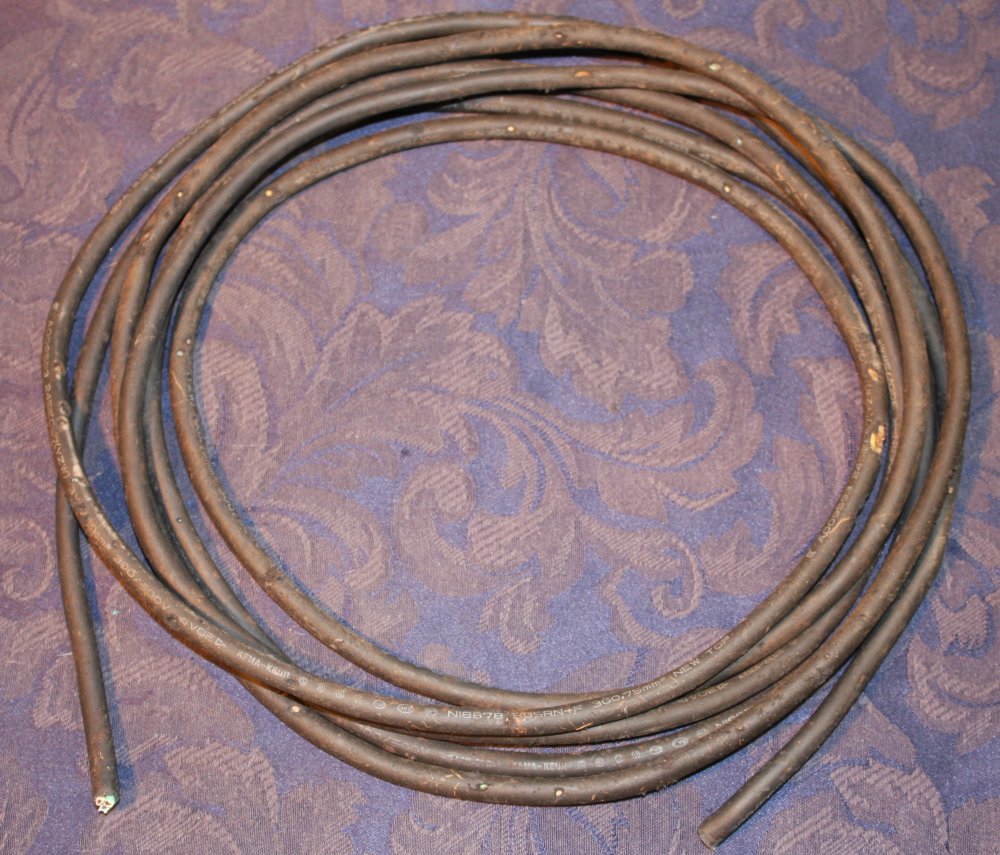
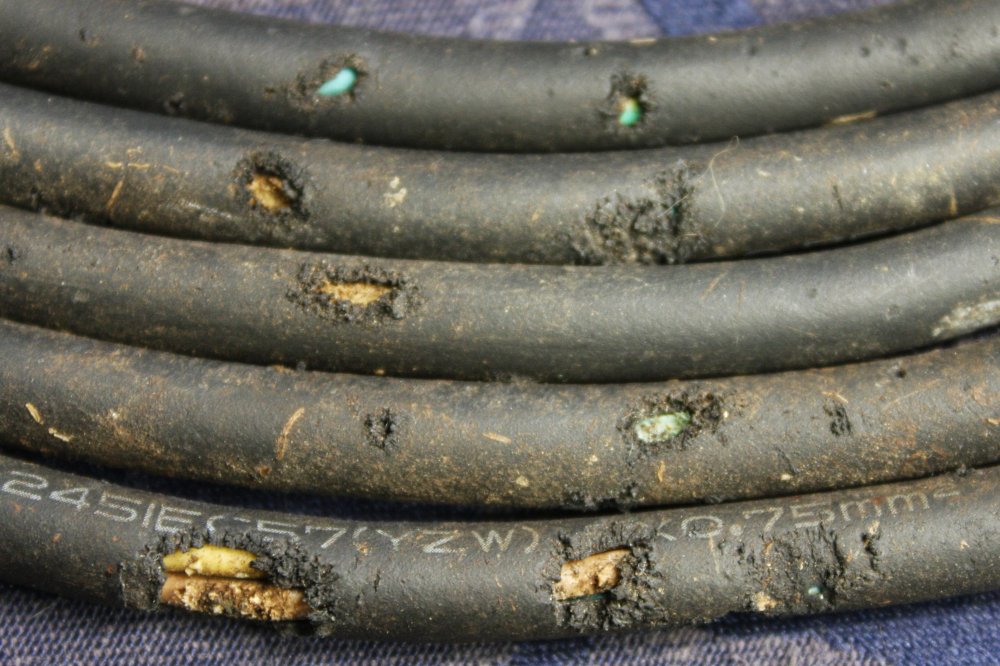
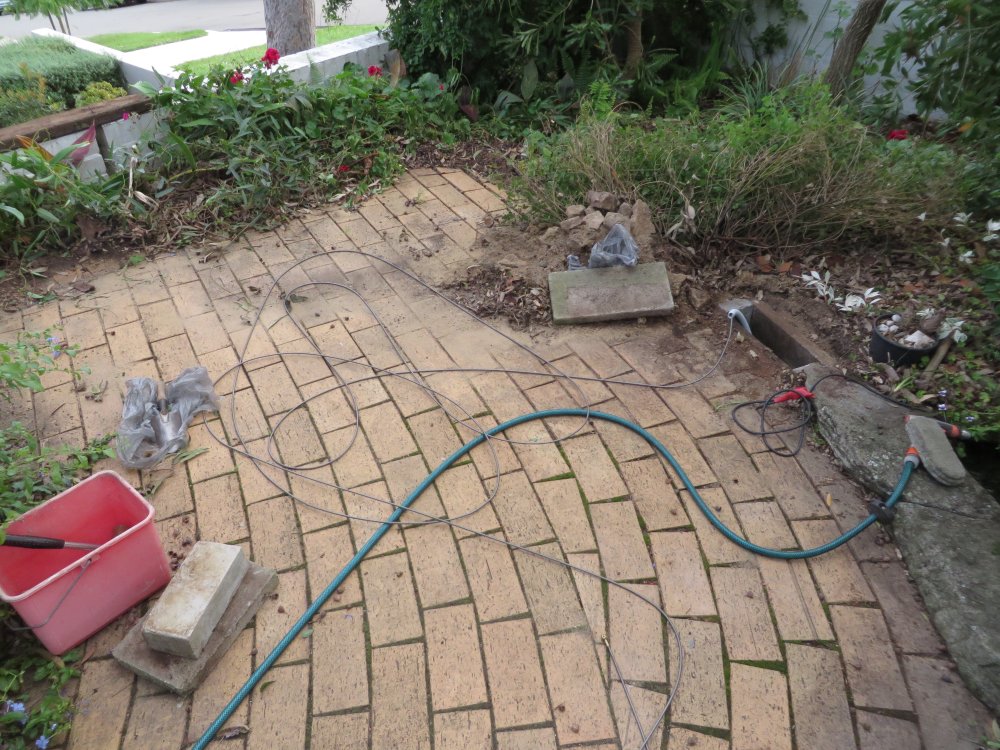
Finally did what I should have done intitially. Checked the power on the cable. At the source end it's OK. At the pump end there's nothing. After disconnecting the power I started pulling up cable. It's rated for use in garden ponds and the outer sheath is some quite tough rubber, possibly neoprene. So I was curious to see how it had become damaged.
 |
 |
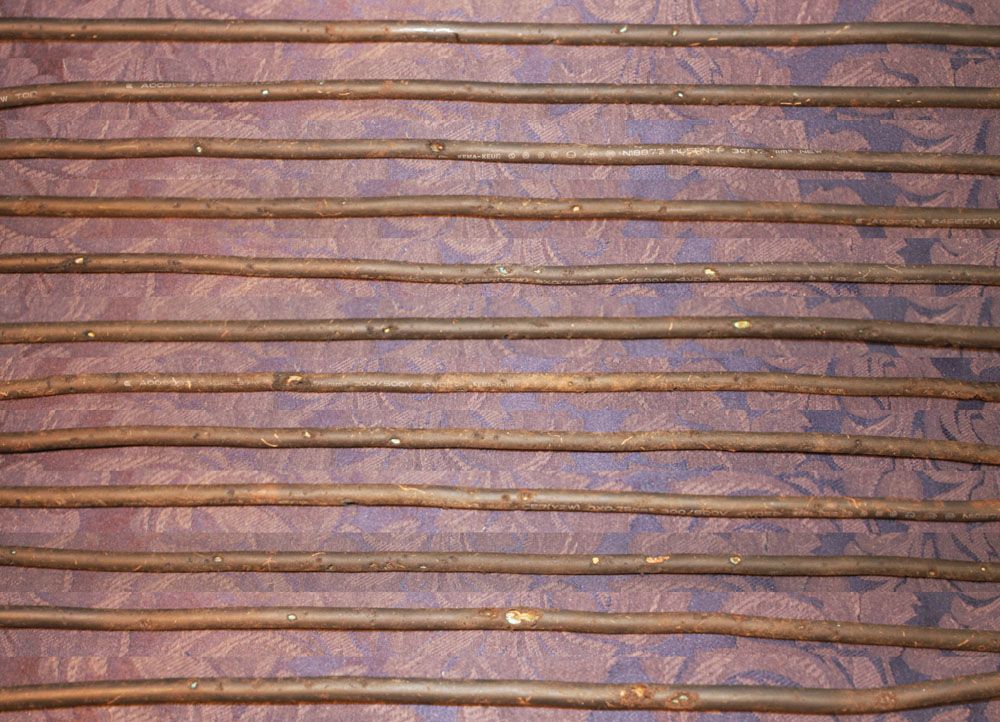 |
Big surprise! For several meters the cable looks like an old woollen jumper left in a closet full of hungry moths. It has hundreds of various sized holes eaten in it. Some are right through both the outer sheath and one of the inner conductor sheaths. One particularly large hole went through to the Active wire, and there the copper is completely gone for about a centimeter. Electrolized away, presumably. Unless these garden neoprene-eating moths or worms also have a taste for live 240V AC copper wire.
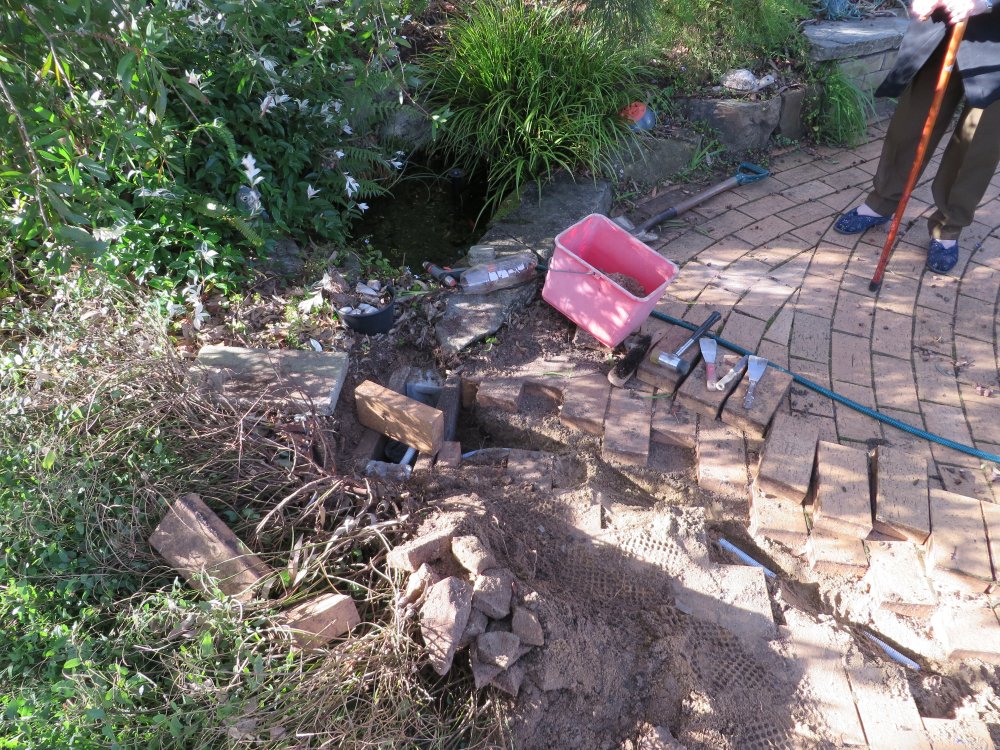
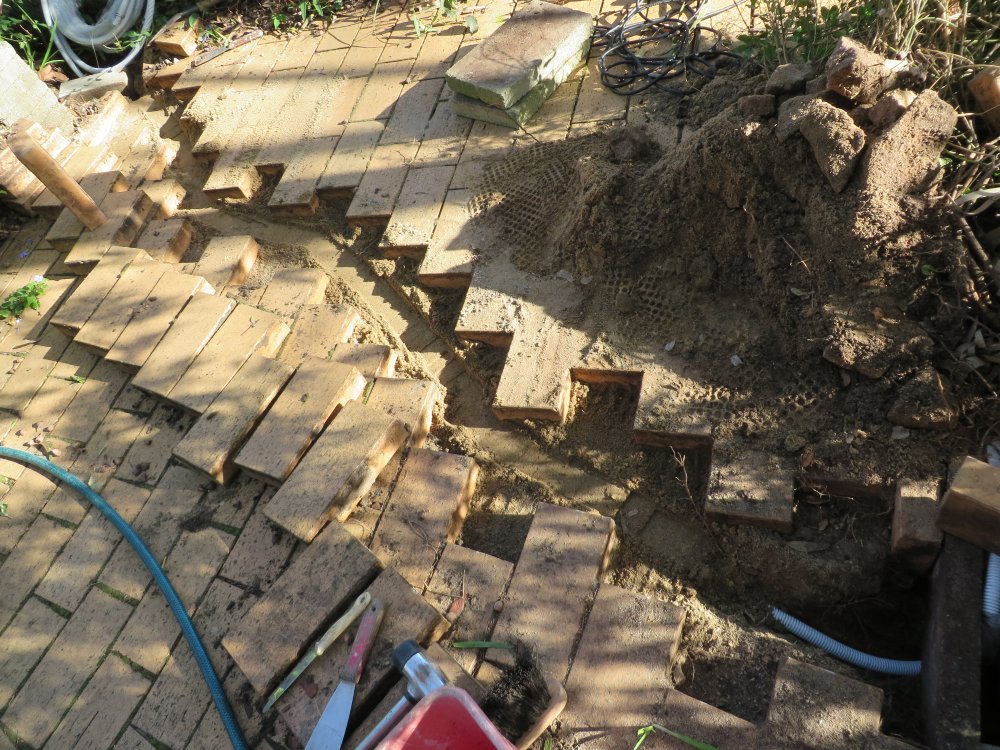
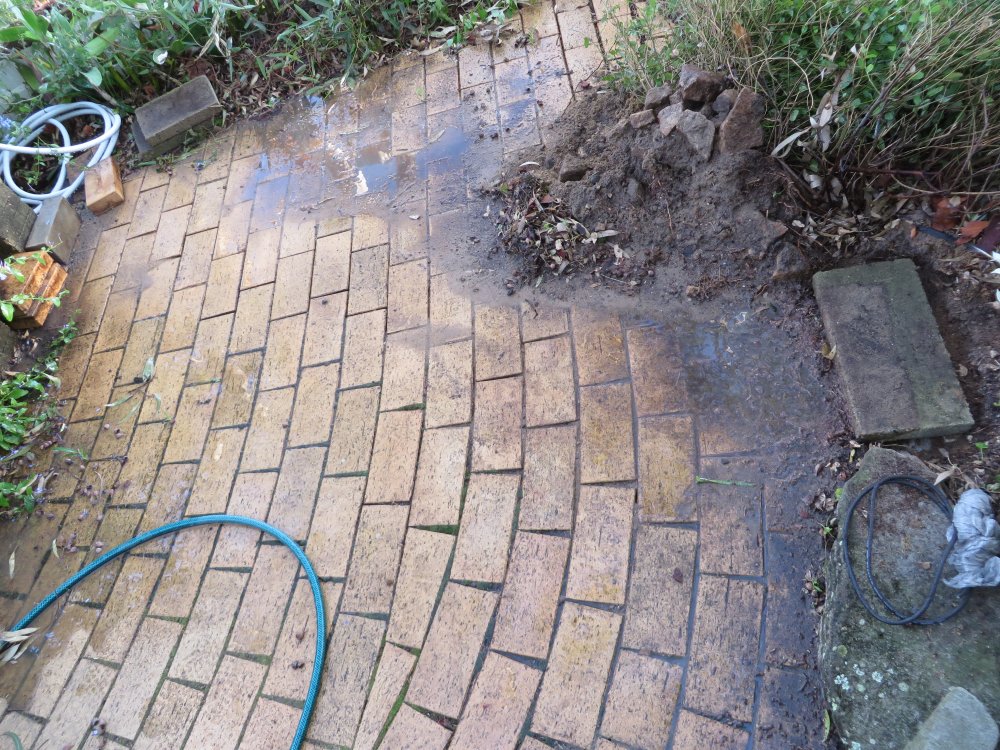
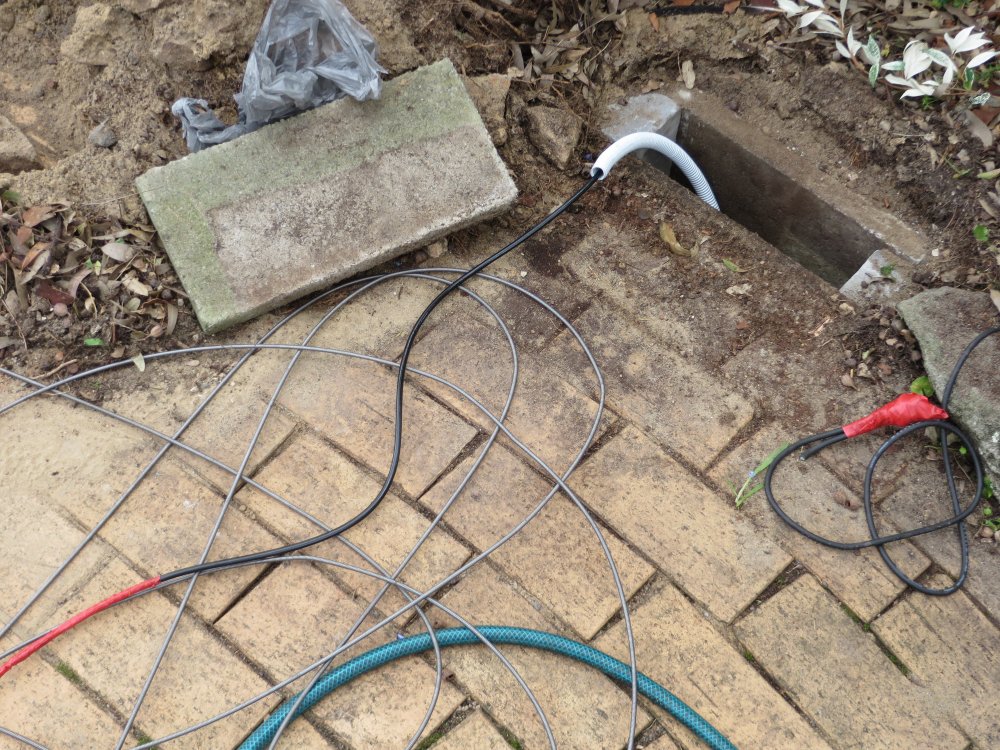
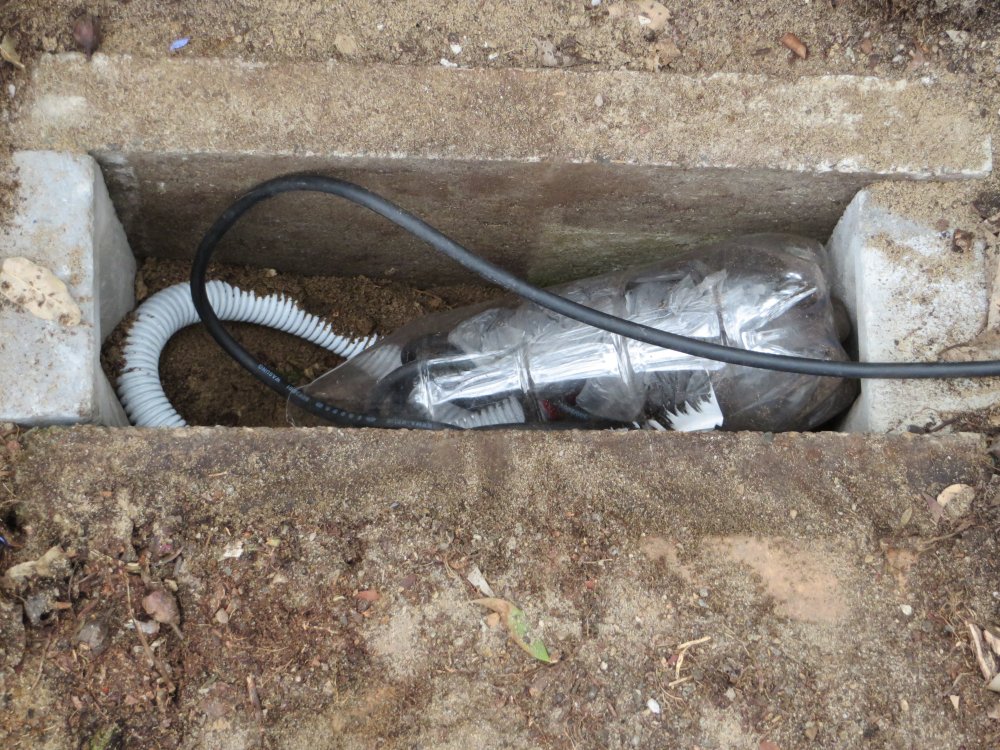
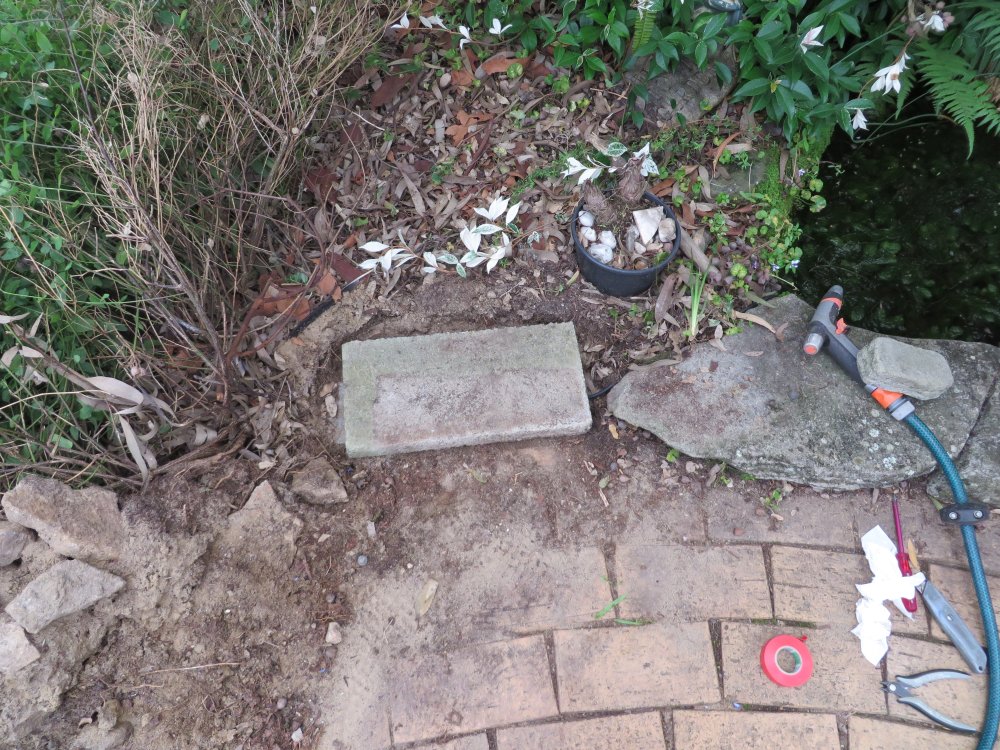
Well, apparently a cable supposedly rated for garden pond use (implying at least some contact with the ground), can't be lightly buried after all. So, conduit time. The cable originally ran around the edge of the paved area, but now it's going to take the direct route, under the pavers.
 |
 |
 |
 |
 |
 |
 |
 |
 |
 |
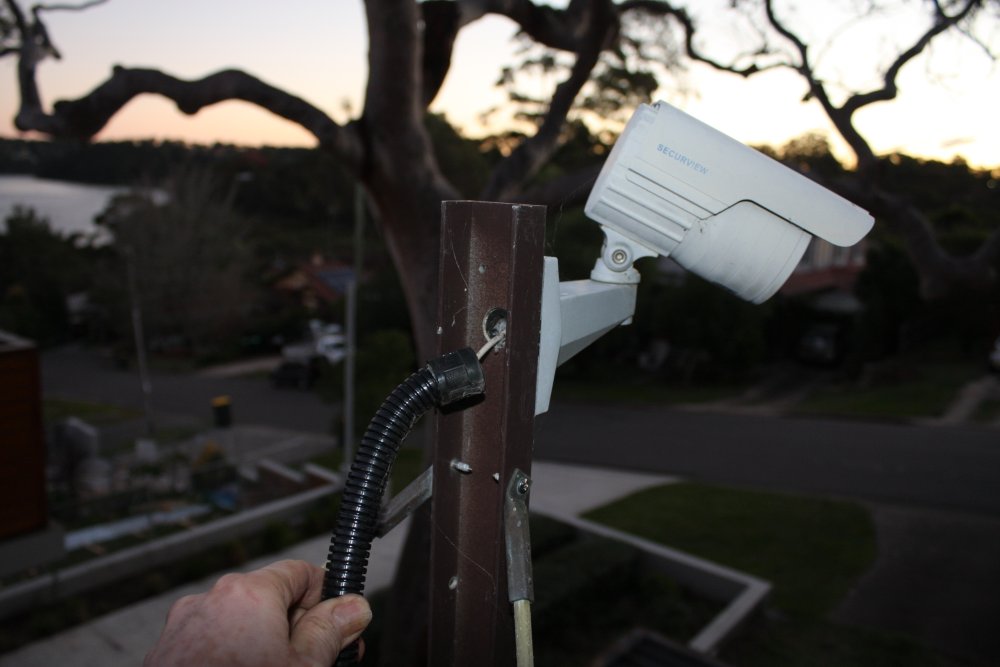
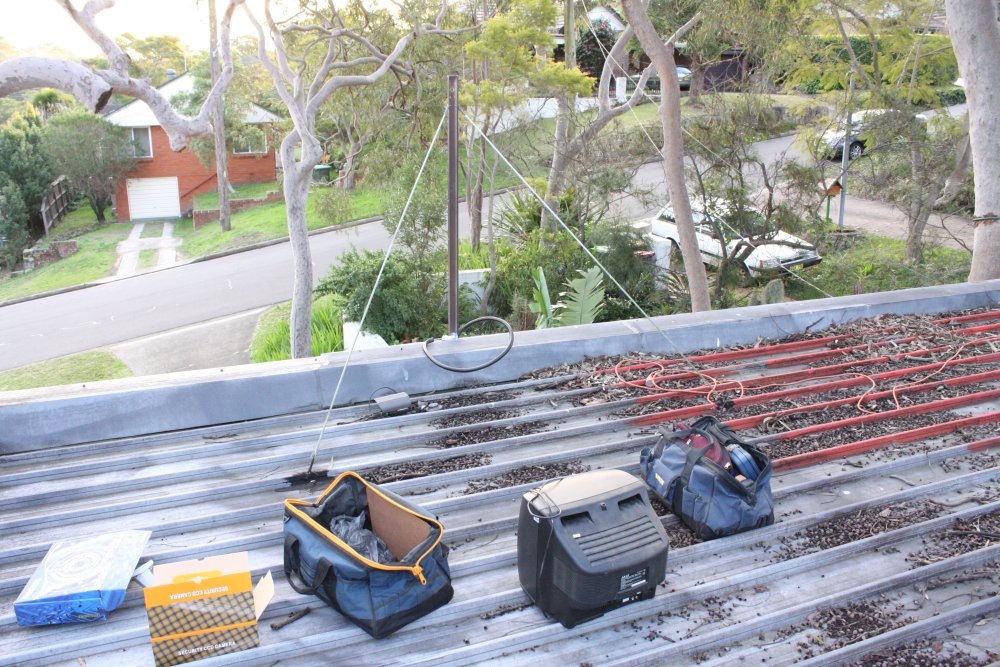
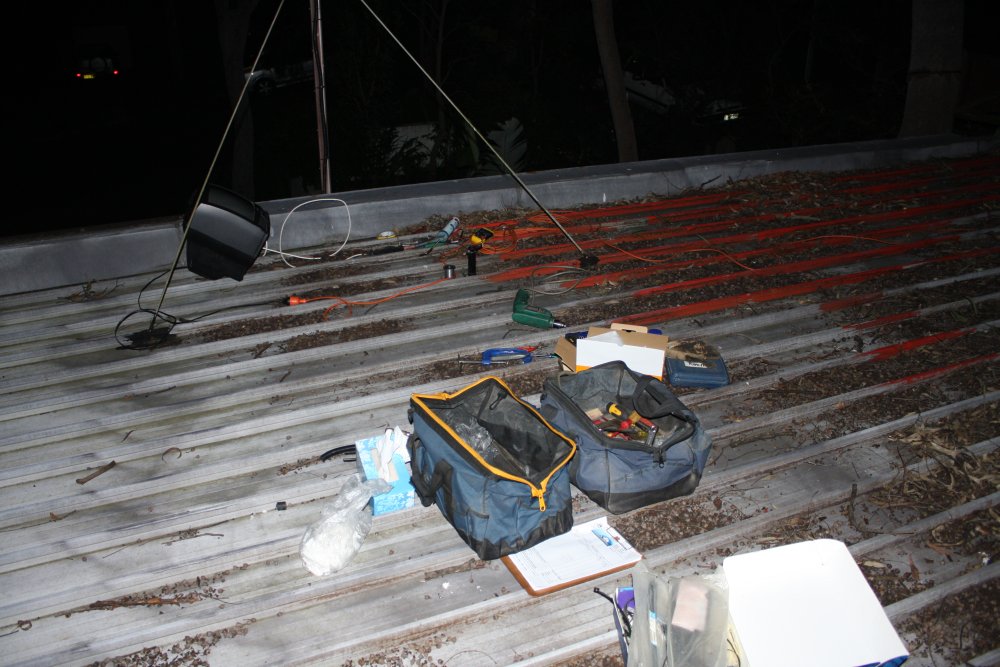
June 2015. Replacing the front yard security camera. On checking the video security system, the front camera was dead. No video output.
 |
 |
 |
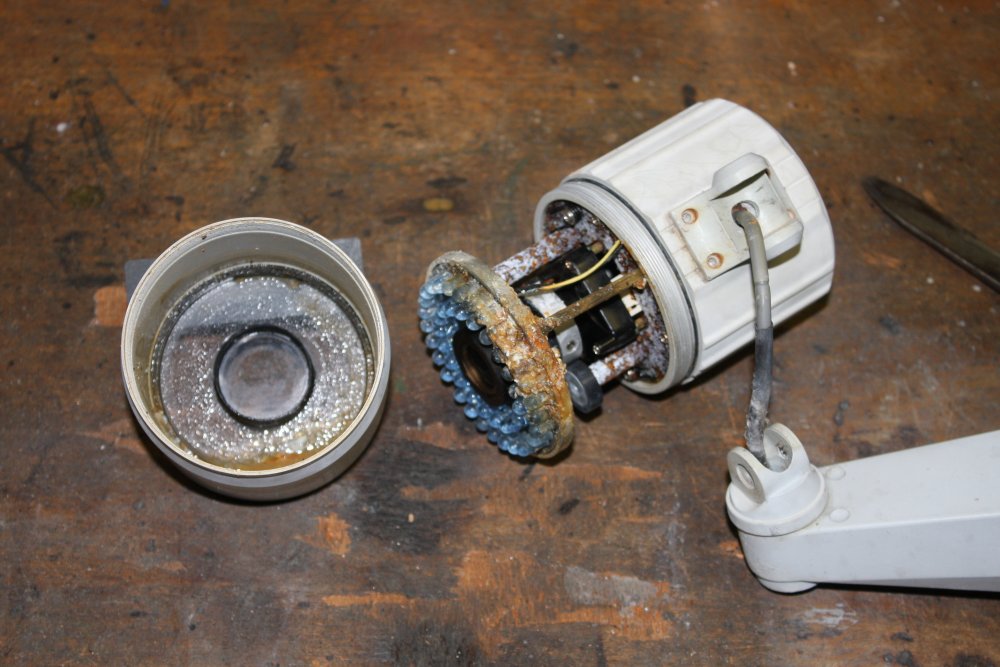
Getting up on the roof and checking it, apart from minor details like cockatoos having chewed off the conduit wireties, and the conduit entry mount breaking off when I touched it (stressed plastic?), the main problem was that the supposedly weatherproof camera case had half an inch of water inside.
Seems a thin rubber sealing O-ring around the main screw-together case sections had perished and snapped, letting in water.
 |
 |
 |
 |
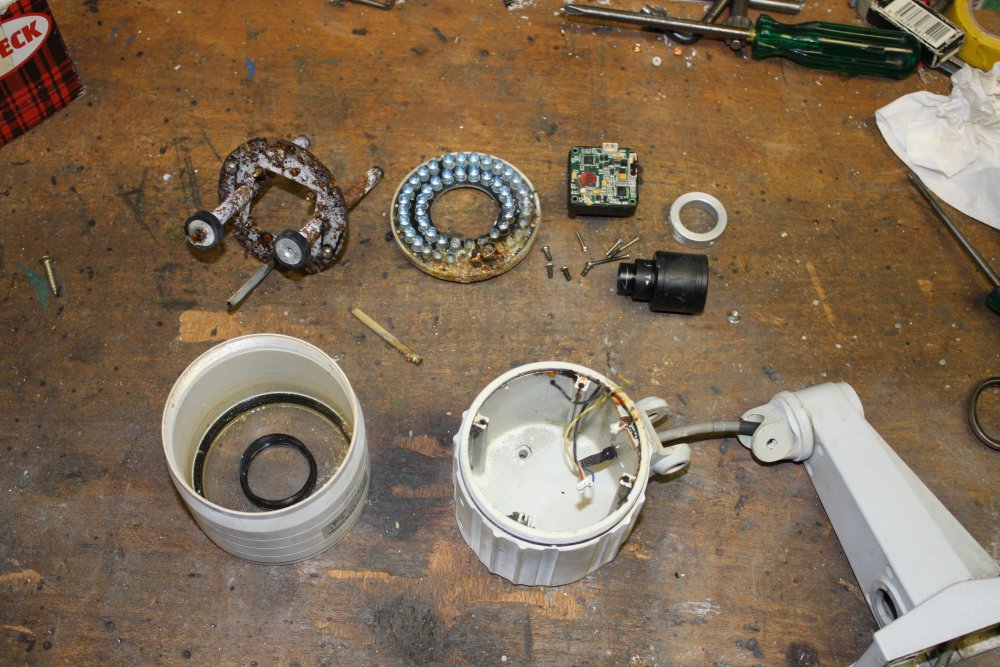
I bought a new camera. It's mounting was different, requiring me to make an adapter plate. This time I disassembled the case and water-proof greased all the threads and seals. Also found one of the adjustment gears was slightly out of position; fixed that.
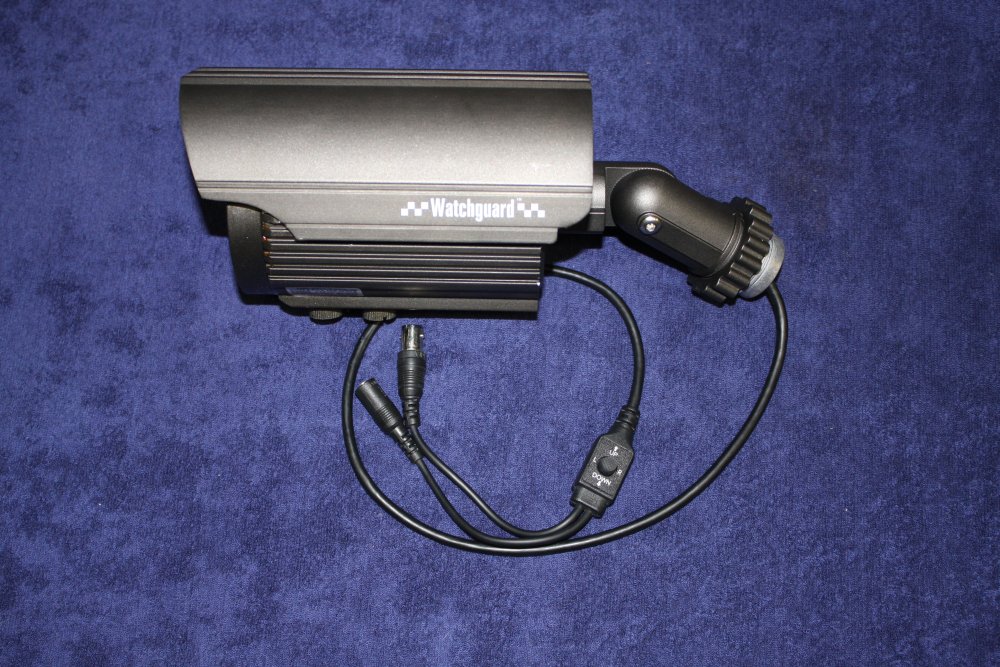
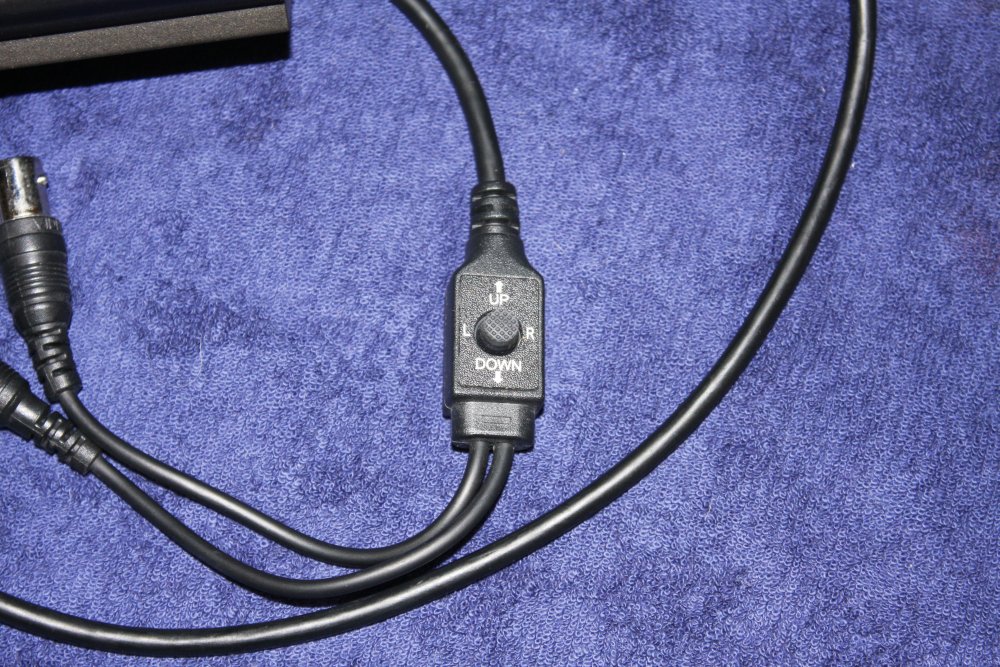
On getting up on the roof to install it, only then I found the camera has a menu system, accessed via a small button on the molded cable fork. Which I'd planned to cut off and splice the wires directly, since there's not room for the plugs junction in this cable's mounting, unlike the previous camera.
So, I quit for the day. Need to work out how to deal with this.
What a dumb design. This bit is always going to be inside the wall or pole once the camera is mounted. So then, when you may need to set up motion detection areas, etc, you can't because the control is inside the wall. Brilliant.
 |
 |
 |
 |
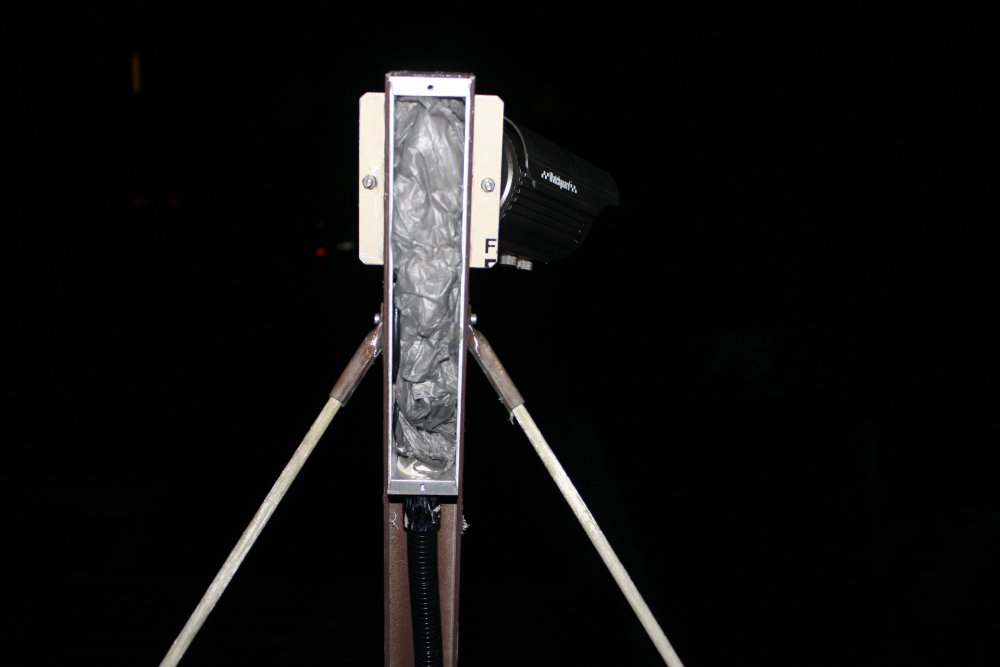
Well, I can't cut it off. The next best solution I could come up with, was to add a junction box to hold the cable plugs and this control. But it had to be weather and pest proof.
 |
 |
 |
 |
 |
 |
 |
 |
Finally mounting it. This time it went smoothly, apart from sticking the point of a stanley knife blade into the end of a finger while adding connectors back onto the end of the existing cable from the house. The box joins are all sealed with silastic, apart from one at the bottom to allow condensation to drain.
And then...
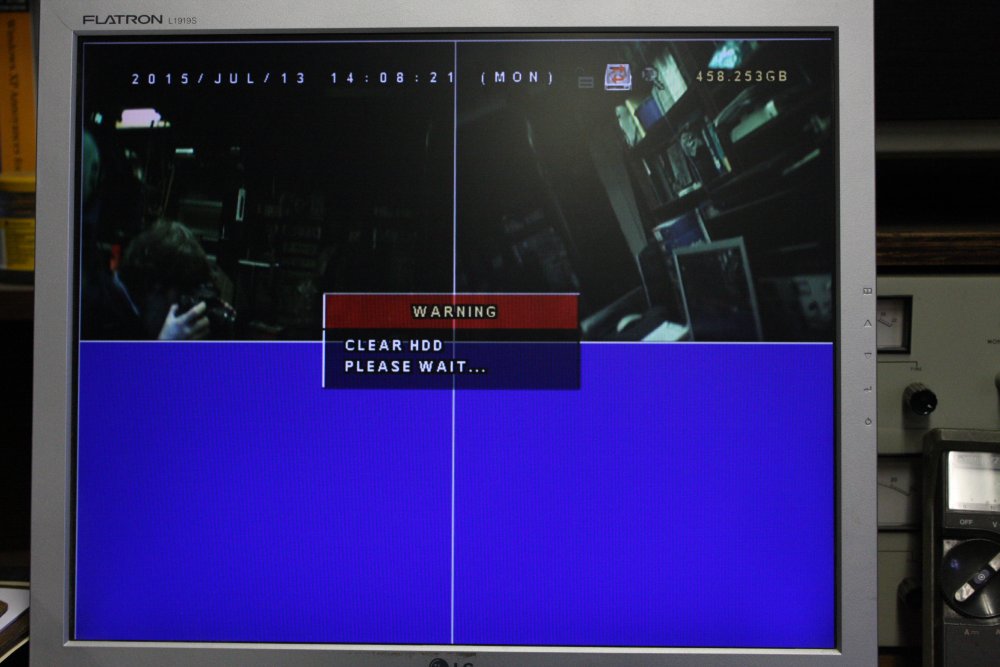
A week later the Digital Video Recorder developed a problem. My mum's description: "It just keeps beeping". It was stuck in a loop where it would reboot, start displaying video, then pop up a 'scanning hard disk' message, sit idle for a while with a frozen progress bar, then power down and reboot. Beeping three times per cycle.
Apparently a problem with the hard disk. Next question: is the system's operating code on the hard disk? Let's hope not, though I know of some DVRs in which the code is on the HD, so if that fails you're screwed.
 |
 |
 |
In this case the system code is in something non-volatile on the PCB, since it runs without a HD. The code memory is probably nothing to do with the coin cell on the PCB, but the voltage on that is OK anyway. Also the external switch-mode supply output voltage is correct and stable — I've seen these go flaky and intermittent. Not the case here. It's just the HD...
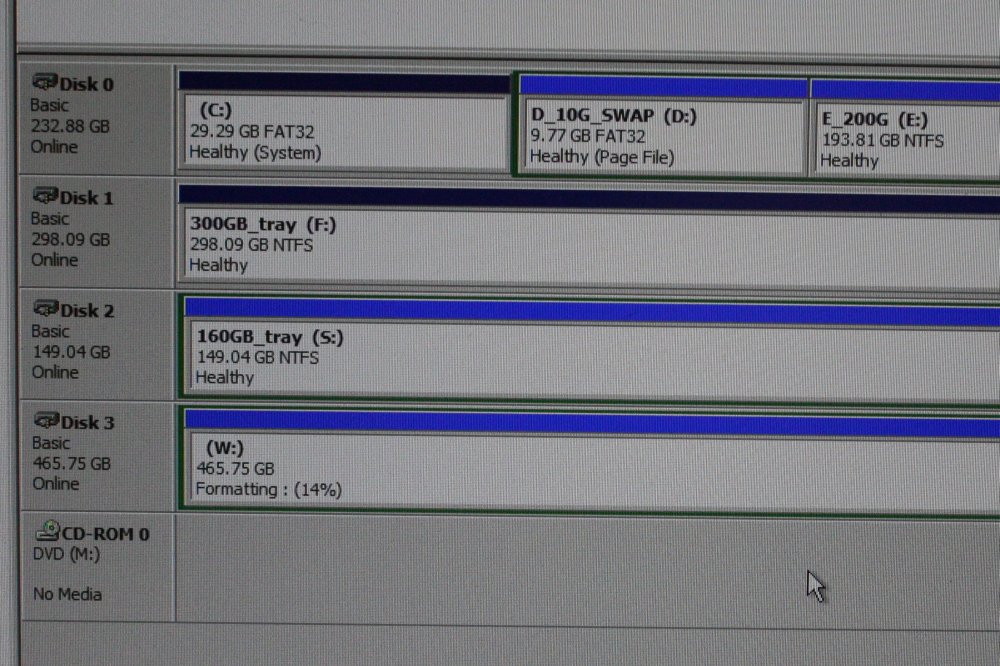
As expected after plugging the drive into an external USB HD dock on a PC, the drive shows in Disk Management as 'unknown format'. But it does report its size correctly, so I formatted it. That went OK, no errors. I saved some large files (music videos) to it, and they play back OK.
Deleted those files from the HD, replaced it in the DVR, ran the DVR's 'wipe disk' function, and it all works again.