In parallel to my troubles with the Spectrum Analyzer, my old mum has had a run of bad luck recently. Which counts as bad luck for me too, since I have to deal with it. First she had another fall at home. Hit the back of her head on the way down. She has a medical emergency pendant, and I get the call when she presses the button. She can't get up on her own and it's a 20 minute drive to her place, so she gets to lie on the floor uncomfortably for 20 minutes whenever this happens. This time she got an egg-sized lump, and made her back (injured in a fall a couple of years ago) worse again. It was mid evening, no doctor could be found to do a home visit, and the prospect of waiting hours in a hospital emergency department didn't appeal to her. She can't sit in a standard chair anyway, due to her back. Apart from the lump she seemed OK, lucid, pupils normal, so after cold-packing the lump for a while she just went to bed.
That was Entropy's entrée, leading into a hearty three course meal.
Second course: One of the four elements of her electric radiant heat stove top failed, and it turns out the maker (AEG) no longer stocks spare parts. This one is not yet solved.
Third course: The quite large roller bind in her kitchen window failed. Broken roller latch mechanism, making it impossible for her to open and close the blind. The company that made this custom blind no longer exists.
All this was just a drum roll preceeding the Entropic Masterpiece. The scene: Early hours of a rainy Monday morning. I've been up all night. Initially just a late Sunday night working on the Spectrum Analyzer, concluding it is in fact seriously non-functional and probably isn't going to be an easy fix. So the late night turned into an all-nighter doing random stuff including a lot of net-browsing. This is a bad habit of mine when I'm feeling depressed. The intermittent rain added to the mood.
I'm retired and live alone, so 'Mondays' are mostly irrelevant and I can sleep in if I want. At 5:30am I'd started preparing for bed when the phone rings. Who phones anyone at 5:30am? Except my mum after a fall? Oh oh...
I pick up. It is her, but she's panicked, near incoherent. "Help! I'm being flooded! It's inches deep, everywhere..." I ask her where it's coming from. No sensible reply. I ask "is it raining?" and she says yes.
I'd asked that. because her house has a flat iron roof, under trees. It's happened more than once that leaves block the gutter, and in a thunderstorm the overflow ends up in the house. At the moment the gutters should be clear enough (which I know because I'm the gutter cleaner, of course) but maybe it's really pouring down at her place?
So I say I'm on my way. Whoopee. I'm completely exhausted, it's still dark, and now I probably have to get up on a roof in the rain. Assuming I don't fall asleep and crash while driving there. I grab some likely stuff... rain jacket, tubes of sealant, torches, small kit of tools, etc, and head on over.
Driving, it's mostly only light or no rain, except for one brief heavy cloud-dump with visibility down to a few car lengths. Perhaps one of those happened at her place ?
On arriving it's not raining at all, and I walk to the front screen door thinking it's no longer an emergency. But at the door I can hear... the water pipes at the garden tap near the door, are making that 'lot of water flowing fast in the pipes' noise.
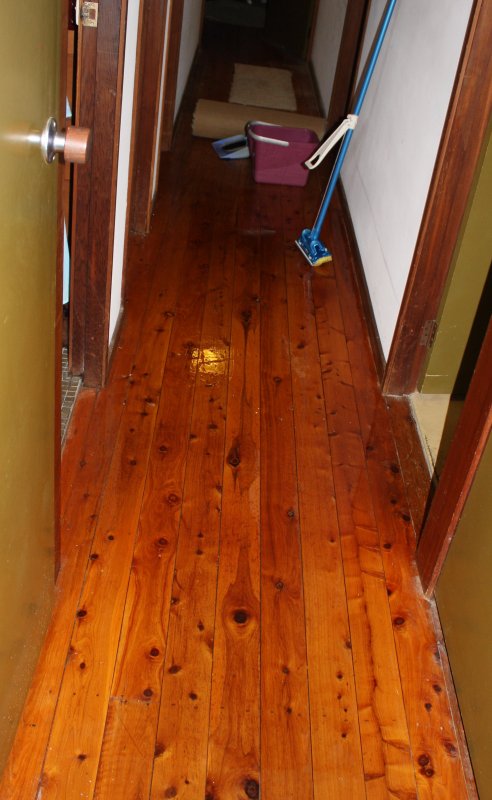
Oh really? I run inside, through the living room, and she's right, it certainly is deep. Most of the hallway is a pool, carpets underwater. There's a roaring very distinctly 'broken water pipe' sound. Great.
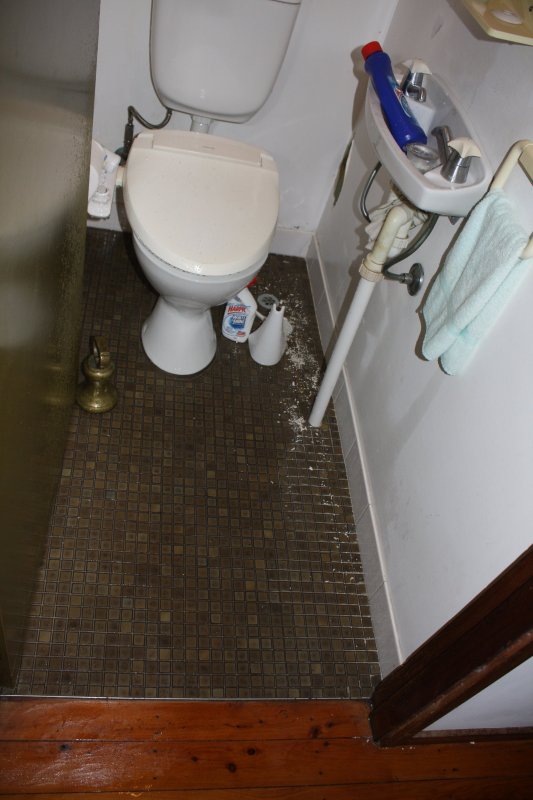
Splooshing down the hall, towards the sound. Into the small toilet room (it's not much bigger than a closet) and there's the problem. On first glance it looks like a jet of water coming out of a hole in the plaster wall. On second glance, no wait... it's going into the hole in the wall. What?
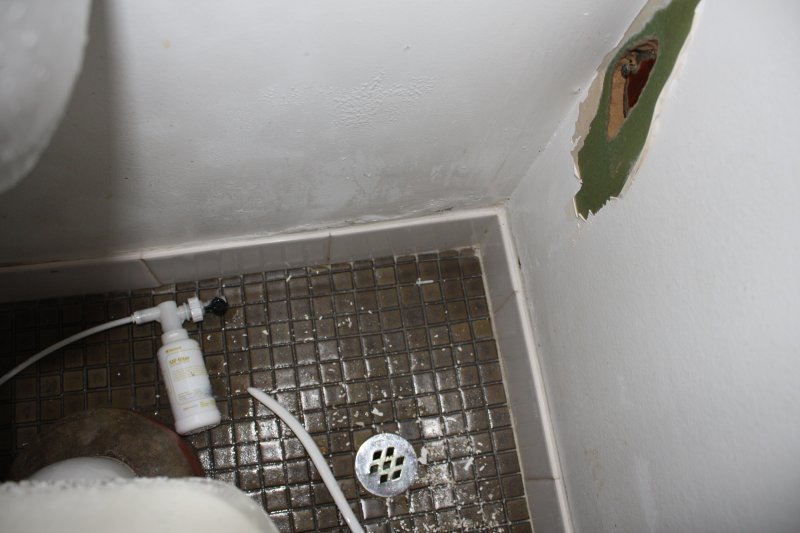
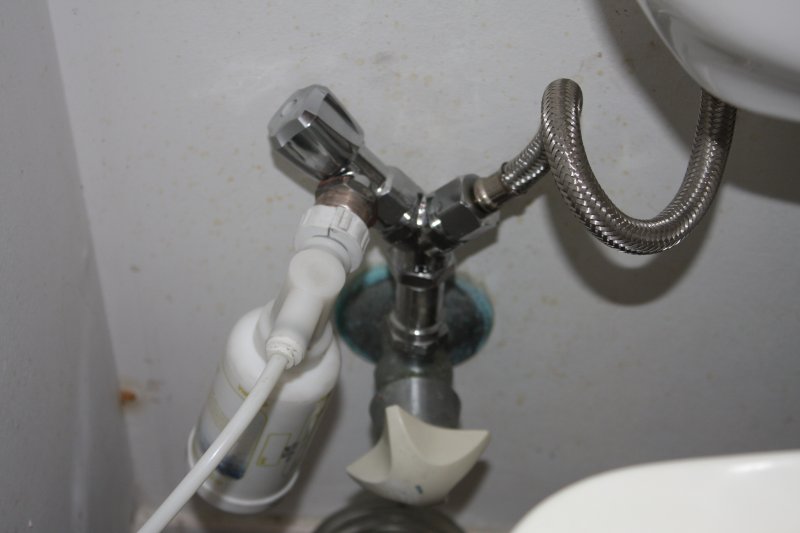
Oh I see. There's a plumbing 'Christmas tree' under the cistern, where a water fitting for the fancy water-jet toilet seat my mum got years ago (good for the frail and inflexible) was added. Part of it (made of plastic) has broken off, resulting in a jet of water that has cut a hole into the wall plaster.
Simply turning off the cistern stopcock puts an end to that. If my mum hadn't panicked and was physically capable of getting on her knees and leaning down behind the toilet to reach the stopcock she could have done that herself, 20 minutes ago. But she isn't capable, so the house has a lot of water on the floor.
Most had been going down the floor drain, till the grill got blocked by bits of plaster. The overflow into the hallway was finding enough gaps in the floorboards to mostly fall through to the under-house space, but some still made it to the next room down the hall. Her bedroom, and some of the things on the floor there.
A few hours of moving soaked carpets and other items, mopping and scrubbing. A bit of plumbing alteration got the toilet working again. But that toilet seat is kind of essential, so has to be fixed. I got home around 10am, had some breakfast, did some other chores, got to bed about 12, had a couple of hours sleep. Then up again to go back to her place to do the usual Monday shopping and evening meal together.
With the broken blind I'd hoped to have the mechanism repaired by the business that had originally supplied it. They are not far from my mum's place, and on my route home. The broken plumbing piece was clealy a design flaw (small plastic part under tension, and I'm surprised it lasted so long) so I'd have to make a reliable replacement rather then try to buy a (same) spare part from the manufacturer. So I took the broken blind and pluming bits with me when I left.
At the 'blinds place', it turns out the old business closed years ago, the new lot (different people and name) only do outdoors blinds and shutters. They can offer no suggestions where I'd be able to find a replacement mechanism. Oh good.
Well, I needed a break from that Spectrum Analyzer anyway. Nice simple mechanical things I can definitely fix. A reprieve from my most hated situation — pouring effort into an open-ended struggle that might not ultimately succeed; no way of knowing if it's worth it, but the motivation/cost/need being too high to just throw the whole problem in the trash.
Also, though I dislike cheap consumer crap that was always going to break eventually, I do get a kick out of overcoming obvious design flaws and/or deliberate planned obsolescence, and repairing things despite them not being intended to be repairable.
|
|
|
|
|
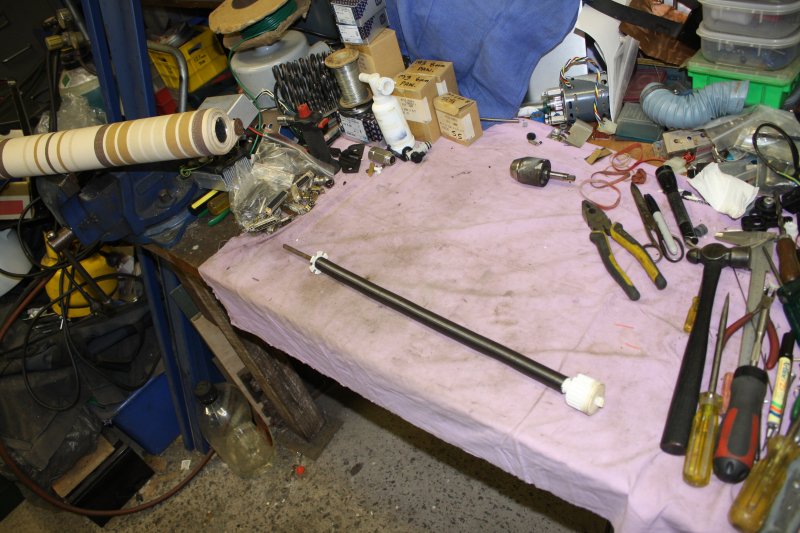
1. The only thing special about this blind, is it's about 2.7m wide, and made with fairly heavy duty cloth. Also it's my mum's, and she's 89 and doesn't like to change things.
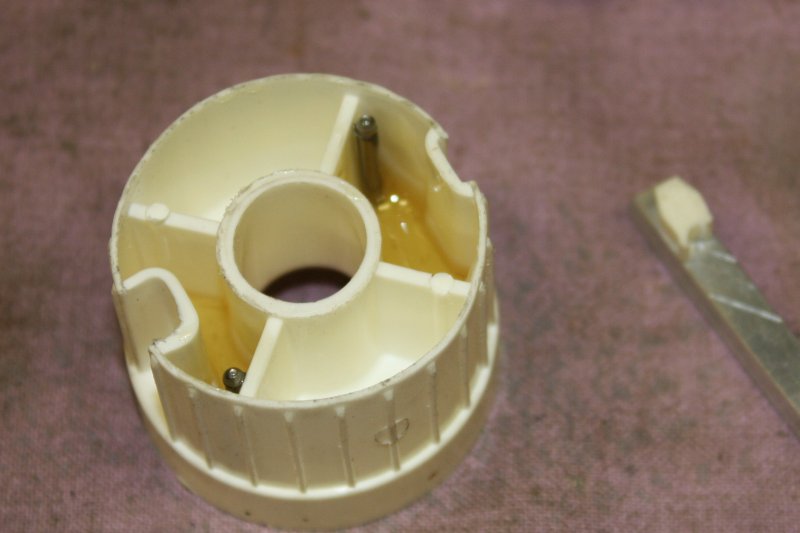
I knew how the internals of these blinds work in general, but hadn't known if it would be possible to disassemble this one. Fortunately it turned out the core mechanism slides out easily.
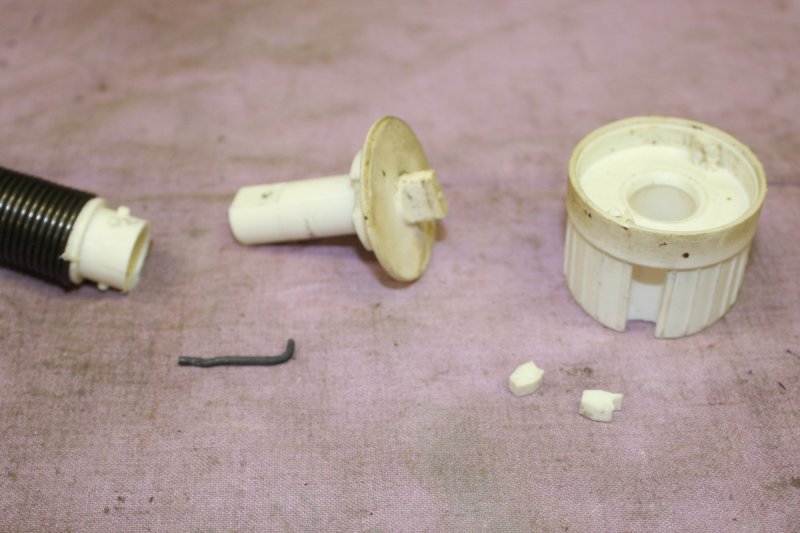
2. Then remove one pin and it comes apart, revealing the ratchet mechanism. Which as expected is completely trashed. There are supposed to be two little free-swinging pawls on pivot pins. When the blind roller is turning quickly, the pawls are held outwards by centrifugal force, so the blind is able to continue moving. But when the blind is held motionless, or moved slowly, at least one of the pawls swings down (inwards for the top one) by gravity and catches one of the stops on the central piece (which is locked to the blind mounting bracket, and does not rotate.)
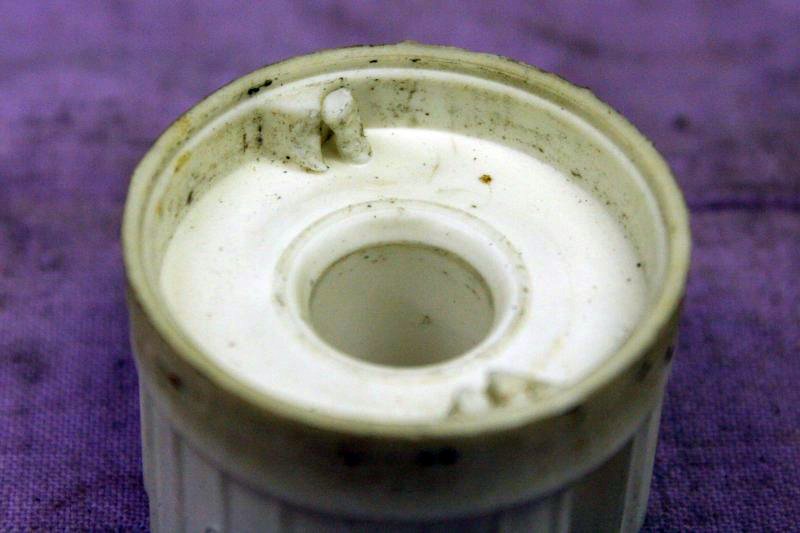
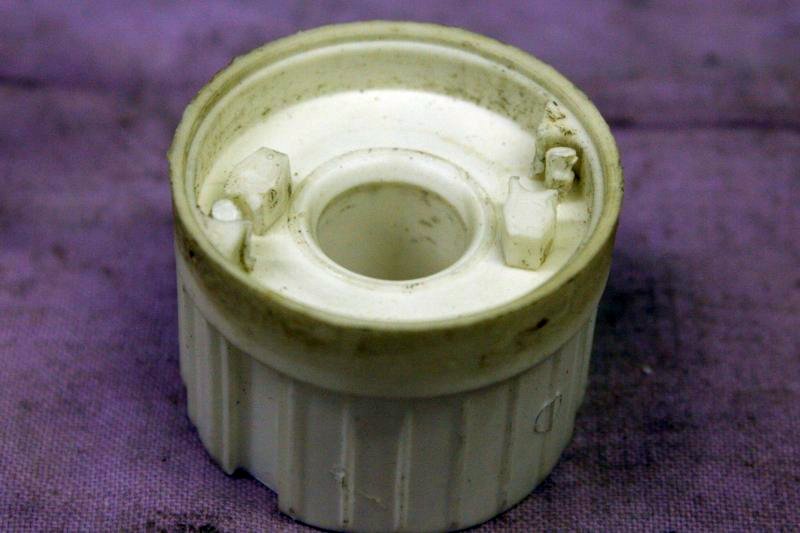
3, 4. Both pawls are broken and tumbling loose. Result: they randomly jam the blind, but don't do it when they are meant to. The pivot pins and backing stops were getting mangled.
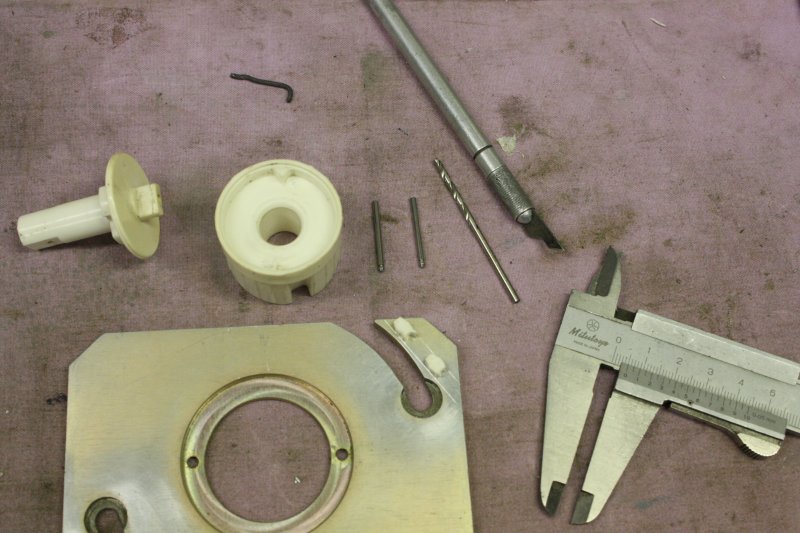
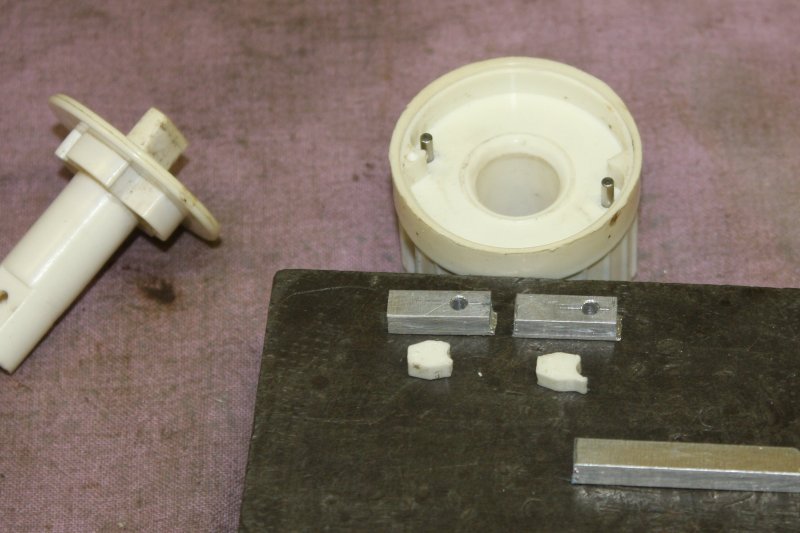
5. Preparing to make replacements. Hard steel pins, and aluminium pawls to be cut from a small plate of the right thickness. All parts from my scrap piles.
 |
 |
 |
 |
 |
1. Pins were from my collection of 'small polished steel rods', a result of many years of salvage-scrapping of things like CDROM players, small motors, etc.
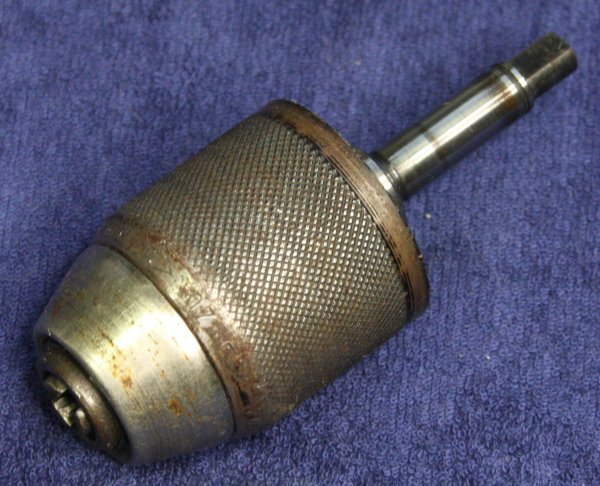
2. Incidentally, a good way to carefully release or add tension to the spring in a roller blind, is by gripping the end tab with an old drill chuck like this.
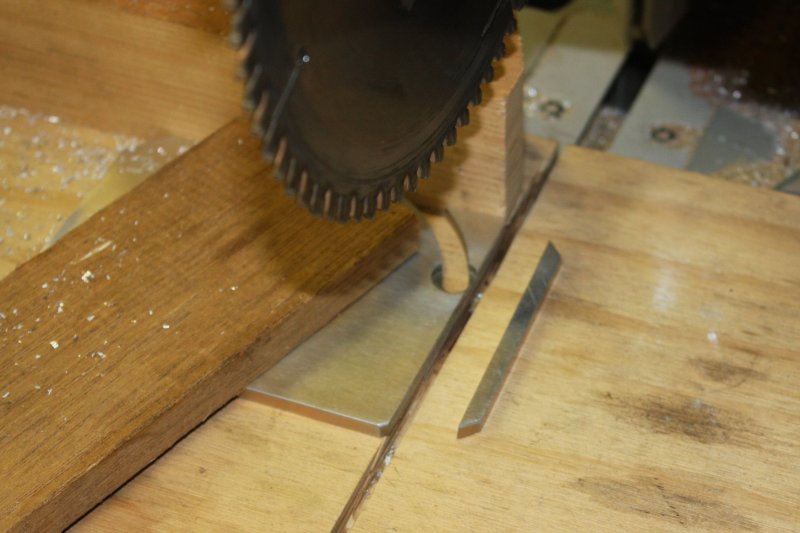
3. Cutting a strip of aluminium, from which to make the pawls. The only semi-difficult thing about them is they are quite small.
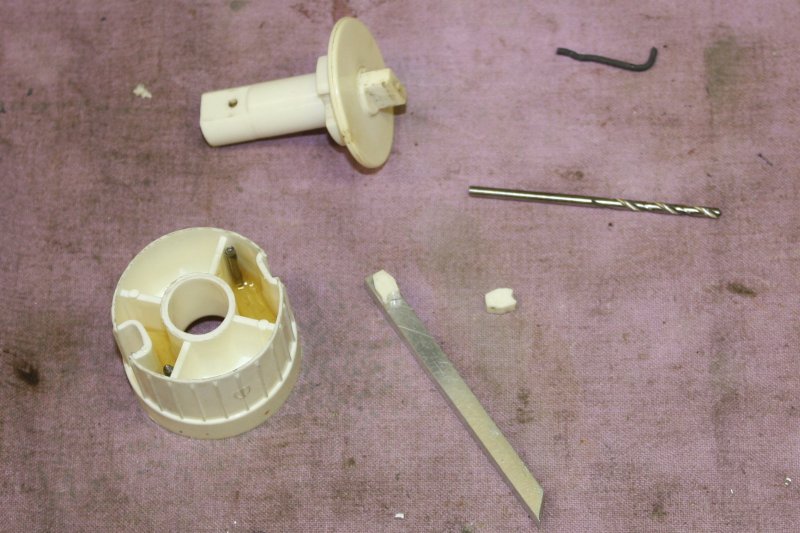
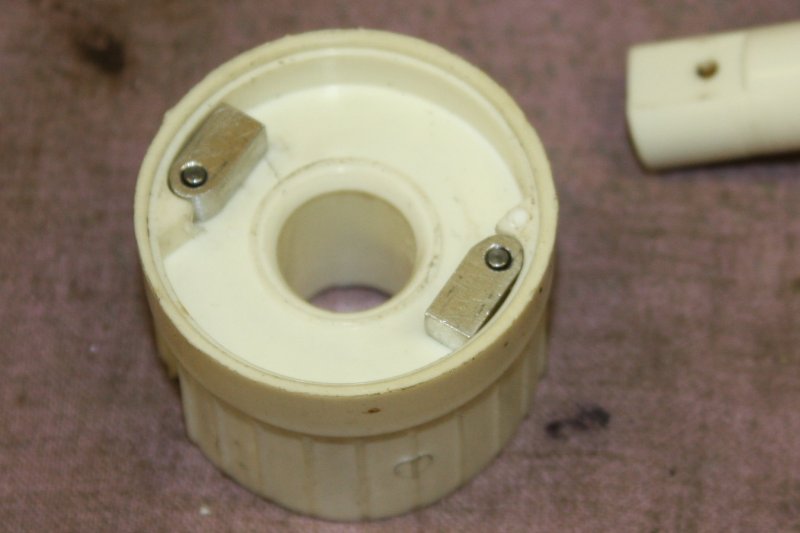
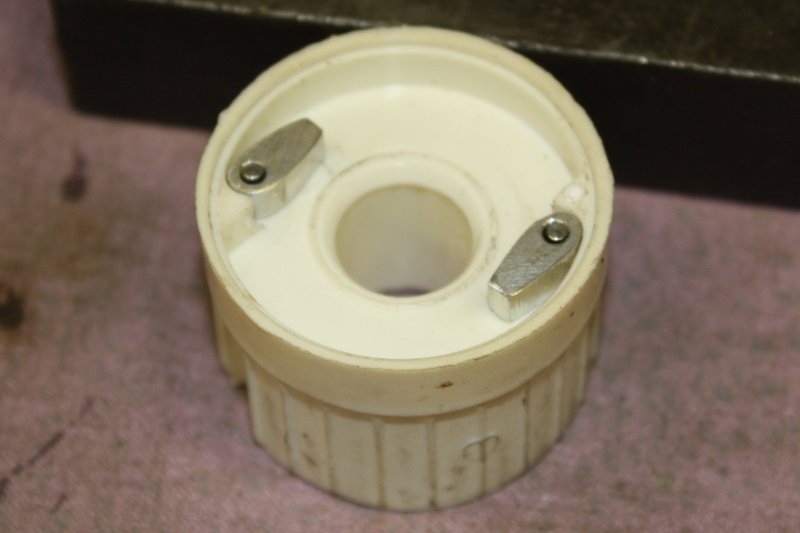
4, 5. The metal pins replacing the mangled plastic ones, fortuitously are right against those plastic bulkhead sheets. Which made fixing them in place easy — I just filled the cavities with urethane glue, which foamed up. It only has to stop the pins falling out; they don't actually take any significant force. Pics are before the glue foamed up.
 |
 |
 |
 |
 |
1. The pawls progressing. Cut longer than needed, so I have something to grip while rounding off the pivot end.
2. Using a pin vice as a holder. The ends were rounded off by eye against a belt sander.
3. Checking fit. The aim is for the pawls to press against the plastic 'buttresses' when acting as a stop, rather than the steel pins. Hence the deliberately oversize holes.
4. Holding in an engineer's vice while filing the pointy end taper. No great accuracy required.
5. Pawls final form.
After reassembling and installing the blind, it works perfectly once again.
 |
 |
 |
 |
1. After removing soaked carpets. It's still a pool, but the water doesn't show up well in the pic.
2. Told you it's a very small toilet 'room.' Everything in the pic is soaked, incuding the hand towel and toilet rolls.
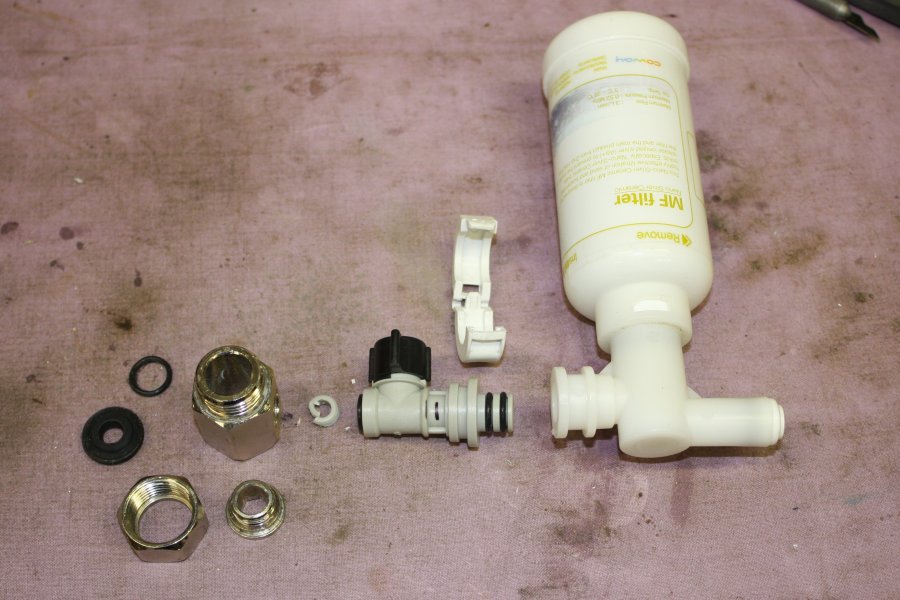
3. The water-jet-cut hole in the wall, and remnants of plaster and paint on the floor tiles. The culprit filter thingy laying on the floor.
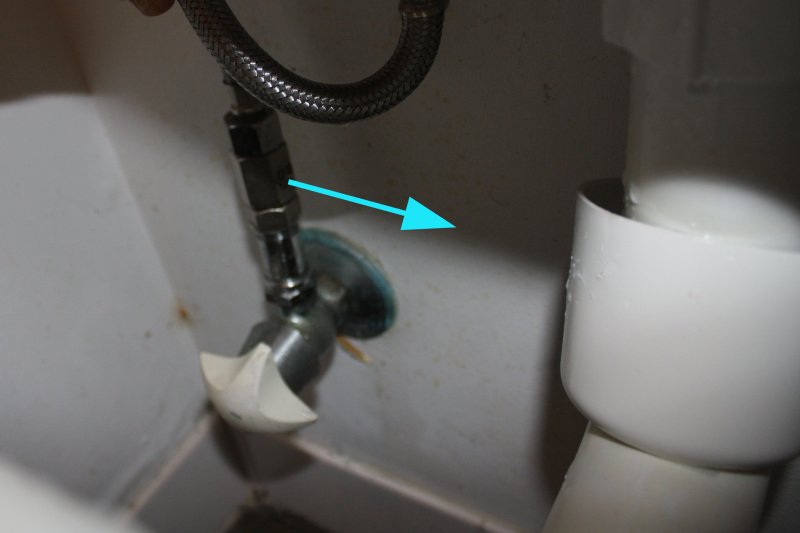
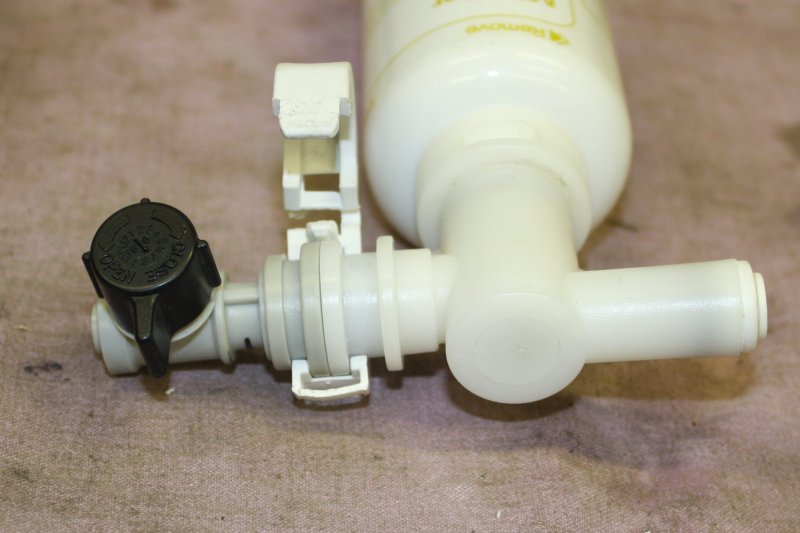
4. It broke off from here. Arrow is direction of tight water jet.
 |
 |
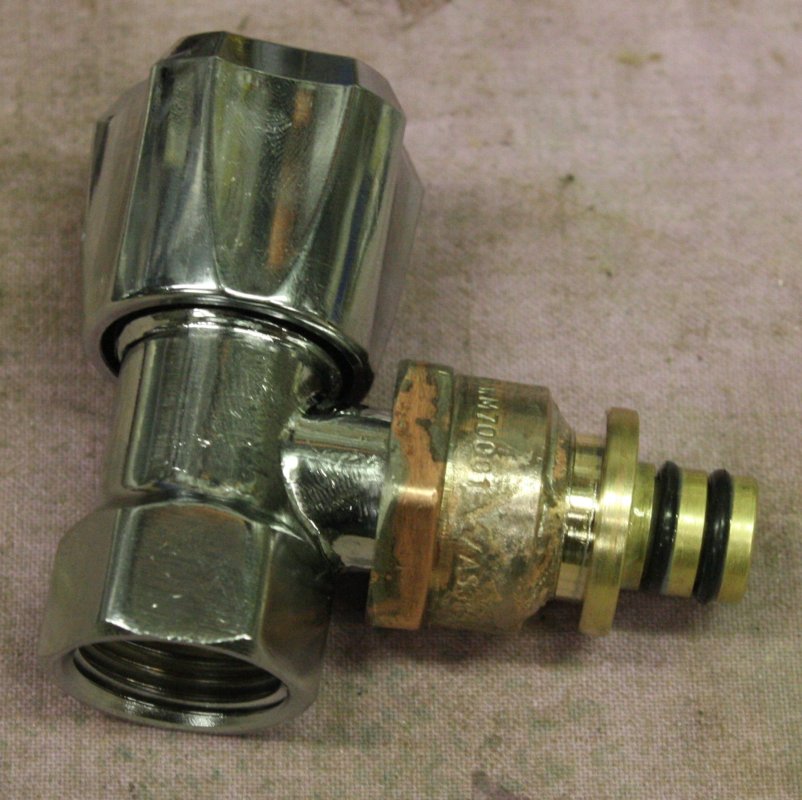
 |
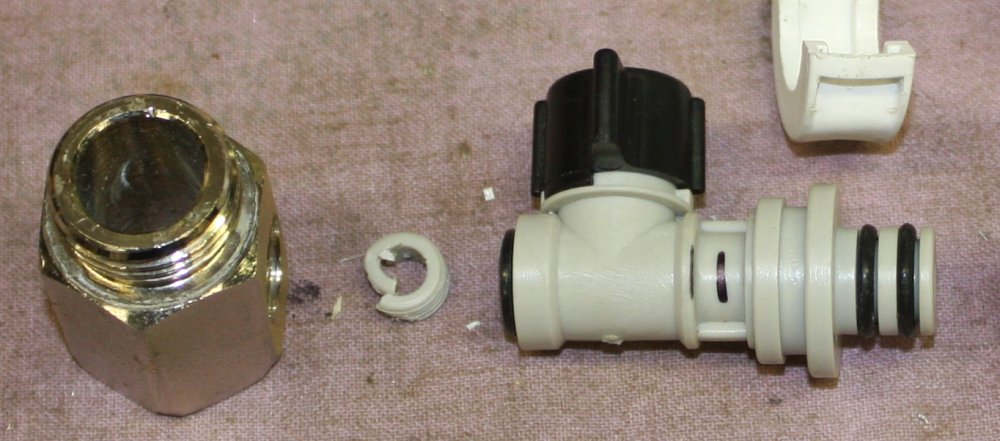
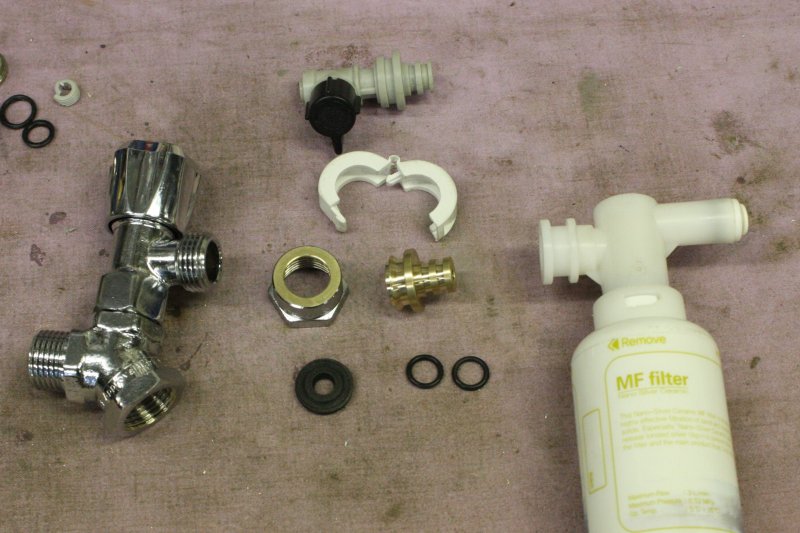
1, 2. This is such a bad design, I think people could sue the company for home damage when it inevitably fails. The gray plastic part and the chromed metal plumbing extender are provided with the filter for the toilet seat. The seal is an O-ring, plus the thread is locked with a plumbing thread sealer. The small plastic threaded end is thus under the screwed-in tension, plus water pressure. It's not any kind of special plastic. In this case it just sheared off all by itself. At around 5:30am Monday morning, of course.
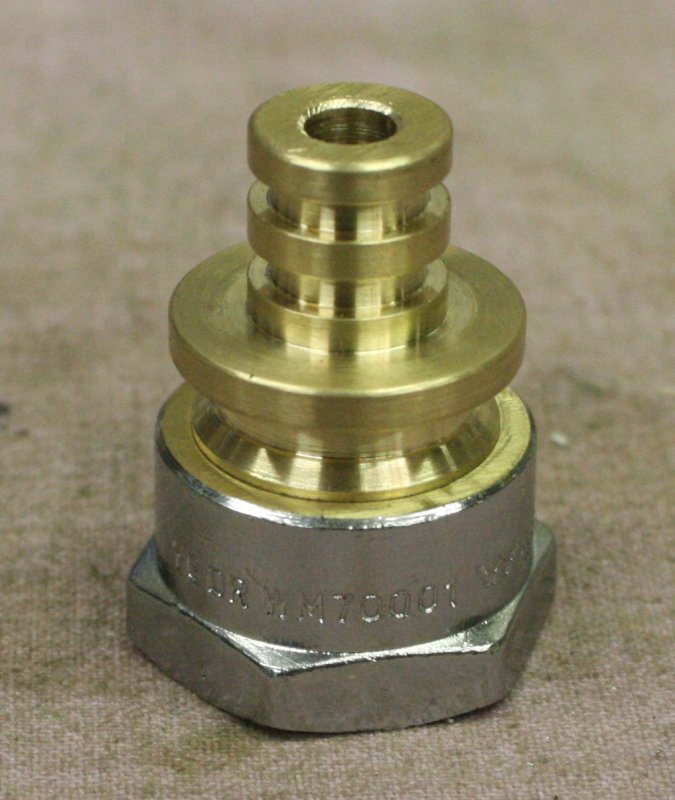
3. How it attaches to the filter. And there's the problem. Whatever I do to reattach the filter has to match this attachment.
But it's certainly not going to be plastic again. And so...
 |
 |
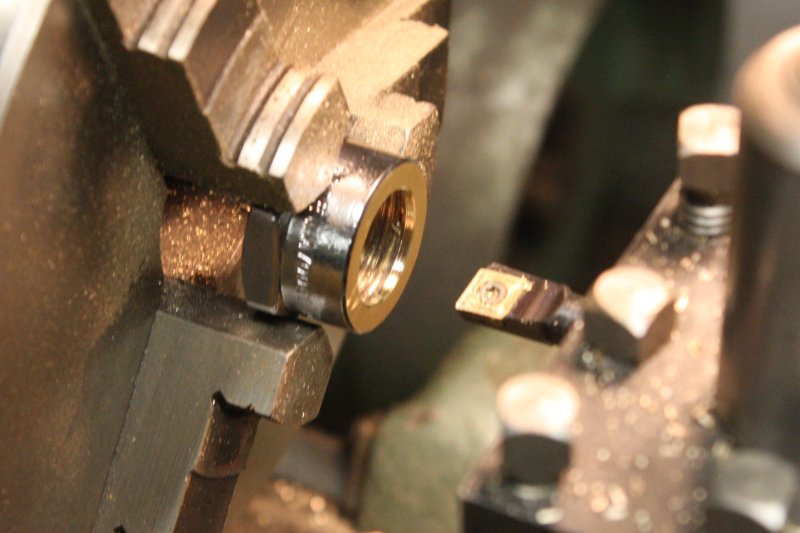 |
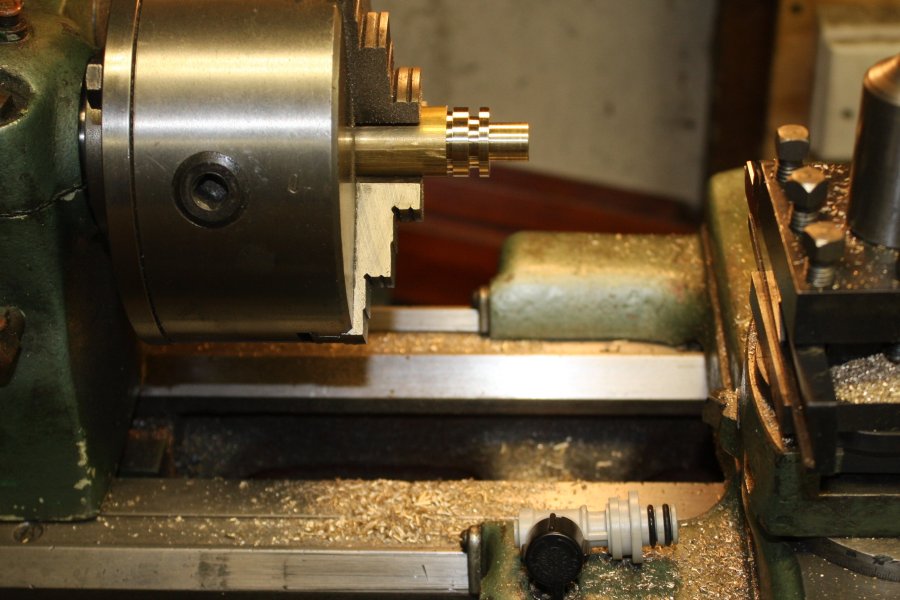
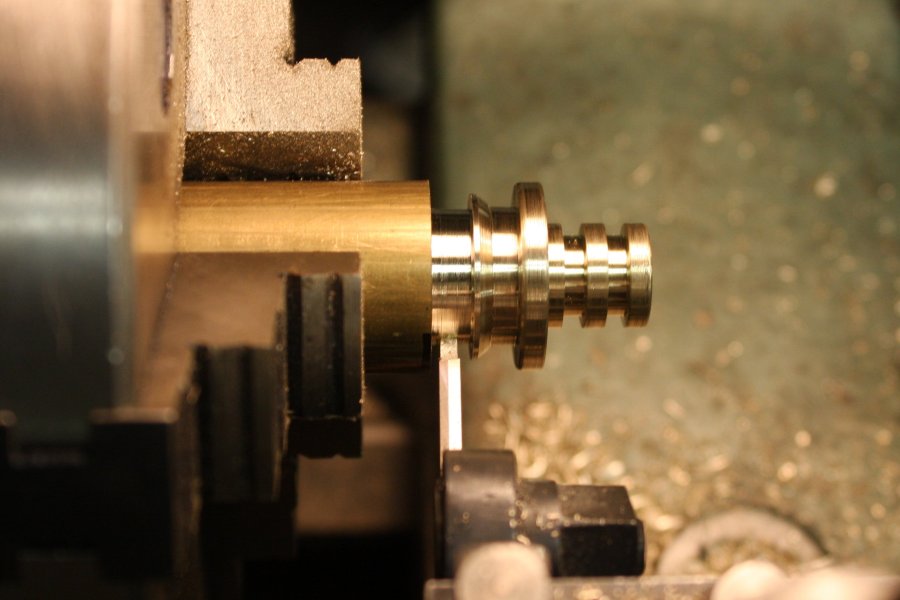
1, 2. Machining a mating part for the filter.
2. And boring a hole in the face of a 15mm brass threaded end cap, to match that part above.
 |
 |
 |
 |
 |
 |
 |
 |
 |
 |
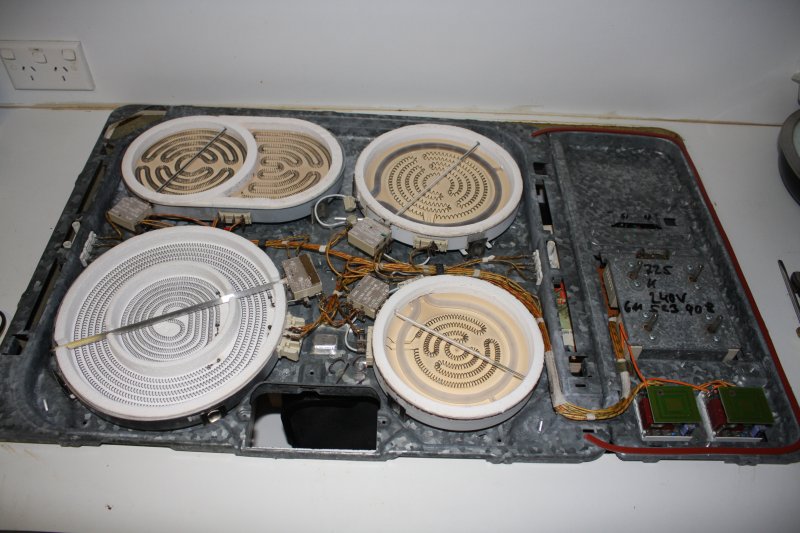
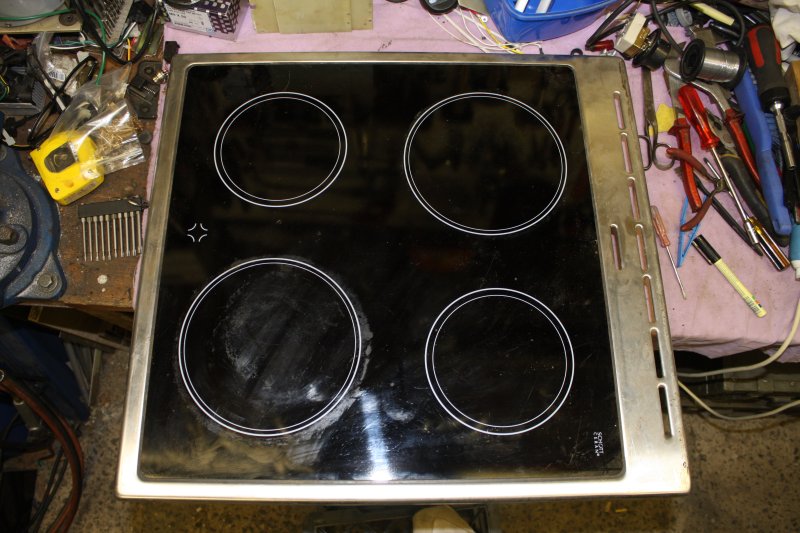
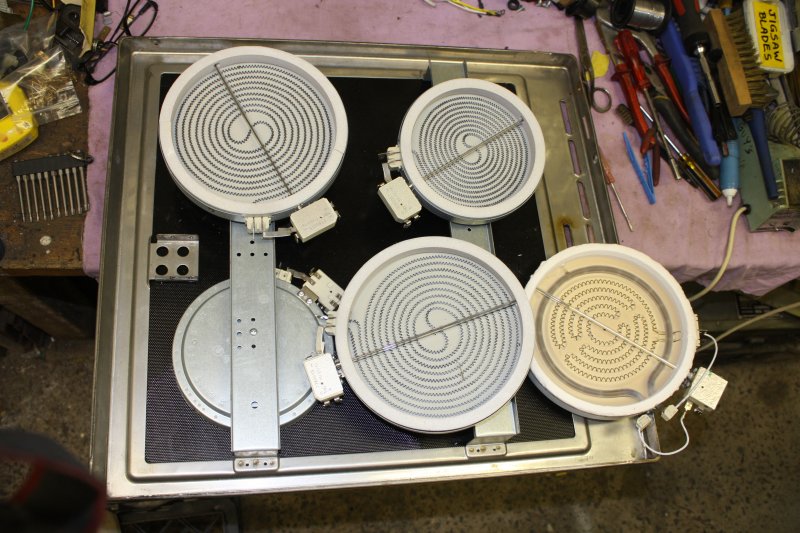
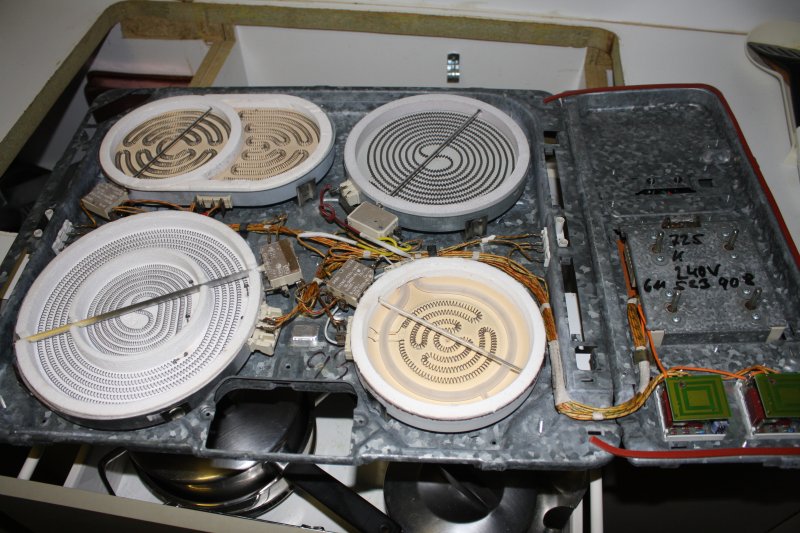
1 - 3. A very standard sort of electric stove top.
4. Except that two of the elements have an outer halogen circular light. This is mostly to light up the deep-red translucent pyrex glass stovetop from underneath, for visual effect. Also so you can tell it's on, and hot.
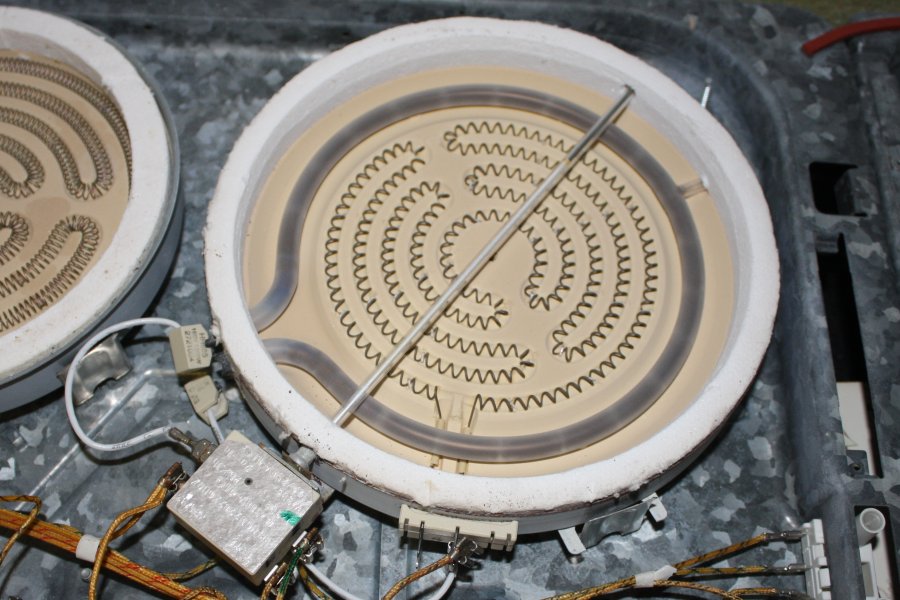
5. This halogen tube is dead, open circuit. It's in series with the actual heater element, so no halogen, no heat. There's no possibility of obtaining a replacement part (AEG kindly doesn't make them any more and has no spares stock.) Also, current stovetops tend to be more square, so apart from the price, getting a whole new stove would mean a new benchtop too. And mum doesn't think she'll be needing it much longer.
Btw for the observant, yes, I had already unclipped one of the leads. Also the halogen end terminals have fractured off. The tube is supposed to be clear. Its black colouring is presumably due to air getting in.
So the question is, what was the operating resistance of the halogen, relative to the resistance of the nichrome wire element? If it was insignificant, it can simply be bypassed with no ill effect. But if it is significant, then something electricaly equivalent must replace it, or the main element will overheat and burn out.
I don't think the halogen lights actually contribute much of the overall heating. Maybe 20%? (A complete guess; since it's open circuit I can't measure it.) The main heating coil is in good condition, and would probably last another 40 years.
The stove is back together (3 elements still work) and a pain to take apart, so I don't want to open it again just to measure this (on the smaller working element) unless unavoidable.
This one is both interesting, and not urgent. The stove still serves its purpose with just three elements for now. Possible solutions include bypassing the halogen, replacing it with some more nichrome heater wire, or some small hallogens wired in series-parallel. So long as whatever it is can survive the high temperature.
In case anyone wants to know, the stove model is an AEG E-Nr 611 523 908.
Now looking at its underside, those heating elements seem a lot like the faulty one from my mum's stove. I wonder...
 |
 |
 |
 |
 |
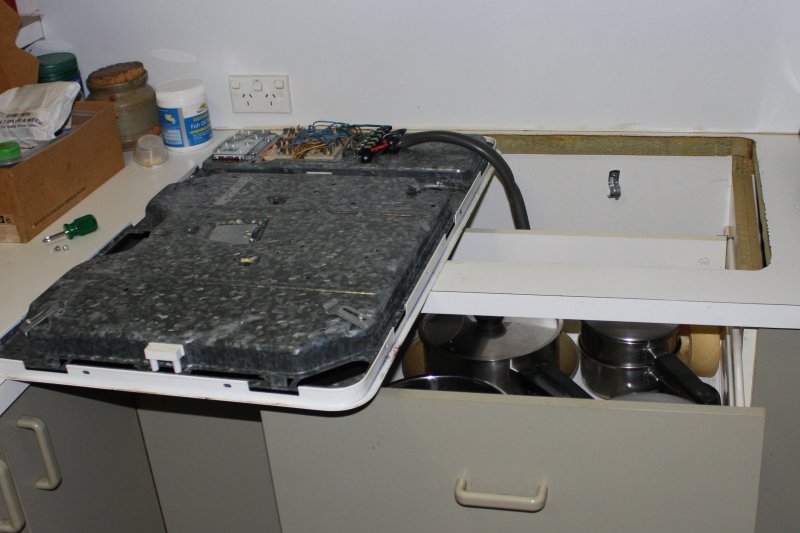
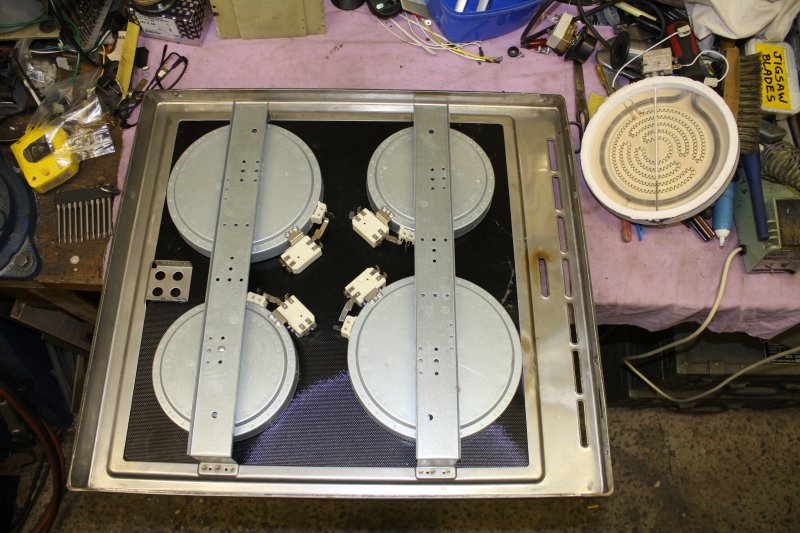
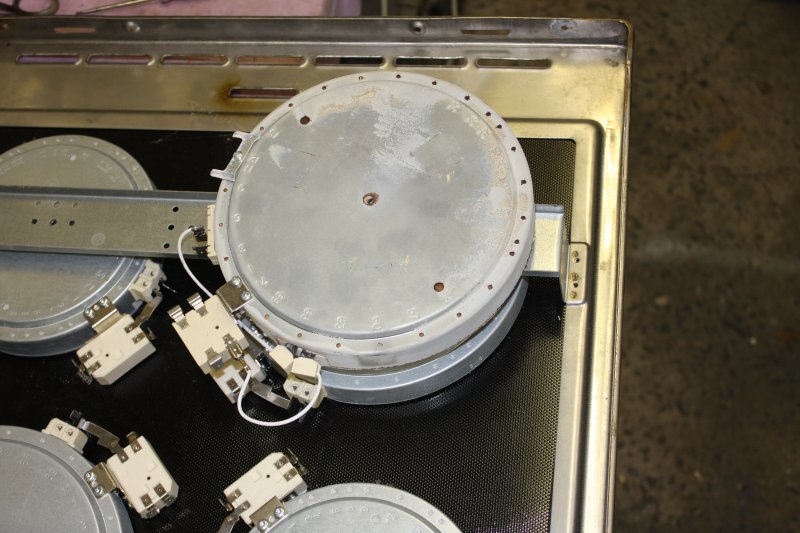
1. The discovered stovetop. I'd removed the panel with the control knobs.
2. The similar looking elements.
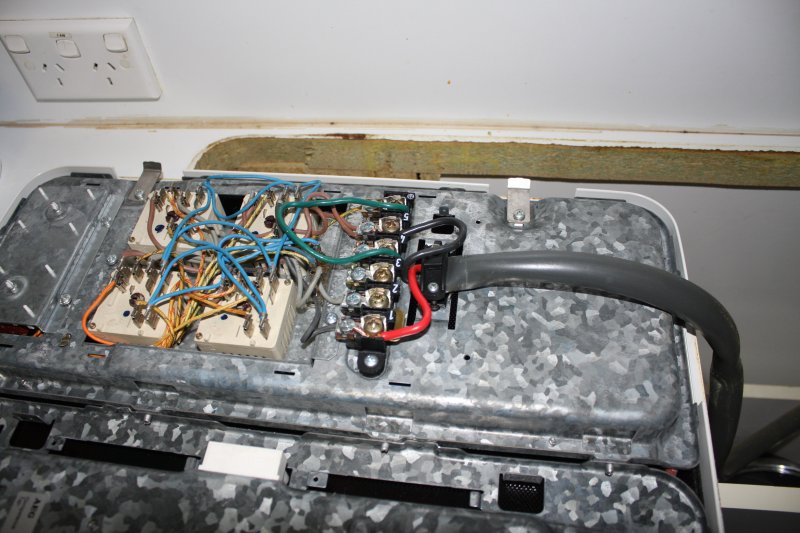
3. Well well. Two of them are identical diameter and very similar in wiring, to the dead element. Hopeful!
4. The control sensing system is very similar too. Even more interesting, the terminals have the same names: "2", "S" and "H". Though in a different arrangement.
5. Installed in my mum's stove. A couple of the loom wires needed extending due to the shuffled locations of connecting tabs. I used some of the high-temp wiring from the street-toss stove.
And... it works! Total repair cost: Zero.
How ironic. Told 'none available anywhere', but I had a couple of spares myself.