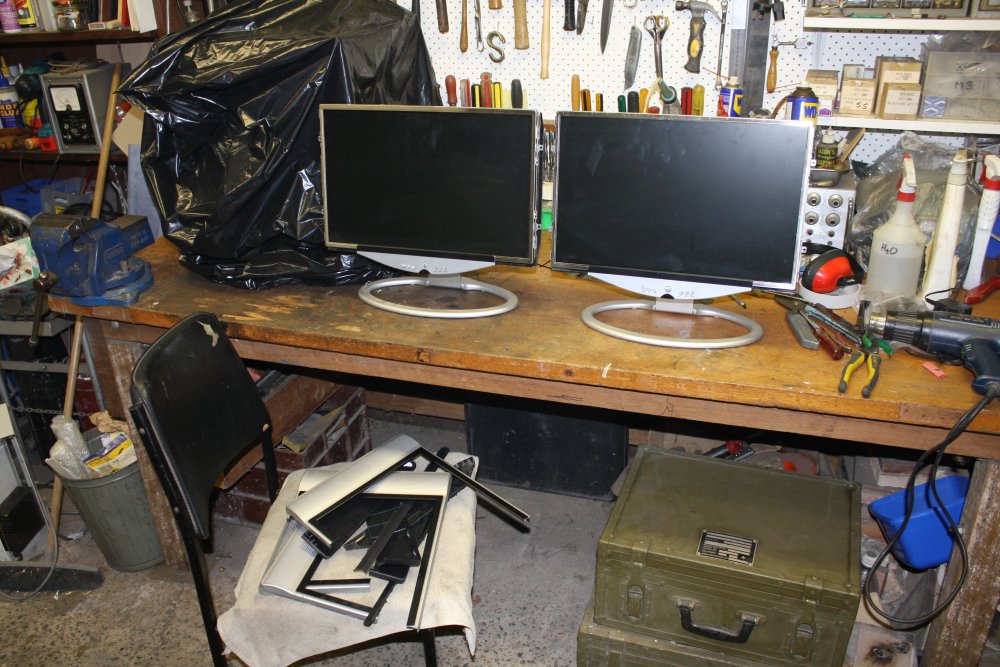
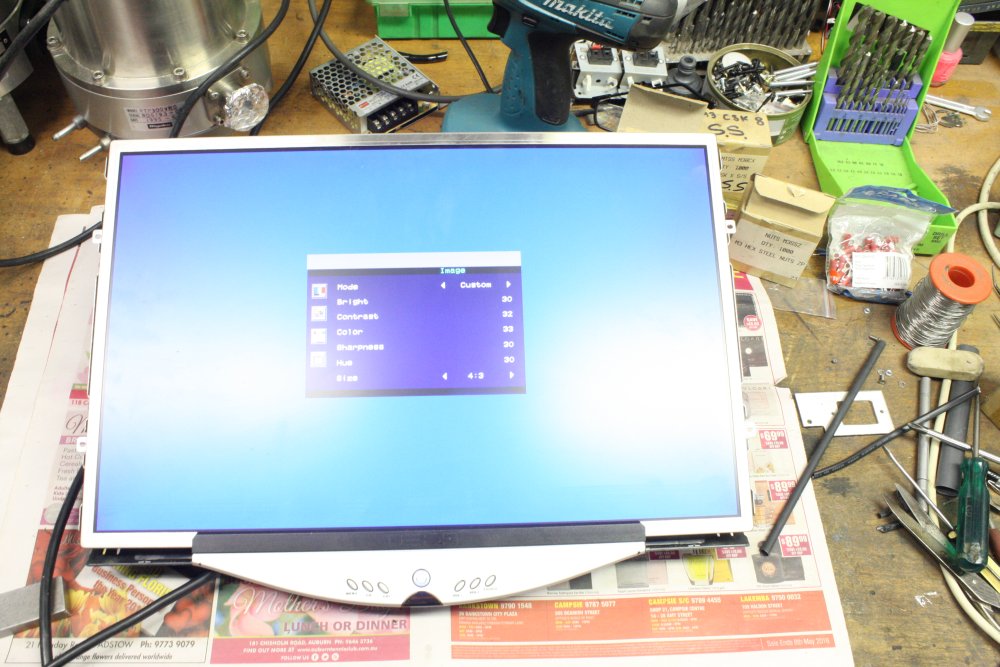
Back in 2015 I had found a couple of LCD monitors in a street toss. They are DECA LCD19T481, "48cm LCD TV." Somewhat unusual by today's standards in that they required external plugpacks to provide 12V DC (at 5A!) Which of course as typical for street tosses, were missing, along with the IR remotes. Something suggesting they are quite early models - they have SCART connectors!
However, these displays also have analog composite video input connectors, which made them something of a rarity in small LCD screens. And something I wanted. I grabbed them.
Trying them in the lab with a bench power supply, one worked, the other didn't power up. I'd intended to apply these as video display monitors for a main project, but with only one working it wasn't worth it. I was busy with other things so set them aside.
Much later in Dec 2016 during a burst of dealing with assorted minor stalled projects, I had another look at them. The fault in the dead one turned out to be simple - the soft power button used a small PCB-mounted switch, which was permanently open circuit. Replaced it, the monitor works. Also they don't draw anything like the 5A stated rating. Actually less than 3A.
The aim was to ceiling mount them, above a system control rack. But how? They have desk stands, and speakers at each side (which make them very wide, and which I don't want.) Also plugpacks suck; I'd much rather they had mains input. So some improvisation would be required. And I don't care if they end up looking 'hacked'; in fact that would be a positive feature.
 |
 |
 |
 |
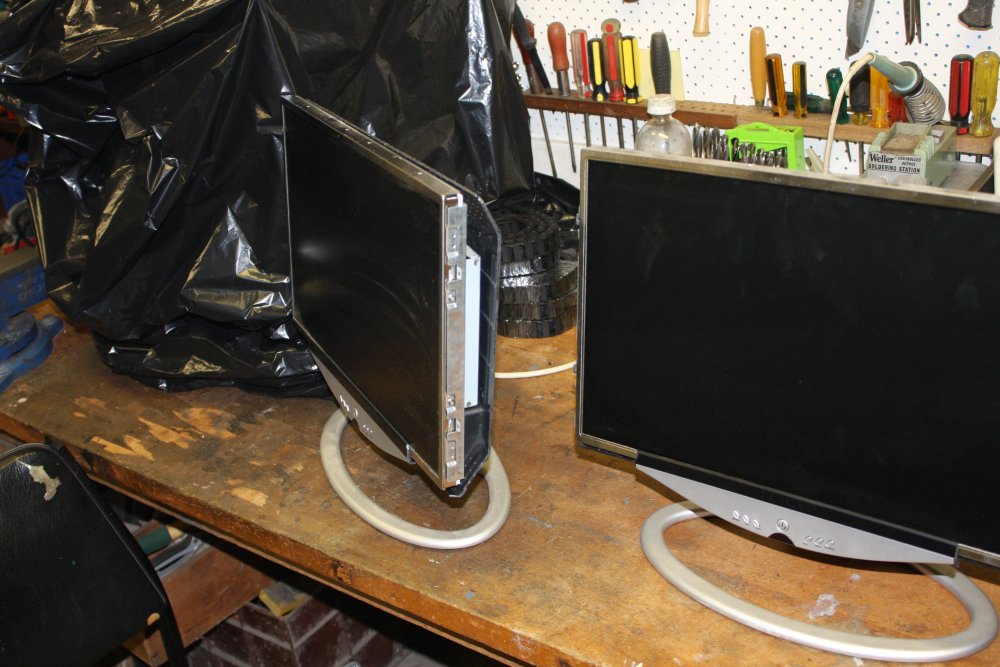
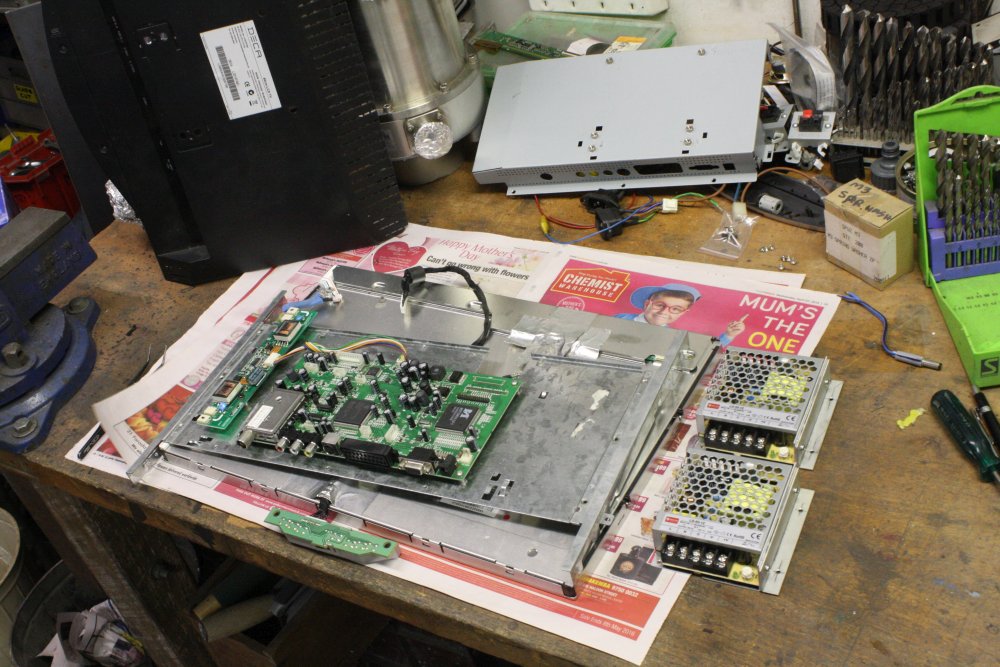
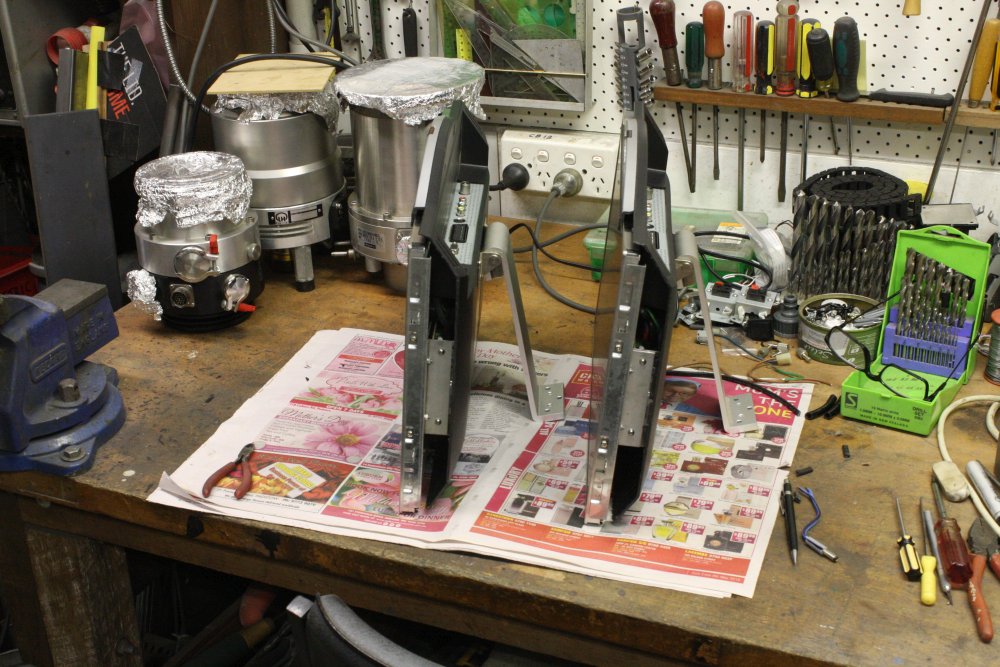
1, 2. First step, get rid of the speakers. A few quick slices of the plastic case with a jig saw, and they are gone. Along with most of the screen surround trim. Fortunately the stand mounting point doesn't depend on the plastic case integrity.
3, 4. The case also had an internal void, that looked like it could fit a power supply. I ordered a couple of cheap switchmode supplies via AliExpress. (Store: Lisa-LED Store, 12V 4A 50W, US$12.79ea, free postage.) The stated dimensions: 129 98 38mm. Space inside monitor approx: 150 x 90 x 35mm. But there are ways to increase that a little. They should fit.
By the time the power supplies arrived I was busy again, so after this quick functional test these sat around for a while.
 |
 |
 |
 |
 |
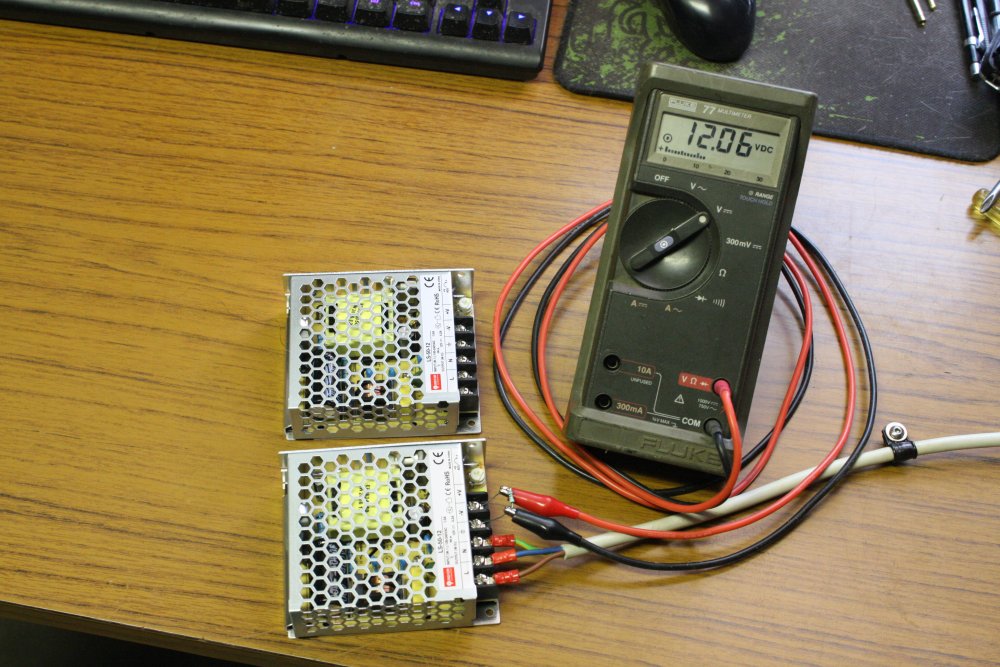
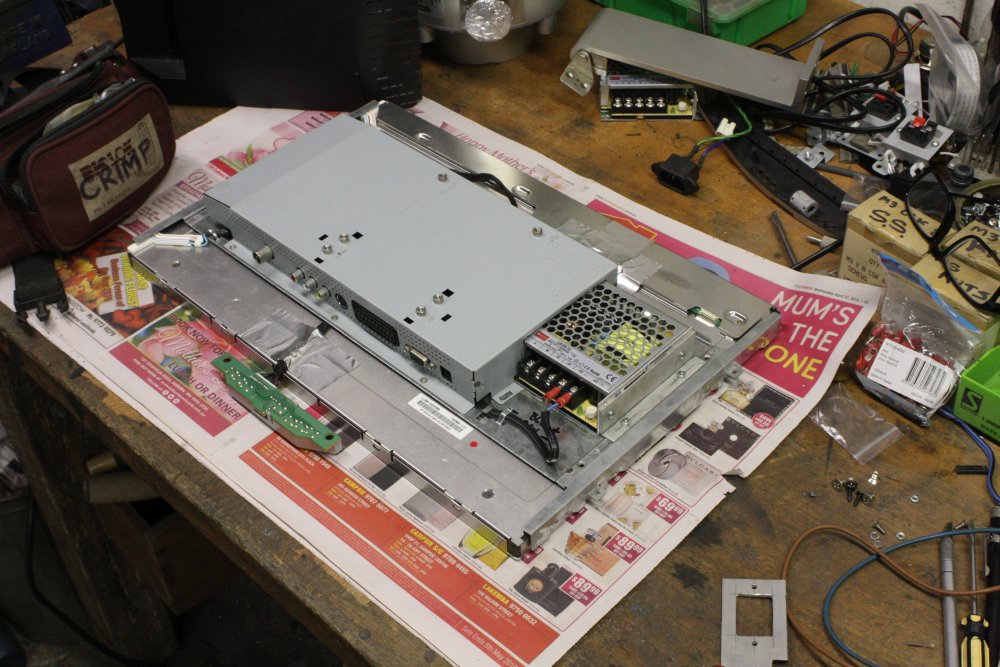
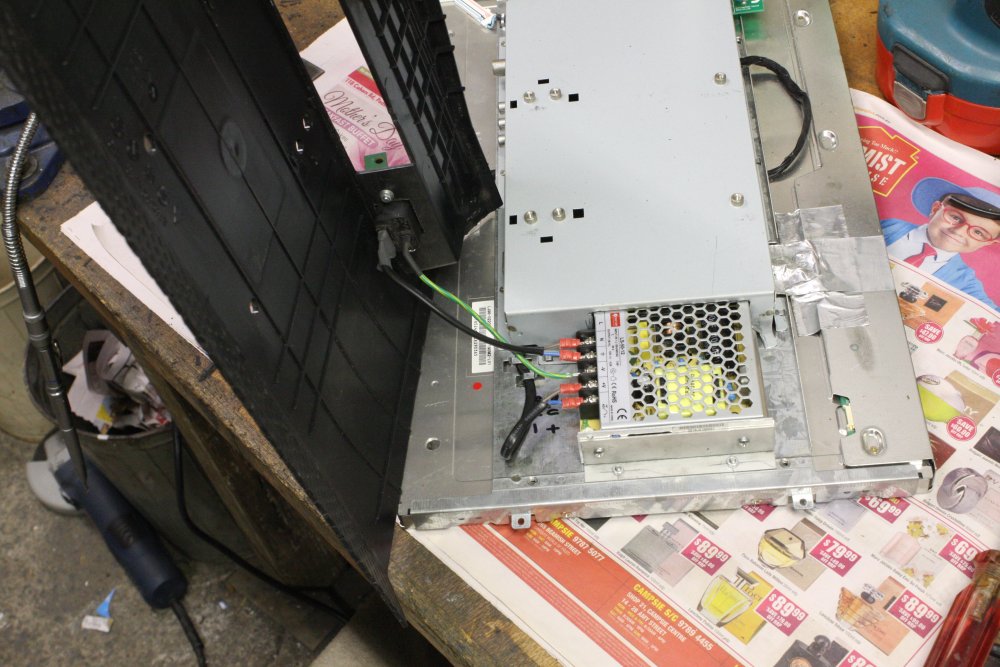
1 - 3. Mounting the power supply. It fitted, but I had to cut a hole in the sheet metal enclosure around the electronics. Plus make a small bracket to secure the supply. A standard IEC mains connector mounted nicely in a hole cut in the remaining plastic rear case. All easy.
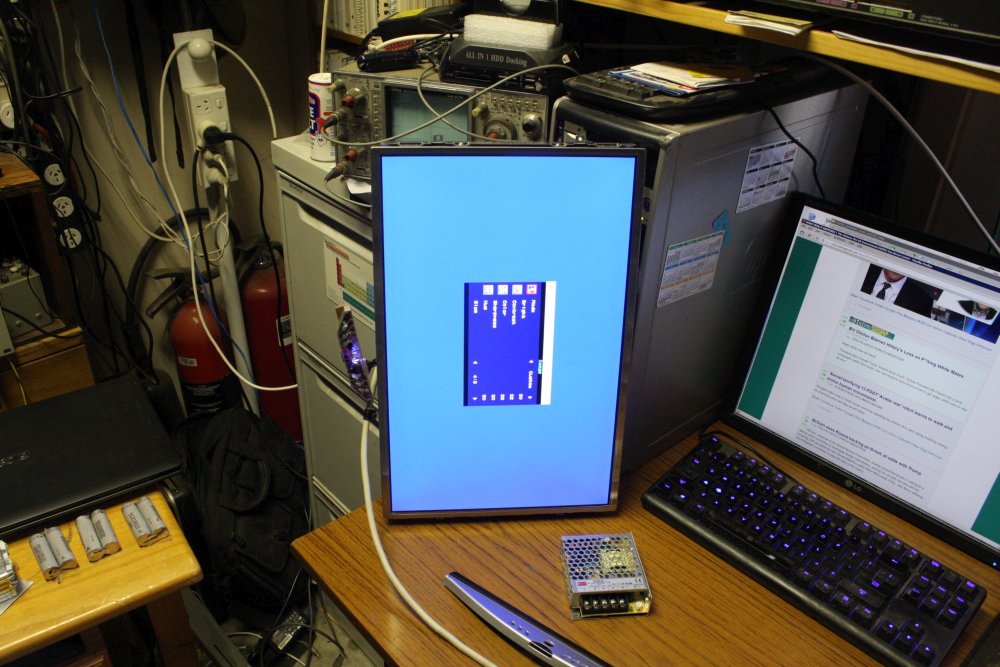
4. The desk-mount stand very fortunately turned out to be reversible — the monitor is upside down in this pic. There were plastic trims on the hinge point, which I threw away.
5. Working, with the new internal supply.
 |
 |
 |
 |
 |
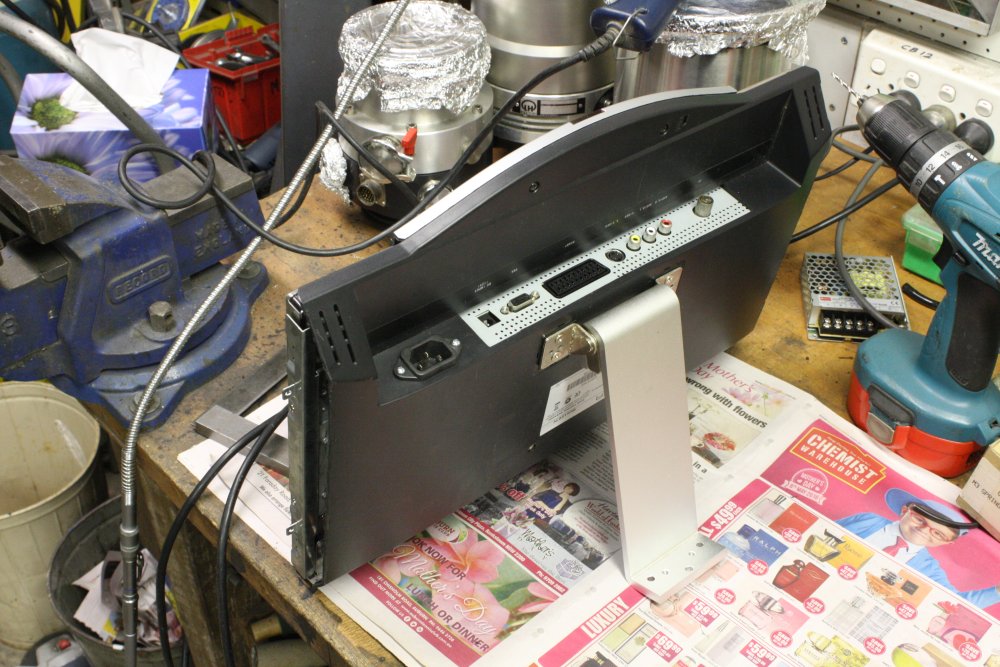
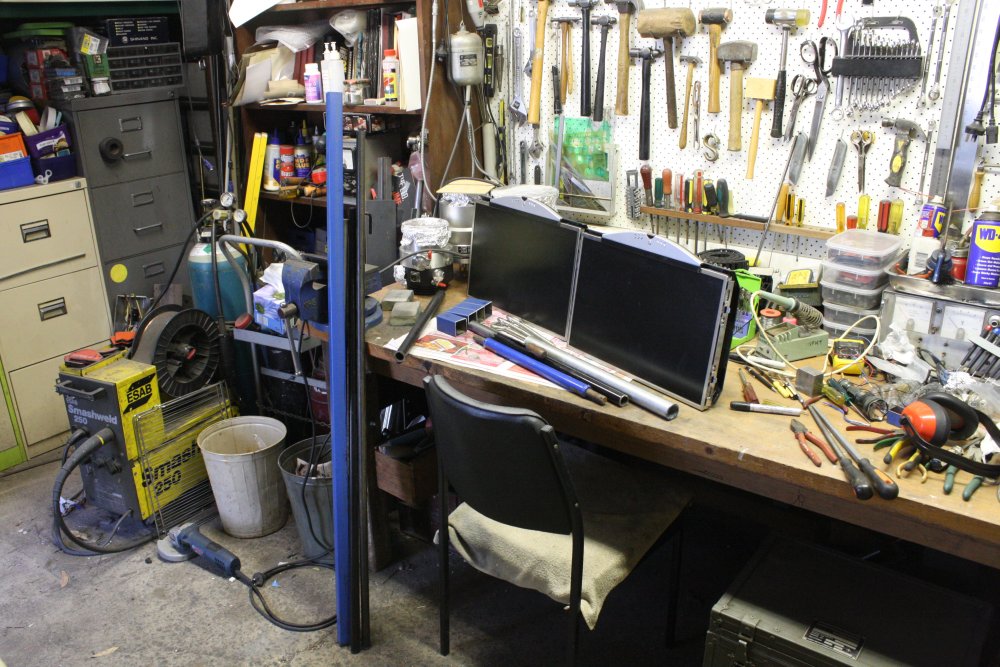
1. Both of them, modifications finished.
2. And now... the mounting. Or rather, trying to figure out how to do it. Here I was just gathering what bits of steel scraps I had that might be useful. Also waiting for ideas to come.
Overall the requirements are:
- A ceiling rail mounting scheme I can extend in future, for other LCD monitors using the typical rear mount points. Each monitor to be movable along the rail, with tilt and rotate.
- Rails attach to the exposed rafters in my lab, without any damage to the rafters. No screws or holes in the timber rafters.
- Rails must be mountable at any horizontal angle to the rafters. This implies some kind of rotational joint in whatever fixes the rails to the rafters.
- Robust, rigid mounting. The monitors should stay where they are set.
- Cheap! In materials anyway. Time for welding and metalworking preferably minimal but not crucial.
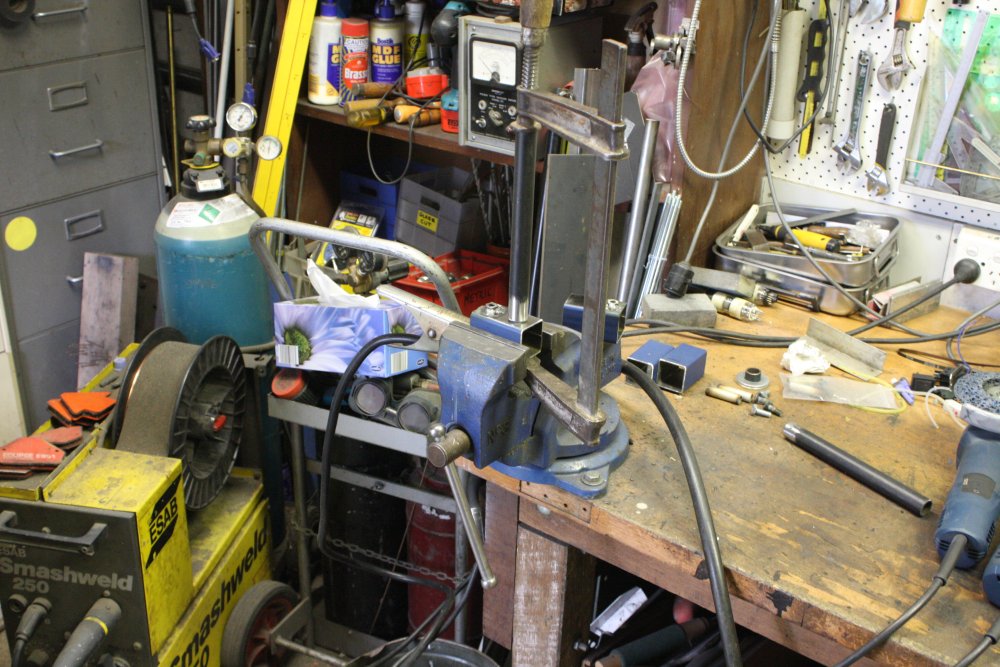
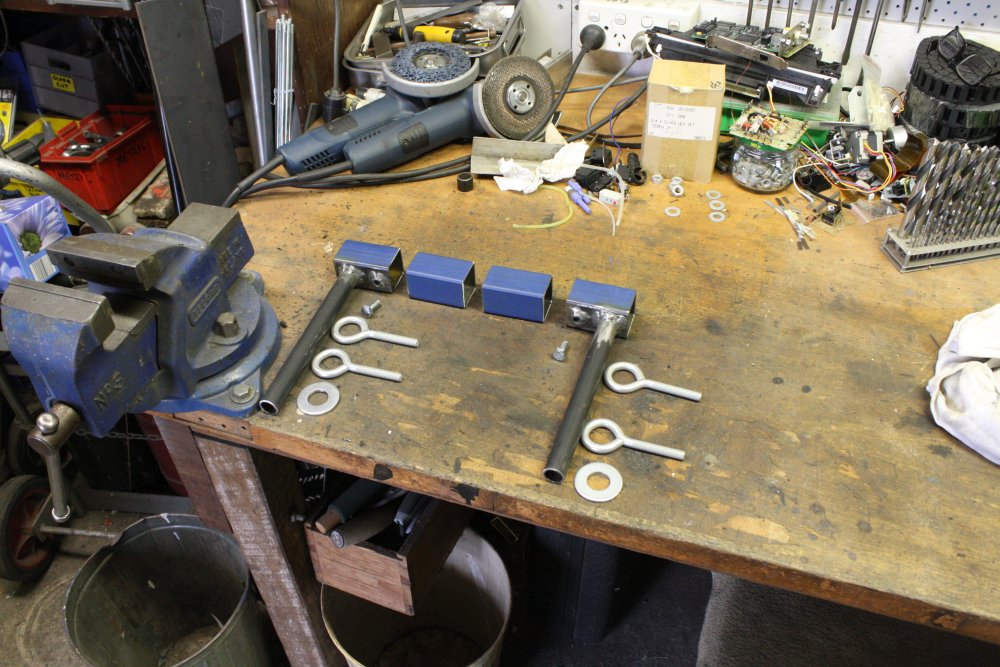
A 40mm square, 2.0mm thick wall square section fits it very well. For this only a few cm were needed, but it's only $7.47 a meter, you have to pay a $3 cutting fee, and I wanted to have plenty spare for future projects so I bought 2 meters of it. Total: $17.95.
For the rafter-mounts, I'd decided to do a clamping system using a round tube, eye-bolts, and a flat backing bar. The tube goes through the bolt eyes, giving that rotational joint needed. I had the tube, it's 22.6mm dia, 2.2mm wall (presumably some Imperial size, who cares.) The eye-bolts I could have got much cheaper at Premier Fasteners, but was at Bunnings for something else so bought them there. "101x25x9.5mm" $12.80 for four. Plus a couple of very large (1/2") washers; 80 cents.
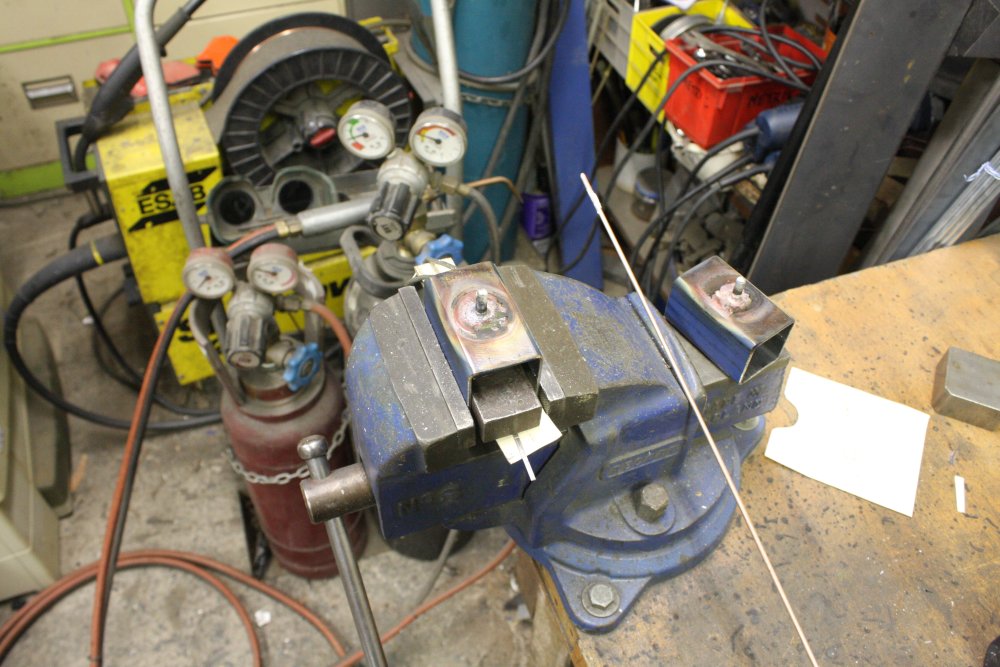
3. Preparing to weld one of the rafter-mounts, tube to square piece. There is already a nut welded on.
4. Coming along. Outer ones are the rafter mounts, slmost done. Inner ones are for the monitors, nothing done on them yet.
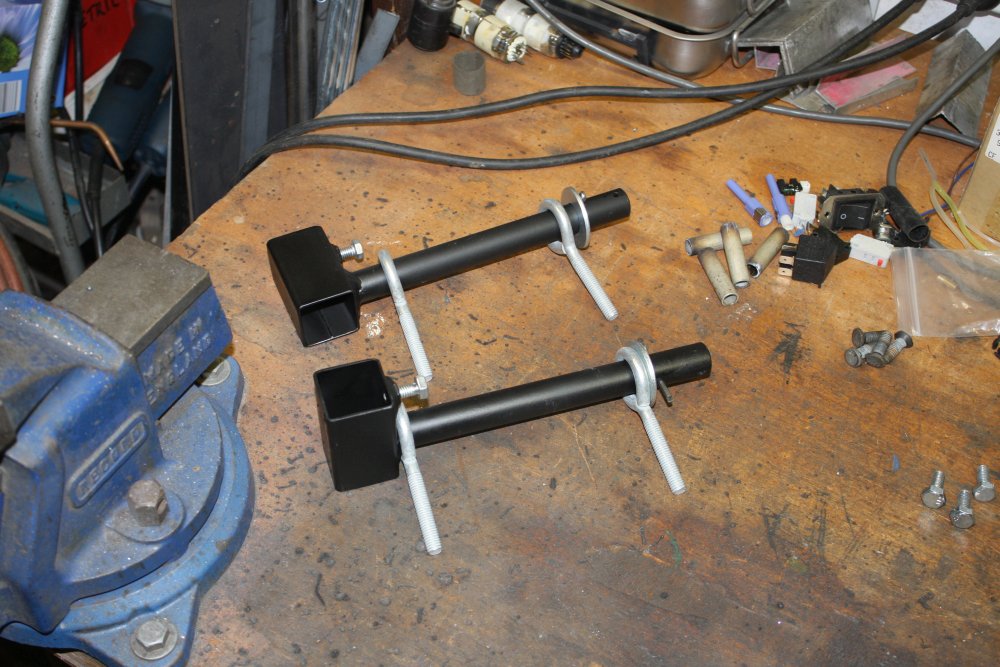
5. Screw mounts for the monitor brackets. This could have done with more photos. The trick was to secure the screw to the square bracket, without obstructing the interior of the square (since that's where the main rail is a sliding fit), and also not losing the flat outer surface (since that's the plane for the monitor pivot.)
The screws are M6 countersunk head, steel. I'd removed the top of the head in the lathe till the remaining head was only 2mm thick. Then countersunk the hole in the square bracket from the inside (via a big hole in the opposite wall), so the scew heads were flush with the inside surface. Then silver-soldered them in place. Not visible in this photo, there's a block of carbon inside the tube, wedged hard up against the screw head to hold it flush with the inside surface. (And prevent any blobs of silver solder hanging down.)
 |
 |
 |
 |
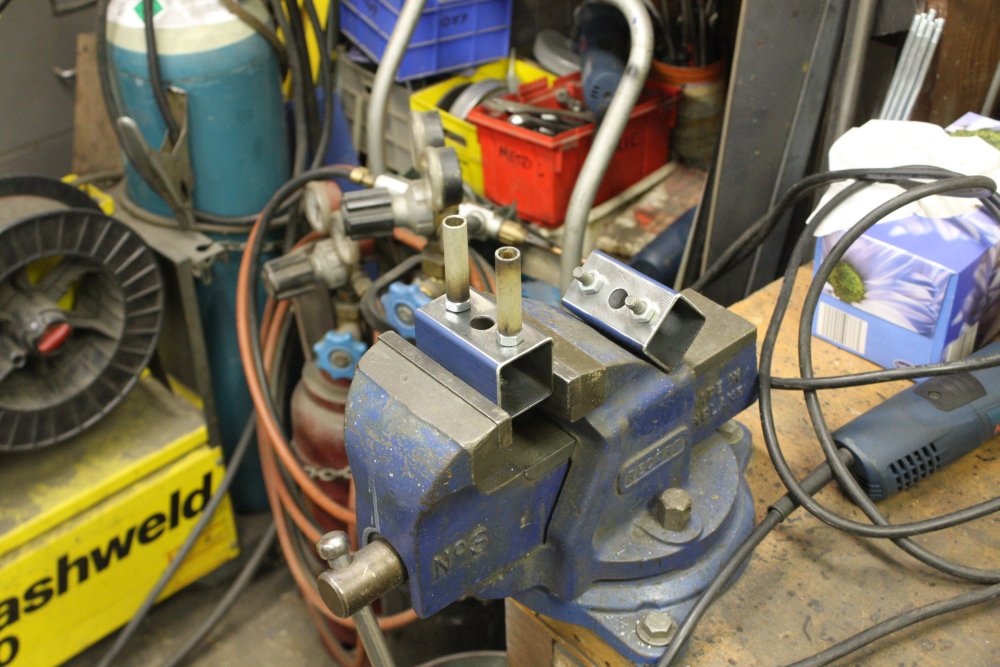
1. Preparing to weld on nuts, for securing the monitor brackets.
2. Painting.
3. Partial assembly. Still have to make the strap bars that the eye-bolts fit into. The washers had their inside holes enlarged on the lathe to be a neat fit on the tubes. They are there because there are also split pins through the tubes, acting as end stop support for when the eyebolts are not tightened up. Like when first putting up the rail.
4. More painting, of the monitor mounts and beam straps.
 |
 |
 |
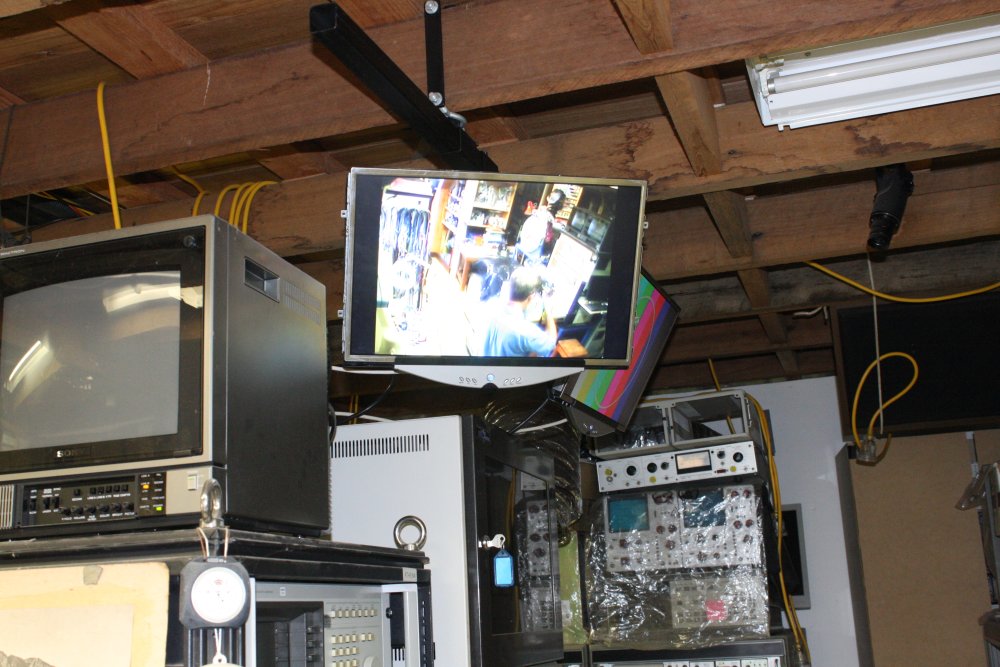 |
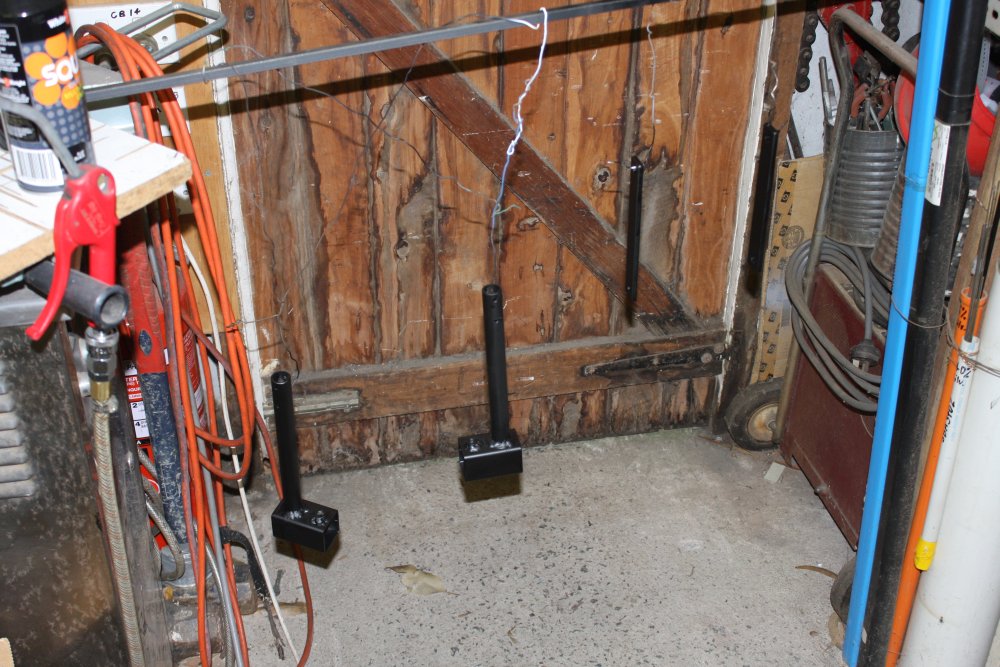
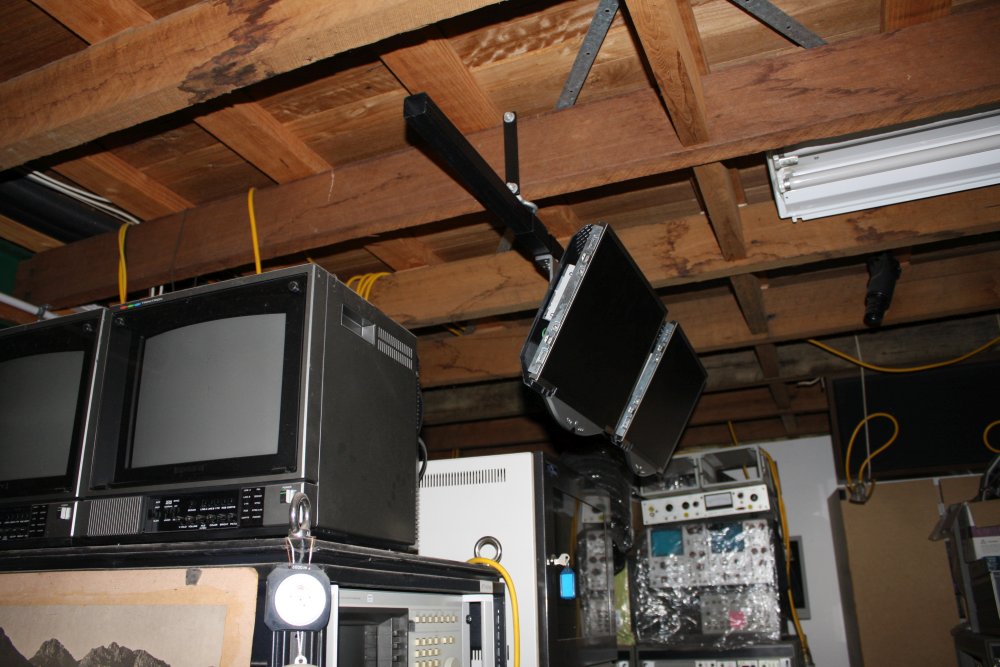
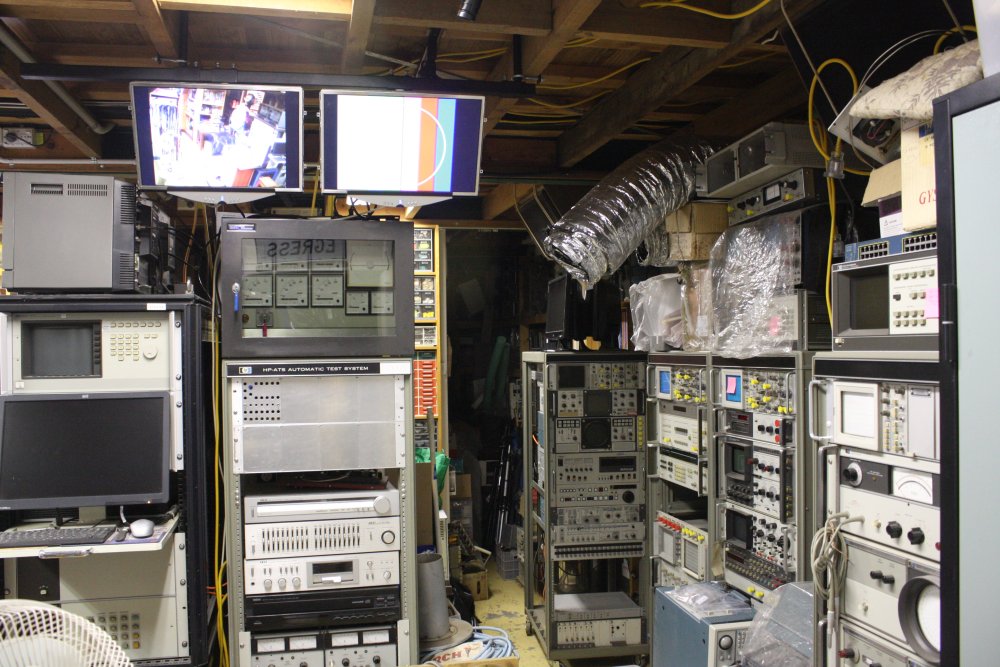
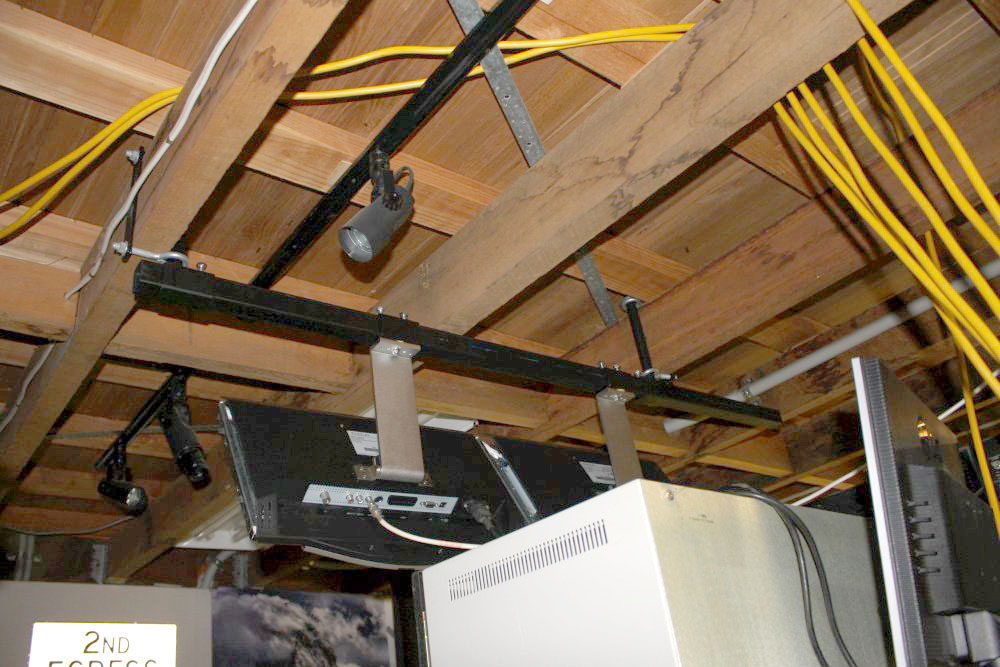
Mounted!
In future I'll replace those two clunky Sony Trinitron glass CRT monitors with LCD screens, and another rail same as this. When doing this again I'd probably use larger screws for the main monitor pivot points too - M6 is a bit undersize but I happened to have some. Those are secured with Nylock nuts, and there's a friction disk cut from Manila folder card in the swivel joint. I'd have used dome spring washers instead of plain flat washers under the Nylock nuts too, if I'd been able to find any in time.