Sigh. I don't understand.
Why doesn't the left border of the grey rounded DIV line up vertically with the surrounding text?
Note: All html and css code is in this file. If you don't know how to read it, this article won't interest you.
 Lorem ipsum dolor sit amet, consectetur adipiscing elit. Non semper, inquam; Bestiarum vero nullum iudicium puto. Immo videri fortasse. Mihi, inquam, qui te id ipsum rogavi?
Verum hoc idem saepe faciamus. Satis est ad hoc responsum. Nihil illinc huc pervenit.
I'm no html expert. For my purposes I prefer simple page layouts, with just a few layout tropes. One is the 'text flowing around an image that has been floated to left or right.' Also some use of <DIV> to style blocks of text.
A few times before I ran into this problem with <DIV> blocks not seeming to flow around floated images as I thought they should. But could not figure out why. Now I needed it to work for something where it matters, so tried again. Without success at first.
I'm completely stumped. What bloody obvious, dumb, must-be-blind thing am I missing?
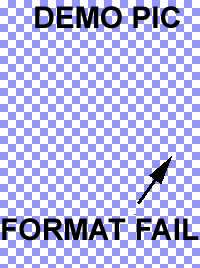
That demo_pic.png is a mesh with transparency, so you can see what is 'behind' it. Exposing the border of the DIV, which you can move by adjusting the left-margin value of its class definition.
Clearly the left border of the DIV is referenced to the left edge of BODY, not the RH edge of the floated image. But then text inside the DIV is horizontally aligning to text outside its container DIV. Both behaviors seem nonsensical, and inconsistent (to me anyway.)
I hesitate to assume a html bug. I only have two browsers installed (Opera 12.15 and Firefox 38.0.1, yes, I know, old) and they both perform exactly the same with this. But why wouldn't they work, this is old stuff, plus it's sooooo simple (I think, could be wrong.)
Someone shows me it acting wrong in Chrome Version 55.0.2883.87 m (latest) too.
Hunting answers
The hardest problems are where you don't know enough to ask the right questions. First attempts turned up nothing that seemed relevant.http://www.w3schools.com/html/html_blocks.asp http://www.w3schools.com/css/css_inline-block.aspLooks like I'm going to have to ask the humans. This is too embarrassing to ask on stackoverflow, so I tried my favorite electronics forum first.
http://www.eevblog.com/forum/chat/'simple'-aka-dumb-html-formatting-question/
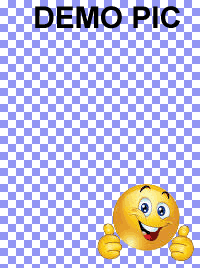
TiN on the forum suggested: "Add display: table; attribute to the dodgy div perhaps?"
Ah ha! That works:
 Lorem ipsum dolor sit amet, consectetur adipiscing elit. Non semper, inquam; Bestiarum vero nullum iudicium puto. Immo videri fortasse. Mihi, inquam, qui te id ipsum rogavi?
Verum hoc idem saepe faciamus. Satis est ad hoc responsum. Nihil illinc huc pervenit.
But I don't understand why. What does "display: parameter" do? I've never even noticed this css element before. More reading:
http://www.w3schools.com/css/css_display_visibility.asp
http://www.w3schools.com/cssref/pr_class_display.asp Lists options, but no explanation for display:table
http://www.smashingmagazine.com/2007/05/css-float-theory-things-you-should-know/
http://colintoh.com/blog/display-table-anti-hero
Oh great. After all that and more, I still don't know. It's frustrating the w3schools page omits any real explanation, just: "display:table Let the element behave like a <table> element". You don't say!
You know what I suspect?
I'm guessing the broken implementation (what you see in the first demo above) is a bug because they didn't make DIVs behave sensibly when adding FLOAT:left|right to the language. But TABLE elements were done right. Then when they got around to fixing DIVs, they couldn't just change it to be correct, since that would break millions of web pages that were using grungy workarounds like using large absolute margins. So they added a switch: display:default (still same broken) vs display:table (works right).
Making a Transparent Chessboard Image
Incidentally, having a test image with a mesh of transparency so you can see what the browser is placing behind it, is quite useful. Wish I'd thought of it before. Knowing Photoshop enough it's also obvious how to construct it, but for those who are not so familiar, here's how. I use Photoshop CS6 sometimes, but mostly the much older 5.5 because it's faster and simpler to use. So this description assumes Ver 5.5.- Decide what size image you want. Create a new image with that size. File ► New Give name and X,Y size.
- Show Layers menu. Window ► Show layers
- In the Layers menu, right click on 'Background' layer. Click Duplicate Layer, name it temp.
- Click the eye icon on both layers, to hide them both. Now you see the Photoshop 'nothing here' grid of squares over the entire image area. (We had to create a new layer, because PS won't let you hide the background if there is no other layer. And we want that chessboard graphic.)
- With the image pane selected, press alt-PrintScreen on the keyboard. We want just that grey mesh, but will get the whole photoshop pane in the clipboard.
- In photoshop, select File ► new. Click OK without altering any of the size parameters. (They are the size of the image in the clipboard.)
- Use the PS crop tool to crop this image to just a bit larger than the grey grid area. You can crop it exactly if you want, but there's no need.
- Select-all and copy that to clipboard. ctl-A, ctl-C.
- Switch back to the window with your correct-sized image.
- Ctl-V to paste the grey-squares mesh. It makes a new layer. Use the pointer tool to align it to the edges.
- Eye-dropper select the color in one of the grey squares.
- Select those grey squares. Select ► color range. Fuzzyness 10.
- Delete the selection! ctl-X
Ha ha, nothing happened. Or did it? It looks the same, but now you have a chessboard of white squares and transparent squares. The grey you see is the underlying Photoshop 'nothing here'. To demonstrate, turn the background layer on and off. See?
- Now restore the selection: Select ► reselect.
- And invert it: Select ► Inverse. Now your selection is the squares that will be a non-transparent color.
- Choose a color for them. Some mid-density pastel shade is best for being able to see whatever shows through the transparencies. Also, a color that will rarely occur in your html pages, so grey, white, black isn't a good choice. Click tools, foreground color, pick something.
- Fill the selection with it. Edit ► Fill Choose foreground color, 100% opacity, normal, etc. 'Preserve transparency' is not relevant, don't tick it.
- Throw away the selection mask. Select ► Deselect
- Delete that old temp layer. Now you have just the new layer with the grid, and an invisible background.
You might want to save at this point (as a Photoshop .PS file) so you can add anything to it later. Put the size in the filename, like mesh_300_300.ps - Now save it as a PNG file with transparency retained.
File ► Save for web
Choose: PNG-8, perceptual, no-dither, and definitely make sure 'transparency' checkbox is ticked.
There should be only two colors in the color table: yours, and 'transparent'. So changing the 'colors' number won't make any difference to the file size, as 2 is the smallest possible and it's going to use that.
Click OK, give it a filename (type must be PNG) - Done. Open the file in some other image viewer like IrfanView to check it's what you expected.
Here's a plain 300px × 300px transparent mesh. 3KB.